Notice: There is no legacy documentation available for this item, so you are seeing the current documentation.
PushEngage tracks sent, delivered, clicked, conversion, and revenue metrics for every WooCommerce push campaign. Whether you are running cart abandonment sequences, drip autoresponders, or order status notifications, all performance data is available directly inside the PushEngage dashboard. Revenue attribution is built in for WooCommerce trigger campaigns – no extra configuration is required.
What Analytics Are Available
| Campaign Type | Where to Find Analytics | Key Metrics |
|---|---|---|
| Triggered Campaigns (cart/browse abandonment, price drop, back-in-stock) | Campaign » Triggered Campaigns → click campaign | Sent, Delivered, Clicked, Conversions, Revenue |
| Drip Autoresponders | Campaign » Drip Autoresponders → click campaign | Sent, Delivered, Clicked per push |
| Order Notifications | WooCommerce » Settings » Push Notifications → Manage | Sent, Delivered, Clicked |
| Push Broadcasts | Campaign » Push Broadcasts → view campaign | Sent, Delivered, Clicked |
Viewing Triggered Campaign Analytics
Triggered campaigns – including cart abandonment, browse abandonment, price drop, and back-in-stock – have the most detailed analytics available.
- In your PushEngage dashboard, go to Campaign » Triggered Campaigns.
- Locate the campaign you want to review and click its name to open it.
- Click the Analytics tab or scroll to the analytics section to expand the view.
You will see the following metrics for each campaign:
- Sent – Total number of push notifications dispatched.
- Delivered – Notifications that were successfully received by the subscriber’s browser or device.
- Clicked – Subscribers who clicked through to your site.
- Conversions – The number of subscribers who completed a purchase after clicking.
- Revenue – Total order value attributed to this campaign within the attribution window.
For multi-push sequences (e.g., a 3-push cart abandonment series), each individual notification within the sequence shows its own row of metrics so you can compare performance push by push.
Viewing Drip Autoresponder Analytics
- Go to Campaign » Drip Autoresponders in your dashboard.
- Click the name of the drip sequence you want to review.
- The campaign detail view shows a per-notification breakdown – each push in the sequence has its own Sent, Delivered, and Clicked counts.
[Screenshot: Drip Autoresponder campaign detail view showing per-push analytics rows]
Drip autoresponders do not show Conversions or Revenue columns, since they are not tied to a specific product trigger. Use UTM parameters (see below) to track drip-driven revenue in Google Analytics.
Revenue Attribution
Revenue is attributed to a triggered campaign when:
- A subscriber clicks a push notification from that campaign.
- The subscriber completes a WooCommerce purchase within the attribution window.
- The order value at the time of conversion is counted toward the campaign’s revenue total.
Revenue tracking is native for WooCommerce trigger campaigns – no extra plugin, no code, and no goal configuration is needed. PushEngage connects directly to your WooCommerce order data once the plugin is active.
The attribution window is the period after a click during which a completed purchase is counted as a conversion. This is configured per campaign in the campaign settings.
You can however change the attribution method and window under Analytics » Goal Tracking
»
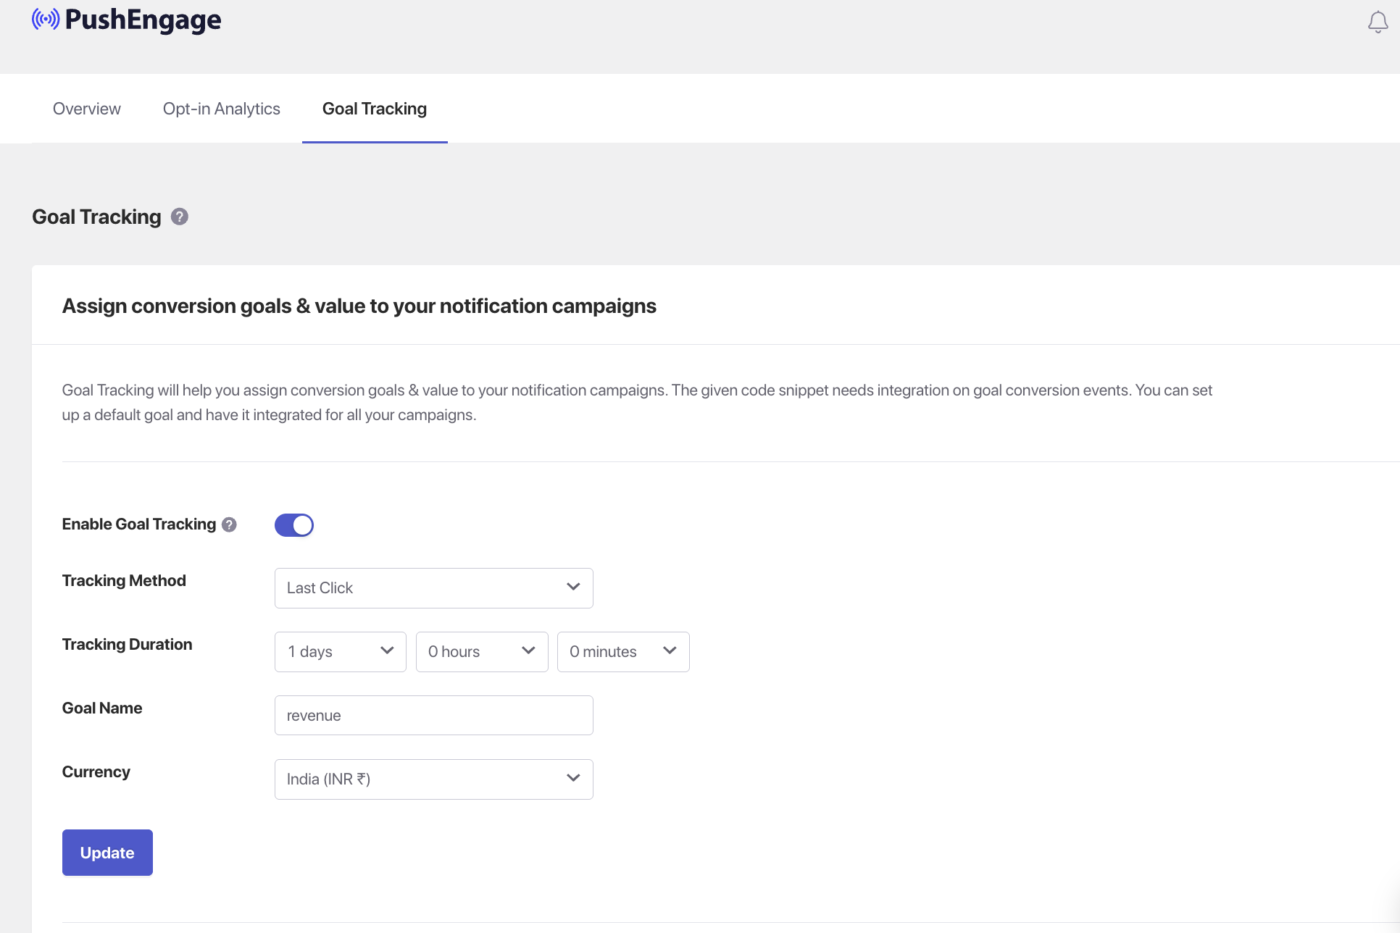
Adding UTM Parameters
To make your push traffic identifiable in Google Analytics or other analytics tools, add UTM parameters to each triggered campaign.
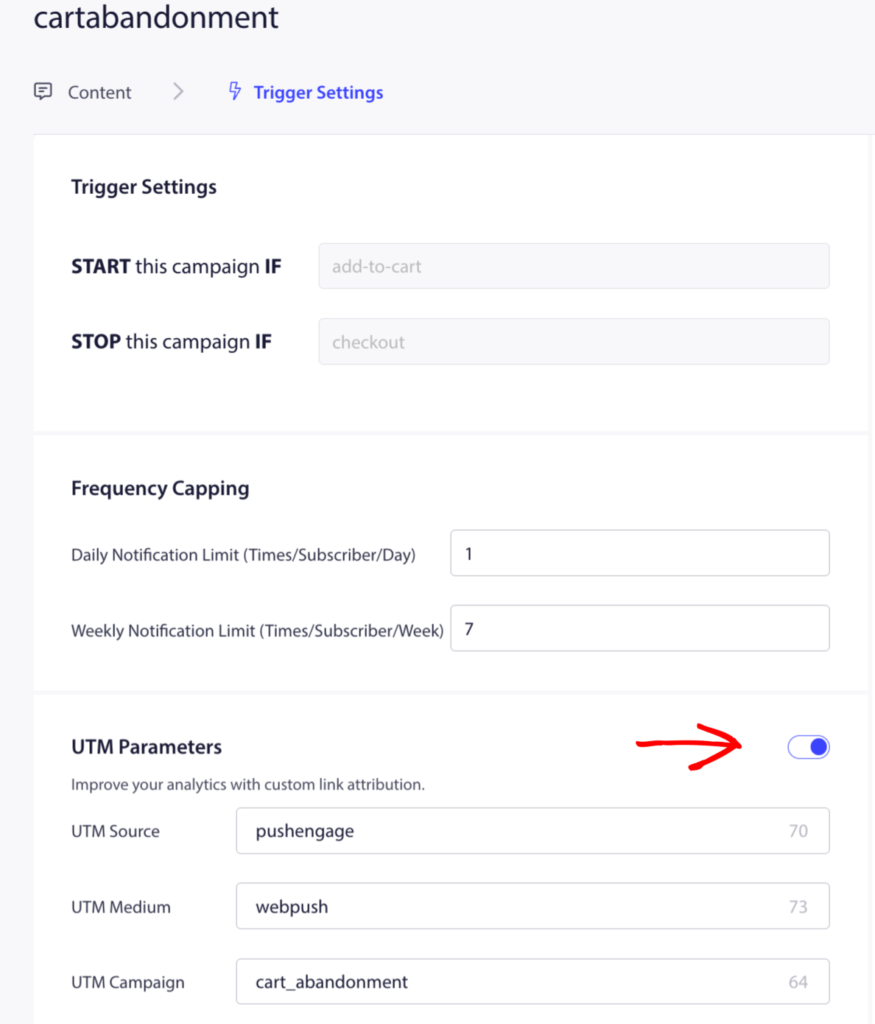
- Open a triggered campaign and go to the Trigger Settings tab.
- Scroll to the UTM Parameters section.
- Fill in the UTM fields.
Recommended UTM values:
| Field | Recommended Value |
|---|---|
| utm_source | pushengage |
| utm_medium | push |
| utm_campaign | cart-abandonment-woo (or browse-abandonment, price-drop, etc.) |
UTM parameters work for triggered campaigns and drip autoresponders. Order notification pushes sent from WooCommerce » Settings » Push Notifications do not have a dedicated UTM field in the same location – apply UTM parameters directly in the notification URL field if needed for those.
Comparing Performance Across Pushes in a Sequence
For multi-push triggered campaigns (such as a 3-push cart abandonment sequence), the per-notification analytics rows let you identify exactly where subscribers are dropping off.
- Push 1 (sent immediately or within 1 hour) typically has the highest CTR – urgency is fresh and no discount has been needed yet.
- Push 2 (sent 24 hours later) usually sees a moderate CTR as the audience shrinks to those who did not convert on Push 1.
- Push 3 (the discount push, sent 48–72 hours later) often has a lower CTR than Push 1 but a higher conversion rate – the subscribers who click this push are highly motivated to buy and the discount closes the deal.
Use this pattern to optimize your sequence: if Push 3’s conversion rate is not outperforming Push 1, test a stronger discount or a more urgent headline.
FAQ
How is revenue attributed? Revenue is attributed when a subscriber clicks a push notification and then completes a purchase on your WooCommerce store within the campaign’s attribution window. PushEngage connects directly to your WooCommerce order data – no extra setup is needed.
Can I see which notification in my sequence performs best? Yes. For multi-push triggered campaigns, the analytics view shows a separate row for each notification in the sequence. You can compare Sent, Delivered, Clicked, Conversions, and Revenue for each individual push.
Do UTM parameters work for order notification pushes? Order notification pushes (sent from WooCommerce » Settings » Push Notifications) do not have a dedicated UTM field in the PushEngage interface. To track them in Google Analytics, manually append UTM parameters to the notification URL when configuring each notification type.
What counts as a conversion? A conversion is counted when a subscriber who clicked a push notification completes a purchase in your WooCommerce store within the attribution window. The attributed revenue is the total order value at the time of purchase.
Where do I find total revenue recovered by push? Go to Campaign » Triggered Campaigns and look at the Revenue column in your analytics view. This shows the cumulative revenue attributed to each triggered campaign. To see revenue across all campaigns combined, use the Revenue dashboard in your PushEngage account overview.
If you run into any issues, please feel free to contact us by clicking here. Our support team will be able to help you.


