What is web push notifications? Don’t worry, we’ll tell you all about it. But first, picture this…
時間のかかるSEOキャンペーンなしで、新しいブログ記事を公開するたびに自動的に無料トラフィックを獲得できることを想像してみてください。WordPressサイトを運営しているなら、コンテンツを宣伝し、読者にコンテンツに戻ってきてもらうのがどれほど大変かはすでにわかっているはずです。
良いニュースは、自動的にリピート訪問者を生成する簡単な方法があることです。
- たとえ…あなたが始めたばかりで、ファンベースがまだ小さい場合でも。
- たとえ…毎月何百ものプロモーションを実行しているeコマースストアを運営している場合でも。
- たとえ…すでに大量のSEOトラフィックを生み出しているメガブログを持っている場合でも。
答えは次のとおりです。
WordPress web push notifications!
この記事では、公開するたびに即座にリピート訪問者を獲得する方法を説明します。
一番良いところは?
It’s completely free, and you don’t have to wait around for search engines to start sending you any traffic.
早速飛び込みましょう。
What is Web Push Notifications?
A push campaign is a short, clickable pop-up message that appears on a subscriber’s device and redirects the subscriber to your content with one click:
The best part is that the notifications pop up even if the subscriber isn’t using a browser. It’s like an email blast, but with a browser push campaign, your subscribers don’t need to be using an app to see your message.
In short: WordPress web push notifications is a simple way to send out a clickable link to your content to anyone who opted in.
With push campaign drip sequences, your audience now has no excuse to ignore you. And unlike social media websites, there is no algorithm throttling your reach to get you to pay for ads.
The coolest part about browser push campaigns is that you can use them to complement your lead magnets and email opt-in forms!
Pro Tip: If you’re not using lead magnets yet, you should start creating lead magnets with OptinMonster to boost your conversions.
We recommend using PushEngage to get started with web push and mobile push for free. Every time you publish a blog post, PushEngage will automatically send out a push broadcast to all your subscribers.
In the next section, we’ll show you exactly how to set it up in 15 minutes or less.
How to Install Web Push Notifications In Your Website
PushEngage is one of the best push notification plugins for WordPress. You instantly reach up to 2,500 subscribers with just the free tier. If your blog grows to more than 2,500 subscribers, you can quickly scale by upgrading your plan.
Now, let’s start growing your audience with browser push notifications for free.
ステップ#1:無料のPushEngageアカウントを作成する
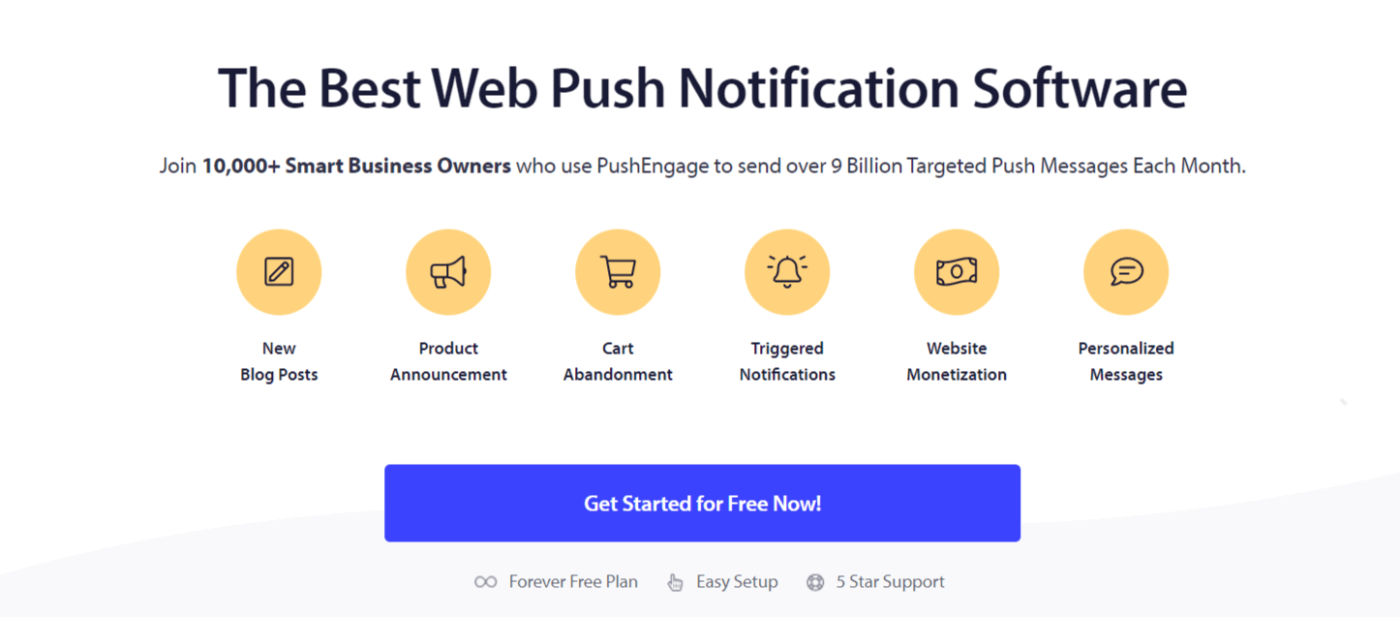
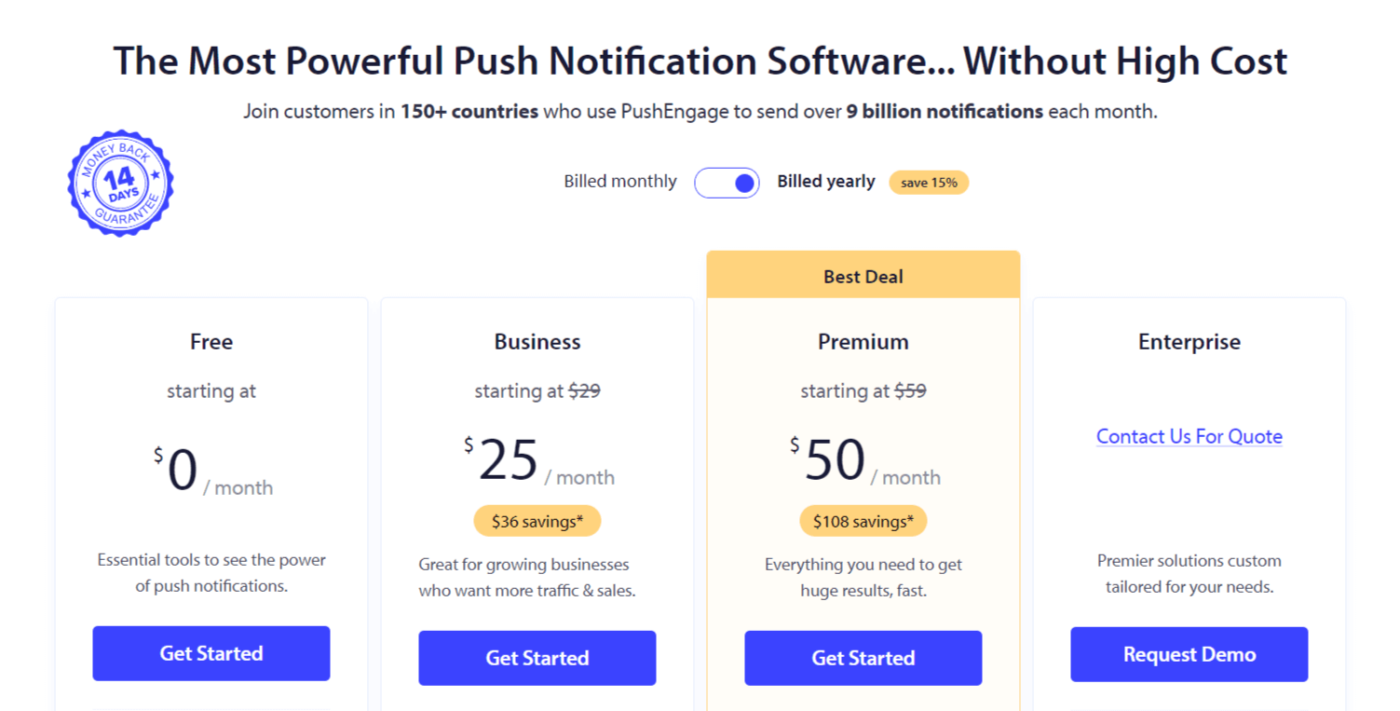
Head over to PushEngage and click on Get Started for Free:
Select the Free plan or whichever suits your needs the best:
ステップ#2:PushEngageにサインアップする
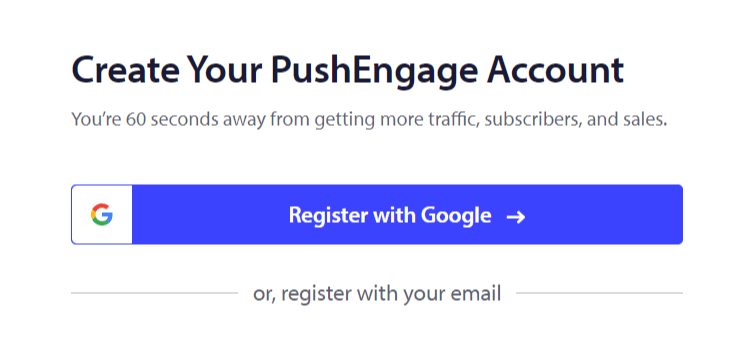
Signup for the plugin with your user details or your Gmail ID:
And just follow along with the instructions and finish setting up your account to add a web push notifications app to your website.
Step #3: Install the Web Push Notifications WordPress Plugin
NOTE: If your website isn’t built using WordPress, you can install website push notifications using other methods. We don’t cover those methods in this article but check out our installation guide if you’re interested.
サインアップすると、PushEngageダッシュボードに移動します。

Head over to Site Settings »Site Details:

Click on the Click Here For Setup Instruction button:

Then, click on the Install WordPress Plugin button:

If you’ve already set up your site’s URL, PushEngage will install itself automatically on your site.
Step #4: Connect Your WordPress Website to the Web Push Service
PushEngage WordPressプラグインのインストールと有効化が完了すると、PushEngageのオンボーディングウィザードが表示されます。

ウィザードは非常にわかりやすいです。新規ユーザーの場合は、新規?無料アカウントを請求をクリックしてください。すでにサインアップ済みの場合、既存のアカウントを接続をクリックしてください。
次に、サインアップ中にサイトを登録した場合、登録済みサイトを接続の下にあるサイトを選択ドロップダウンからサイトを選択できます:

または、 プレミアムプラン以上をお持ちの場合は、新規サイトを登録をクリックして新しいサイトを追加できます。次のステップでは、オンボーディングウィザードが他の 必須のWordPressプラグインをインストールするように促します。

各ステップを正しく実行すると、ウィザードからこの成功メッセージが表示されます。

これで、キャンペーンやプッシュ通知ポップアップモーダルを作成する準備が整いました。
How Do Web Push Notifications Work?
Let’s get a little bit technical now and explore how web push notifications work.
The simplified version is that every time a new visitor enters your website, they get prompted to become a web push subscriber.
All this is taken care of by a Javascript file called the service worker. The service worker’s job is to help create web push optins to collect push subscribers. This is not just true for websites, but also progressive web apps (PWAs). However, it’s different for Android app push and iOS app push notifications. Mobile push notifications typically require a push API like the PushEngage Mobile SDKs.
Next, you use a web push notification service like PushEngage to create and schedule the notifications you want to send out to your subscribers. You can choose to either send it to every subscriber on your list or to specific segments of your subscribers.
まず、Drip Autoresponderを作成します。
Finally, your subscribers receive your notifications when their device comes online and take the suggested action.
これらはすべて完全に真実ですが、これはバックグラウンドで起こることのほんの一部です。それでは、技術的な詳細を見てみましょう。しかし、まず、まだ行っていない場合は、今日PushEngageを使い始めましょう。
First off, PushEngage has servers that connect to your subscriber’s devices and send them your push notifications. Now, these servers don’t store any personal information such as the name or email address of any subscriber.
では、これらのサーバーは何を保存するのでしょうか?
PushEngageと当社のサーバーにとって、購読者は、購読者のデバイスとブラウザに基づいて生成される一意のハッシュ番号です。さらに、サーバーは購読者のジオロケーションを保存することもできます。
これらのサーバーに直接アクセスすることはできません。PushEngageダッシュボードを使用して、プッシュ通知キャンペーンを作成、最適化、管理することしかできません。
In other words, PushEngage is your service provider. This means that you don’t need to know anything about coding or how to maintain the original servers. We take care of all that for you. All you have to worry about is setting up your campaigns and making a profit!
Some other popular browser push services include:
- Firebase Cloud Messaging
- Amazon Simple Notification Service
- Airship
- Leanplum Inc.
- Pushwoosh Inc.
If you’re not sure which service is right for you, start by taking a look at how much push notifications cost.
By now, you’re probably wondering how personalized push campaigns work if the servers only store a hash number and no personal details. The reality is that you can store enough customer data using segments without having to ever identify your subscribers. Also, you can create fully custom campaigns and store any type of user data you want. This is where the web push API comes into play. For you, that would be the PushEngage Javascript API.
You can use this API and connect it to any other CRM or database you might have. This allows you to use the personal details of your subscribers to send them personalized push notifications.
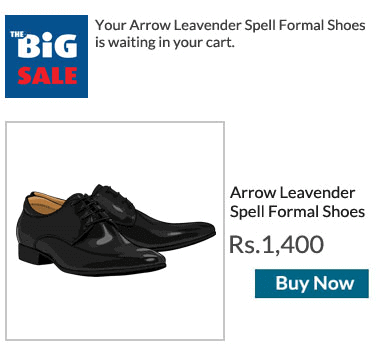
PushEngage APIを使用して、カート放棄キャンペーンなどの高度なキャンペーンを送信することもできます。
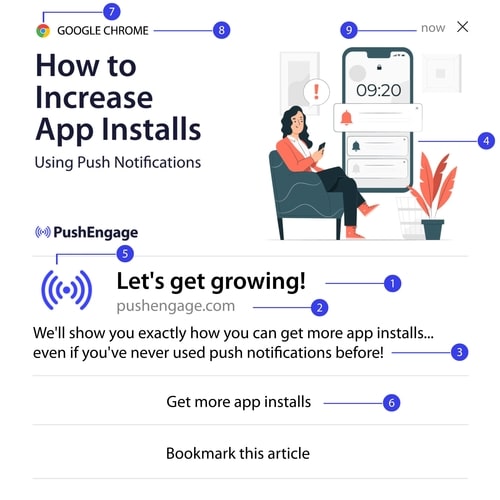
What Are the Different Parts of Any Web Push Notification?
Now that we understand how push notifications technically work, let’s a look at the different parts of a push notification that you can customize (or can’t):
Also, you should check out some web push notification examples for a clearer picture.
#1. Push Notification Title
タイトルは、プッシュ通知の中で最も目立つテキストです。明確な視認性のために 60〜80 文字に制限されています。このタイトルの目的は、購読者の注意を引くことです。そのため、タイトル全体がはっきりと見えるようにすることが重要です。
購読者が気に入るような、 killer なタイトルを作成するために、プッシュ通知のコピーライティングガイドをご覧ください。
#2. The Domain
The domain on a push notification is just the URL of your website. You can’t change this either. But unlike the browser icon, your domain needs to be clearly visible as it adds to your brand recognition.
ここで、PushEngage のサブドメインにプッシュ通知データを保存するオプションがあります。サブドメインを使用すると、プッシュ通知のこの部分は、ブランドの代わりに PushEngage サブドメインの URL を表示します。
ブランド価値が低下する可能性があるため、このオプションの使用はお勧めしません。
#3. Push Notification Content
通知コンテンツには、通知全体の中で最も多くのテキストが含まれます。タイトルと同様に、視認性のために 120〜150 文字に制限されています。より多くの文字を使用することもできますが、短く簡潔に保つことをお勧めします。
Typically, this part serves as a way to offer more context about the title or to complete an offer. Don’t bother using a call to action in the text itself. With web push, you can add call-to-action buttons.
プロのヒント: 地域言語を使用して、プッシュ通知をよりパーソナライズされたものにすることができます。エンゲージメントを高めるために、Phoot がローカル言語をプッシュ通知に使用した方法に関するこのケーススタディをお読みください。
#4. Notification Large Image
大きな画像は、通知の中で最初に目に入るものです。通常は 360x180 の画像で、プッシュ通知の中で最も魅力的な部分となります。
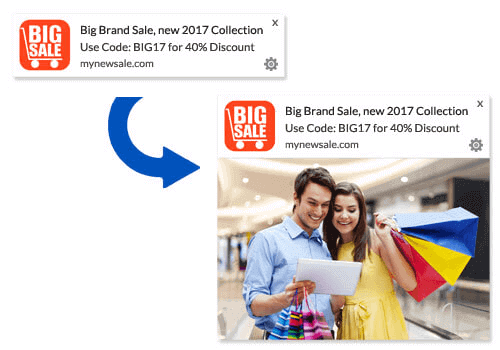
The notification image is also entirely optional. You can choose to not use one if you like. Using a notification image can make your push notification feel like an advertisement. This can cause the notification to be ignored by many subscribers.
But if you do it right, images can improve CTR (click-through rates) by up to 62%. Check out our study on the impact of images in push notifications by industry.
If you’re not sure whether you should use a large image, we suggest A/B testing the notification with and without the image.
#5. Push Notification Icon
The push notification icon is like the site icon on your website, but for your push campaigns. It’s an image that’s 192×192 or larger to represent your business. Typically, this will be your site icon and you can only set this one time for all your push notifications.
Pro Tip: If you rebrand at any time, remember to change the push notification icon in PushEngage as well. Also, remember that you can’t use animated images for your icon. So, GIFs won’t work here.
#6. 行動喚起ボタン
Every push notification supports up to 2 buttons. We recommend using customized call-to-action buttons for your campaigns. You can even add separate URLs and button icons for each CTA.
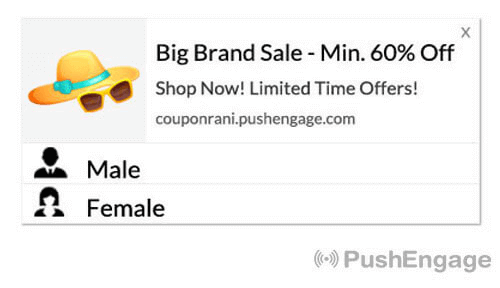
Check out this list of web push notification tricks for some nice CTA ideas.
#7. ブラウザアイコン
The smallest part of the push notification is the browser icon that denotes which browser your subscriber is using currently. It’s one of the most overlooked parts because you can’t change this in any way and for the most part, a subscriber won’t notice the browser icon either.
#8. ブラウザのラベル
The browser label is just the text version of a browser icon. Like the icon, you can’t change the browser name label.
#9. Time Stamp
The timestamp is a simple way for your subscribers to know when the message was received. It’s system generated and you can’t change this either.
プッシュ通知のオプトインのさまざまな種類
Every push campaign begins with consent. It’s an extension of Seth Godin’s idea of permission marketing. The idea is very simple: before you send your web visitors any content that they may or may not want to see, ask for permission.
The process of getting permission to send push campaigns is called “opting in”. So, before you can send out a push notification campaign, you first need your website visitors to opt-in and subscribe to your notifications.
If you’re a content creator on YouTube, then you’re already familiar with how subscribers work. The only difference is that you don’t own the list of your YouTube subscribers and you can’t control the notifications you send them.
With PushEngage, you do own that list because that information is stored on your domain. Now, there are two types of opt-ins you can use for your website based on the opt-in process:
- Single Opt-ins
- Double Opt-ins
The primary difference between them is very clear. Single opt-ins ask for permission to send notifications only once. Double opt-ins ask each subscriber to confirm their decision. So, which one should you choose?
We’ve observed that single opt-ins can get up to 150% more subscribers than double opt-ins. Check out our article on how to increase your opt-in rates if you’re struggling with this.
法的な観点から、GDPRではシングルオプトインのみが要求されます。しかし、ダブルオプトインでは、購読者が実際にコンテンツを求めているため、エンゲージメントが大幅に向上します。ただし、純粋なオプトイン数という点では、シングルステップオプトインの方がはるかに効果的です。
考慮すべきもう1つの点は、シングルオプトインを使用するには、ウェブサイトにSSL証明書をインストールする必要があるということです。しかし、セキュアなウェブサイトがなくても、ツーステップオプトインをインストールできます。
したがって、SSL証明書がインストールされている場合は、シングルオプトインを使用してください。そうでない場合は、WordPressウェブサイトにSSL証明書をインストールする方法に関するこの記事をご覧ください。
Improve Push Notification Engagement Rates by Personalizing
Before you create a campaign, you should set up segments and audience groups to send personalized push messages.
プッシュ通知購読者向けのセグメントとオーディエンスグループを作成することで得られるパーソナライゼーションのレベルを超えるものはありません。 PushEngage » オーディエンスにアクセスし、すぐにセグメントとオーディエンスグループの作成を開始してください。
セグメントタブの下で、新しいセグメントを作成したり、既存のセグメントを編集したりできます:

さらに深いパーソナライゼーションが必要な場合は、オーディエンスグループタブでオーディエンスグループを作成してください:

If you’re new to push notification segments and personalized push notifications, you should check out our article on how to create segments and how to use audience grouping to target user behavior.
Create Targeted Web Push Notifications for Better Engagement
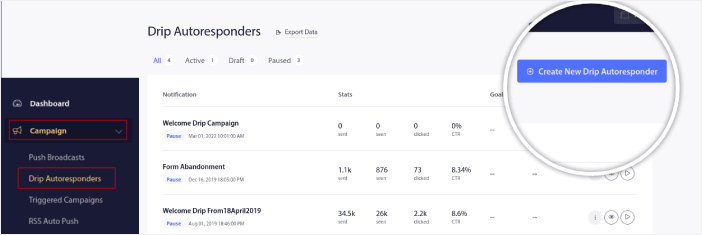
PushEngage ダッシュボードに移動し、キャンペーン » ドリップ自動応答 に進み、新しいドリップ自動応答を作成 をクリックします。

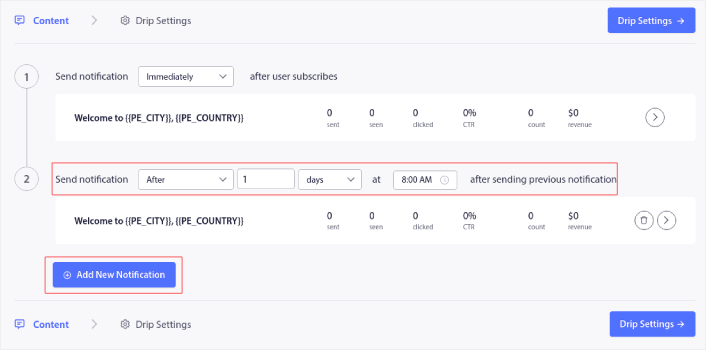
次に、キャンペーンに名前を付け(「ウェルカムドリップ」のような名前をお勧めします)、コンテンツの下で、「ユーザー登録直後に通知を送信」というオプションを選択します。

この時点で、通知の横にある矢印をクリックして、通知の内容を編集できます。
If you have a Premium or Enterprise plan with PushEngage, you’ll be able to add more than one notification to create a sequence of automated welcome messages. Just click on Add New Notification and edit the content. Once you’re done, click on Drip Settings and select the option to send your welcome campaign to all subscribers:

次に、下にスクロールして独自のUTMパラメータを設定し、プッシュ通知を追跡します。

完了したら、上にスクロールして戻り、自動応答を有効にするボタンをクリックします。

これで完了です!
How to Send Web Push Broadcasts
「PushEngageダッシュボード」にアクセスし、「Campaign » Push Broadcasts」に移動して、「Create a New Push Broadcast」ボタンをクリックします。

「Content」タブで、プッシュ通知のコンテンツを追加します。

また、クリック率を向上させるためにA/Bテストを設定したり、より多くの表示回数を獲得するためにプッシュブロードキャストをスケジュールしたりすることもできます。いずれの場合も、最良の結果を得るために、プッシュ通知のベストプラクティスを確認してください。
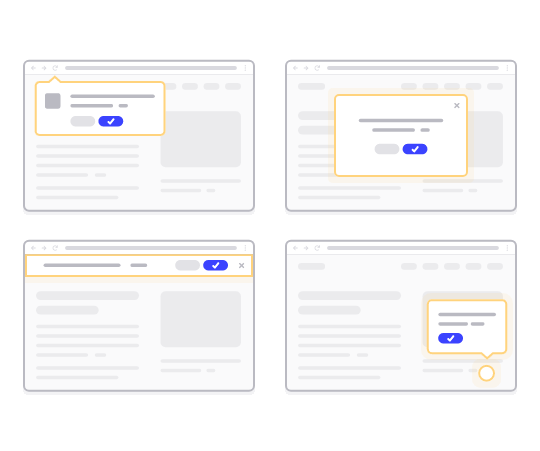
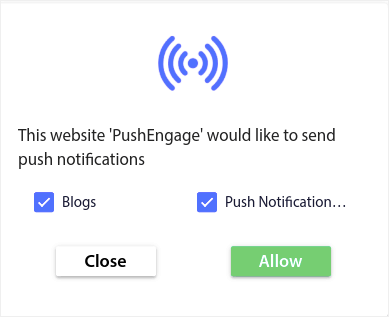
How to Create Engaging Web Push Popup Modals
A push notification popup modal is a small window that appears on top of a website or mobile app interface to display a message or notification to the website visitor. The popup modal can be triggered by various events. You can set up popups to get triggered on page visit, on scroll depth, and even on custom actions such as button click.
Usually, you’ll see a call to action on the popup modal such as “Subscribe” or “Allow” to get consent from visitors to send them push broadcasts or drip campaigns. If you follow this tutorial, you can create a popup like this one:
登録者を直接セグメント化できるポップアップモーダルを作成したり、ジオロケーションやブラウザなどのデフォルト属性で登録者を収集するだけの通常のポップアップを作成したりできます。
WordPressダッシュボードに戻ります。PushEngage » デザインに移動します。
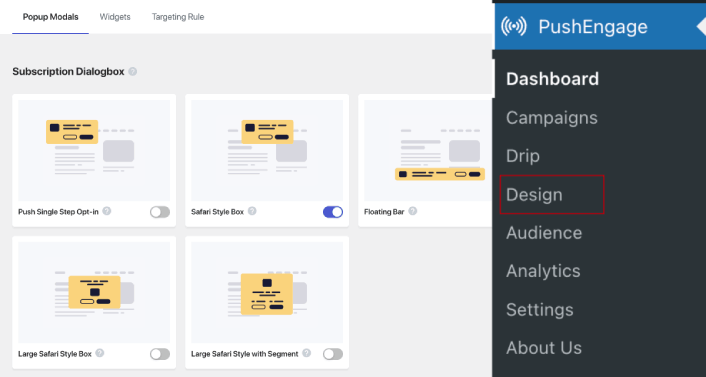
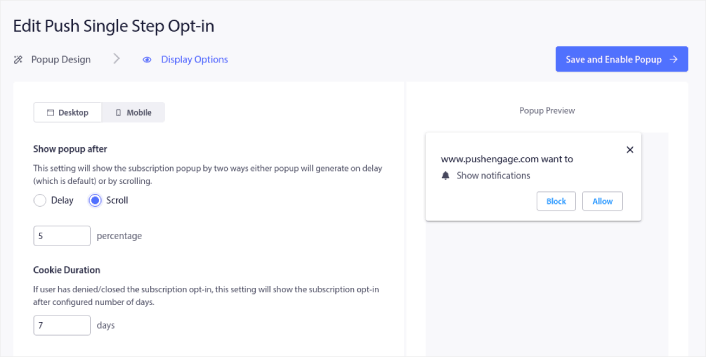
そして、好きなだけ多くのポップアップモーダルを作成できます。もちろん、各ポップアップモーダルの表示オプションの下で、異なる時間にトリガーされるようにすることができます。
ここでのアイデアは、訪問者に購読する確かな理由を与えることです。そのためのヘルプが必要な場合は、カスタムプッシュ通知オプトインを作成する方法 に関する記事を確認してください。
よりターゲットを絞ったポップアップモーダルを作成したい場合は、ターゲティングルールタブの下にあるターゲティングルールを使用できます。
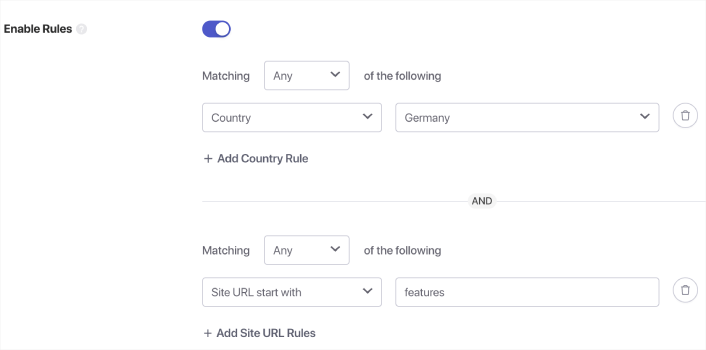
これらはグローバルなターゲティングルールであり、個々のポップアップモーダルのターゲティングルールよりも優先されます。ただし、必要に応じて、それらを編集することで、各モーダルに堅牢なターゲティングルールを作成できます。
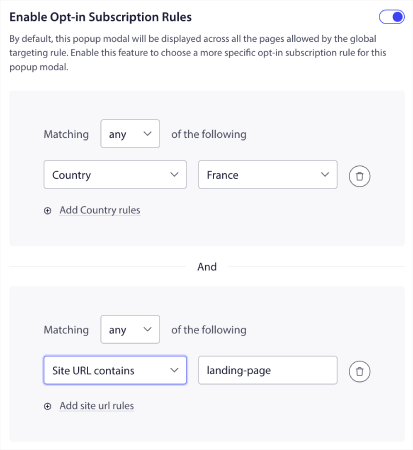
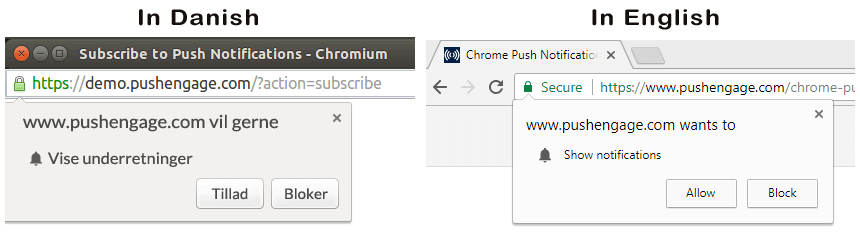
たとえば、さまざまな国の訪問者をターゲットにするために、さまざまな言語でポップアップモーダルを作成できます。
開始するためにクリック率の高いテンプレートが必要な場合は、コンバージョン率の高いプッシュ通知オプトイン に関するこの記事を確認してください。
What to Do Before You Send Targeted Web Push Notifications
You’re almost done. Before you start sending push broadcasts or drip campaigns, you’ll need to set up a subscription opt-in for your website. Your opt-in will convert web visitors into push notification subscribers. So, this is a critical element. If you need some inspiration, you can check out this article on high-converting push notification opt-ins. Once you’re done setting up the opt-in, your site can collect subscribers. But how do you even know that your opt-in is working properly?
したがって、賢明なのは、ウェルカムプッシュ通知を設定することです。
Pro-Tip: You should spend some time on a full-scale test of your push notifications. This will troubleshoot the most common problems and you won’t waste your time trying to resolve issues later on. Also, you need a proper user engagement strategy or a push campaign strategy before you launch a bunch of campaigns.
What to Do Now That You Know What is Web Push Notifications
Now that you know what is web push notifications, it’s time to set up your own push campaigns.
If you’re just getting started with web push, check out how to create your first welcome message using PushEngage. A welcome message is great for re-engagement and repeat visitors to your website.
Also, if you’ve already started using web push, we realize that it can be difficult to come up with campaign ideas. The longer you use a traffic source, the harder it becomes to come up with new ideas. Check out some push campaign ideas that our customers are already using. You might just get the inspiration you need!
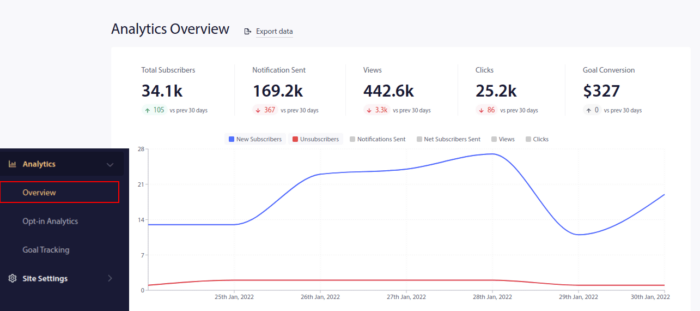
Getting started with segmentation can seem intimidating. But if you keep an eye on goal tracking and analytics, you should be fine. More importantly, you’ll make a lot more profit with the help of push notification campaigns. Here are a few cool resources to get you started:
- リターゲティングプッシュ通知を使用して収益を2倍にする方法
- プッシュ通知の並べ替え方法と、成果の出るキャンペーンの見つけ方
- プッシュ通知購読者リストをクリーンアップする方法(簡単)
- RSSプッシュ通知を自動送信する方法
- プッシュ通知を使用してニュースサイトを宣伝する方法
- クロスセルプッシュ通知を使用して売上を2倍にする方法
- 閲覧放棄プッシュ通知の使用方法(4つのステップ)
If you’re an eCommerce website, check out cart abandonment campaigns next. If not, send out your first drip push campaign. These are some of the highest converting campaigns for most of our customers.
まだの方は、今日からPushEngageを始めましょう!


Thank you for sharing good information. Very Nice Article it helps me a lot to how to use Push Notification in our blog.
This is a great information you have share, As I’m newbie into Blogging, it can surely make a difference. Thank you so much
can i send web push notifications when a user hits a specific site? for ex. my website sells socks; when a web push opted-in user visits amazon i trigger a web push notification to them. i think not, but thought i’d check anyway.
also i thought a site needs be be https to enable web push notifications. can i still enable web push notifications on a http site by creating a https page?
IOS does not support web push notifications. Please correct me if I am wrong
Yes, you are correct. iOS still does not support web push notifications.
Done everything but still I’m not getting this things for my blogger’s blog.
Can you drop a mail to [email protected] or on live chat? The team will help you to solve the issue.
you’re actually a just right webmaster. The website loading speed is amazing.
It kind of feels that you’re doing any distinctive
trick. Moreover, The contents are masterwork. you have performed a wonderful task in this subject!