Looking for an easy way to add push notification action buttons that actually work?
The biggest challenge isn’t to add a button to your push notification. What’s most challenging is creating buttons that get clicks. Unlike your website, you don’t have unlimited characters to craft compelling buttons.
So, you need to keep your buttons simple, relevant, and focused.
In this article, we’ll show you how to add multiple push notification action buttons, how to optimize them for clicks, and some cool ways to use them. And yes, there will be some real examples as well.
さあ、始めましょう。
How to Add Multiple Push Notification Action Buttons
Before we get started, it’s always best to choose a push notification service to send push notifications. The right push notification service will make it super easy to create powerful campaigns with little to no code.
If you’ve been using Firebase Cloud Messaging (FCM) to send push messages, then it’s time to switch up right away. Check out this article to get a better understanding of why FCM is not the best option for you.
We recommend using PushEngage to create and send your push notifications.

PushEngage is the #1 push notification service in the world.
プッシュ通知は、ウェブサイトのトラフィックとエンゲージメントを自動で増やすのに役立ちます。オンラインストアを運営している場合は、PushEngageが自動eコマースプッシュ通知の作成を支援することで、売上を伸ばすのにも役立ちます。
無料で開始できますが、ビジネスの成長に真剣に取り組んでいる場合は、有料プランを購入する必要があります。また、プッシュ通知サービスを購入する前に、プッシュ通知のコストに関するこのガイドを確認してください。
PushEngageで得られるものを簡単に見てみましょう。
- コンバージョン率の高い自動キャンペーン
- 複数のターゲティングおよびキャンペーンスケジュールオプション
- 目標追跡と高度な分析
- スマートA/Bテスト
- 専任のサクセスマネージャー
ビジネスのトラフィック、エンゲージメント、売上を伸ばしたいのであれば、PushEngageが断然最良の選択肢であることがわかるでしょう。予算が限られている場合は、プッシュ通知で少しクリエイティブになることもできます。
「PushEngageダッシュボード」にアクセスし、「Campaign » Push Broadcasts」に移動して、「Create a New Push Broadcast」ボタンをクリックします。

「Content」タブで、プッシュ通知のコンテンツを追加します。

Then, scroll down to Multi Action Notification and enable it:
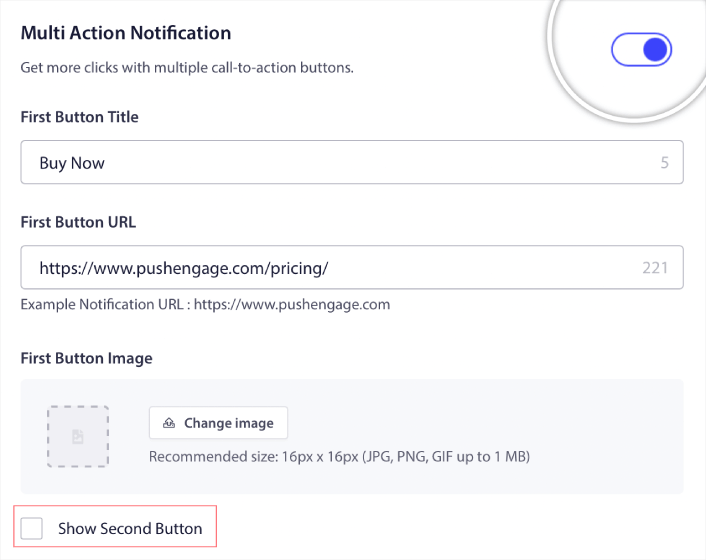
You can click the Show Second Button option to create a second push notification action button.
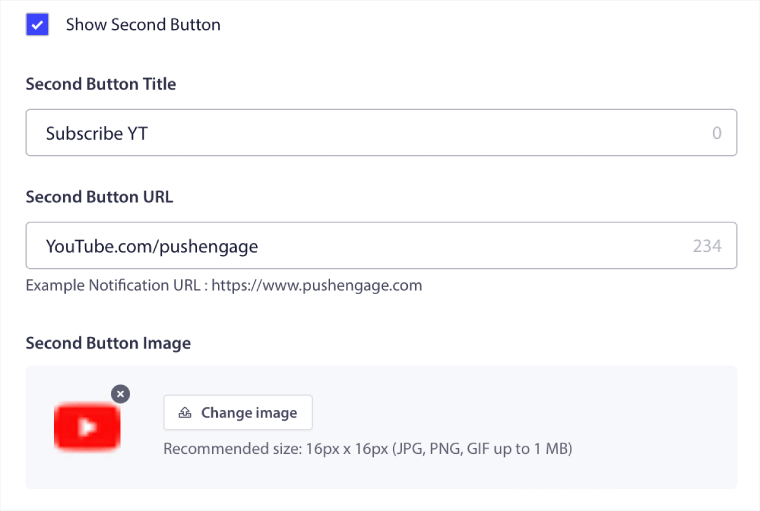
Since you can only use 12 characters for your button label, it can be difficult to write compelling copy sometimes.
For instance, you can ask your push notification subscribers to subscribe to your email newsletter or your YouTube channel. But how do you let them know what to subscribe to without using so many words? A cool hack is to use the button images to add more context to your button.
You can only use a maximum of two push notification action buttons. So, you need to make them both count. Before you send your notification, be super clear on what you want from your push campaign. An easier way to get better results would be to use drip push notifications.
PushEngage allows you to create push notification action buttons for your drip campaigns as well. This way, you can send out targeted push notifications to get focused results.
Let’s check out some cool ways to use push notification action buttons now.
How to Use Push Notification Buttons to Get More Traffic
If you’re running a blog or a news site or even an agency site, repeat traffic is super important. The only issue is getting clicks on your push notification action buttons.
You can’t really use power words in your button copy like you can in an email.
So, what do you do?
A simple way to increase your repeat traffic is to use your push notification action buttons to give them more options to click. For instance, if you’re running an eCommerce site, you’re likely going to use a browse abandonment campaign. You can use one button to ask your visitors to complete the purchase and another to get them to browse a category page.
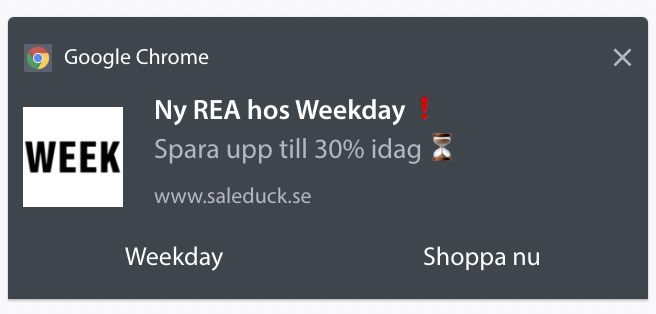
By giving them two options, you get a much better chance of your visitors clicking through to your site.
How to Add a Click to Subscribe Button to Your Popup
プッシュ通知は、ウェブサイトのトラフィックとエンゲージメントを自動で増やすのに役立ちます。オンラインストアを運営している場合は、PushEngageが自動eコマースプッシュ通知の作成を支援することで、売上を伸ばすのにも役立ちます。
無料で開始できますが、ビジネスの成長に真剣に取り組んでいる場合は、有料プランを購入する必要があります。また、プッシュ通知サービスを購入する前に、プッシュ通知のコストに関するこのガイドを確認してください。
PushEngageで得られるものを簡単に見てみましょう。
- コンバージョン率の高い自動キャンペーン
- 複数のターゲティングおよびキャンペーンスケジュールオプション
- 目標追跡と高度な分析
- スマートA/Bテスト
- 専任のサクセスマネージャー
ビジネスのトラフィック、エンゲージメント、売上を伸ばしたいのであれば、PushEngageが断然最良の選択肢であることがわかるでしょう。予算が限られている場合は、プッシュ通知で少しクリエイティブになることもできます。
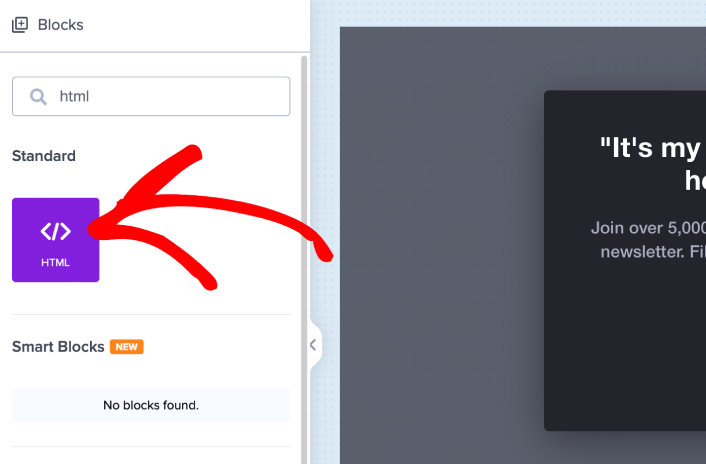
まず、OptinMonsterのサイドバーからポップアップにHTMLブロックを追加します。
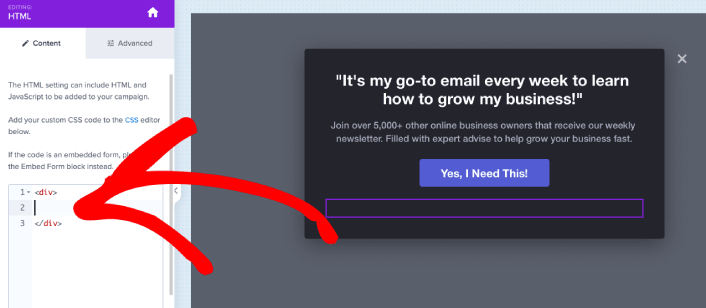
ここで、プッシュ通知購読者を収集するためのコードを追加します。まず、クリック可能なボタンを作成するために、次のコードを貼り付けます。
<button onclick="subscribeOnClickButton()" style="border: none; width: 100%; padding-left: 15%; padding-right:15%; text-align: center; display: inline-block; color: white;">Get Updates via Push Notifications</button>HTMLを追加できる場所にコードを貼り付けます。
もちろん、スタイルを調整して、より魅力的に見せることもできます。次に、ボタンをクリックしたときにプッシュ通知購読者を収集するようにします。
PushEngageのホームページにアクセスし、開始するボタンをクリックします。

次に、PushEngage を試すために無料プランを選択するか、ビジネスの成長に真剣に取り組んでいる場合は有料プランを選択します。有料プランには、より多くのキャンペーンオプションと、さらに大きな購読者リストを構築する機能が付属しています。
あなたのPushEngageダッシュボードで、サイト設定 »サイト詳細に移動し、セットアップ手順を表示するにはここをクリックボタンをクリックします。「任意のサイト」の下に、インストールコードが表示されます。

警告:ダッシュボードから取得したコードをコピーする必要があります。コードはPushEngageユーザーごとに固有です。画像内のコードをコピーしてプッシュ通知購読者を収集することはできません。
PushEngageダッシュボードにコードが表示されたら、2番目のスクリプトを取得し、追加のコードをいくつか追加します。最終的なコードは次のようになります。
<script src="https://clientcdn.pushengage.com/core/02a6e92667ae2279fcba8932356c1d93.js" async></script>
<script> window._peq = window._peq || [];
function subscribeOnClickButton(){
window._peq.push(['subscribe',{}.pe,function(res){
console.log(res);
}]);
}
</script>
このコードを OptinMonster のHTML ブロックに、ボタンのコードの直後、<div></div> コードブロックの間に挿入すれば完了です!
How to Use Push Notification Buttons to Get More Sales
Sales keep your business alive. And you can use push notifications to get a ton of extra sales. Let’s check out how you can use your push notification action buttons to get more sales.
Think of a simple cart abandonment campaign. The point is to get your customers to buy what’s in their cart. But instead of using a straightforward cart abandonment campaign, you can also use personalized recommendations for other products and get them to revisit your store. Chances are that they’ll add the new product to their cart and actually make a purchase.
It’s super easy to do using push notification segments. And if this sounds like a new idea to you, it’s not. Thousands of our customers already use this idea. It’s called cross-selling.
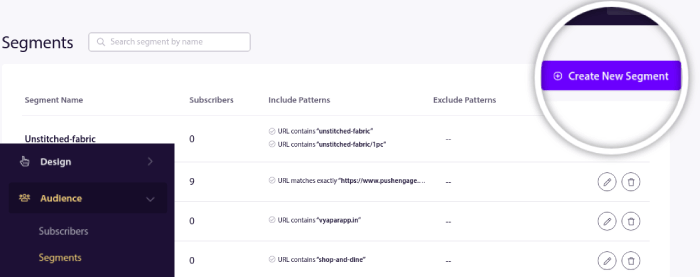
Cross-selling push notifications help you increase sales as you’re 60-70% more likely to sell to an existing customer. Head over to your PushEngage dashboard and go to Audience » Segments and create your segments:
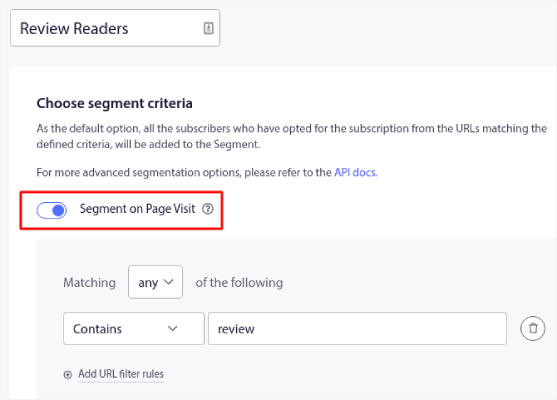
特定のカテゴリの商品を訪問した際に、訪問者をセグメント化したいと思うでしょう。
Then, just pair a product with each of your segments. Not all your customers will be interested in the exact same product. You’ll want to find products that are interesting to each customer segment.
Once that’s done, create a drip autoresponder to promote it.
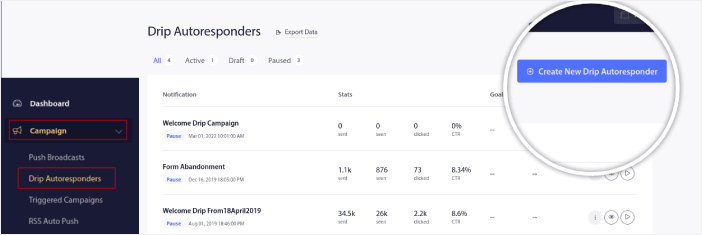
PushEngageダッシュボードにアクセスし、Campaign » Drip Autoresponders » Create New Drip Autoresponder に移動します。
Go ahead and create separate drips for each segment. If you’re new to push notifications, you should check out our article on how to use eCommerce push notifications for epic campaign ideas.
What to do After You Learn to Use Push Notification Action Buttons
今回は以上です、皆さん!
Once you’ve created a click-on-subscribe button for your site, you should check out our advanced segmentation rules.
Creating granular segments can help you personalize your push notifications to a great extent. This means more engagement, higher clicks, and more sales from your push notification campaigns. Check out these epic resources to get started:
And if you’re new to push notifications, you should try out PushEngage. PushEngage offers some of the most powerful and flexible push notification campaigns anywhere. So, if you’re serious about growing your business, get started with PushEngage today!


