WhatsApp isn’t just for personal chats anymore. With over 2 billion users worldwide, it’s become an essential business communication channel that can significantly boost your customer engagement.
This step-by-step guide will walk you through creating a WhatsApp Business account and connecting it to PushEngage for maximum impact. We’ll cover everything from initial setup to advanced features that will help you engage customers effectively.
今すぐWhatsAppメッセージを送信!
WhatsApp Business Automation is a super-effective, low-cost marketing tool to help you grow your repeat traffic, engagement, and sales on autopilot.
- Prerequisites
- Step 1: Download and Install WhatsApp Business App
- Step 2: Register Your Business Phone Number
- Step 3: Set Up Your Business Profile
- Step 4: Create a Meta Business Account
- Step 5: Generate WhatsApp Access Tokens
- Step 6: Generate a Permanent Access Token
- Step 7: Connect PushEngage to WhatsApp Business
- Step 8: Add WhatsApp Chat Widget to Your Website (Optional)
- Step 9: Set Up WhatsApp Automation Messages (Optional)
- 一般的な問題のトラブルシューティング
- Best Practices for WhatsApp Business
- よくある質問
- Can I have both personal WhatsApp and WhatsApp Business on the same phone?
- Is WhatsApp Business free to use?
- Can I convert my personal WhatsApp account to a business account?
- How do I get verified on WhatsApp Business?
- Can multiple people use the same WhatsApp Business account?
- How is WhatsApp Business different from regular WhatsApp?
- How do I integrate WhatsApp Business with my other marketing tools?
- 次のステップ
Prerequisites
Before you start, make sure you have:
- A smartphone (Android or iOS)
- A phone number for your business (ideally separate from your personal number)
- Access to email for creating a Meta Account
- Your business information ready (name, address, description, hours)
Step 1: Download and Install WhatsApp Business App
First, you’ll need to download the WhatsApp Business app on your smartphone:
For Android:
- Open Google Play Store
- Search for “WhatsApp Business”
- Look for the app with the “B” logo
- Tap “Install”
- Open the app once installation completes
For iOS:
- Open App Store
- Search for “WhatsApp Business”
- Tap “Get”
- Complete the installation
- Open the app
Step 2: Register Your Business Phone Number
Now comes an important decision: which phone number to use.
You have two options:
- Use your existing WhatsApp number: This migrates your personal account to business, keeping your chat history.
- Use a different number: Creates a completely separate business account (recommended for maintaining professional boundaries).
Registration steps:
- Launch the WhatsApp Business app and accept the terms
- Choose whether to use your existing number or a new one
- Enter your country code and full phone number
- Tap “Next” and wait for the verification code via SMS
- Enter the 6-digit code when prompted
- If you don’t receive the code, request a phone call after the timer expires
- Grant necessary permissions for contacts and media
Step 3: Set Up Your Business Profile
This is where you make your business look professional and trustworthy:
- Add your business name – Use your official business name
- Select your business category – Choose from retail, services, etc.
- Upload a profile picture – Your logo or storefront (high quality)
- Write a description – Keep it concise (256 characters max) and highlight what makes you unique
- Add your address – Helps local customers find you
- Set business hours – Let customers know when you’re available
- Include website and email – Give customers multiple ways to reach you
You can edit this information anytime through Settings > Business Settings > Profile.
Step 4: Create a Meta Business Account
Since WhatsApp is owned by Meta (formerly Facebook), you’ll need a Meta Account to unlock all the business features:
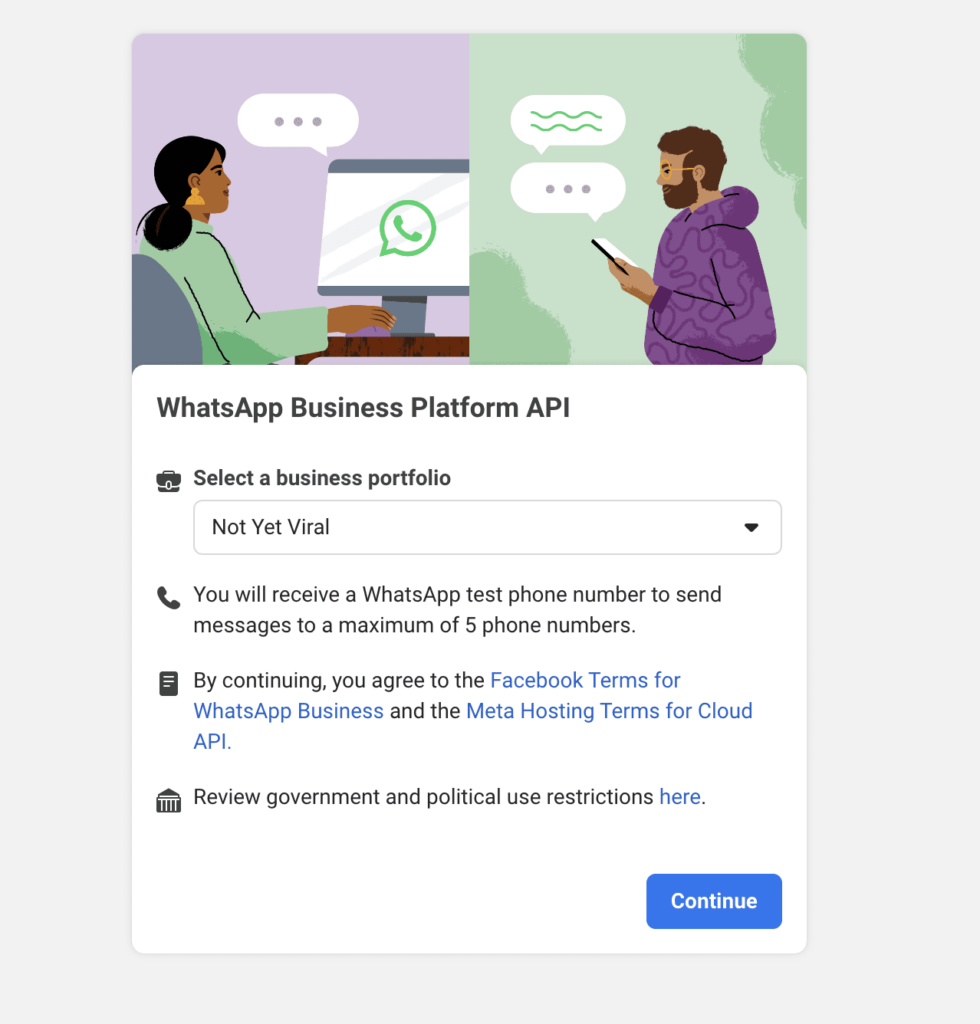
- Visit Meta’s Business Manager
- Click “Create Account” if you don’t already have one
- Enter your business details
- Verify your email address
- Complete the business verification process if prompted
Step 5: Generate WhatsApp Access Tokens
To connect WhatsApp Business with PushEngage, you’ll need to generate access tokens:
- Go to Business Settings in your Meta Business account
- Look for “Users” in the left menu and click “System Users”
- Click the “Add” button
- Give your system user a name (e.g., “WhatsApp Integration”)
- Select “Admin” as the role
- Click “Create System User”
- Click “Assign Assets” in the dialog box that appears
- Select Apps » Your App Name » Full control
- Click “Generate token” at the top of the screen
- In the popup, select your app, set an expiration period, and choose permissions
- The permissions must include: “whatsapp_business_management” and “whatsapp_business_messaging”
- Click “Generate token” and copy it immediately
Note: This initial token is temporary and will be valid for only 24 hours.
Step 6: Generate a Permanent Access Token
For long-term integration, you’ll need a permanent token:
- In Business Manager, go to Business Settings
- Navigate to “Users” » “System Users”
- Click “Add” to create a new system user
- Name this user (e.g., “PushEngage WhatsApp Integration”)
- Select “Admin” as the role
- Click “Create System User”
- Click “Assign Assets” and select Apps » Your App Name » Full control
- Click “Generate token” at the top
- Select your app, set the expiration to “Never” if available
- Ensure permissions include “whatsapp_business_management” and “whatsapp_business_messaging”
- Generate and copy this token securely
Step 7: Connect PushEngage to WhatsApp Business
Now it’s time to connect your WhatsApp Business account to PushEngage:
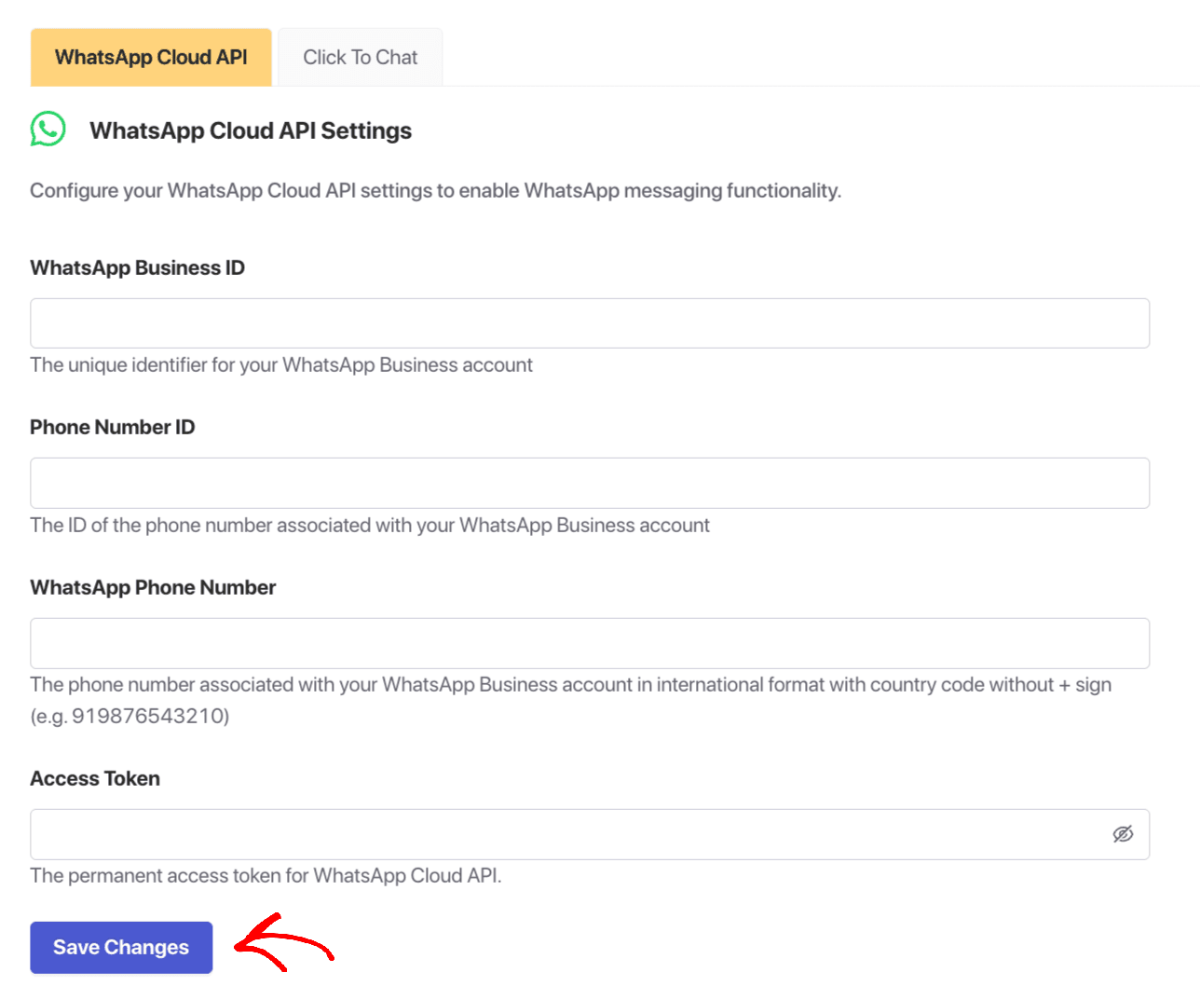
- Log into your PushEngage dashboard
- Navigate to the WhatsApp section in the listed plugins
- Click on “Settings Tab”
- Under WhatsApp Cloud API Settings, you’ll need to enter:
- WhatsAppビジネスアカウントID
- 電話番号ID
- WhatsApp Phone Number (with country code but without the + sign)
- Permanent Access Token (from Step 6)
- Click “Save Changes”
Important: Your Meta Developer account will help you gather these details. Note that WhatsApp Phone Number and Phone Number ID are different identifiers.
Step 8: Add WhatsApp Chat Widget to Your Website (Optional)
Want to let visitors chat with you directly from your website? Here’s how:
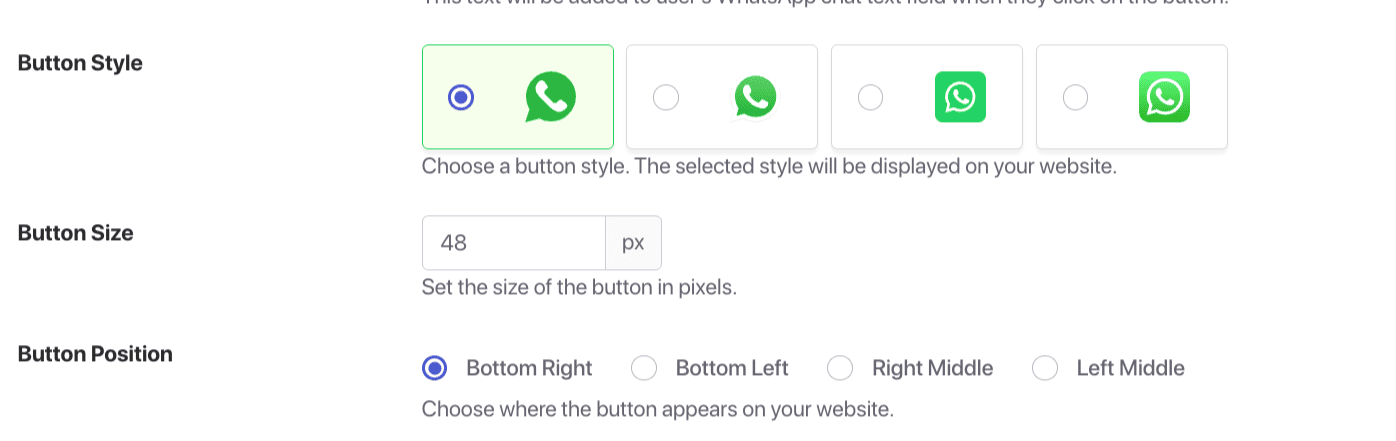
- In your PushEngage dashboard, navigate to WhatsApp
- Click on “Click to Chat Tab” under Settings
- Enable the feature by clicking the checkbox
- Enter your WhatsApp number with country code but without the + sign (e.g., 919876543210)
- Set a greeting message (e.g., “Hi there! How can we help you today?”)
- Choose a button style from the available options
- Set the button size (48px is recommended for visibility without being intrusive)
- Select positioning (Bottom Right, Bottom Left, Right Middle, or Left Middle)
- Adjust offset settings to ensure proper spacing from screen edges
- Set Z-index to make sure the chat widget appears above other elements
- Click “Save Changes”
Step 9: Set Up WhatsApp Automation Messages (Optional)
Enhance your customer experience with automated messages:
- In your PushEngage dashboard, go to WhatsApp
- Configure automation messages for different scenarios
- Create templates for:
- Welcome messages for new customers
- 注文確認
- Shipping updates
- カート放棄リマインダー
- Follow-up messages after purchase
一般的な問題のトラブルシューティング
Even with careful setup, you might encounter some challenges:
Can’t verify your phone number?
- Check your network connection
- Make sure your phone can receive SMS or calls
- Try requesting a call instead of SMS
- Wait 24 hours if you’ve made multiple attempts
Connection issues between PushEngage and WhatsApp?
- Verify all IDs and tokens are entered correctly
- Ensure permissions are set properly in Meta Business Manager
- Check that your WhatsApp Business account is active
- Contact PushEngage support if issues persist
Best Practices for WhatsApp Business
Follow these tips to maximize your WhatsApp Business results:
応答時間
- Aim to respond within 24 hours
- Use away messages during off-hours
- Set clear response time expectations
Message Templates
- Create templates for common inquiries
- Personalize messages whenever possible
- Keep communications concise and valuable
Privacy and Compliance
- Get consent before adding customers
- Follow WhatsApp’s Business Policy
- Comply with privacy regulations like GDPR
よくある質問
Can I have both personal WhatsApp and WhatsApp Business on the same phone?
Yes, you can have both apps installed on the same device, but they must use different phone numbers.
Is WhatsApp Business free to use?
The WhatsApp Business app is completely free to download and use. The WhatsApp Business API may have costs depending on your provider.
Can I convert my personal WhatsApp account to a business account?
Yes, you can migrate your personal account to a business account, but you can’t have both types using the same phone number.
How do I get verified on WhatsApp Business?
WhatsApp has a verification process for businesses that meet certain criteria. This typically involves confirming your business information and may require documentation.
Can multiple people use the same WhatsApp Business account?
With the multi-device feature, you can use WhatsApp Business on up to four linked devices. For more extensive team collaboration, you’ll need the WhatsApp Business API.
How is WhatsApp Business different from regular WhatsApp?
WhatsApp Business offers additional features designed specifically for businesses, including a business profile, catalog, quick replies, automated messages, and analytics.
How do I integrate WhatsApp Business with my other marketing tools?
PushEngage makes this easy by allowing you to connect your WhatsApp Business account to your overall customer engagement strategy, creating a seamless omnichannel experience.
次のステップ
Setting up a WhatsApp Business account is a powerful step toward meeting your customers where they already are. By following this guide, you’ve created a professional business presence on one of the world’s most popular messaging platforms.
Remember that successful customer engagement is an ongoing process. Regularly update your profile, refine your messaging, and stay responsive to customer needs.
For businesses looking to take their customer engagement to the next level, integrating WhatsApp Business with PushEngage creates a truly omnichannel experience that can significantly boost customer satisfaction and drive business growth.
PushEngageは、市場でナンバーワンの顧客エンゲージメントプラットフォームです。どこから始めればよいかわからない場合は、無料バージョンにサインアップできます。ただし、強力なキャンペーンでビジネスを拡大したい場合は、有料プランのいずれかを選択する必要があります。または、これらの素晴らしいリソースをチェックして開始することもできます。
いずれにしても、待たないでください。 お客様はすでにWhatsAppを使用しています。問題は、あなたはそこで彼らに会いますか?
あなたのビジネスにとって正しいと感じる方法で始めてください。後でもっと洗練されたソリューションにアップグレードできます。重要なのは、WhatsAppで可能になる直接的な顧客関係の構築を開始することです。
お客様は、あなたに連絡しやすくしてくれたことに感謝するでしょう。そして、あなたのビジネスは、より良い顧客コミュニケーションによってもたらされるエンゲージメントとコンバージョンの増加に感謝するでしょう。
- モバイルアプリのプッシュ通知がアプリにとって素晴らしい理由
- 新しいアプリビルダー向けのモバイルアプリエンゲージメント戦略
- どのアプリエンゲージメント指標を確認すべきか
- プッシュ通知とは?エピックな結果のための簡単なガイド
- プッシュ通知のコスト:本当に無料なの?(価格分析)
今回は以上です。


