失われたリードを回復するためにフォーム放棄トラッキングを使用する方法をお探しですか?
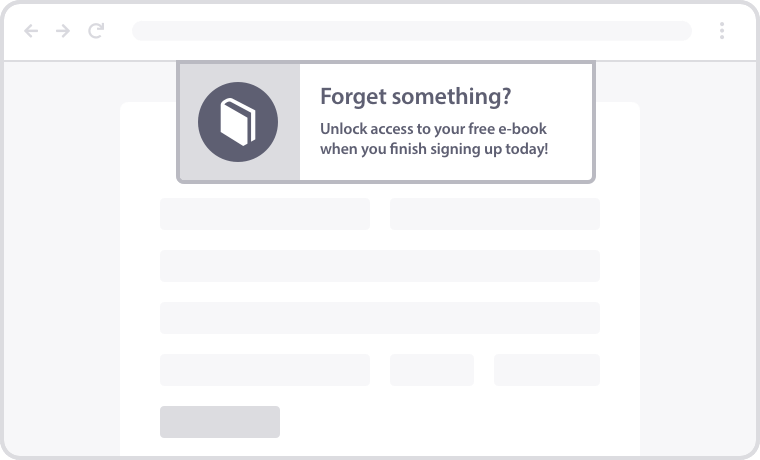
フォーム放棄とは、ユーザーがHTMLフォームに入力した後、送信せずに離脱することです。フォームは単一ページフォームでも複数ページフォームでも構いません。複数ページフォームの場合、通常はフォームの最後のページを指します。しかし、ユーザーが最初の数ページに詳細を入力した後、すべてのステップを完了する前にフォームを離脱した場合も、フォーム放棄となります。
この記事では、フォーム放棄プッシュ通知キャンペーンを設定して、失われたリードを自動的に回復する方法をご紹介します。最も良い点は、設定に10分もかからないことです。
さあ、始めましょう。
フォーム放棄トラッキングの仕組み
eコマースサイトにカート放棄の問題があるように、代理店サイトにはフォーム放棄の問題があります。PushEngageのウェブプッシュ通知の助けを借りて、放棄するユーザーをターゲットにし、お問い合わせフォームの入力を完了するように促すことができます。
PushEngageは世界で最高のプッシュ通知サービスです。そのため、キャンペーンは安全な手元にあります。
フォーム放棄とは何かを見てきたので、フォーム放棄トラッキングがどのように機能するかを理解する時が来ました。放棄されたフォーム回復キャンペーンを作成するための一般的なプロセスを理解するために、シングルステップフォームとマルチステップフォームの両方を確認します。
シングルステップフォーム放棄トラッキングキャンペーン
フォームが存在するページを訪問するとすぐに、「未完了フォーム入力」というセグメントに追加されます。
もちろん、最初にそのセグメントを作成する必要があります。セグメントの条件は、フォームの「送信」ボタンをクリックするまで、フォームを訪問した購読者がURL訪問時に自動的にセグメントに配置されることです。
訪問者がフォームの「送信」ボタンをクリックしない場合、わずかな遅延の後、自動プッシュ通知が送信され、フォーム入力を完了するように求められます。
メールの自動返信機能のように、プッシュ通知のシーケンス全体を設定できます。購読者がフォーム入力を完了すると、自動的にセグメントから削除され、それ以上の通知の受信が停止します。
マルチステップフォーム放棄トラッキングキャンペーン
マルチステップフォーム放棄は、シングルステップフォームとほぼ同じように機能します。唯一の違いは、フォームの入力ステップ数に応じて複数のセグメントを作成する必要があることです。
たとえば、3つのパートからなるフォームがある場合、3つのセグメントを作成することになります。

理想的には、各ステップのURLに基づいて、各ステップのセグメントを作成します。訪問者がいずれかのURLでアクションを実行すると、フォーム全体を完了するまで、次のセグメントに自動的に追加されます。唯一手動で行う必要があるアクションは、前のセグメントから購読者を削除することです。
訪問者がどのセグメントにいるかに基づいて、途中で離脱した場合にフォーム入力を完了するように説得するためのドリップキャンペーンを送信します。
フォーム放棄回復キャンペーンの設定方法
Finally, let’s take a look at how you can quickly create a form abandonment recovery campaign. For this part, we’ll be using PushEngage to set up push notification campaigns. To create form abandonment campaigns, you’ll need to have the Premium plan or higher. So, go get started with PushEngage before you proceed with the rest of this tutorial.
Once, you’ve signed up for PushEngage and installed it, head over to the PushEngage dashboard.
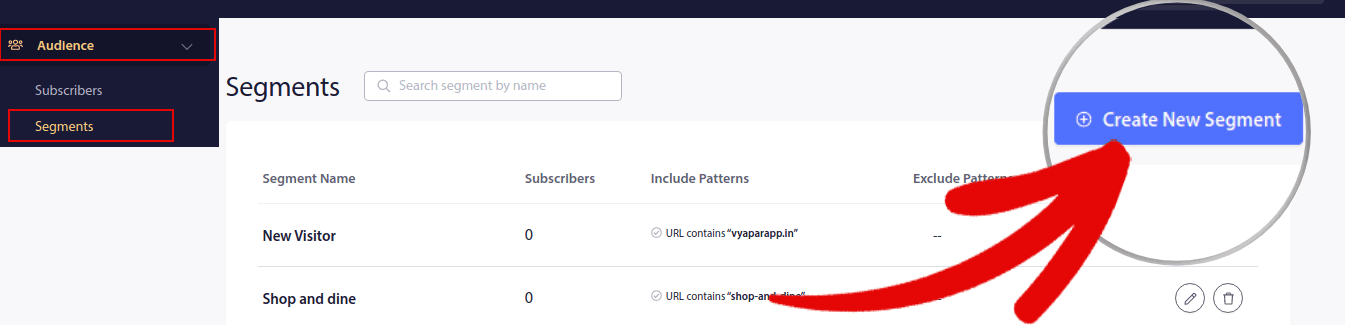
Then, go to Audience » Segments and click on Create a New Segment:
Then, name your segment and click on Segment on Page Visit and select Exact Match for the URL selection settings and paste in the URL for your form page:
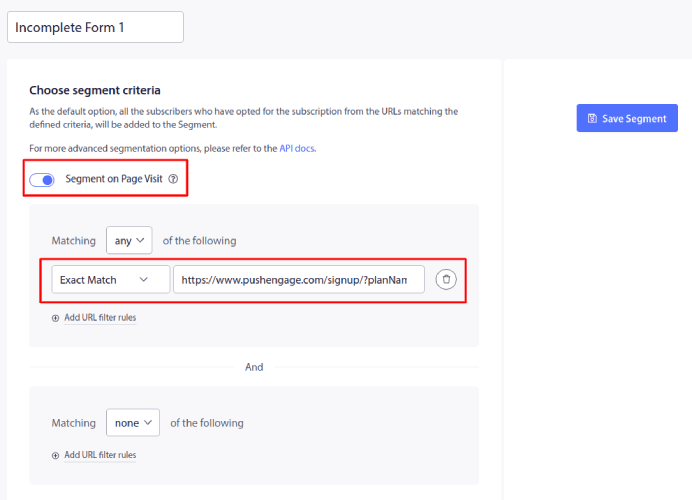
When you’re done, click on Save Segment.
If you have multiple contact form pages, go ahead and create a segment for each URL. Then, go to Campaign » Drip Autoresponders and click on Create New Drip Autoresponder:

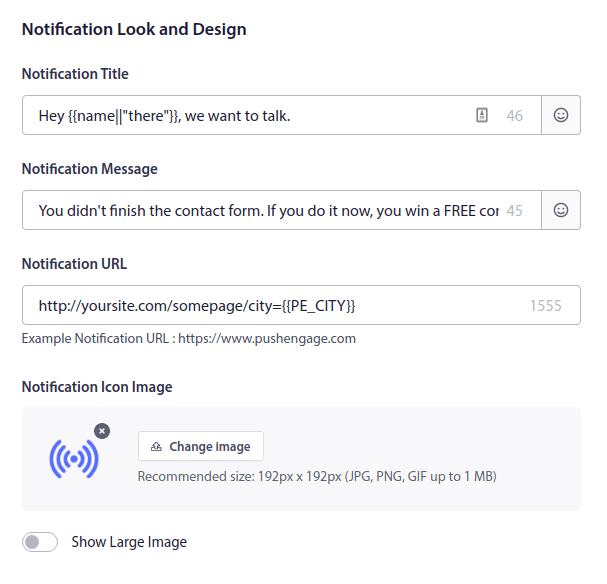
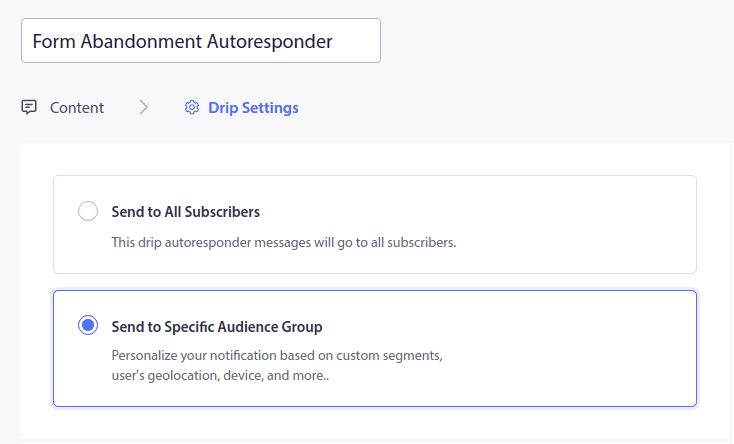
Next, create the form abandonment autoresponder under Content:
Once that’s done, head over to Drip Settings and select Send to a Specific Audience Group:
And under Custom Segments, select the segment you created:
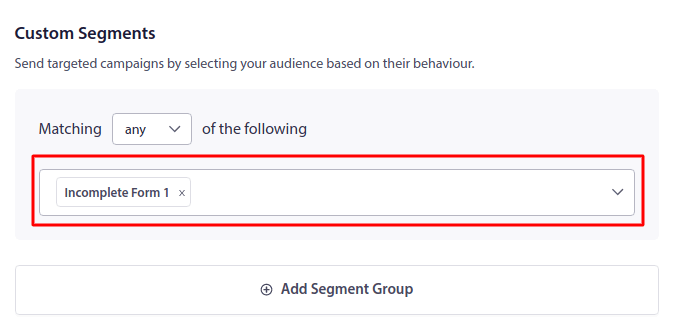
When you’re done, click on Activate Autoresponder:

Next, you’ll need to set up a way to remove your subscribers from the Incomplete Form segment when they enter the Incomplete Form 1 segment. To do that, you’ll need to use the PushEngage API to remove the subscriber from the segment when they click the Submit button on each part of the form.
Check out the documentation on how to create form abandonment campaigns to set up this process.
これで完了です!
What to do After You Set Up Form Abandonment Tracking
If you’re just starting out with push notifications, you should get started with PushEngage. PushEngage is the best push notification software in the world. Besides form abandonment campaigns, you can set up a bunch of other automated push notification campaigns.
It’s super easy to get started with these campaigns as well and you can also check them out next:
まだの場合は、今すぐPushEngageを始めましょう。


