
購読時にウェブプッシュ購読者をセグメント化しますか?
購読者を自動的にセグメント化すると、パーソナライズされたプッシュ通知キャンペーンを非常に簡単に送信できます。そうすることで、プッシュ通知のクリック率を向上させ、サイトへのリピートトラフィックを増やすことができます。
しかし、どうすればよいのでしょうか?
この記事では、購読時に購読者をセグメント化するための正確な手順を説明します。
PushEngageを使用してその方法を説明します。PushEngageは世界No.1のプッシュ通知ソフトウェアであり、ダッシュボードから非常に高度なセグメンテーションオプションを利用できます。
さあ、始めましょう。
URLに基づいて購読者をセグメント化する方法
購読者セグメントを作成する最も簡単な方法の1つは、リードが閲覧するコンテンツの種類に基づいてリードを整理することです。
そして、これはPushEngageで設定するのが非常に簡単です。通常、セグメントを作成するにはJavascript APIを使用する必要があります。PushEngageでは、そのオプションも引き続き利用できますが、最も簡単な方法はPushEngageダッシュボードから行うことです。Audience » Segmentsに移動し、Create a New Segmentをクリックします。
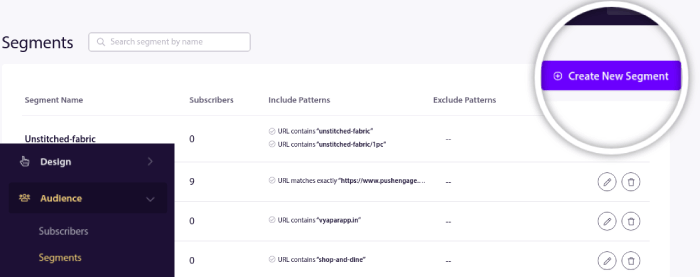
そして、閲覧しているURLに基づいて購読者を自動的にセグメント化するルールを作成します。
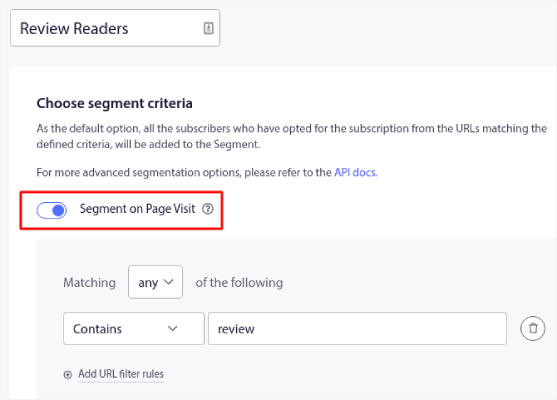
この例では、「Sample Segment」という名前のセグメントを作成しました。これは、サイトのURLに「examples」という単語が含まれている場合に購読者を自動的にセグメント化します。ここでは、好きなキーワードをほぼすべて使用できます。
ルールに満足したら、Createをクリックします。
そして、あっという間に完了です!
プッシュ通知オプトインを使用して購読者をセグメント化する方法
また、プッシュ通知オプトインをカスタマイズすることで、プッシュ通知を購読する際に購読者をセグメント化することもできます。
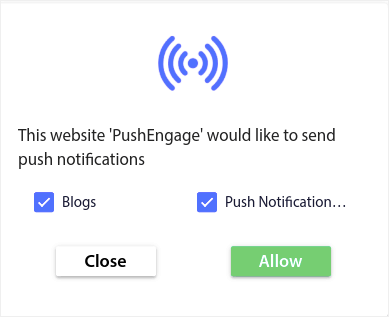
これは、PushEngageを使用して実行できるユーザーpreference-based segmentation(ユーザーの好みに基づくセグメンテーション)の一種です。User-Driven Segmentation(ユーザー主導のセグメンテーション)と呼ぶこともできます。ここでは、購読者は提供された2つの選択肢のいずれかを選択します。
仕組みは次のとおりです。
- ユーザーが購読すると、PushEngageはサブスクリプションデバイスID、ジオロケーション、およびデバイスタイプを取得します。
- この場合、PushEngageは購読時にユーザーの好みも収集し、カスタムセグメントに保存します。
早速始めましょう。
最初の部分は前の方法と同じです。Segmentationに移動し、Create a New Segmentをクリックします。
注:このタイプのセグメンテーションでは、Segment on Page Visitをクリックしないでください。
セグメントを作成したら、Design » Popup Modalsに移動し、新しいLarge Safari Style with Segmentオプトインを作成します。
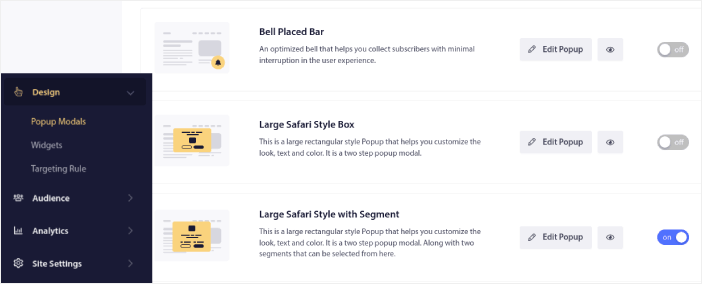
Edit Popupをクリックし、Popup Designタブの下でオプトインをデザインします。
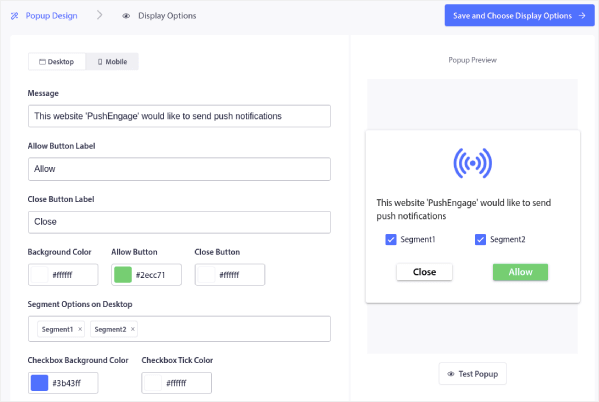
ここでは、コピーからブランドカラーをオプトインに表示させるまで、オプトインに関するほぼすべてのものをカスタマイズできます。Segment Options on Desktopフィールドで、訪問者に購読してもらいたいセグメントを選択できます。
The beauty of this optin is that the same subscriber can choose to subscribe to multiple segments right from the popup.
Scroll down to Enable Opt-in Subscription Rules and you can configure when you want your push notification optin to show up.

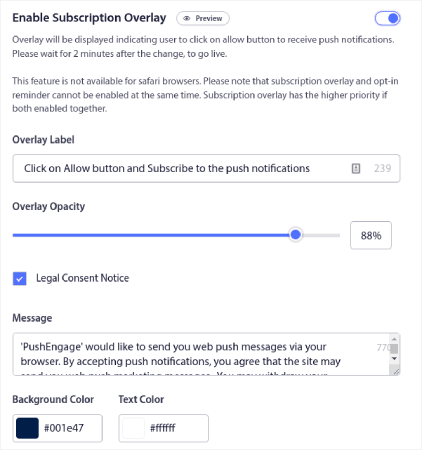
You can also create a Subscription Overlay with a Legal Consent Notice:
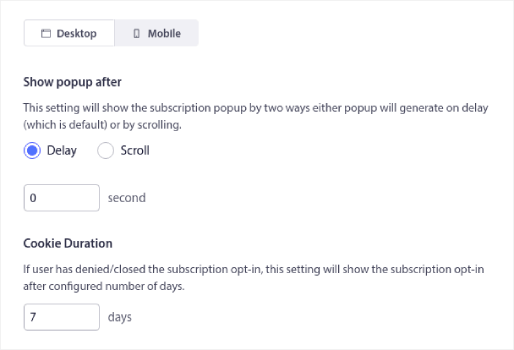
When you’re done, click the Save and Choose Display Options button. There, you can set up when the optin shows up by creating a delay after a visitor lands on a targeted page.
When you’re done just hit the Save and Enable Popup:

That’s really all! There’s no need for any code. If you followed every step exactly, you should see the push notification opt-in with segments on your site.
What to do After You Segment Your Push Notification Subscribers
今回は以上です、皆さん!
Segmentation is a great push notification strategy. Before you sign up with any push notification service, make sure to check out their audience segmentation features.
While you’re at it, you should also check out these epic resources as well:
We recommend getting started with PushEngage. PushEngage is the #1 push notification software in the world and you get extremely powerful segmentation features right out of the box.
まだの方は、今日からPushEngageを始めましょう。


This was a very useful article. I will apply the instructions you have given on my website in the PushEngage settings.
Thank you.