X-Cart is one of the most popular eCommerce site builders in the world. Using X-Cart, you can create a full-blown online store in seconds. But how do you add push notifications to an X-Cart site?
Push notifications can help you increase traffic, engagement, and revenue for your store by creating very simple push notification campaigns. The best part is that push notifications can be really affordable and simple to execute.
In this article, we’re going to show you step-by-step how to add web push notifications to X-Cart.
We’re going to show you how to do it using PushEngage. PushEngage is the best push notification software in the world and we highly recommend that you use the software to send your push notification campaigns.
早速飛び込みましょう。
How to Install Push Notifications on X-Cart
Installing push notifications to X-Cart isn’t really difficult. As long as you follow each step in this tutorial, you’ll be fine.
At the end of it all, you should see a welcome push notification on your site like this one:

さあ、始めましょう。
ステップ1:PushEngageアカウントの設定
PushEngageのホームページにアクセスし、開始するボタンをクリックします。

You can try out PushEngage for free. But we recommend selecting a paid plan to unlock all the powerful features it offers. Since X-Cart is an eCommerce site builder, you should ideally get the Enterprise package to get full access to automated push notification campaigns.
Once you’ve signed up for your PushEngage account, head over to your PushEngage dashboard and go to Settings » Site Settings » Installation Settings:
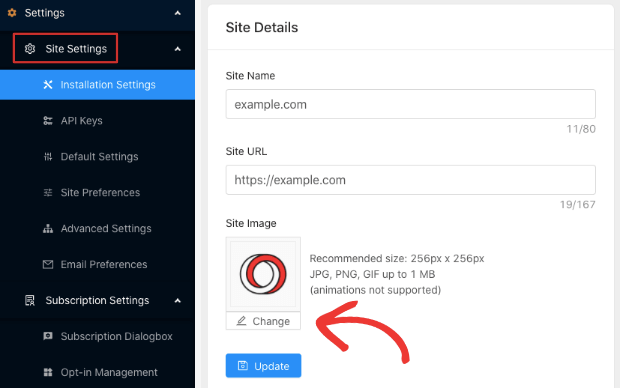
You can set your logo, site name, and site URL here. Once that’s done, we’ll move on to the installation. But you should really get this done right now so that you can test your push notifications later.
ステップ2:PushEngageからインストールコードを取得する
To install push notifications, you’ll need to get an installation code from your PushEngage dashboard. Head over to Settings » Site Settings » Installation Settings:
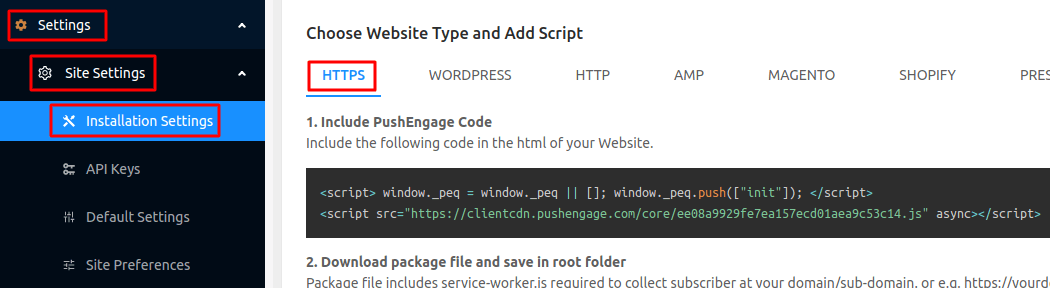
サイトにSSL証明書がインストールされているかどうかに応じて、HTTPタブまたはHTTPSタブのいずれかからインストールコードを取得します。
Copy this Javascript code snippet. You’ll need it soon.
Step #3: Place the Installation Code in Your X-Cart Site
Log in to your X-Cart dashboard and head to Content » Front Page:
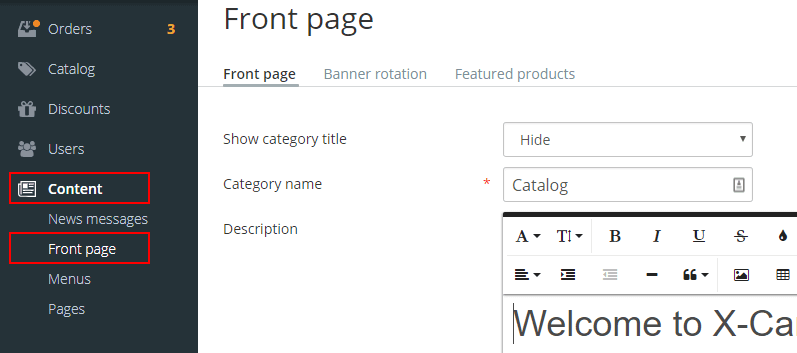
In the text editor, select Code View to and paste the PushEngage installation code snippet you got from the PushEngage dashboard:
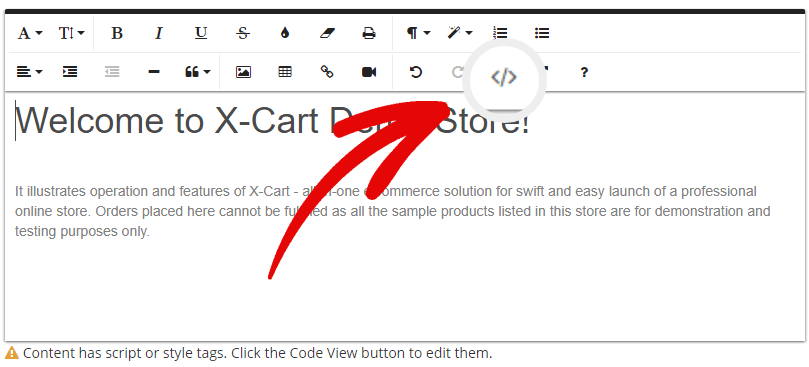
When you’re done, hit Update. And you’re done!
ステップ4:PushEngageオプトインの設定
Finally, in your PushEngage dashboard, go to Settings » Subscription Settings » Subscription Dialogbox » Edit:
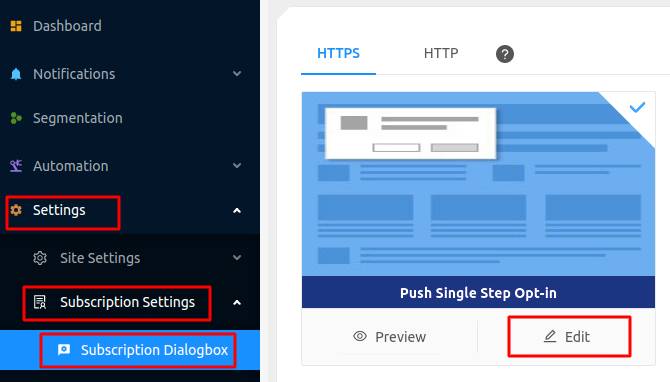
Here, you can customize your push notification opt-in. The best way to approach this is to treat it like any opt-in. You want to give your visitors a solid reason to subscribe. If you need some help with that check out our article on how to create a custom push notification opt-in.
And if you’d like some templates to get started, you should check out this article on high-converting push notification opt-ins.
ステップ5:ウェルカム通知の作成
Now that you’re done setting up the opt-in, it’s time to test if it’s set up the right way.
これを実行する最善の方法は、ウェルカム通知を作成し、プッシュ通知を購読してすべてが機能するかどうかを確認することです。ウェルカム通知とは、新規購読者が購読を確認し、歓迎するために送信するプッシュ通知です。
では、どうすればよいでしょうか?
設定 » サイト設定 » インストール設定 にアクセスして、ウェルカムメッセージを設定してください。
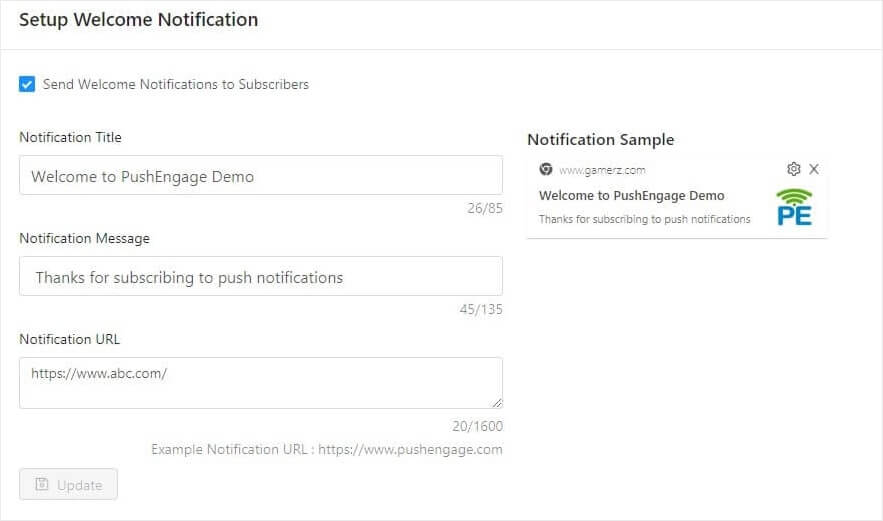
そして、本当にそれだけです。
次に、サイトに戻って自分の通知を購読するだけです。この時点で、プッシュ通知設定の完全なテストを実行することも非常に良い考えです。なぜなら、キャンペーンを作成する準備ができているからです。訪問者が見て、壊れたユーザーエクスペリエンスについて不平を言う前に、一般的な問題をトラブルシューティングするのに役立ちます。
まとめ
今回は以上です、皆さん!
すでにX-Cartサイトにウェブプッシュ通知を追加している場合は、次にプッシュ通知キャンペーンの構築を開始する必要があります。始めるのに良い場所は、インスピレーションを得るために、クリエイティブなプッシュ通知に関する記事を確認することです。
しかし、あなたがマーケティングのプロで、クリエイティブなアイデアの助けを必要としない場合は、自動プッシュ通知キャンペーンに関する記事をご覧ください。これらは、トラフィック、エンゲージメント、収益を自動操縦で増やし続ける、より高度なアイデアです。
PushEngageを使用してキャンペーンを作成することをお勧めします。PushEngageは世界No.1のプッシュ通知ソフトウェアであり、あなたのキャンペーンは安全な手に委ねられます。
ですので、まだの場合は、今すぐPushEngageを使い始めましょう!


