Are you looking for a detailed, step-by-step guide to creating Black Friday push notifications that convert?
Sure, you can send out a simple push notification broadcast. But will that work? We’ve figured out a rock solid process to help you get more sales from holiday season. And we’ve tested it out multiple times with multiple brands.
In this article, we’re covering how we create push notifications for PushEngage’s Black Friday Sale. And how you can do the same thing as well. We’re going to check out what you need to get started, how you would create the campaigns, and what an ideal schedule would look like.
よさそうですね?さあ、始めましょう。
Before You Get Started with Black Friday Push Notifications
Push notifications are a marketing tool that helps you to connect with web visitors even after they leave your website. You can send targeted notifications to your push subscribers and even personalize your notifications for difference customer segments. But which push notification service should you choose?
We recommend using PushEngage to send push notification campaigns.

PushEngage は世界最高のプッシュ通知サービスです。無料版だけでなく、ターゲットを絞ったプッシュメッセージでサイトを離れた訪問者とつながることができます。
PushEngageがプッシュ通知サービスおよびツールとして第一選択肢である理由は次のとおりです。
- 使い方が非常に簡単
- HTTPおよびHTTPSサイトで効果的
- 設定にほとんどまたはまったくコーディングを必要としないビジュアルビルダーが付属しています
- あらゆる種類のサイト向けに、完全に 自動化されたプッシュ通知キャンペーン を簡単に設定できます
- クリック率を高めるためのパーソナライズされたプッシュ通知を送信するための複数のオプションがあります
- カスタム目標追跡、UTMパラメータ、および高度な分析を備えています
これはほんの始まりにすぎません。さらに進む前に、PushEngageの機能の全リストを確認してください。PushEngageの最も素晴らしい点は、購入を決定する前に試すことができる、永久無料プランがあることです。
Pro Tip: Check out our article on push notification cost analysis before you buy any service.
Once you’re done creating your account, head over to the PushEngage dashboard and follow along:

サイト設定 » サイト詳細をクリックし、セットアップ手順はこちらをクリックボタンをクリックしてください。

WordPressタブをクリックし、PushEngage WordPressプラグインをインストールボタンをクリックして、ウェブサイトにプラグインをインストールします。

素晴らしい点: PushEngageアカウントを作成したときに、すでにウェブサイトとPushEngageアカウントを同期しています。したがって、PushEngageダッシュボードのインストールリンクをクリックして、PushEngage WordPressプラグインをウェブサイトに自動的にインストールします。
And you’re done! You have successfully set up a web notifications WordPress plugin on your website. website. You don’t have to login to your WordPress admin panel at all. For a more detailed guide, check out our article on how to install web notifications on WordPress.
Before you start creating Black Friday push notifications, you should also check out these resources to help you get started.
- ウェブ通知WordPressプラグインをサイトに追加する方法
- プッシュ通知アイコンの追加方法(簡単な方法)
- 即時トラフィックを獲得するための7つのプッシュ通知のベストプラクティス
- プッシュ通知のワンステップオプトインを有効にする方法
- [お知らせ] PushEngageに高度なオーディエンスグルーピングが追加されました
I highly recommend using these resources to get started with PushEngage quickly.
How to Create Your Push Notification Campaign
Now that we have a basic understanding of how PushEngage works, let’s create our campaign. Currently, PushEngage only offers the Audience Group feature for Push Broadcasts.
So, in your PushEngage dashboard, go to Campaign » Push Broadcasts to create your push notifications.

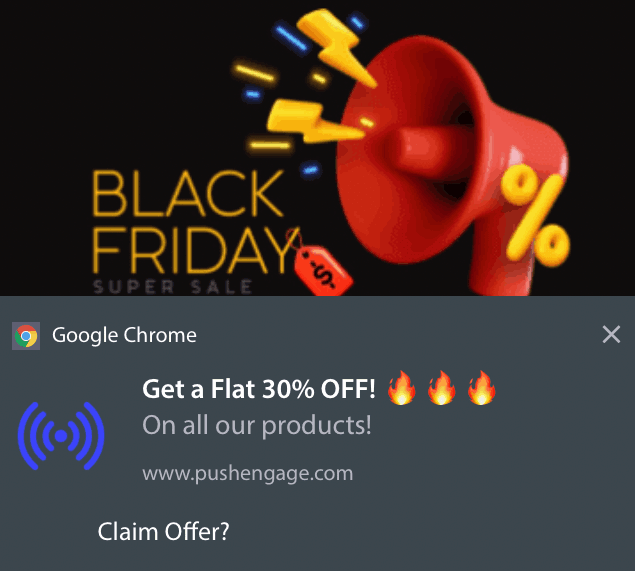
Next, follow our step-by-step process to create a powerful Black Friday Sale. If you follow every step, you should have powerful push notifications like this one:
Step #1: Draft Your Push Notification Content
Your push notification content will include:
- A Notification Title
- A Notification Message
- A URL to redirect to
- A Large Image for the Notification
- Call-to-Action Buttons
- A notification expiration limit
Start with the basic content of your notification first:
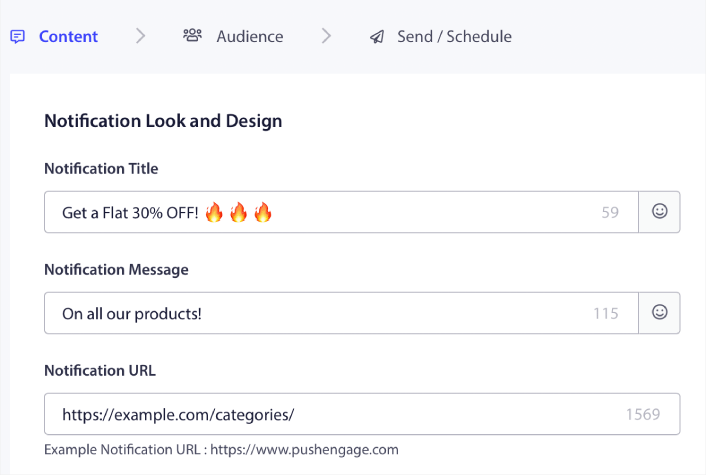
Notice the use of emojis in the Notification Title. We recommend using emojis in the title and the message for all your push notifications for higher open rates. You can A/B test your notifications as well for better performance.
Step #2: Add a Large Image to Your Notification
It’s difficult to stand apart from a bunch of notifications in the Notification Tray. That’s why you need a Large Image to make your notifications pop:
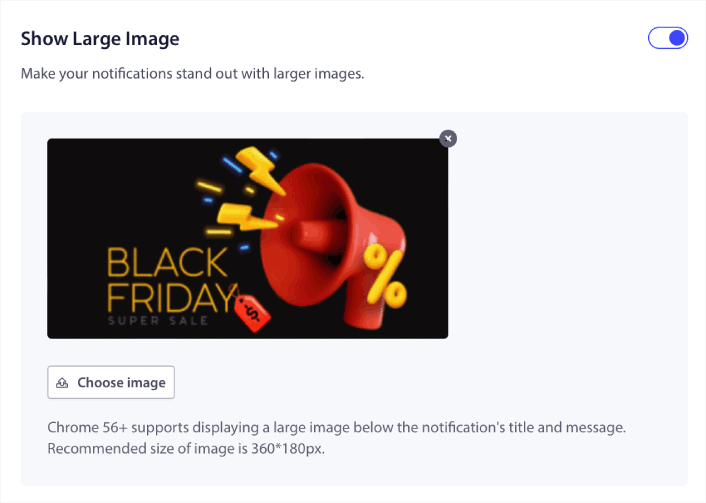
You can use PNG and JPEG formats for images.
Step #3: Add CTAs for Higher Click Rates
We’ve seen that using custom call-to-action buttons increase the click rates on your notifications. So, we highly recommend using the Multi Action Notification option to create a custom CTA:
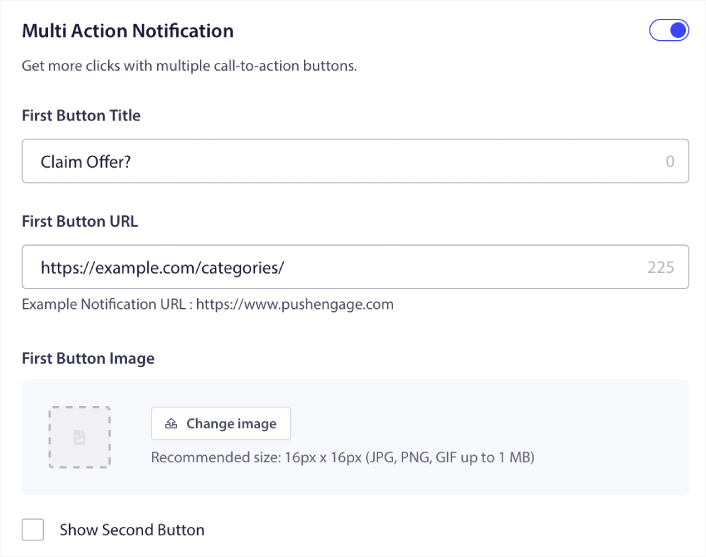
You can add at most two CTAs. If you want, you can create a split test with one CTA or two. In our experience, it’s usually best to use multiple CTAs unless you are super focused on ONLY one action.
One thing you want to be careful about is push notification character limits. Everything in push notifications has a character limit based on your subscriber’s browser and device. If your notifications are too wordy, they simply won’t show up the right way.
Step #4: Set Notification Duration
The Notification Duration is a time limit after which your push notification expires. After expiry, your subscriber won’t be able to see the notification even if it was delivered to them.
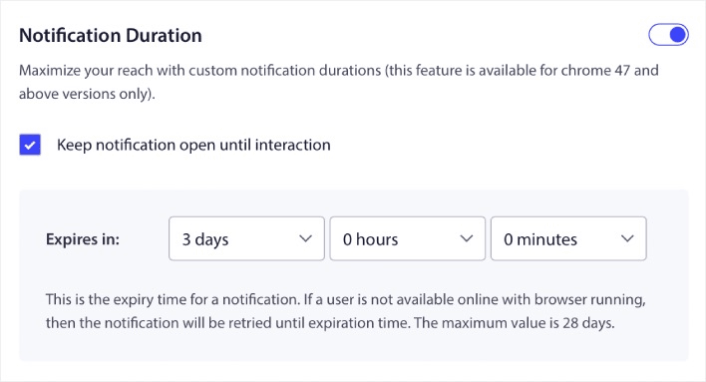
Setting a Notification Duration is a great practice for all sales. This way, your subscribers won’t get flooded with a bunch of notifications.
Pro Tip: Make sure to set the right duration for a Flash Sale. If your subscribers click through to an offer that’s already expired, they will be very unhappy.
Step #5: Select Your Audience Group
Now that you have your content in place, it’s time to find the right audience for your notifications.
すべての購読者に通知を送信する方法
3つの通知で最大のリーチを獲得したいと考えています:
- 早期ブラックフライデーのお知らせ
- ブラックフライデーフラッシュセール
- サイバーマンデーセール
そのため、これらの3つの通知を全員に送信します。「オーディエンス」タブで、「すべての購読者に送信」を選択します。

全員への一斉送信をクリックしなかった購読者を再ターゲティングする方法
If you’re not sending the notification to all subscribers, you’ll need to create an Audience Group.
Go to Audience » Audience Groups and click Create New Audience Group:

前回の通知をクリックしなかった購読者をターゲットにするには、最後のクリック日時でフィルタリングする必要があります。
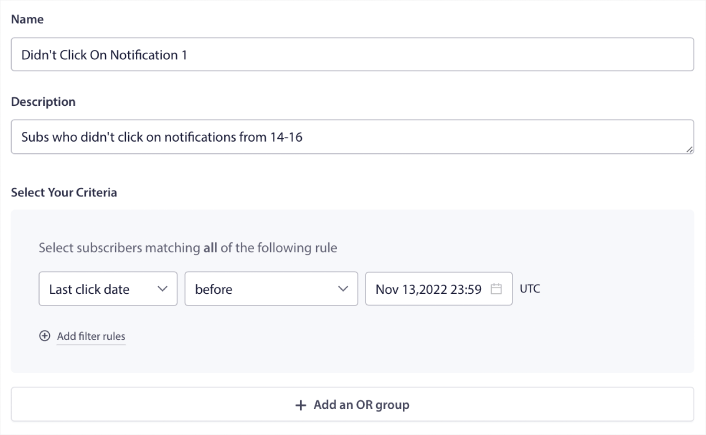
前回の通知を送信した日時より前の「最後のクリック日時」でフィルタリングします。たとえば、11月14日に最後のプッシュ通知を送信した場合、11月13日の深夜より前に通知をクリックした購読者をフィルタリングします。
注意:メールキャンペーンとは異なり、最後の通知のクリック率で実際にフィルタリングすることはできません。最も近い近似値は、日付範囲でのクリックをフィルタリングすることです。
完了したら、「通知を保存」をクリックします。
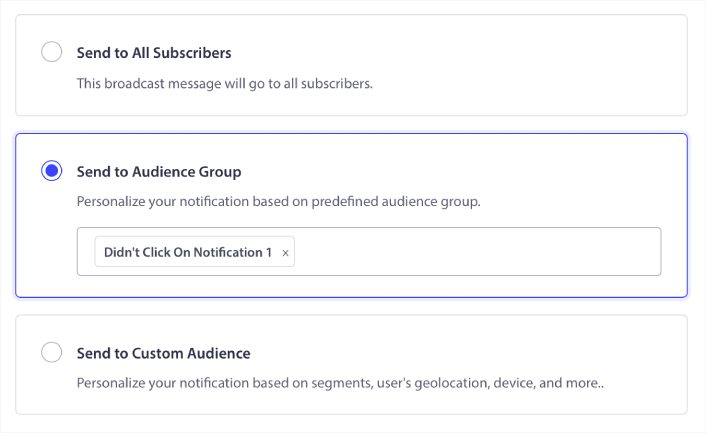
次に、プッシュ通知の一斉送信に戻り、「オーディエンスグループに送信」を選択します。ドロップダウンからグループを選択します。
全員への一斉送信をクリックした購読者を再ターゲティングする方法
If you want to target subscribers who did click on your last notification, you can create another Audience Group.
前回の通知を送信した日時より「後」であり、次の通知を送信したい日時より「前」の「最後のクリック日時」で購読者をフィルタリングします。
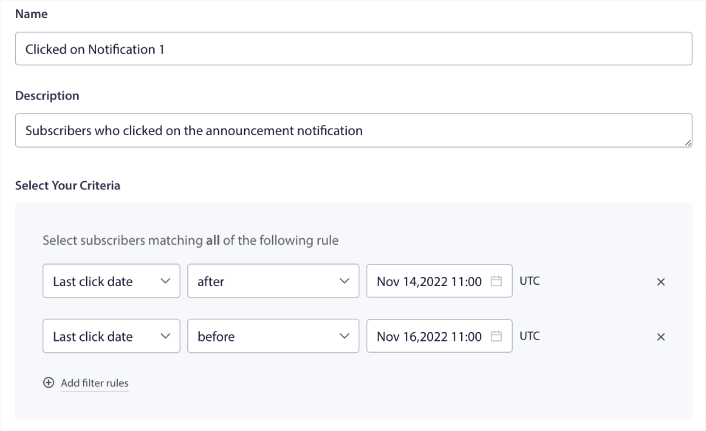
「フィルター条件を追加」をクリックすることで、フィルターに「AND」条件を追加できます。このようなフィルターは、クロスセルプッシュ通知に最適です。
Step #6: Schedule Your Push Notification
In the Schedule tab, select the Begin sending at particular day and time for granular scheduling options.
We’re sending the notification at 11:00 AM. Since browser push notifications get shown no matter when you actually sent the notification, you can send it even earlier if you want.
Since my default Timezone Setting is not in EST, I’m using the Send Notifications in Subscribers timezone option:
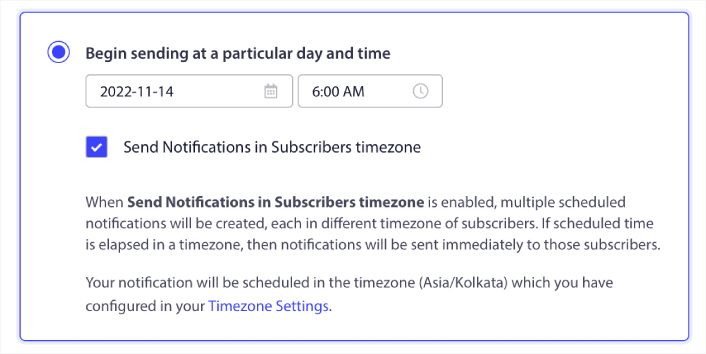
Don’t forget to test your notifications by clicking the Test Notification button. When you’re done, click Schedule Notification.
What’s the Ideal Black Friday Push Notifications Schedule
There’s no one right or wrong schedule with holiday campaigns. But we follow a very strict schedule and it works:
- 3 notifications for an early Black Friday sale
- 1 notification for Black Friday
- 1 notification for Small Business Saturday
- 1 notification for Cyber Monday
- 1 notification for Cyber Monday Extended sale
And retargeting push notifications to target the subscribers who clicked on them or didn’t. Let us know how that works for you. In the meantime, check out these resources:
- 好奇心を刺激してプッシュ通知のクリックを増やす方法
- 各プッシュ通知をパーソナライズする方法
- リッチメディアでプッシュ通知を目立たせる方法
- 休眠中のプッシュ購読者を再エンゲージさせる方法
- 顧客に情報を提供するためにプッシュ通知を使用する方法
- クリック率を高めるためにプッシュ通知で絵文字を使用する方法
- 緊急性を醸成してコンバージョンを増やす方法
まだの場合は、今日PushEngageを使い始めましょう。


