Remarque : Il n'y a pas de documentation héritée disponible pour cet élément, vous voyez donc la documentation actuelle.
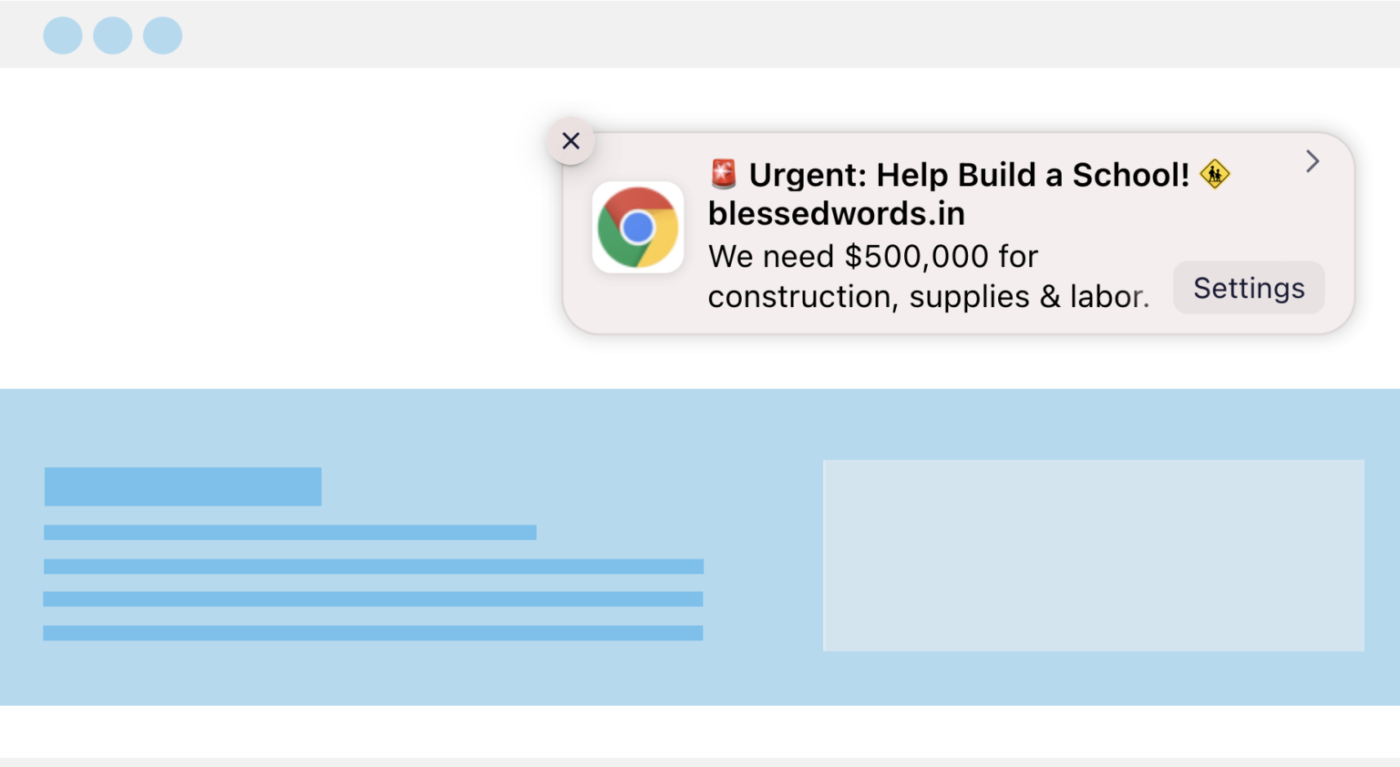
Si vous menez des campagnes de collecte de fonds sur WordPress en utilisant WPCharitable, PushEngage s'intègre désormais directement à Charitable Pro pour vous permettre d'envoyer des notifications push automatisées aux moments les plus importants : lorsqu'une personne fait un don, lorsqu'une campagne atteint un jalon, lorsqu'une campagne est lancée et lorsqu'une campagne est sur le point de se terminer.
Cela signifie que les donateurs et les abonnés de votre liste reçoivent des alertes personnalisées et opportunes directement sur leur appareil mobile ou de bureau, sans avoir besoin de leur numéro de téléphone et sans être enfouis dans une boîte de réception.
Avant de commencer
- Charitable Pro 1.8.16 ou version ultérieure installé et actif sur votre site WordPress.
- Plugin gratuit PushEngage installé et connecté à votre compte PushEngage. Si vous ne l'avez pas encore installé, vous pouvez le faire depuis le constructeur de campagnes Charitable (couvert dans les étapes de configuration ci-dessous) ou en le téléchargeant depuis le répertoire des plugins WordPress. Un compte PushEngage. Si vous n'en avez pas encore, inscrivez-vous sur pushengage.com.
- Au moins une invite d'opt-in publiée sur votre site afin que les visiteurs puissent s'abonner aux notifications push.
Configuration de l'intégration
Il existe deux façons de connecter PushEngage à Charitable.
Option 1 – Installer depuis votre compte Charitable
- Connectez-vous au tableau de bord WordPress du site où Charitable est installé.
- Accédez à l'onglet Téléchargements et trouvez PushEngage.
- Téléchargez le fichier du plugin sur votre ordinateur.
- Dans votre tableau de bord WordPress, allez dans Plugins » Ajouter » Téléverser un plugin.
- Téléversez le fichier et cliquez sur Installer maintenant, puis sur Activer le plugin.
- Une fois activé, le plugin vous invitera à connecter votre compte PushEngage.
Option 2 – Connecter depuis le constructeur de campagnes
- Ouvrez n'importe quelle campagne dans Campagnes » [votre campagne] » Constructeur de campagnes.
- Cliquez sur l'onglet Marketing.
- Sélectionnez PushEngage.
- Suivez les instructions à l'écran pour installer le plugin et connecter votre compte.
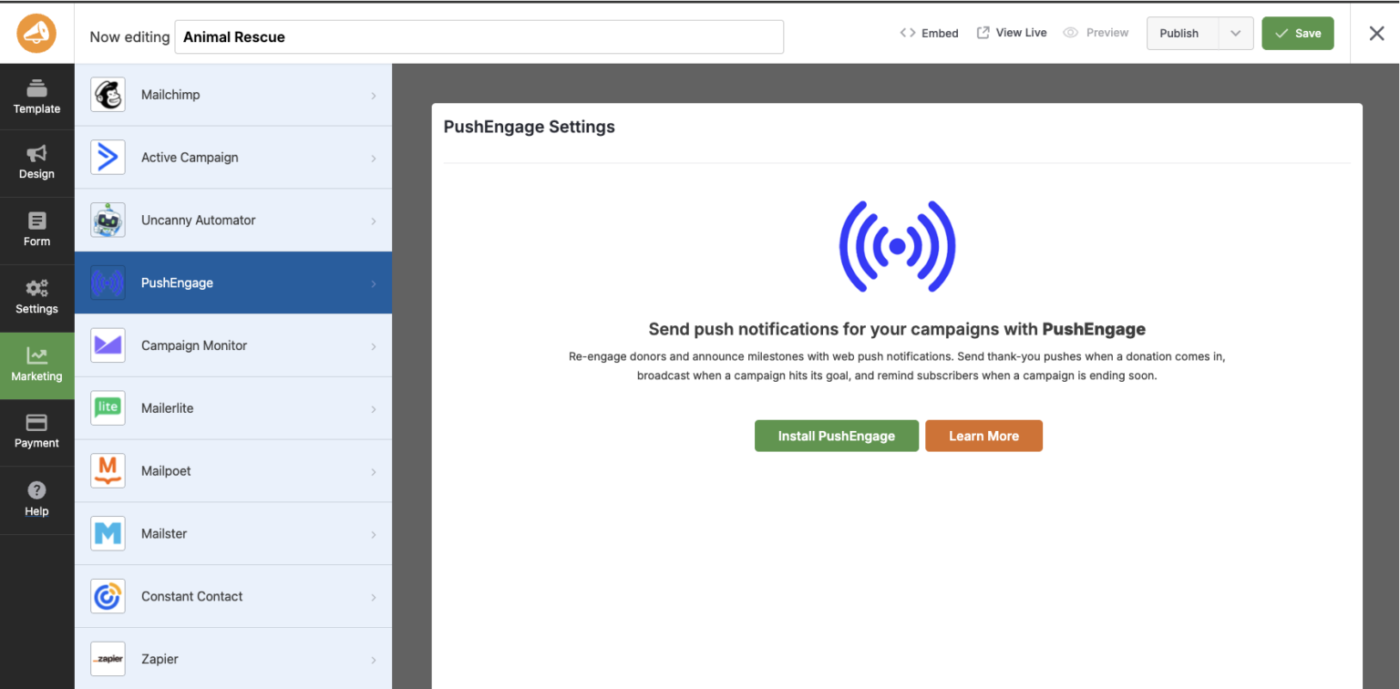
Une fois connecté, vous êtes prêt à configurer les déclencheurs de notification pour chaque campagne.
Les quatre déclencheurs de notification
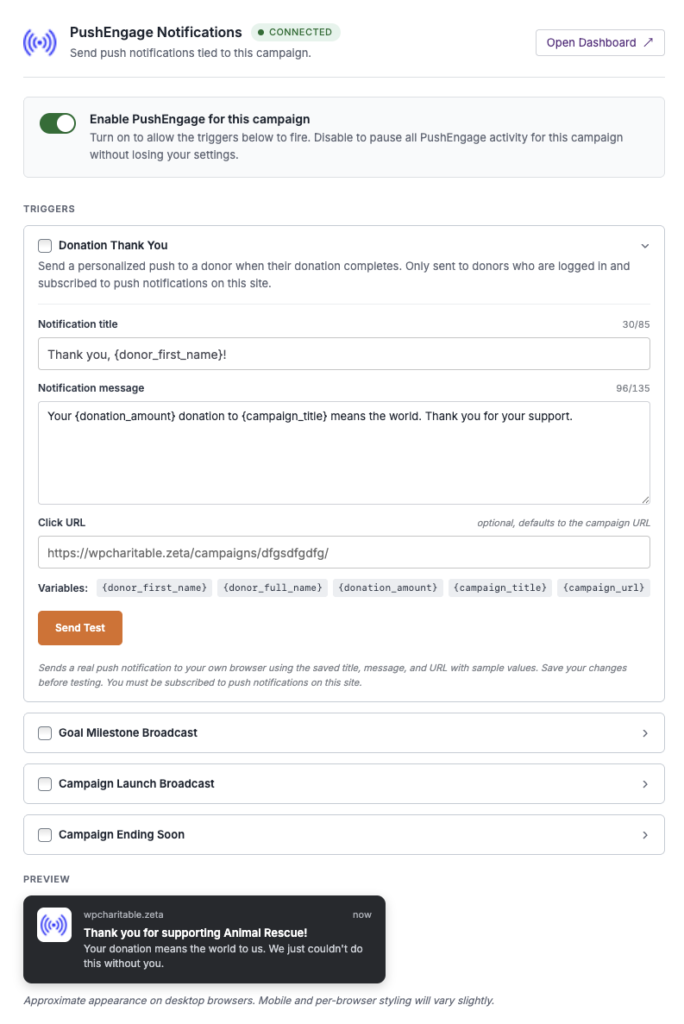
Chaque campagne a ses propres paramètres PushEngage. Vous pouvez activer et personnaliser chaque déclencheur indépendamment dans Campagnes » Choisir une campagne et aller dans Constructeur de campagnes » Marketing » PushEngage.
Remerciement pour le don
Cette notification se déclenche à l'instant où un don est complété et est envoyée uniquement au donateur qui vient de donner. Comme elle est envoyée quelques secondes après le don, elle arrive alors que le moment est encore frais – bien avant qu'un e-mail transactionnel n'arrive généralement.
Utilisez ce déclencheur pour renforcer la décision du donateur avec un accusé de réception chaleureux et immédiat.
Exemple de texte :
- Titre :
Merci, {{donor_first_name}} ! - Message :
Votre don pour {{campaign_title}} a fait une différence. Nous vous sommes très reconnaissants.
Jalon de l'objectif
Cette notification est diffusée à toute votre liste d'abonnés lorsqu'une campagne atteint 50 %, 75 % ou 100 % de son objectif de collecte de fonds. Elle transforme un chiffre privé de votre tableau de bord en une victoire publique et partageable qui crée un sentiment d'urgence et une preuve sociale pour les donateurs indécis.
Les trois alertes de jalon sont envoyées automatiquement une fois que vous activez ce déclencheur — vous n'avez pas besoin de configurer chaque pourcentage séparément.
Exemple de texte (jalon de 75 %) :
- Titre :
{{campaign_title}} est financé à 75 % ! - Message :
Nous y sommes presque. Aidez-nous à franchir la ligne d'arrivée — il ne reste que {{amount_remaining}} à collecter.
Lancement de campagne
Cette notification annonce une nouvelle campagne à tous ceux qui se sont inscrits pour recevoir des notifications sur votre site. Elle est envoyée une seule fois, au moment où la campagne est lancée.
Utilisez-la pour donner à votre liste d'abonnés un accès anticipé et créer une dynamique initiale avant de promouvoir par d'autres canaux.
Exemple de texte :
- Titre :
Nouvelle campagne : {{campaign_title}} - Message :
Nous venons de lancer une nouvelle collecte de fonds et nous avons besoin de votre aide. Consultez l'objectif et donnez dès aujourd'hui.
Bientôt terminée
Cette notification est envoyée à votre liste d'abonnés lorsqu'une campagne approche de sa date de fin. Elle crée une échéance naturelle qui incite à l'action les donateurs qui envisageaient de donner.
Exemple de texte :
- Titre :
Dernière chance de donner ! - Message :
{{campaign_title}} se termine bientôt. Chaque euro avant la date limite compte.
Personnalisation de vos notifications
Chaque déclencheur a son propre titre, message et lien de destination modifiables. Vous pouvez personnaliser le contenu à l'aide des espaces réservés suivants, que Charitable remplit automatiquement au moment de l'envoi :
| Espace réservé | Ce qu'il insère |
|---|---|
{{donor_first_name}} | Le prénom du donateur (uniquement pour les remerciements aux donateurs) |
{{campaign_title}} | Le nom de la campagne |
{{amount_raised}} | Le montant total collecté jusqu'à présent |
{{goal_amount}} | L'objectif de collecte de fonds de la campagne |
{{amount_remaining}} | Le montant encore nécessaire pour atteindre l'objectif |
{{progress_percentage}} | Le pourcentage de l'objectif atteint |
Utilisez le bouton Envoyer un test dans chaque panneau de déclenchement pour prévisualiser exactement à quoi ressemblera la notification dans un navigateur avant que quoi que ce soit ne soit mis en ligne. C'est la meilleure façon de détecter les problèmes de formatage ou les textes tronqués avant qu'ils n'atteignent vos donateurs.
Bonnes pratiques pour la longueur des notifications
Les notifications push s'affichent différemment selon les navigateurs et les systèmes d'exploitation. Pour vous assurer que vos messages s'affichent correctement partout :
- Limitez les titres à 50 caractères ou moins.
- Limitez le corps du message à 90 caractères ou moins.
- Placez les informations les plus importantes, comme le nom de la campagne ou la demande clé, avant les valeurs de substitution, car les substitutions longues peuvent tronquer le texte.
Si vous avez des questions sur votre compte PushEngage ou si vous avez besoin d'aide pour configurer l'intégration, n'hésitez pas à nous contacter. Notre équipe de support sera ravie de vous aider.


