Remarque : Il n'y a pas de documentation héritée disponible pour cet élément, vous voyez donc la documentation actuelle.
We will walk you through enabling Restock and Price Drop Alert Campaigns in your Shopify store. These alerts allow your customers to receive notifications when a product they are interested in is restocked or experiences a price drop, helping to drive engagement and increase sales.
Follow these simple steps to integrate and customize these campaigns using PushEngage, all without the need for any coding.
Avant de commencer
Voici quelques points à savoir avant de commencer :
- This guide assumes you already have the PushEngage App and Shopify Store for your website.
- Our Shopify integration requires a PushEngage Growth subscription to activate our Price Drop & Restock Alerts using our Trigger Campaign feature.
An Alert Widget will initiate the campaigns. Once visitors subscribe to the alerts, they will begin receiving these notifications.
Enable Widgets for Subscribing Alerts
You can navigate to Design » Widgets.
Then scroll down to Alert Campaign Widget. You can toggle this on so your subscribers can specifically subscribe to Price Drop Alert & Restock Alert Campaigns to trigger.

You can customize the alert widget with different messages, matching the colors with your brand theme to make it more attractive for visitors to click and subscribe through it.

Enabling Price Drop & Restock Alert Campaigns
Log in to your PushEngage account. From the dashboard, go to the Campaigns » Trigger Campaigns.
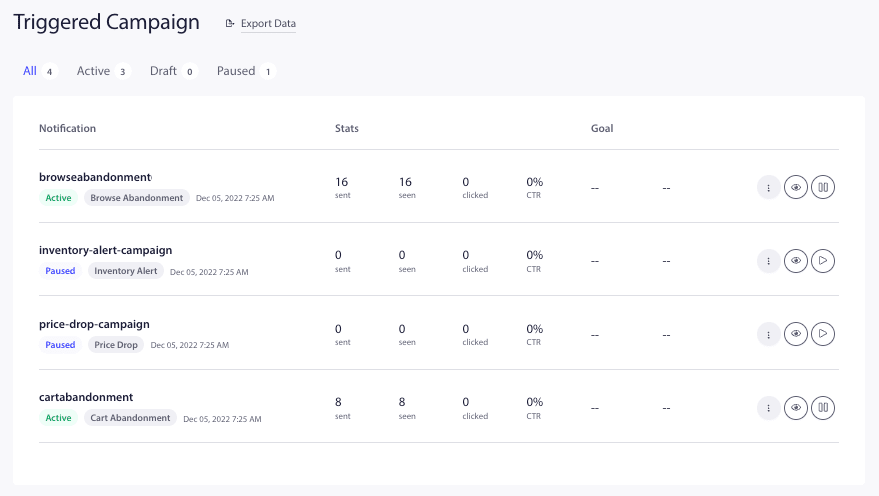
PushEngage integrates seamlessly with your store and offers ready-made templates for Price Drop & Restock Alert Campaigns. These campaigns integrate directly with your product feed and fetch all the needed variables.
You can click on the Resume Trigger Button.

You can also Edit the already created campaigns, after you click on edit you will have few push notifications added in the campaign.
Note : Please do not remove the variables for product name, price, image, and URL to ensure dynamic content is displayed to users.
You can also schedule the campaign flow for each notification. You can add new campaigns or remove them.
Optimizing Settings of Notifications
Notification Duration will help set up the campaign duration for how long the campaign lives. The best practice is to have it on the basis of next scheduled. This means if the first notification was set to go out after 1 day and the second notification would go out after 2 days, the duration of expiry should be 48 hours/2 days for the first notification.
You should also always have the notification open until reaction so the campaign does not go away from screen and stays in action center if there is no action by the subscriber.

Set Frequency Capping
This is very important factor to avoid spamming users when they have added multiple notifications. You can navigate to Trigger Settings.
Vous pouvez ajouter un plafond de notification hebdomadaire et mensuel. Par exemple, si une limite quotidienne est de 2, vous pouvez ajouter une limite hebdomadaire de 14. Cela signifie que le plafond s'applique à chaque abonné/jour.
Suivre les performances des campagnes
Vous pouvez utiliser les paramètres UTM et le suivi des objectifs pour surveiller les performances de vos campagnes. En dehors de cela, nous pouvons également activer le suivi des objectifs. Voici le guide qui vous aidera à activer le suivi des objectifs.
A
C'est tout ; vous avez activé les campagnes d'alerte de baisse de prix et de réapprovisionnement pour votre boutique avec PushEngage.
Si jamais vous rencontrez des problèmes, n'hésitez pas à nous contacter en cliquant ici. Notre équipe de support pourra vous aider.


