If email open rates are dropping and your social posts are getting buried, it might be time to try something different. A web push notification campaign could be exactly what you need.
Web push is fast, direct, and shows up right when your subscriber is online. No inbox. No algorithm. Just a quick message that brings people back to your site when it matters most.
In this guide, I’ll show you how to set up your first web push notification campaign using PushEngage. It’s easier than you might think, and you’ll see how even a simple campaign can drive real results.
Lyder det godt? Lad os bare dykke lige ned i det.
Send Web Push Notifications Today!
Push-notifikationer er et supereffektivt, billigt marketingværktøj, der hjælper dig med at øge din gentagne trafik, engagement og salg automatisk.
Why Web Push Works (Even When Other Channels Don’t)
Web push notifications cut through the noise in a way that email and social just can’t.
- You don’t need a phone number or email address to grow your list
- Messages show up while your subscriber is actively browsing
- You can automate everything — from cart recovery to product drops
- It works across devices and browsers (no app required)
It’s like having your own private traffic channel… one that actually gets noticed. Think about it… when was the last time you ignored a browser notification that popped up with your name, a juicy headline, and a call to action you cared about?
⚡ Instant Visibility: Unlike emails that sit unread for days, push notifications hit instantly. Right on the user’s screen. Desktop, mobile, doesn’t matter. You’re not waiting for them to open an inbox. You’re showing up exactly when it matters.
🧠 Zero Memory Required: Users don’t need to remember your website. Or your product. Or even their login.
Once they subscribe, you can re-engage them anytime — no forms, no friction, no fuss. It’s like having a fast lane straight into their attention span.
📈 Stupid-High Engagement: Web push CTRs often 2–3x email. Why? Because it’s short. Unexpected. And native to how people browse. Plus, no one’s inbox is drowning in push notifications (yet). So you stand out.
💸 You Own the Channel: No algorithms. No bidding. No social feed shenanigans. Push subscribers are yours. You decide what they see and when. It’s your audience, not rented from Meta or Google.
🧪 Perfect for Testing: Need to know if a headline works? If people care about a new feature? Push is the fastest A/B testing tool you didn’t know you had. Send a headline variation. See which one gets more clicks. Learn fast. Move faster.
Web push is the rare channel that’s cheap, high-converting, and brutally effective when used right.
And the best part… it takes under 10 minutes to launch your first campaign.
Let’s build one.
A Breakdown of Web Push Notification Campaign Types
In the broadest sense, there are 3 types of web push notification campaigns:
- Broadcast notifications
- Drip web push notification campaigns
- Triggered web push notification campaigns
Broadcasts are push notifications that you send out as a single notification. You can schedule them, but they will only fire off once. Triggered campaigns involve setting up a push notification, defining a trigger to set it off, and a workflow to control its scheduling. Automated drip notifications are a series of notifications that set off automatically at specific times or when specific conditions are met.
For all intents and purposes, triggered campaigns and automated drip campaigns look the same from the outside. The critical difference is that trigger campaigns are way more flexible and customizable. If you consider that push notifications cost way less than most other channels, it makes perfect sense to use a combination of all three to grow your business.
If you’re new to push notifications, we strongly recommend starting your journey using proven templates.
NOTE: Most triggered campaigns need some development experience. You’d need to use an API to make the best use of triggered notifications. However, there are some triggered notifications that you can send straight off the rack. If you’re curious, check our article on eCommerce push notifications for a better idea.
The Best Service to Send a Web Push Notification Campaign
Let’s start things off by saying that most of the “free push notification services” out there are actually free trials. Some of the providers we’ve listed here are trial software, while others have a forever-free plan that you can opt for.
There are some other freemium options, such as Firebase Cloud Messaging (FCM), but that’s not really a good option at all. You can read more about why FCM can’t compete with a service provider like PushEngage. But for now, just take our word for it and jump into the better options.
Vi anbefaler at bruge PushEngage.

PushEngage er verdens førende plugin til push-notifikationer.
Push-notifikationer hjælper dig med at øge din webtrafik og dit engagement automatisk. Og hvis du driver en onlinebutik, hjælper PushEngage dig også med at øge dit salg ved at hjælpe dig med at oprette automatiserede e-handels-push-notifikationer.
Du kan komme i gang gratis, men hvis du er seriøs omkring at vækste din forretning, bør du købe en betalt plan. Før du køber en push-notifikationstjeneste, bør du også se denne guide til priser på push-notifikationer.
Her er et hurtigt overblik over, hvad du får med PushEngage:
- Højtkonverterende automatiserede kampagner
- Flere målretnings- og kampagneplanlægningsmuligheder
- Målsporing og avanceret analyse
- Smart A/B-test
- Push campaign templates
- Powerful segmentation options
- En dedikeret succesmanager
Og dette er kun lige begyndelsen. Tjek PushEngages fulde liste over funktioner, før du går videre.
Men den mest attraktive del af PushEngage er, at du kan komme i gang med en evigt gratis plan. Og du kan bruge den til rent faktisk at vækste din forretning ved hjælp af flere tilpasningsmuligheder.
Du vil se, at PushEngage uden tvivl er det bedste valg, hvis du vil opbygge trafik, engagement og salg for din virksomhed. Og hvis du har et stramt budget, kan du altid være lidt kreativ med dine push-notifikationer.
NOTE: If you’re running a WordPress site, you should install and activate the PushEngage WordPress plugin.
Den gratis version tillader op til 200 abonnenter og 30 livstidsnotifikationer. Det er godt nok til at få din forretning til et punkt, hvor du nemt har råd til de betalte planer, der starter fra $9/måned for 100.000 abonnenter.

Og bare rolig, hvis du absolut intet ved om kodning. Du kan installere PushEngage ved hjælp af en af de mange installationsvejledninger til enhver hjemmeside og CMS.
Pushengage’s AI-powered optimization helps you craft better titles and messages, leading to increased engagement and campaign success. Ever wished that your push notifications would write themselves? Well, now they can!
In all likelihood, you can cut down campaign creation time for push broadcasts, drip campaigns, and automated trigger campaigns by as much as 50% while improving the quality of your copywriting.
The PushEngage AI uses high-performing campaigns as a reference point for all copywriting and will always stick to best practices by default.
And the best part is that it works for web push, Android native notifications, iOS native notifications, Flutter notifications, and React Native notifications from the same dashboard!
You can use AI text generation for any campaign type. For this example, I’m using a push broadcast to demonstrate the capabilities. But if you want to see its full potential in action, watch this video!
Create a new campaign or choose any from the Templates. You can then click on Generate Text Button.
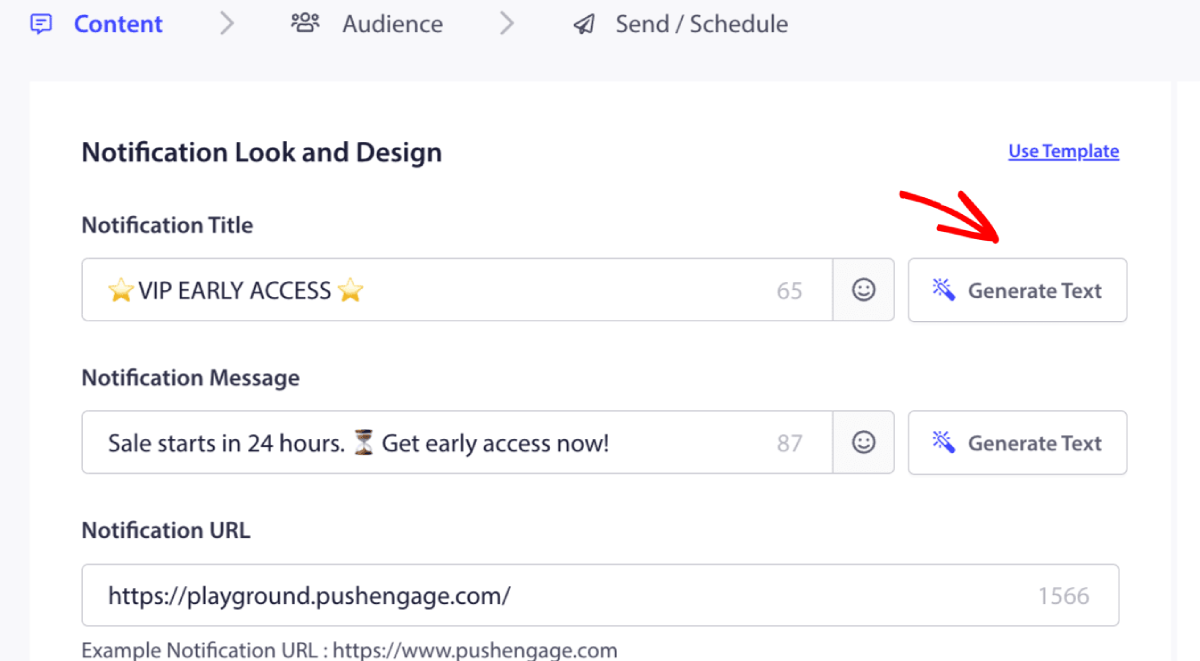
It will open up a small window for the web push notification campaign title & message. You can start by adding any keywords that will act as a prompt for the AI. The prompt can be as detailed as you like.
You can also set the tone for the web push notification campaign title or message. The tone of the conversation is very important in deciding the type of campaign that will be created. Make sure that it resonates with your brand style.
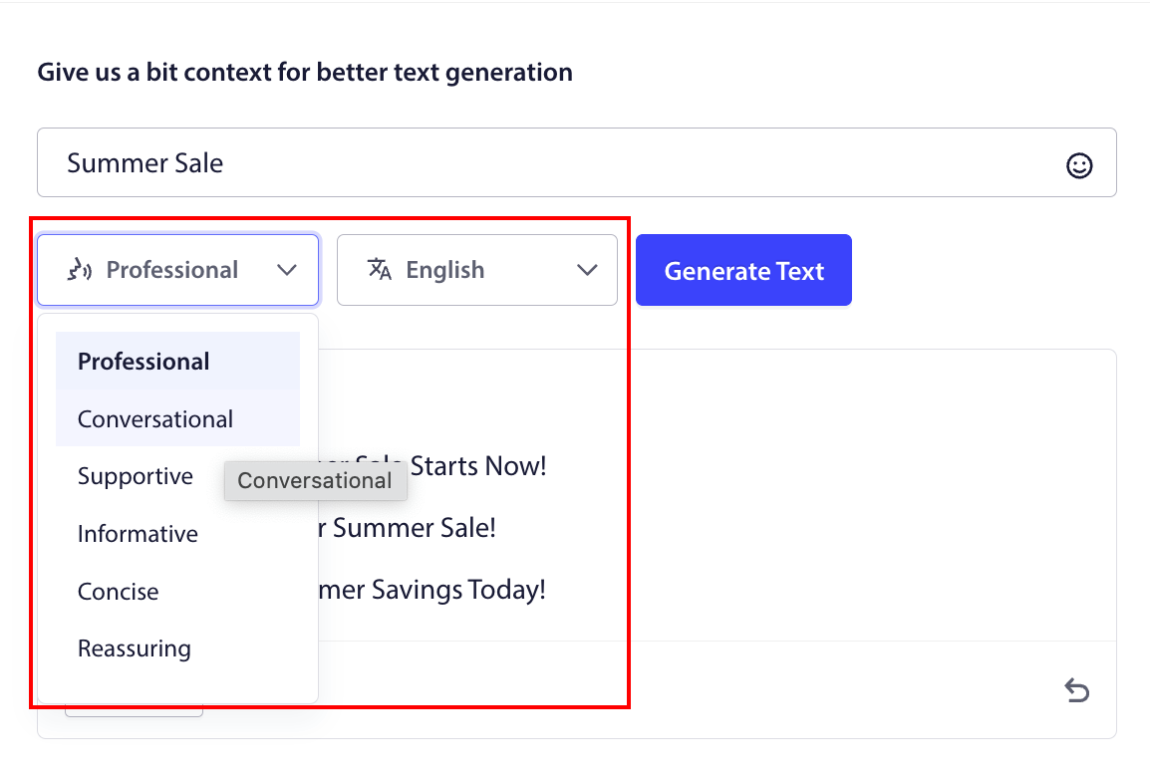
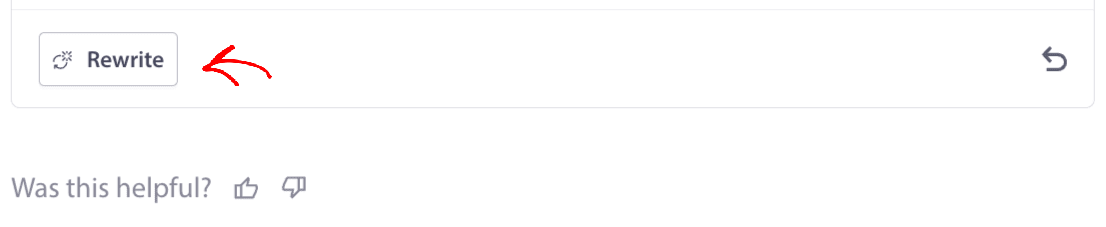
Once it’s set, you can click on the Generate Text button. Not happy with the generated text? Simply click the Rewrite button!
You can actually craft copy in ANY LANGUAGE!
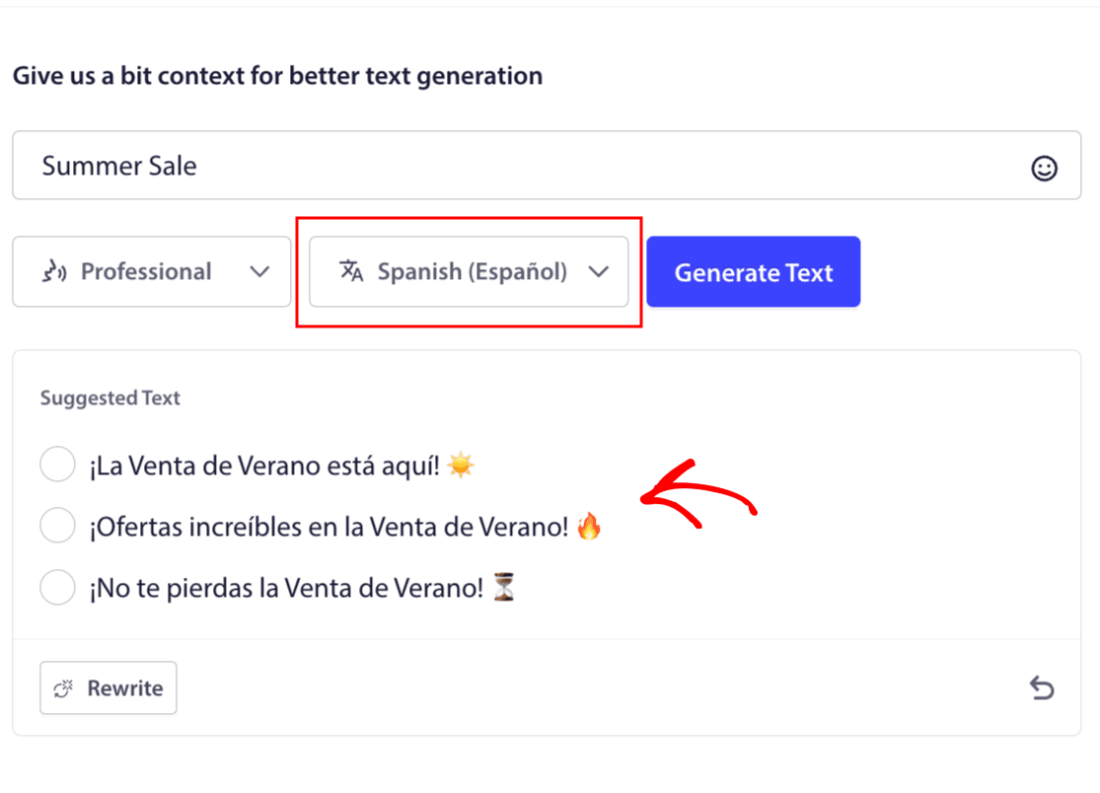
This level of built-in multi-language support simply doesn’t exist in any other push notification software. And don’t worry, the translations are dead on! So, you can send geo-specific campaigns very easily now. Select the right Audience Group, select the language, and let our AI do its magic.
How to Send a Web Push Notification Campaign
Now that you know what a web push notification campaign is and what service you need to send them, it’s time to check out how to send different notifications.
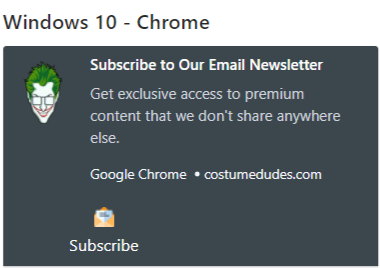
Here’s what web push campaigns look like in the wild:
🛒 E-commerce:
- Welcome discount: “Thanks for subscribing! Here’s 10% off.”
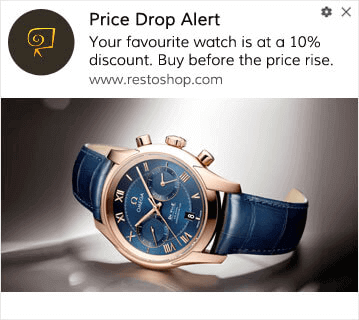
- Price drop alert: “The jacket you liked? It’s finally on sale.”
- Product drops: “New arrivals just landed. Be the first to shop.”
📚 Publishers & Bloggers:
- New post alert: “Don’t miss this week’s breakdown on [Topic].”
- Weekly digest: “Your Friday readlist is here.”
- Lead magnet delivery: “Here’s your free guide. Let us know what you think.”
💼 SaaS & Tools:
- Feature updates: “We just launched something new. Try it free.”
- Trial reminders: “Your free trial ends tomorrow.”
- Abandoners: “Still thinking it over? Here’s 20% off to try us out.”
Start small. Steal these. Tweak them to match your tone. Done.
For practical purposes, we aren’t talking about custom triggered campaigns you can create using an API service here. If you’re more interested in custom notifications, you should check out our documentation.
#1. Welcome Web Push Notification Campaign
A welcome web push notification campaign is a simple push notification meant to welcome any new subscriber.
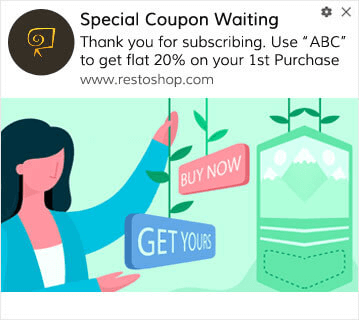
You can also send an offer or a gift for subscribing to your push notifications. This is pretty common with a lot of our customers. You can use your welcome push notifications to:
- Dele en velkomstkupon
- Tilbyde premium-funktioner
- Sende gratis levering
- Tilbyde gratis gaver
- Onboard din abonnent med en gennemgang
Lad os nu opsætte din første velkomst-push-notifikation ved hjælp af PushEngage.
Here is how to Enable Welcome Notifications in PushEngage. Go to the PushEngage dashboard and head over to Campaign » Drip Autoresponders and click on Create New Drip Autoresponder:

Navngiv derefter din kampagne (vi foreslår noget som "Velkomst Drip"), og under Content, vælg muligheden "Send notification immediately after user subscribes“:

På dette tidspunkt kan du klikke på pilen ud for notifikationen for at redigere indholdet af din notifikation. Hvis du har en Premium- eller Enterprise-plan med PushEngage, vil du kunne tilføje mere end én notifikation for at oprette en sekvens af automatiserede velkomstbeskeder. Klik blot på Tilføj ny notifikation og rediger indholdet.
Når du er færdig, skal du klikke på Drip Settings og vælge muligheden for at sende din velkomstkampagne til alle abonnenter:

Rul derefter ned for at indstille dine egne UTM-parametre for at spore push-notifikationerne:

Og når du er færdig, rul op igen og klik på knappen Activate Autoresponder:

Now you know why setting up a welcome push notification campaign is important. You also know how to set it up. Go ahead and activate welcome push notifications to re-engage new subscribers, or check out this article on website welcome messages for inspiration.
#2. Abandoned Cart Web Push Notification Campaign
Shoppingkurv-forladelse sker, når en potentiel kunde tilføjer et produkt til indkøbskurven og ikke fuldfører checkout-processen.
Din opgave er at reducere forladte indkøbskurve så meget som muligt.
One way to recover your lost sales is to use a cart abandonment web push notification campaign. Cart abandonment recovery campaigns target subscribers with an abandoned cart and send them follow-ups, reminders, offers, coupons, and discounts.

Det er en simpel idé: Få så mange mennesker som muligt til at købe noget.
Push-notifikationer for forladte indkøbskurve har en meget reel indvirkning på din bundlinje. For eksempel får WickedWeasel $2.000 – $4.000 om ugen i ekstra salg fra deres push-kampagne for forladte indkøbskurve.
Lad os nu gå i gang med at opsætte din allerførste kampagne for forladte indkøbskurve med PushEngage.
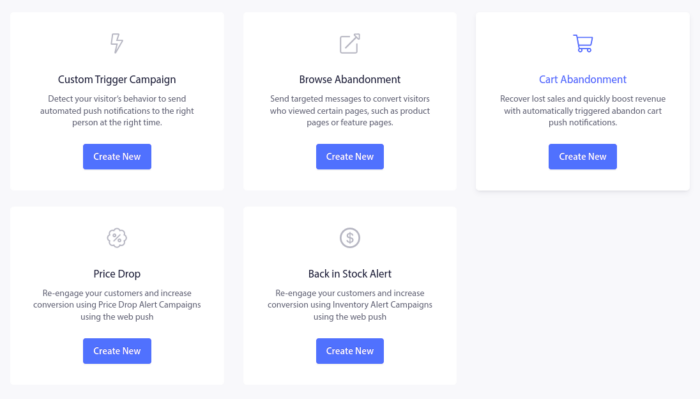
Go to the PushEngage dashboard and head over to Campaign » Triggered Campaigns, and click on Create New Triggered Campaign:

Vælg derefter skabelonen Indkøbskurv forladt og klik på Opret ny:
Og du kan begynde at udarbejde en autoresponder for forladte indkøbskurve. Under fanen Indhold kan du oprette en række push-notifikationer:
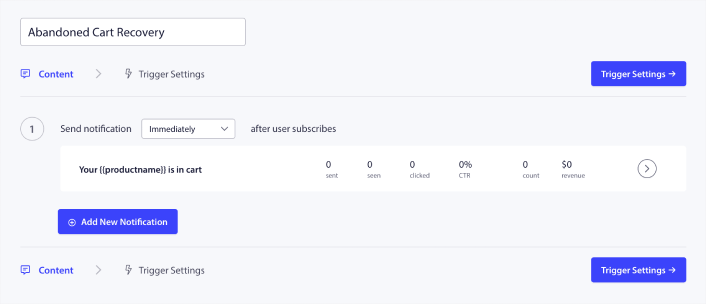
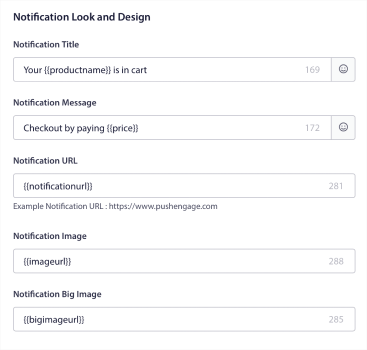
To edit a notification, simply click the arrowhead next to it, and you can customize the push notification:
For en mere detaljeret vejledning, tjek denne artikel om hvordan man opsætter push-notifikationer for forladte indkøbskurve.
#3. Browse Abandonment Web Push Notification Campaigns
Gennemse forladte er præcis, hvad det lyder som. Det er, når en besøgende på et websted gennemser dit websted og pludselig beslutter sig for at gå væk. Disse hændelser er også kendt som funnel abandonment af andre leverandører.
Gennemse forladte er en meget almindelig forekomst i næsten alle brancher.
Og det er virkelig svært at reducere eller kontrollere, fordi der ikke er nogen måde at incitamentere en tilfældig bruger til at blive på dit websted. Det er her, kampagner for gennemse forladte er så kraftfulde.
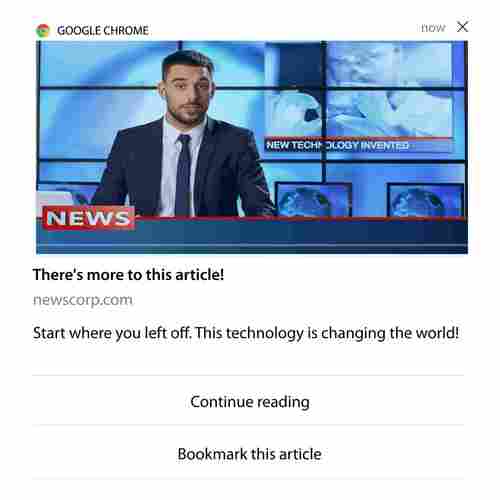
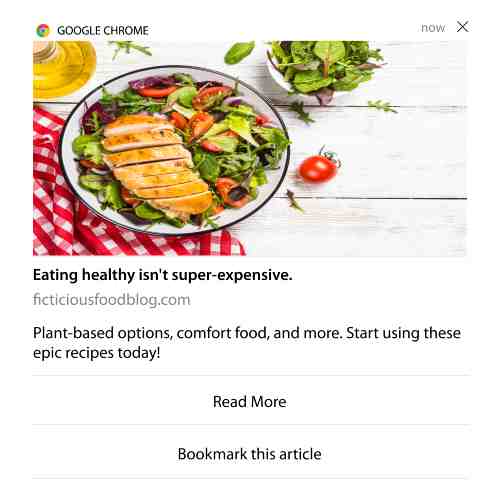
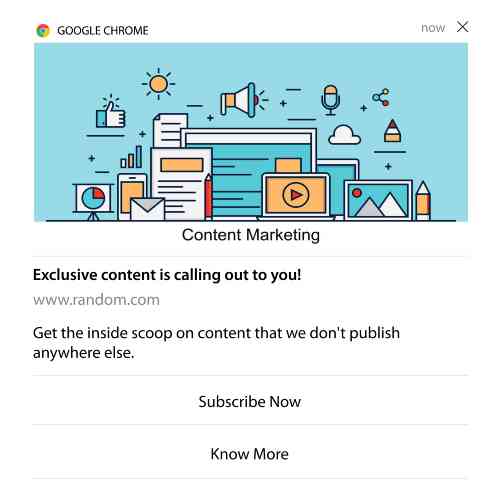
Her er et eksempel på push-notifikationer for gennemse forladte for en udgiver:
Det imponerende ved PushEngage er, at du kan opsætte kampagner for stort set enhver branche. Så du kan sende push-notifikationer om forladte indkøbskurve til SaaS- og rejsewebsteder.
Så hvordan opsætter du kampagner for forladte indkøbskurve?
Med forladte indkøbskurve er der en meget klar parameter til at sende dine push-notifikationer. For forladte indkøbskurve kan du overveje parametre som:
- Tilføjede produktet til Ønskeliste
- Kiggede på det samme produkt mere end X gange
- Gennemset mere end X produkter i samme kategori
- Søgt på siden efter et specifikt produkt
- Blev på siden i mindst X minutter før afvisning
Idéen bag denne kampagne for en e-handelside er at få abonnenten til at tilføje produktet til deres indkøbskurv. For udgivere kan det være et klik eller en download på artiklen, de læste.
Head over to the PushEngage dashboard again and go to Campaign » Triggered Campaigns to create a new triggered campaign:

Then, create a new Browse Abandonment campaign by click on the Create New button:

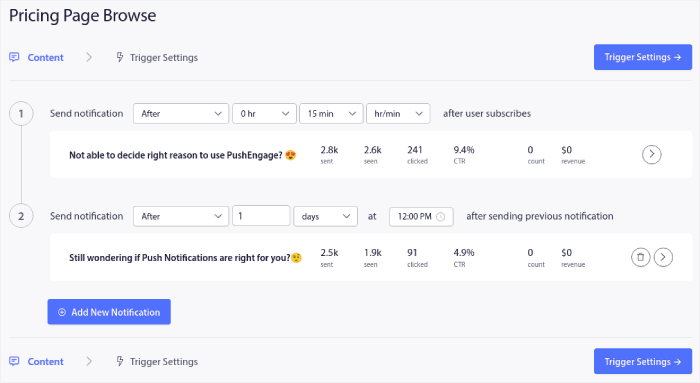
Next, you’ll be able to set up your entire sequence of push notifications along with a delay in between each notification:
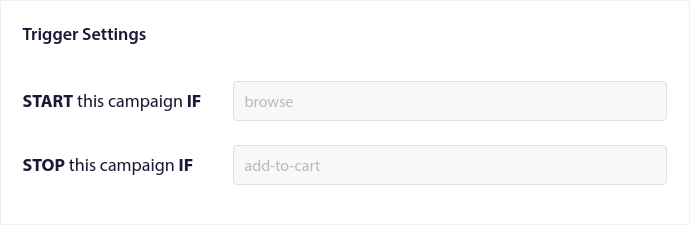
If you’re new to push notifications, you should check out our article on push notification best practices. When you’re happy with your push notification content, click on Trigger Settings. You’ll see that the conditions for a browse abandonment campaign have been pre-configured into the sequence.
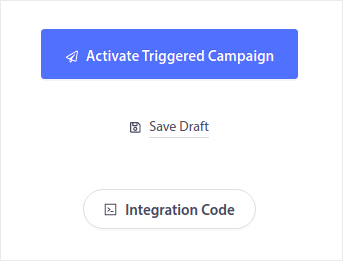
Click on the Integration Code button to get the code snippet you need to embed the browse abandonment campaign on your site.
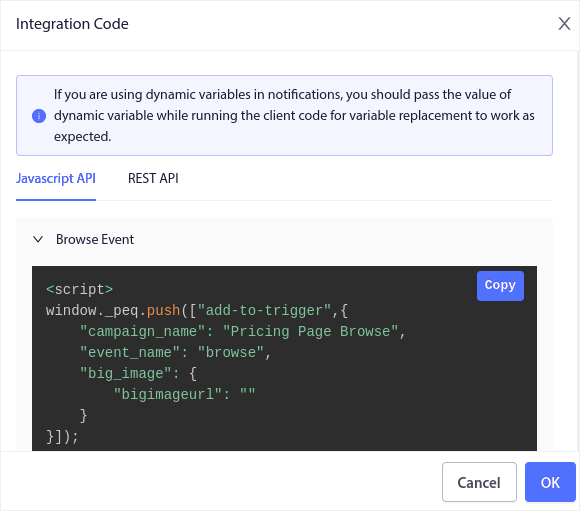
Then, copy the code and paste it into your site. You want to paste that code into the HTML <head> section of the page that you want to track. Finally, click on the Activate Triggered Campaign button:
Og du er færdig!
#4. RSS Feed Web Push Notification Campaign
RSS Auto Push giver dig mulighed for at automatisere dine notifikationer via RSS.
PushEngage tjekker hvert 10. minut for et nyt indlæg tilføjet til dit RSS-feed. Hvis et nyt indlæg findes, konverterer PushEngage det til en push-notifikation og sender det ud til alle dine abonnenter. Det bedste er, at det sker helt automatisk.
RSS Feed-kampagner er perfekte til udgivere og nyhedssider:
Hvis du er en stor udgiver og udgiver mere end 1 indlæg hver 30. minut, holder PushEngage en forsinkelse på 5 minutter mellem 2 indlægsnotifikationer.
Før vi går videre, bør du tjekke denne artikel om hvordan man bruger RSS-feeds for flere episke tips og tricks.
Now, let’s go set up an RSS feed web push notification campaign on PushEngage.
Create a New RSS Web Push Notification Campaign
Once you’ve installed PushEngage on your site, head over to your PushEngage dashboard and go to Campaign » RSS Auto Push and click on Create New Campaign:

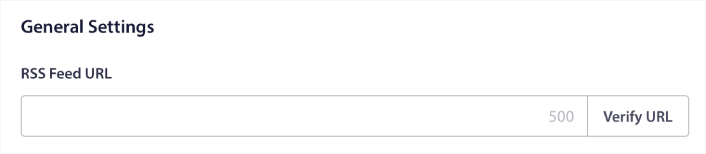
This will create a brand new RSS web push notification campaign. You can set up multiple RSS feed campaigns in PushEngage. Start by giving your campaign a descriptive name. Then, paste in the URL for your RSS feed:
Set Up RSS Notification Settings
Next, you want to set the Campaign Frequency:
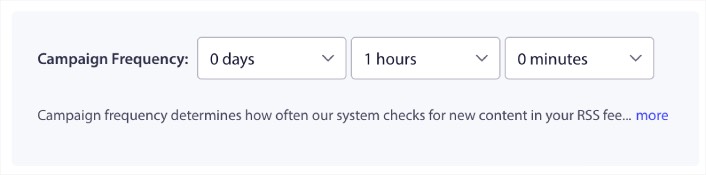
The Campaign Frequency is how often the RSS feed web push notification campaign looks for new content in your blog to send an automated push notification. The minimum value is 15 minutes, and the maximum value is 7 days.
Vi anbefaler at lede efter indhold at promovere hver anden dag, medmindre du er et nyhedsbureau. For nyhedsbureauer bør du holde det på 15 minutter. Husk, at PushEngage kun vil lede efter nyt indhold, efter du har opsat og udgivet din RSS-feedkampagne.
Vælg indlæg, der skal promoveres
You can select what posts to promote. You can choose between Only the latest item or All items. If you set up the RSS push notifications to select only the latest item, PushEngage only sends the latest post:
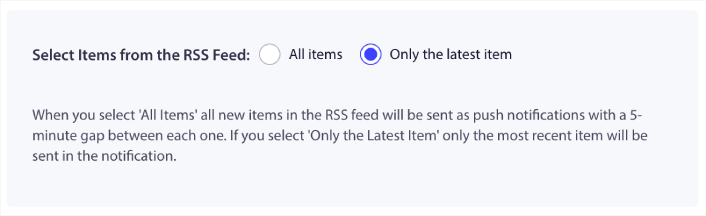
Or, you can select the All items options. In this case, the campaign will select all the posts on your site and send out a web push notification campaign for each with a 5-minute gap between them.
Set an RSS Push Notifications Icon
Your push notification icon establishes your brand identity in your RSS push notifications. We recommend using your brand mark so that your subscribers know instantly that the notification is from your brand.
Nu er der to muligheder her. Du kan enten uploade notifikationsikonet manuelt:
And that’s really simple to do. Just click on Change image and upload your notification icon. Or, you can fetch it from your RSS feed:
You can either select the item element or the attribute inside an element to dynamically select your notification icon from the feed. Typically, most RSS feeds will hold the site icon inside the media:content item element. Even more specifically, it’s usually inside the media:thumbnail attribute of the media:content element.
To target the element, you can select the Item Element Value option and set it to media:content. Or, you can select the Element Attribute Value option and set it to media:content > media:thumbnail.
NOTE: We recommend using this option only if you know how to read XML. RSS feeds might not contain the site icon in the same XML tags as our example. So, if you’re not sure how to fetch the notification icon from the RSS feed, we recommend uploading it manually instead.
Select Large Image for RSS Feed Notifications
Now, we’re going to select the large image for your RSS feed web push notifications. Again, there are two ways to do this. You can let PushEngage automatically find the image from the RSS feed:

Eller du kan manuelt vælge, hvilket billede du vil have fra feedet:
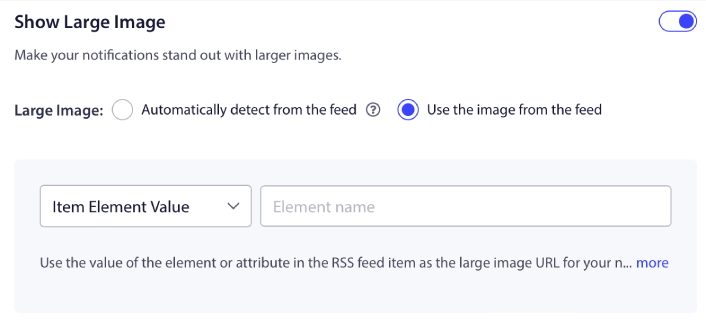
Dette er præcis det samme som at vælge notifikationsikonet fra RSS-feedet. Du kan igen vælge billedet fra XML-elementet, der indeholder det, eller du kan vælge det specifikke attribut, der indeholder dit foretrukne billede.
NOTE: We only recommend selecting a URL from your RSS feed if you know how to read XML. If you’re not sure how to read XML, it’s better to let PushEngage find the best image for your notifications.
Set Web Push Notification Campaign Duration
The web push notification campaign duration is how long the notification stays in your subscriber’s notification tray before it gets automatically deleted.
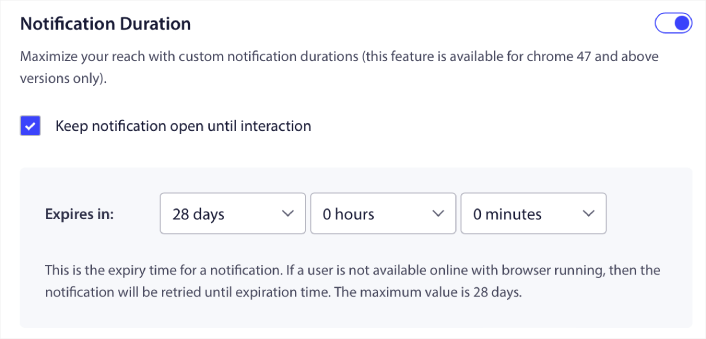
Hvis du ikke vil overvælde dine abonnenter med en masse ulæste notifikationer, er det sandsynligvis bedst at lade push-notifikationerne udløbe om et par dage.
Unlike broadcast notifications or even other automated web push notifications, you can’t really schedule RSS push notifications. So, you always have the option to keep the notification open until your subscriber interacts with it, even within the expiry limit.
Set UTM Parameters
Vi er næsten færdige. Rul ned for at indstille dine egne UTM-parametre til sporing af push-notifikationerne:
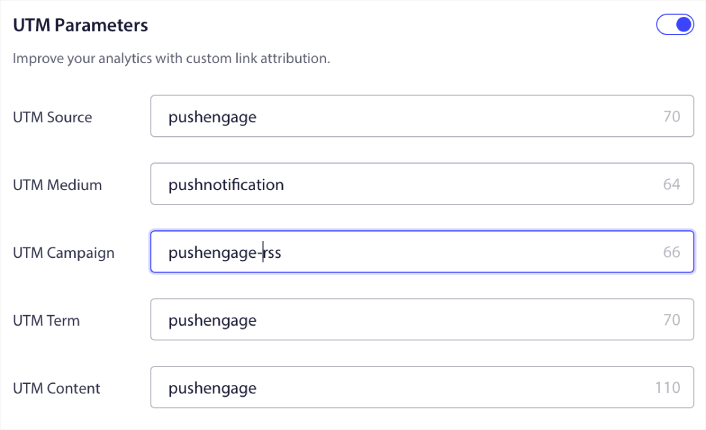
På denne måde kan du nemt tilskrive din trafik fra disse push-notifikationer i Google Analytics.
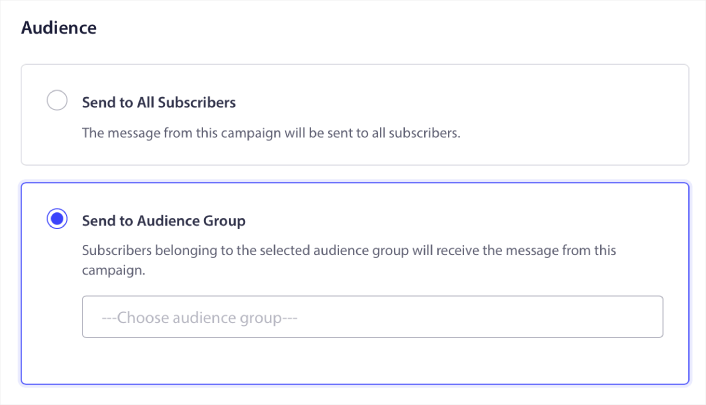
Select Audience Group
Finally, we’re going to select an Audience Group to send your RSS web push notification campaign. You can either send the RSS feed campaign to all your subscribers, or you can create Audience Groups to send personalized push notifications even from your RSS feed.
Og det er det! Det er virkelig alt, hvad der er at sige om det.
Nu, hver gang du udgiver et nyt indlæg, vil alle push-notifikationsabonnenter i den valgte målgruppe automatisk modtage en push-notifikation om dit nye indhold.
Det var det! Du er klar. Hver gang du udgiver et nyt indlæg, vil det automatisk blive sendt til alle dine abonnenter.
#5. Automated Re-engagement Notifications
Du kan opsætte automatiserede genaktiveringskampagner for abonnenter, der ikke har interageret med dit indhold i et stykke tid.
Men hvorfor ville du gøre det i første omgang?
Hvad med dette:
- Omkostningen ved at anskaffe nye kunder er 5 gange højere end omkostningen ved at fastholde eksisterende kunder
- Det er nemt at målrette og remarketing til et kendt publikum, hvis personlige præferencer vi allerede forstår.
- På lang sigt giver engagerede kunder mere forretning til virksomheden end nogen, der knap nok forbinder sig med dit brand.
Ofertia var i stand til at øge deres tilbagevendende brugere med 39% ved hjælp af push-notifikationer, der tilbyder personlige tilbud. De er ikke de eneste. Du kan bruge dette til en e-handelswebshop med stor effekt:
Der er mange måder at genaktivere dine abonnenter på.
Picture this:
- A user visits your site. Sees a subtle opt-in. Clicks “Allow.”
- Instantly gets a welcome notification with a discount or the next step.
- Leaves your site…
- Later that day, they see a reminder: “Still thinking about it?”
- They click, come back, and buy.
That’s a basic push funnel — and you didn’t lift a finger once it was live.
Now, imagine layering in segmentation and automated campaigns. That’s when it gets fun. Using dynamic segments, you can figure out a lot about your subscribers and send them personalized content that they’ll love.
I dit PushEngage-dashboard skal du gå til Segmentering og oprette et nyt segment:
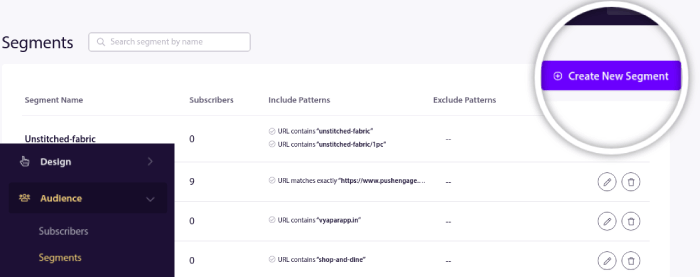
This allows you to create segments based on behavior and browsing patterns. You can actually set up a sequence of AND/OR operations that decide when certain segments receive automated push notifications.
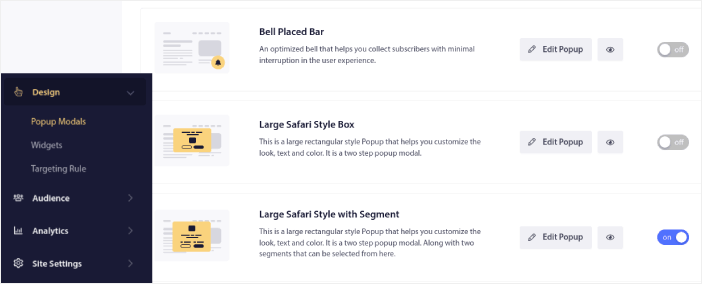
You can even segment your users when they subscribe to push notifications. Head over to Design » Popup Modals and select the Large Safari Style with Segment.
Hvis du har brug for endnu flere måder at segmentere dine brugere på, kan du oprette brugerdefinerede segmenter baseret på brugerhandlinger ved hjælp af PushEngage Javascript API.
#6. Page Visit Web Push Notification Campaign
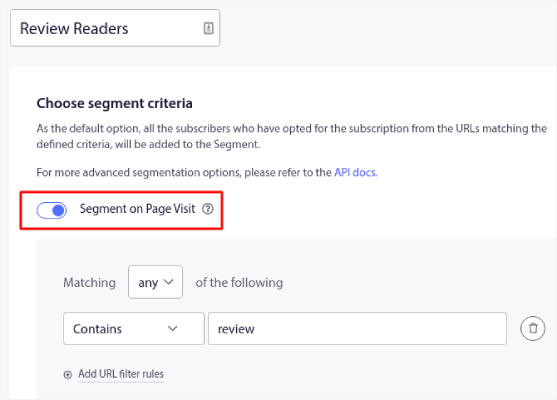
Sidebesøgsudløsere er en udvidelse af push-notifikationssegmenter. Alt, du skal gøre, er at oprette et segment, når en webbesøgende browser en URL med en bestemt frase eller et bestemt mønster.
Then, you just head over to Audience » Segments and set your audience to a specific segment:
Dette giver dig mulighed for at oprette virkelig personlige og automatiserede push-notifikationer.
And the best part is that you can create custom segments in PushEngage in a couple of minutes.
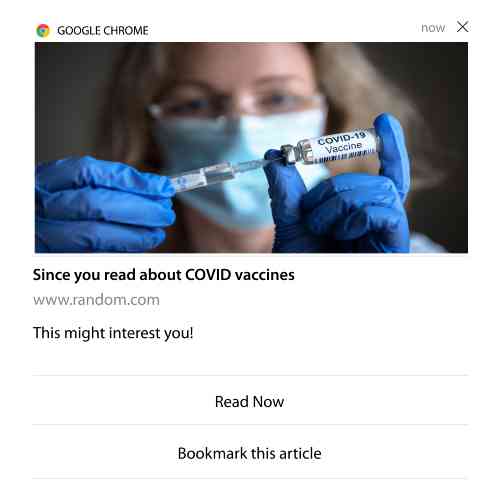
#7. Automated Push Notifications from Click-Through
Du kan ikke oprette push-notifikationer, der udløses, når dine abonnenter klikker på en leveret notifikation ved hjælp af PushEngage.
Men der er en meget smart løsning.
You can create a segment based on the URL that a particular notification leads to. Every time someone lands on this URL, they get added to the segment, and you can use this segment to send targeted notifications.
Push-notifikationsklik-kampagner er essentielt en udvidelse af den standard målgruppesegmentering for drypkampagner.
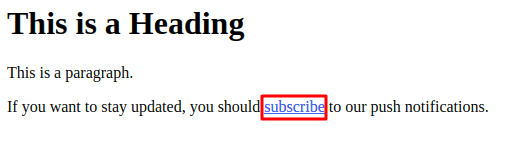
Se denne vejledning om hvordan man opretter en klik-til-abonner-knap.
#8. Gentagende automatiserede push-notifikationer
Forestil dig, at du har…
- Et ugentligt udsalg for et loppemarked;
- Eller et weekendudsalg;
- Eller et lageroprydningsudsalg;
- Eller et månedligt flash-udsalg.
Hvor upraktisk ville det være at skulle oprette push-notifikationer for hver begivenhed manuelt?
Heldigvis kan du indstille gentagende notifikationer med PushEngage.
Gentag notifikationer er planlagte og automatiserede push-notifikationer for en tilbagevendende begivenhed. Du kan opsætte dem én gang, angive en tidsplan, og du er færdig.
Det er blot én af de måder, hvorpå MyDeal bruger push-notifikationer. Sørg for at læse hele casestudiet!
Gå til Kampagne og tilføj en automatiseret notifikation i dit PushEngage-dashboard. Rul derefter ned til planlægningssektionen og gå til fanen Send/Planlæg:
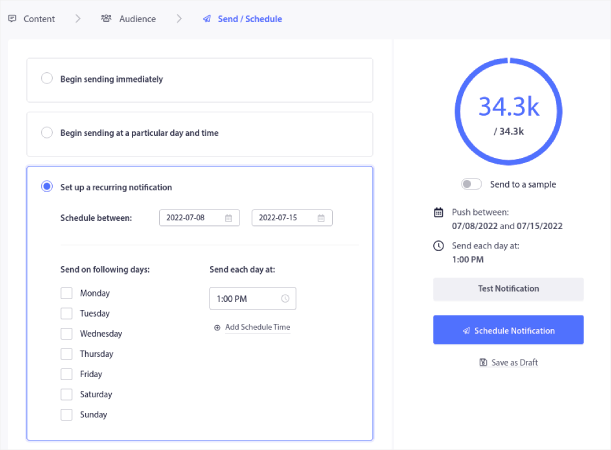
Bare indstil tidspunktet, og du er færdig!
#9. Abonnent Tidszone Notifikationer
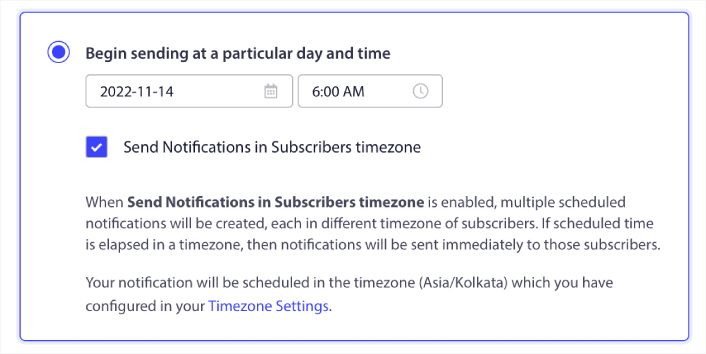
Subscriber timezone notifications are exactly what they sound like. You send automated push notifications to your subscribers in their time zone.
Hvorfor er dette så stor en sag?
Abonnent tidszone notifikationer har højere åbningsrater. Typisk leveres enhver push-notifikation, selvom din abonnent er offline. Disse notifikationer hober sig op og bliver ignoreret, når din abonnent endelig kommer online.
On the other hand, a subscriber time zone web push notification campaign will get delivered when you KNOW your subscriber is most likely online.
Pro-tip: Brug A/B-test til at finde det perfekte tidspunkt at sende dine abonnenter en push-notifikation.
Abonnent tidszone notifikationer føles meget mere personlige. Og hvis du er smart omkring det, kan du kombinere det med geolokaliseringsdata for at personliggøre dine notifikationer endnu mere. Dette er præcis hvad Phooto gjorde, da de brugte lokale sprog til at skyrocket deres åbningsrater.
Lad os opsætte abonnent tidszone notifikationer i PushEngage nu.
Når du opretter en ny notifikation, skal du gå til planlægningsmulighederne og klikke på afkrydsningsfeltet, der siger Send Notifikationer i Abonnent Tidszone:
Det er alt! Du bliver nødt til at gøre det samme for dine drypkampagner, men resultaterne er indsatsen værd at klikke på én knap for hver kampagne.
Start with 1–2 messages per week. Ramp up once you see what’s working.
Here’s a simple cadence to start with:
- Week 1: Welcome message + 1 product or content push
- Week 2: Reminder or discount follow-up
- Week 3: New drop, blog post, or feature highlight
If users stop clicking, pull back. If they keep clicking? Double down.
Pro-tip: De sidste to taktikker handlede om planlægning af push-notifikationer. Men disse to er ikke de eneste måder at planlægge automatiserede push-notifikationer på. Tjek vores artikel om hvordan man planlægger push-notifikationer for flere episke tricks.
#10. E-mail Opt-In Notifikationer
Email marketing has long been the best way to generate and nurture leads. The best part about automated push notifications is that you can generate more email subscribers using them.
It’s really simple to set up, and using a combination of email and web push notification campaigns is way more effective than using one or the other.
Alt, du skal gøre, er at sende en udløser-notifikation, der beder brugeren om at tilmelde sig e-mail-notifikationer.
Opret blot en brugerdefineret call to action (CTA) -knap, og indsæt et abonnementslink som knap-URL. Det er alt, hvad du behøver. Hvis du er usikker på, hvordan du får en abonnementsknap, skal du bare følge med.
In any notification, you can scroll down and turn on Multi-action buttons:
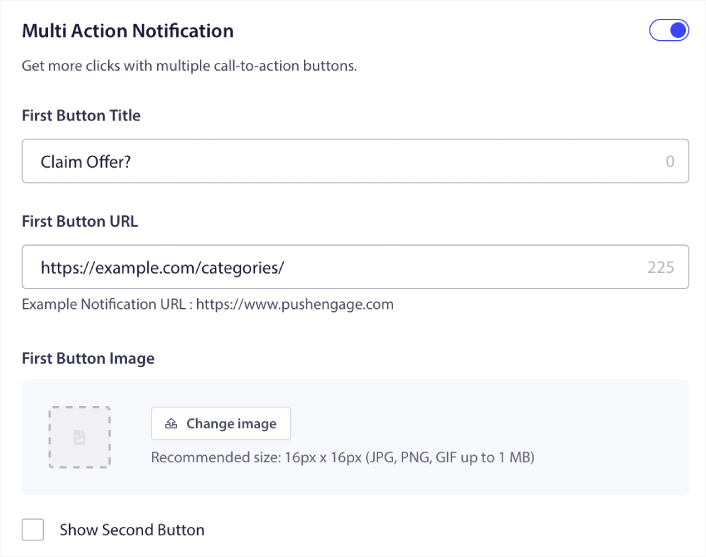
URL'en skal være et link til en e-mailtilmeldingsformular. Du kan oprette en ved hjælp af stort set enhver e-mailtjenesteudbyder som Drip. Alt, du skal gøre, er at klikke på delingsmulighederne for tilmeldingsformularen og kopiere den URL. Indsæt den derefter i knap-URL'en for din push-notifikation.
Check out our tutorial on multi-action buttons for more details. You can even add an email icon to your button to make it super-clear that you’re asking your users to subscribe to your email notifications:
Pro-tip: Du kan bruge den samme idé til at udvide din YouTube-kanal også. Tilføj blot '?sub_confirmation=1' til slutningen af din kanal-URL, og indsæt den i din push-notifikationsknap-URL.
Hver gang nogen klikker på abonnementsknappen på din push-notifikation, vil de blive omdirigeret til din YouTube-kanal og blive bedt om at abonnere på den.
Segmentation Ideas You Can Steal
Segments are a really great way to send targeted push campaigns. And it should be a big part of your push notification marketing strategy. But how do you get started? What kinds of segments should you be creating?
Til at starte med bør du ikke fokusere på kun at oprette én type segment. Vi vil guide dig gennem de forskellige typer segmentering, som vi har fundet er de mest effektive.
Here are a few high-impact segments worth setting up:
- Engaged shoppers: People who clicked 2+ notifications in the past week
- Cart abandoners: People who visited a product but didn’t purchase
- Category fans: Users who keep checking one product category (e.g., “Sneakerheads”)
- Geo-targeted: Tailor messages based on country or city
The more specific you get, the more clicks you’ll earn. If you’re an advanced marketer, you should craft segments the way you would for an email campaign with different segmentation models:
- Geographic segments
- Behavioral segments
- Occasion-based segments
- Cultural segments
- Demographic segments
- Psychographic segments
Dynamic segments let you talk to subscribers like real people… not just traffic stats.
And if you’d like to further personalize your messaging, you can use audience groups.
Sådan opretter du en målgruppe for push-notifikationer
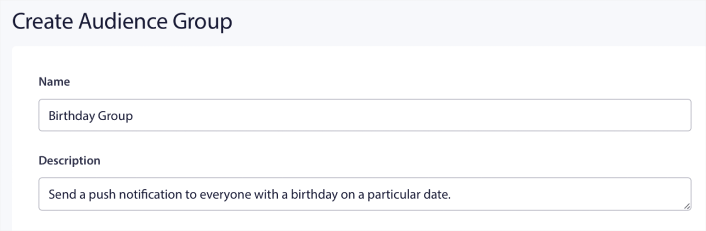
To get started, head over to your PushEngage dashboard and go to Audience » Audience Groups and click the Create New Audience Group button:

Før du kan bruge dine målgruppegrupper til at sende målrettede push-udsendelser, skal du oprette en målgruppegruppe med regler for at oprette den gruppe. Du kan starte med et navn og en beskrivelse af din målgruppegruppe.
Opret et udvælgelseskriterium
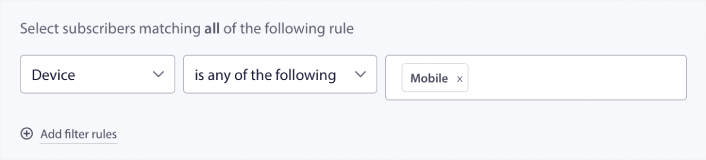
Next, create a selection criterion to filter and target the right audience:
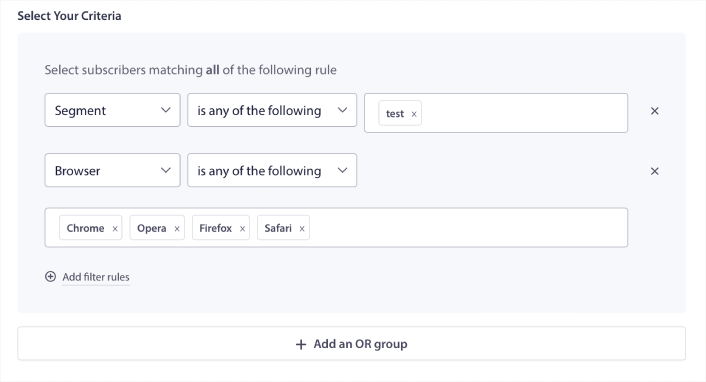
You can click Add filter rules to select subscribers who match ALL the filter rules or, you can click Add an OR group to create a filter where the subscribers meet at least one of the selection criteria.
Brugeradfærd er den mest grundlæggende måde at målrette dine push-notifikationsabonnenter på. Som vi sagde før, grupperer abonnentsegmenter normalt besøgende, der kan lide at browse lignende indhold. Men selv inden for den gruppe af abonnenter, der elsker det samme indhold, er der små personaliseringer, du kan foretage.
Endnu mere relevant er, at du kan samle flere abonnentsegmenter for at sende dem en fælles, relevant besked.
Filtrer efter abonnentsegment
If you haven’t already, you should start segmenting your push notification subscribers right away. Otherwise, this filter simply won’t work. But if you already have segments, then you can select multiple segments as the base for your audience group.

Derefter kan du tilføje andre filtre for at forbedre din målretning.
Filtrer efter abonnentattribut
While attributes are mostly for drip push notifications, you can use them for push broadcasts as well. Now, push notification attributes are mostly useful for eCommerce sites. But you can also use them to send personalized push notifications if you have a Customer Relationship Management (CRM) tool.
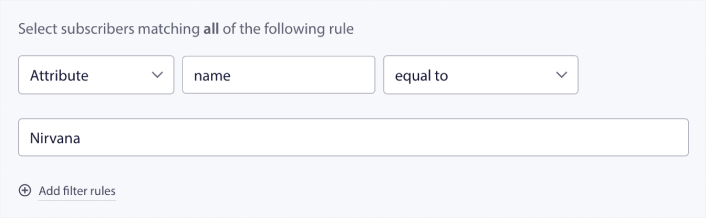
Attributter kan indeholde personlige oplysninger som abonnentnavne, fødselsdato, enhver anden information, du ville gemme i din CRM til personlige marketingkampagner.
Filtrer efter abonnentens enhed og browser
I mange tilfælde er det afgørende at vide, hvordan dine abonnenter modtager dine beskeder.
Der er en virkelig god historie om Michael Jackson. Hver gang han indspillede en sang, lyttede han til den på en radio. Ikke i sit milliondyre lydstudie i top lydkvalitet, men på en billig radio, som de fleste af hans publikum ville gøre senere. Hvis han kunne lide, hvordan sangen lød, selv på den billigste enhed på markedet, ville han godkende udgivelsen af sangen.
No wonder Billie Jean went Platinum 29 times!
For dine push-notifikationer er det ikke anderledes.
Filtrer efter abonnentbrowser
Different browsers have different character limits for push notifications. So, when you send a push broadcast you need to be wary of these limits. The cool thing is that you can save different audience groups to retarget different browsers. You don’t need to create segments each time.

Filtrer efter abonnentenhed
There’s a difference in the types of rich push notifications you can send to iOS, Android, and Windows devices. So, not every campaign you send out will look the same on all devices. In fact, many push notification types won’t even show up on all devices. Different devices also have different screen sizes. So, you may want to optimize how your push notifications look before sending them.
Men nu hvor du kan filtrere din målgruppe efter deres enhed, burde det ikke være et problem længere.
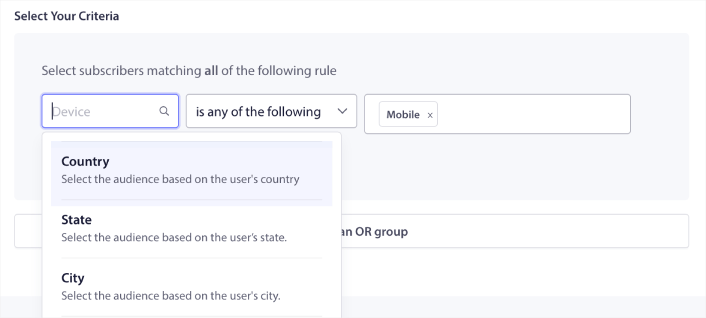
Sådan filtrerer du efter geolokation
Du kan også filtrere efter geolokation for at personliggøre dine kampagner yderligere. Filteret giver dig mulighed for at vælge en målgruppe efter land, by og stat:
Phooto used geolocation to send push notifications in local languages. And it helped them skyrocket their engagement rates quickly. Read the full case study.
Sådan filtrerer du efter engagementmetrikker
En af de bedste ting ved målgruppegrupper er, at det kan hjælpe dig med at oprette genmålretningskampagner ved hjælp af push-notifikationer. Du kan filtrere din målgruppe efter:
- Abonnementsdato
- Sidste sendingsdato
- Sidste klikdato
- Sidste visningsdato
Brug af disse metrikker kan hjælpe dig med at genmålrette abonnenter med lave engagementrater eller sælge til abonnenter med høje engagementrater.
Eller du kan filtrere målgruppen efter:
- Samlet antal afsendelser
- Samlet antal visninger
- Samlet antal klik
Disse tal kan hjælpe dig med at finde abonnenter, der får færrest beskeder fra dig, så du kan finde bedre måder at personliggøre notifikationer på. Du kan også finde de abonnenter, der interagerer mest med dine push-notifikationer.
Pro Tip: Combine two or more filters to find the best ways to re-engage with your subscribers. For instance, subscribers with a high Total View Count and high Total Click Count will give you subscribers who have been engaging with you for a while. These are loyal subscribers who deserve a reward.
Sådan filtrerer du efter identifikatorer
Identifikatorer er, hvordan PushEngage identificerer dine abonnenter. Da PushEngage er GDPR-kompatibel som standard, gemmer vores software aldrig personligt identificerbare data for nogen af dine abonnenter. I stedet tildeler vi hver abonnent et profil-ID og en abonnenthash.
Keep in mind, you’ll be using profile IDs and subscriber hashes mostly as part of advanced campaigns. In other words, you’ll need to use the PushEngage API to create custom campaigns that use these identifiers.
Identifikatorer er fantastiske til at sende transaktionelle push-meddelelser som denne:
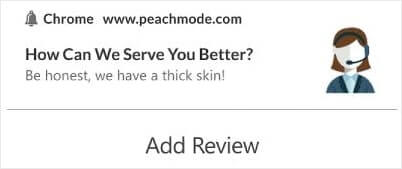
They’re great for custom eCommerce push notifications. So, we don’t really recommend using them for anything besides testing push broadcasts from the dashboard.
What to Do After You Set Up Web Push Notification Campaigns
Launching a web push notification campaign won’t guarantee success. As with any marketing tool, you need to test and improve your messaging and your segments.
Don’t get lost in the weeds. Focus on three numbers:
- Click-through rate (CTR): Are people engaging?
- Opt-in rate: Is your prompt working?
- Unsubscribes: Are you sending too much?
Bonus if you’re tracking revenue per send — but even without it, CTR and opt-in rate give you a fast feedback loop. Unfortunately, you can’t A/B test automated notifications directly. But these resources will help you get on the fast track:
- How to Install a Web Notifications WordPress Plugin to Your Site
- Sådan udføres A/B-test af push-meddelelser (bedste praksis)
- 7 bedste praksisser for push-meddelelser for at få øjeblikkelig trafik
- 21 Best eCommerce WordPress Plugins in 2022 (Free and Paid)
- 7 Best WordPress News Plugins in 2022 (Compared)
Also, PushEngage comes with its fair share of integrations. You can even set up some custom triggers using Zapier. These are fairly advanced campaigns, and we recommend setting them up only once you’re familiar with our other built-in automation.
You should also know that the PushEngage Javascript API is very flexible, and you can set up custom triggers for pretty much any action on your website.
Når du har gennemgået alle disse ressourcer, vil du indse, at PushEngage er den #1 push-notifikationssoftware på markedet.
Så hvis du ikke allerede har gjort det, kom i gang med PushEngage i dag!


