What is web push notifications? Don’t worry, we’ll tell you all about it. But first, picture this…
Forestil dig at få gratis trafik på autopilot, hver gang du udgiver et nyt blogindlæg uden de tidskrævende SEO-kampagner. Hvis du driver et WordPress-websted, ved du allerede, hvor meget arbejde det er at promovere dit indhold og få læsere til at vende tilbage til dit indhold.
Den gode nyhed er, at der er en ubesværet måde at generere gentagne besøgende på autopilot:
- Selv hvis... du lige er startet, og din fankreds stadig er lille;
- Selv hvis... du driver en e-handelsbutik med hundredvis af kampagner hver måned;
- Selv hvis... du har en mega-blog, der allerede genererer en masse SEO-trafik;
Svaret er:
WordPress web push notifications!
I denne artikel vil vi vise dig, hvordan du får gentagne besøgende øjeblikkeligt, hver gang du udgiver:
Den bedste del?
It’s completely free, and you don’t have to wait around for search engines to start sending you any traffic.
Lad os dykke lige ned i det.
What is Web Push Notifications?
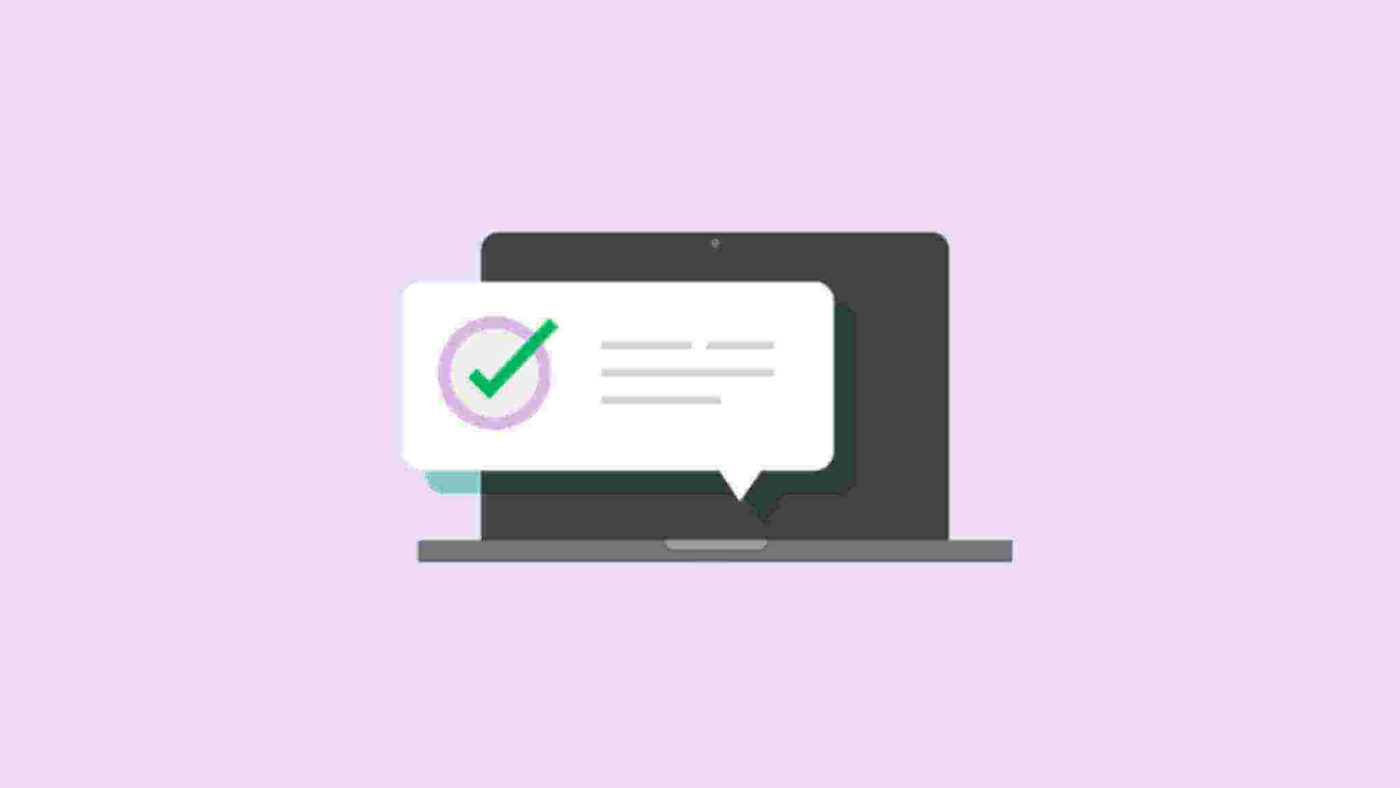
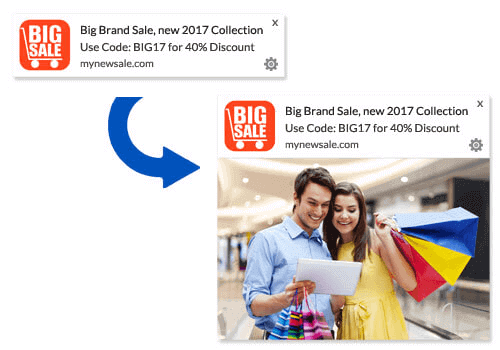
A push campaign is a short, clickable pop-up message that appears on a subscriber’s device and redirects the subscriber to your content with one click:
The best part is that the notifications pop up even if the subscriber isn’t using a browser. It’s like an email blast, but with a browser push campaign, your subscribers don’t need to be using an app to see your message.
In short: WordPress web push notifications is a simple way to send out a clickable link to your content to anyone who opted in.
With push campaign drip sequences, your audience now has no excuse to ignore you. And unlike social media websites, there is no algorithm throttling your reach to get you to pay for ads.
The coolest part about browser push campaigns is that you can use them to complement your lead magnets and email opt-in forms!
Pro Tip: If you’re not using lead magnets yet, you should start creating lead magnets with OptinMonster to boost your conversions.
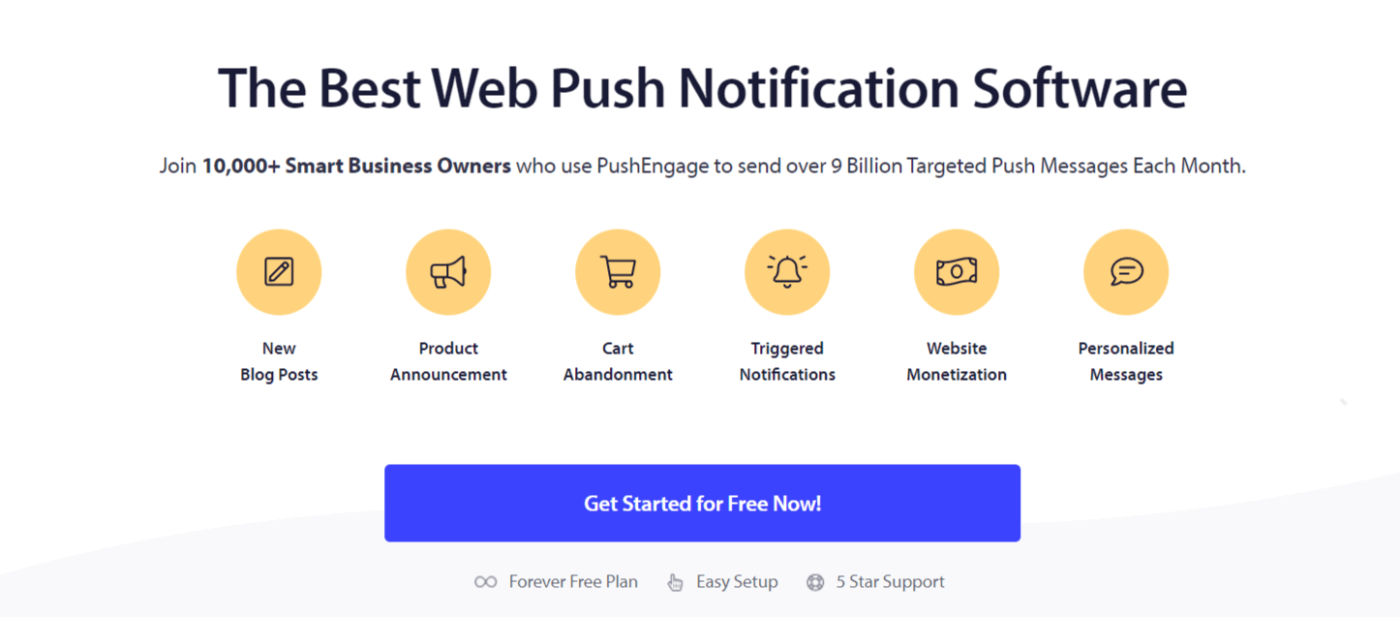
We recommend using PushEngage to get started with web push and mobile push for free. Every time you publish a blog post, PushEngage will automatically send out a push broadcast to all your subscribers.
In the next section, we’ll show you exactly how to set it up in 15 minutes or less.
How to Install Web Push Notifications In Your Website
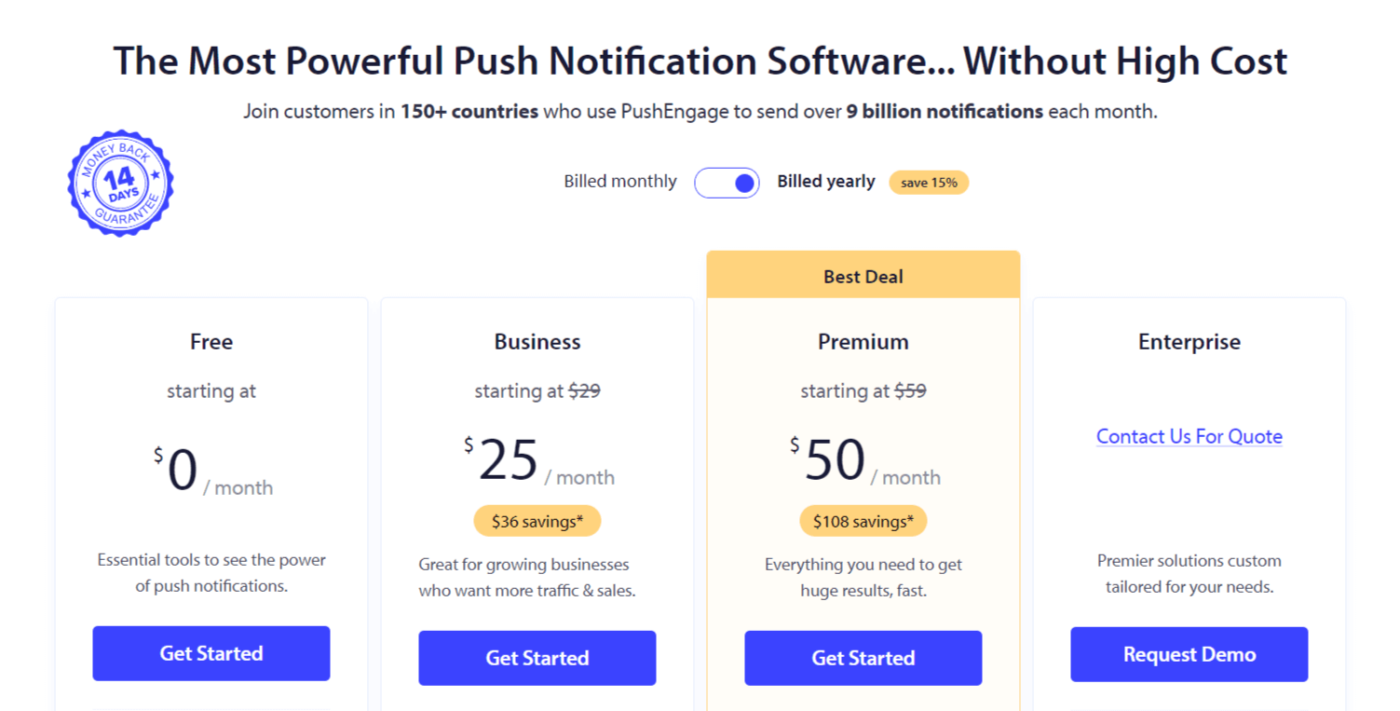
PushEngage is one of the best push notification plugins for WordPress. You instantly reach up to 2,500 subscribers with just the free tier. If your blog grows to more than 2,500 subscribers, you can quickly scale by upgrading your plan.
Now, let’s start growing your audience with browser push notifications for free.
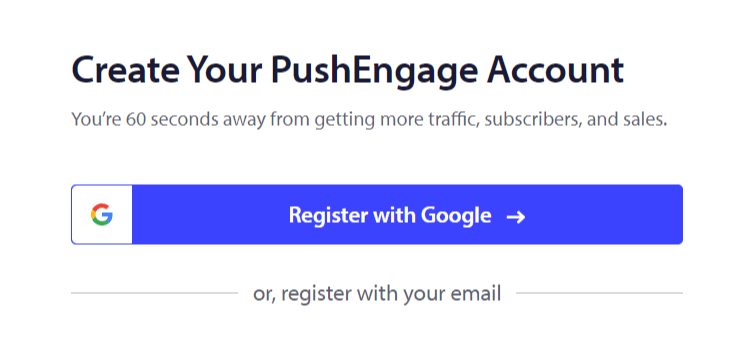
Trin #1: Opret en gratis PushEngage-konto
Gå til PushEngage og klik på Kom i gang gratis:
Vælg gratisplanen eller den, der passer bedst til dine behov:
Trin #2: Tilmeld dig PushEngage
Tilmeld dig plugin'et med dine brugeroplysninger eller dit Gmail-id:
And just follow along with the instructions and finish setting up your account to add a web push notifications app to your website.
Step #3: Install the Web Push Notifications WordPress Plugin
NOTE: If your website isn’t built using WordPress, you can install website push notifications using other methods. We don’t cover those methods in this article but check out our installation guide if you’re interested.
Når du har tilmeldt dig, bliver du ført til PushEngage-dashboardet:

Gå til Sideindstillinger » Sideoplysninger:

Klik på knappen Klik her for opsætningsinstruktioner :

Klik derefter på knappen Installer WordPress Plugin:

Hvis du allerede har indstillet din hjemmesides URL, installeres PushEngage automatisk på din side.
Step #4: Connect Your WordPress Website to the Web Push Service
Når du er færdig med at installere og aktivere PushEngage WordPress-pluginet, vil du se PushEngage-guiden:

Guiden er ret ligetil. Hvis du er ny bruger, skal du klikke på Ny? Gør krav på din gratis konto. Og hvis du allerede har tilmeldt dig, skal du klikke på Forbind din eksisterende konto.
Dernæst kan du vælge din side fra rullemenuen Vælg en side under Forbind en registreret side, hvis du allerede har registreret en side under tilmelding:

Eller du kan klikke på Registrer en ny side for at tilføje en ny side, hvis du har en Premium prisplan eller højere. I næste trin vil guiden bede dig om at installere andre nødvendige WordPress-plugins.

Hvis du fulgte hvert trin korrekt, vil du se denne succesmeddelelse fra guiden:

Du er nu klar til at oprette kampagner og push-underretningspop op-modaler.
How Do Web Push Notifications Work?
Let’s get a little bit technical now and explore how web push notifications work.
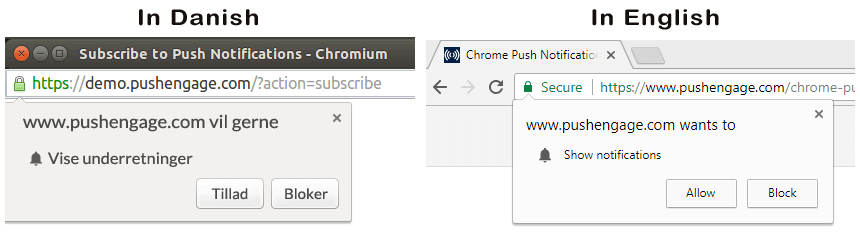
The simplified version is that every time a new visitor enters your website, they get prompted to become a web push subscriber.
All this is taken care of by a Javascript file called the service worker. The service worker’s job is to help create web push optins to collect push subscribers. This is not just true for websites, but also progressive web apps (PWAs). However, it’s different for Android app push and iOS app push notifications. Mobile push notifications typically require a push API like the PushEngage Mobile SDKs.
Next, you use a web push notification service like PushEngage to create and schedule the notifications you want to send out to your subscribers. You can choose to either send it to every subscriber on your list or to specific segments of your subscribers.
You’ll want to start by creating a Drip Autoresponder:
Finally, your subscribers receive your notifications when their device comes online and take the suggested action.
This is all perfectly true, but this is only a small part of what happens in the background. So, let’s take a look at the technical details. But first, if you haven’t already, get started with PushEngage today.
First off, PushEngage has servers that connect to your subscriber’s devices and send them your push notifications. Now, these servers don’t store any personal information such as the name or email address of any subscriber.
So, what do these servers store?
To PushEngage and our servers, your subscribers are a unique hash number generated based on your subscriber’s device and browser. Besides, the server can also store the geolocation of your subscribers.
Now, you won’t have direct access to these servers. You can only use the PushEngage Dashboard to create, optimize, and manage push notification campaigns.
In other words, PushEngage is your service provider. This means that you don’t need to know anything about coding or how to maintain the original servers. We take care of all that for you. All you have to worry about is setting up your campaigns and making a profit!
Some other popular browser push services include:
- Firebase Cloud Messaging
- Amazon Simple Notification Service
- Airship
- Leanplum Inc.
- Pushwoosh Inc.
If you’re not sure which service is right for you, start by taking a look at how much push notifications cost.
By now, you’re probably wondering how personalized push campaigns work if the servers only store a hash number and no personal details. The reality is that you can store enough customer data using segments without having to ever identify your subscribers. Also, you can create fully custom campaigns and store any type of user data you want. This is where the web push API comes into play. For you, that would be the PushEngage Javascript API.
You can use this API and connect it to any other CRM or database you might have. This allows you to use the personal details of your subscribers to send them personalized push notifications.
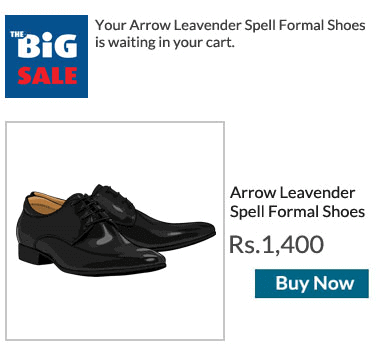
You can also use the PushEngage API to send out advanced campaigns such as cart abandonment campaigns.
What Are the Different Parts of Any Web Push Notification?
Now that we understand how push notifications technically work, let’s a look at the different parts of a push notification that you can customize (or can’t):
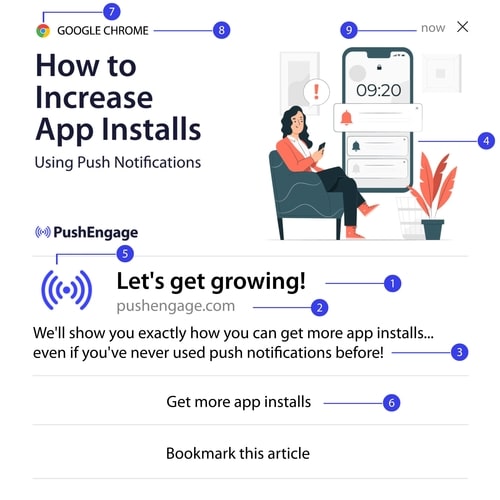
Also, you should check out some web push notification examples for a clearer picture.
#1. Push-notifikationstitel
Titlen er den mest fremtrædende tekst på push-notifikationen. Den er begrænset til 60-80 tegn for klar synlighed. Formålet med denne titel er at fange abonnentens opmærksomhed. Så det er vigtigt at have hele titlen tydeligt synlig.
Se vores guide til copywriting af push-notifikationer for at skabe fantastiske titler, som dine abonnenter vil elske.
#2. Domænet
The domain on a push notification is just the URL of your website. You can’t change this either. But unlike the browser icon, your domain needs to be clearly visible as it adds to your brand recognition.
Nu er der en mulighed for dig til at gemme push-notifikationsdata på et underdomæne af PushEngage. Hvis du bruger underdomænet, vil denne del af push-notifikationen vise URL'en på et PushEngage-underdomæne i stedet for dit brand.
Vi anbefaler ikke at bruge denne mulighed, da den kan sænke din brandværdi.
#3. Push-meddelelsindhold
Notifikationsindholdet indeholder den største del af tekst i hele notifikationen. Den er begrænset til 120-150 tegn for synlighed ligesom titlen. Selvom du kan arbejde med flere tegn, anbefaler vi at holde det kort og præcist.
Typically, this part serves as a way to offer more context about the title or to complete an offer. Don’t bother using a call to action in the text itself. With web push, you can add call-to-action buttons.
Pro Tip: Du kan bruge regionale sprog til at få dine push-notifikationer til at føles mere personlige. Læs denne casestudie om hvordan Phooto brugte lokale sprog i push-notifikationer for at øge deres engagement.
#4. Stort billede til notifikation
Det store billede er festens midtpunkt og det første, du ser i enhver notifikation. Det er typisk et 360×180 billede, der tjener som den mest attraktive del af en push-notifikation.
Notifikationsbilledet er også helt valgfrit. Du kan vælge ikke at bruge et, hvis du vil. Brug af et notifikationsbillede kan få din push-notifikation til at føles som en reklame. Dette kan medføre, at notifikationen bliver ignoreret af mange abonnenter.
Men hvis du gør det rigtigt, kan billeder forbedre CTR (klikrater) med op til 62 %. Læs vores undersøgelse om effekten af billeder i push-notifikationer efter branche.
Hvis du er usikker på, om du skal bruge et stort billede, foreslår vi A/B-test af notifikationen med og uden billedet.
#5. Push-notifikationsikon
The push notification icon is like the site icon on your website, but for your push campaigns. It’s an image that’s 192×192 or larger to represent your business. Typically, this will be your site icon and you can only set this one time for all your push notifications.
Pro Tip: Hvis du omdøber til enhver tid, skal du huske også at ændre push-notifikationsikonet i PushEngage. Husk også, at du ikke kan bruge animerede billeder til dit ikon. Så GIF'er vil ikke fungere her.
#6. Knapper til opfordring til handling
Hver push-notifikation understøtter op til 2 knapper. Vi anbefaler at bruge tilpassede call-to-action-knapper til dine kampagner. Du kan endda tilføje separate URL'er og knapikoner for hver CTA.
Se denne liste over web push-notifikationstricks for nogle gode CTA-idéer.
#7. Browserikon
Den mindste del af push-notifikationen er browserikonet, der angiver, hvilken browser din abonnent i øjeblikket bruger. Det er en af de mest oversete dele, fordi du ikke kan ændre dette på nogen måde, og for det meste vil en abonnent heller ikke bemærke browserikonet.
#8. Browseretiketten
Browseretiketten er blot tekstversionen af et browserikon. Ligesom ikonet kan du ikke ændre browsernavnets etiket.
#9. Tidsstempel
Tidsstemplet er en enkel måde for dine abonnenter at vide, hvornår beskeden blev modtaget. Det er systemgenereret, og du kan heller ikke ændre dette.
Forskellige typer af tilmeldinger til push-meddelelser
Every push campaign begins with consent. It’s an extension of Seth Godin’s idea of permission marketing. The idea is very simple: before you send your web visitors any content that they may or may not want to see, ask for permission.
The process of getting permission to send push campaigns is called “opting in”. So, before you can send out a push notification campaign, you first need your website visitors to opt-in and subscribe to your notifications.
Hvis du er indholdsskaber på YouTube, er du allerede bekendt med, hvordan abonnenter fungerer. Den eneste forskel er, at du ikke ejer listen over dine YouTube-abonnenter, og du kan ikke kontrollere de notifikationer, du sender dem.
With PushEngage, you do own that list because that information is stored on your domain. Now, there are two types of opt-ins you can use for your website based on the opt-in process:
- Enkel tilmelding
- Dobbelt tilmelding
The primary difference between them is very clear. Single opt-ins ask for permission to send notifications only once. Double opt-ins ask each subscriber to confirm their decision. So, which one should you choose?
We’ve observed that single opt-ins can get up to 150% more subscribers than double opt-ins. Check out our article on how to increase your opt-in rates if you’re struggling with this.
Fra et juridisk synspunkt kræver GDPR, at du kun har en enkelt tilmelding. Men med dobbelt tilmeldinger får du langt bedre engagement, fordi dine abonnenter rent faktisk ønsker mere af dit indhold. Med hensyn til rene tilmeldingsantal er enkelttrins tilmeldinger dog langt mere effektive.
Et andet punkt at overveje er, at du SKAL installere et SSL-certifikat på din hjemmeside for at kunne bruge enkelt tilmeldinger. Men du kan installere totrins tilmeldinger selv uden en sikker hjemmeside.
Så hvis du har et SSL-certifikat installeret, skal du bruge enkelt tilmeldinger. Hvis ikke, så læs denne artikel om hvordan du installerer et SSL-certifikat på WordPress-hjemmesider.
Forbedre engagementraten for push-notifikationer ved at personalisere
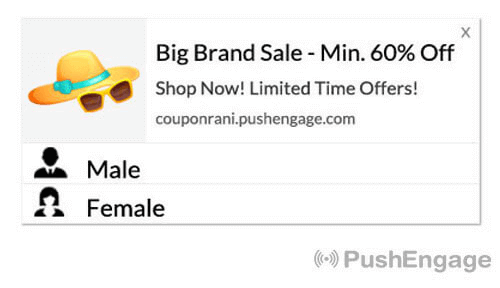
Før du opretter en kampagne, bør du opsætte segmenter og målgrupper for at sende personlige push-beskeder.
Intet slår niveauet af personalisering, du kan opnå ved at oprette segmenter og målgruppegrupper til dine push-notifikationsabonnenter. Gå til PushEngage » Audience og begynd at oprette segmenter og målgruppegrupper med det samme.
Under fanen Segments kan du oprette nye segmenter eller redigere eksisterende:

Og hvis du har brug for endnu dybere personalisering, skal du oprette en målgruppegruppe under fanen Audience Groups:

If you’re new to push notification segments and personalized push notifications, you should check out our article on how to create segments and how to use audience grouping to target user behavior.
Create Targeted Web Push Notifications for Better Engagement
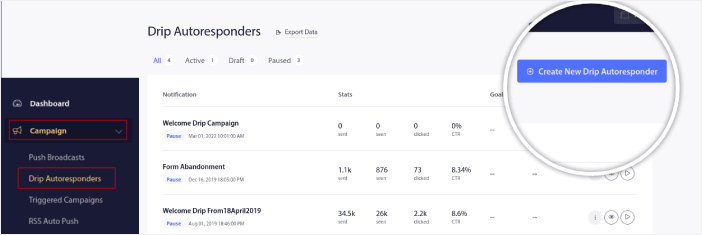
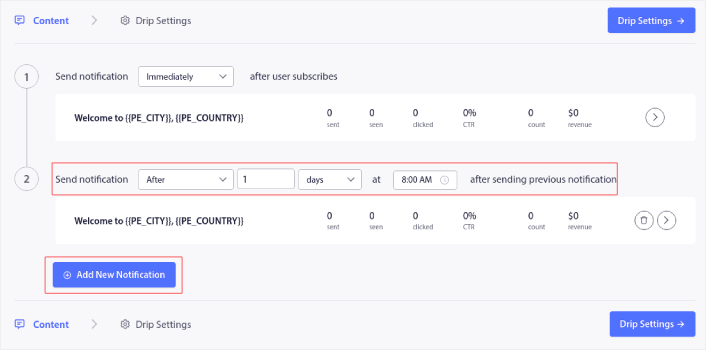
Gå til PushEngage dashboard og gå til Campaign » Drip Autoresponders og klik på Create New Drip Autoresponder:

Navngiv derefter din kampagne (vi foreslår noget som "Velkomst Drip"), og under Content, vælg muligheden "Send notification immediately after user subscribes“:

På dette tidspunkt kan du klikke på pilen ved siden af notifikationen for at redigere indholdet af din notifikation.
If you have a Premium or Enterprise plan with PushEngage, you’ll be able to add more than one notification to create a sequence of automated welcome messages. Just click on Add New Notification and edit the content. Once you’re done, click on Drip Settings and select the option to send your welcome campaign to all subscribers:

Rul derefter ned for at indstille dine egne UTM-parametre for at spore push-notifikationerne:

Og når du er færdig, rul op igen og klik på knappen Activate Autoresponder:

Og du er færdig!
How to Send Web Push Broadcasts
Gå til dit PushEngage dashboard og gå til Campaign » Push Broadcasts og klik på knappen Create a New Push Broadcast:

Under fanen Content, tilføj dit push-notifikationsindhold:

Og du kan opsætte en A/B-test for at øge dine klikrater, eller du kan planlægge dine push-udsendelser for at få flere visninger. I begge tilfælde bør du tjekke vores bedste praksis for push-notifikationer for de bedste resultater.
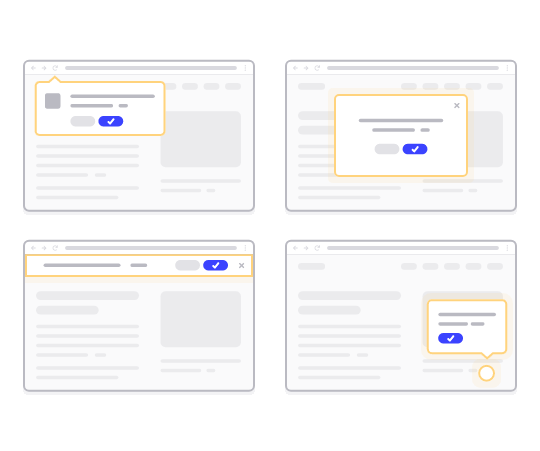
How to Create Engaging Web Push Popup Modals
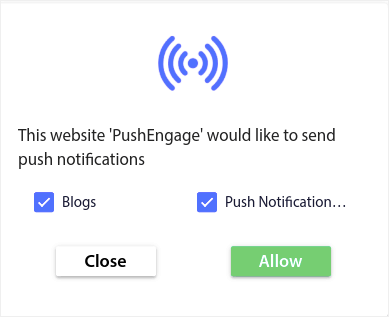
A push notification popup modal is a small window that appears on top of a website or mobile app interface to display a message or notification to the website visitor. The popup modal can be triggered by various events. You can set up popups to get triggered on page visit, on scroll depth, and even on custom actions such as button click.
Usually, you’ll see a call to action on the popup modal such as “Subscribe” or “Allow” to get consent from visitors to send them push broadcasts or drip campaigns. If you follow this tutorial, you can create a popup like this one:
Du kan oprette popup-modalvinduer, der kan segmentere abonnenter direkte, eller oprette almindelige popups, der blot indsamler abonnenter med standardattributter som geolokation og browser.
Gå tilbage til dit WordPress-dashboard. Gå til PushEngage » Design:
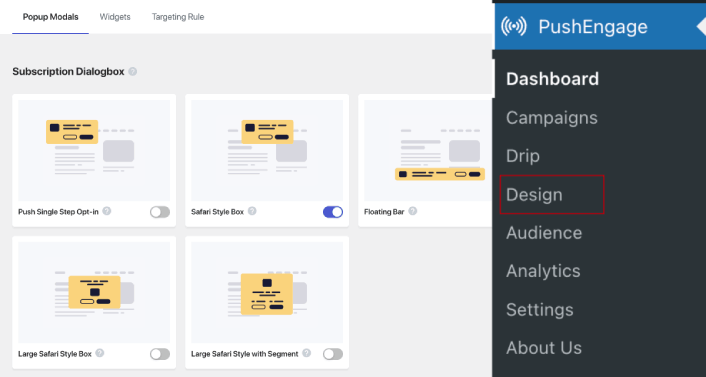
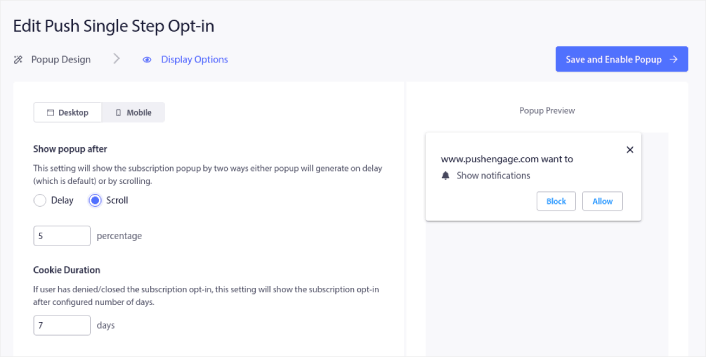
Og du kan opsætte så mange popup-modalvinduer, som du ønsker. Selvfølgelig kan du sørge for, at de udløses på forskellige tidspunkter under Visningsindstillinger for hvert popup-modalvindue.
Idéen her er at give dine besøgende en solid grund til at abonnere. Hvis du har brug for hjælp til det, kan du se vores artikel om hvordan man opretter en brugerdefineret push-notifikations-opt-in.
Og hvis du vil oprette mere målrettede popup-modalvinduer, kan du bruge målretningsreglerne under fanen Målretningsregel :
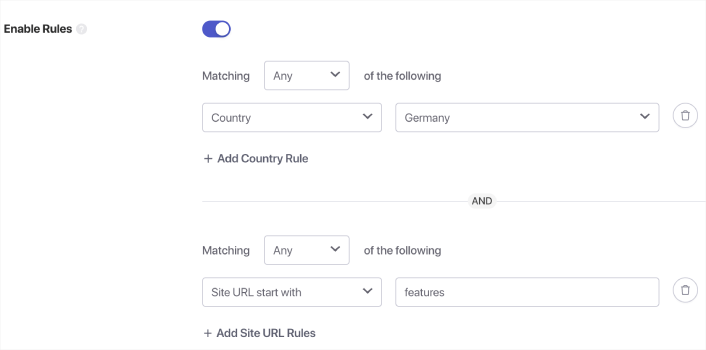
Dette er globale målretningsregler og vil have præference frem for målretningsregler for individuelle popup-modalvinduer. Men hvis du ønsker det, kan du oprette robuste målretningsregler for hvert modalvindue ved at redigere dem.
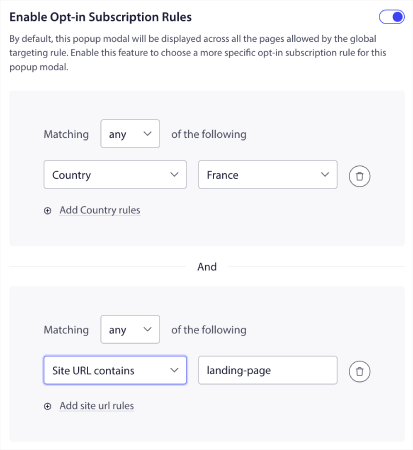
For eksempel kan du oprette popup-modalvinduer på forskellige sprog for at målrette besøgende fra forskellige lande.
Og hvis du gerne vil have nogle skabeloner med en høj klikrate til at komme i gang, bør du se denne artikel om konverteringsdygtige push-notifikations-opt-ins.
What to Do Before You Send Targeted Web Push Notifications
You’re almost done. Before you start sending push broadcasts or drip campaigns, you’ll need to set up a subscription opt-in for your website. Your opt-in will convert web visitors into push notification subscribers. So, this is a critical element. If you need some inspiration, you can check out this article on high-converting push notification opt-ins. Once you’re done setting up the opt-in, your site can collect subscribers. But how do you even know that your opt-in is working properly?
Så det fornuftige er at opsætte en velkomst-push-notifikation.
Pro-Tip: You should spend some time on a full-scale test of your push notifications. This will troubleshoot the most common problems and you won’t waste your time trying to resolve issues later on. Also, you need a proper user engagement strategy or a push campaign strategy before you launch a bunch of campaigns.
What to Do Now That You Know What is Web Push Notifications
Now that you know what is web push notifications, it’s time to set up your own push campaigns.
If you’re just getting started with web push, check out how to create your first welcome message using PushEngage. A welcome message is great for re-engagement and repeat visitors to your website.
Also, if you’ve already started using web push, we realize that it can be difficult to come up with campaign ideas. The longer you use a traffic source, the harder it becomes to come up with new ideas. Check out some push campaign ideas that our customers are already using. You might just get the inspiration you need!
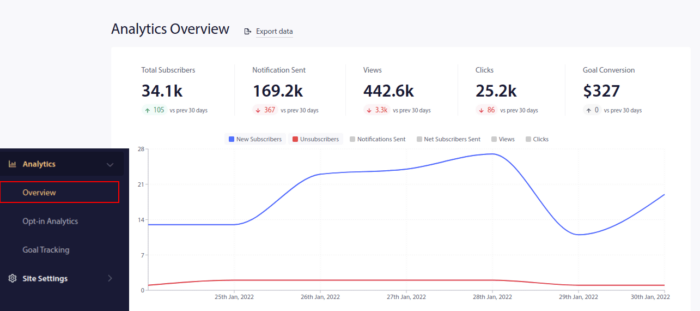
Getting started with segmentation can seem intimidating. But if you keep an eye on goal tracking and analytics, you should be fine. More importantly, you’ll make a lot more profit with the help of push notification campaigns. Here are a few cool resources to get you started:
- Sådan bruges retargeting push-notifikationer til at fordoble din omsætning
- Sådan sorteres dine push-notifikationer og finder vindende kampagner
- Sådan renses push-notifikationsabonnentlister (nemt)
- Sådan sendes RSS push-notifikationer automatisk
- Sådan bruges push-notifikationer til at promovere en nyhedsside
- Sådan bruges cross-selling push-notifikationer til at fordoble dit salg
- Sådan bruges browse abandonment push-notifikationer (4 trin)
If you’re an eCommerce website, check out cart abandonment campaigns next. If not, send out your first drip push campaign. These are some of the highest converting campaigns for most of our customers.
Og hvis du ikke allerede har gjort det, kom i gang med PushEngage i dag!


Thank you for sharing good information. Very Nice Article it helps me a lot to how to use Push Notification in our blog.
This is a great information you have share, As I’m newbie into Blogging, it can surely make a difference. Thank you so much
can i send web push notifications when a user hits a specific site? for ex. my website sells socks; when a web push opted-in user visits amazon i trigger a web push notification to them. i think not, but thought i’d check anyway.
also i thought a site needs be be https to enable web push notifications. can i still enable web push notifications on a http site by creating a https page?
IOS does not support web push notifications. Please correct me if I am wrong
Yes, you are correct. iOS still does not support web push notifications.
Done everything but still I’m not getting this things for my blogger’s blog.
Can you drop a mail to [email protected] or on live chat? The team will help you to solve the issue.
you’re actually a just right webmaster. The website loading speed is amazing.
It kind of feels that you’re doing any distinctive
trick. Moreover, The contents are masterwork. you have performed a wonderful task in this subject!