Looking for a way to create push button notifications and collect push notification subscribers?
Vi forstår det. Nogle gange er det meget mere bekvemt at have lidt fleksibilitet i den måde, du udvider dine abonnenter på.
Bare rolig. Vi har dig dækket.
In this article, we’re going to show you step-by-step how to create your own push button notifications.
Klar? Lad os dykke ned.
How to Create Push Button Notifications in WordPress
Before you create push button notifications in WordPress, you need to create a landing page to collect push subscribers. We highly recommend using SeedProd to create your landing pages.

SeedProd is the best WordPress landing page builder. It’s perfect for businesses, bloggers, and website owners looking to build high-converting landing pages without any development skills.
With SeedPreed, you get pre-built templates for high-converting landing pages that you can publish instantly. This includes templates for:
- Salgsider
- Kommer snart-sider
- 404-sider
- Vedligeholdelsessider
- Squeeze-sider
- Takkesider
- Webinar-sider
- Video-sider
Og meget mere!
Step #1: Install and Activate SeedProd
First, you’ll want to get the SeedProd Pro plugin and activate it. If you’re not sure how to do that, check out this article on how to install a WordPress plugin. Then, go to SeedProd » Settings on your WordPress dashboard and activate the Pro version:

Next, head to SeedProd » Pages for an overview of SeedProd’s landing page dashboard. This is where you can see the different types of landing pages you can create using SeedProd:

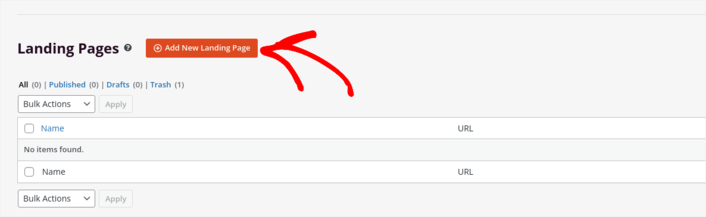
Keep in mind that these are all special pages with pre-built functionality and design templates. For a landing page, you don’t want to use ANY of these special landing pages. Instead, you’re going to create a custom landing page.
Scroll further down and click the Add New Landing Page button to get started:
Step #2: Create a New Landing Page for Push Button Notifications
After clicking the Add New Landing Page button, you’ll see SeedProd’s library of landing page templates. These are professionally designed landing page templates that are completely responsive.
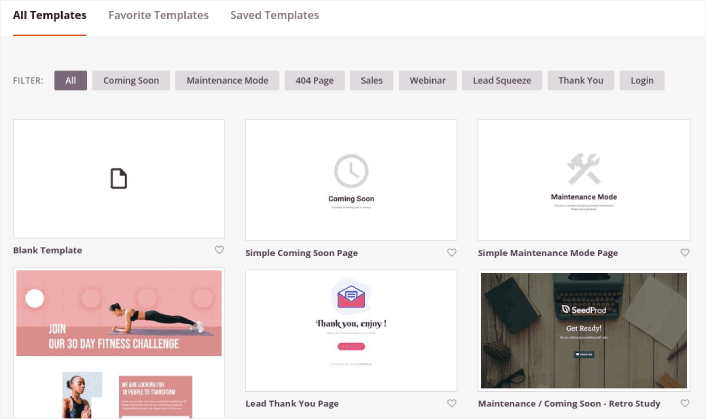
Next, you can select one of these templates to help you get started.
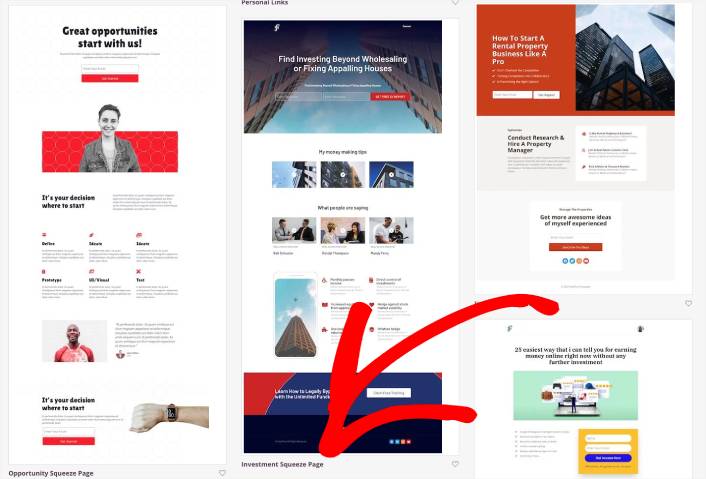
Remember, the template is just a starting point. you can customize everything about the page later on. For now, find a template that you think will fit. When the templates page opens, you can click Squeeze Page to filter the list:

For this guide, we’ll select the Investment Squeeze Page.
A squeeze page has only one objective. It’s to “squeeze” you just enough to get your email address. Know anyone in the investment and personal finance space? Yeah, they can squeeze for sure!
Go ahead and click on it now.
Next, we’re going to customize the landing page.
Step #3: Customize Your Landing Page Design
SeedProd’s visual builder allows you to customize your landing page using drag-and-drop content blocks.
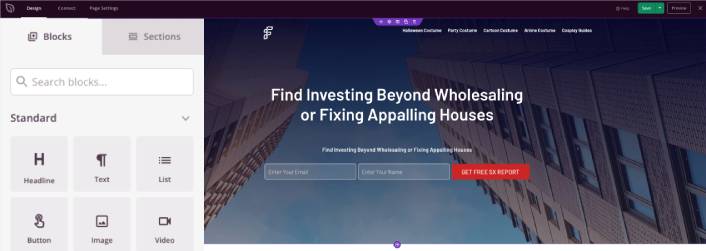
You can create a fully customized header for your landing page in a matter of minutes. You can even add custom elements to convince and convert your traffic. For instance, you can create a video module and embed a YouTube video to convince your visitors to buy your product or service.
It’s also super easy to add a section with a brief description of your product or service . Head over to the Sections tab in the visual builder and under the Hero section, you’ll find several pre-built templates that you can import with a single click.
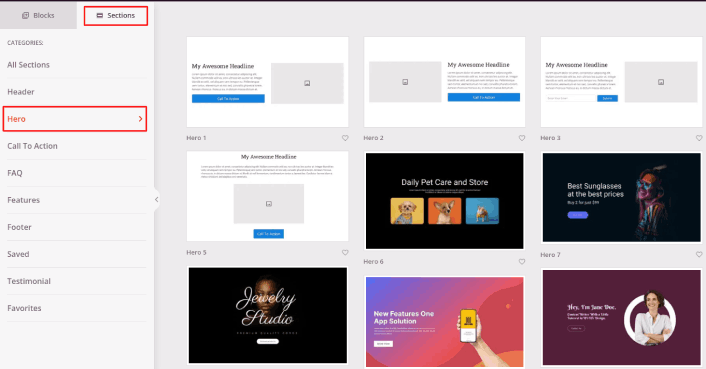
Go ahead and select one that you like.
Don’t worry about the colors or the content. You can edit all of it. What you should look for is a layout that goes well with your template.
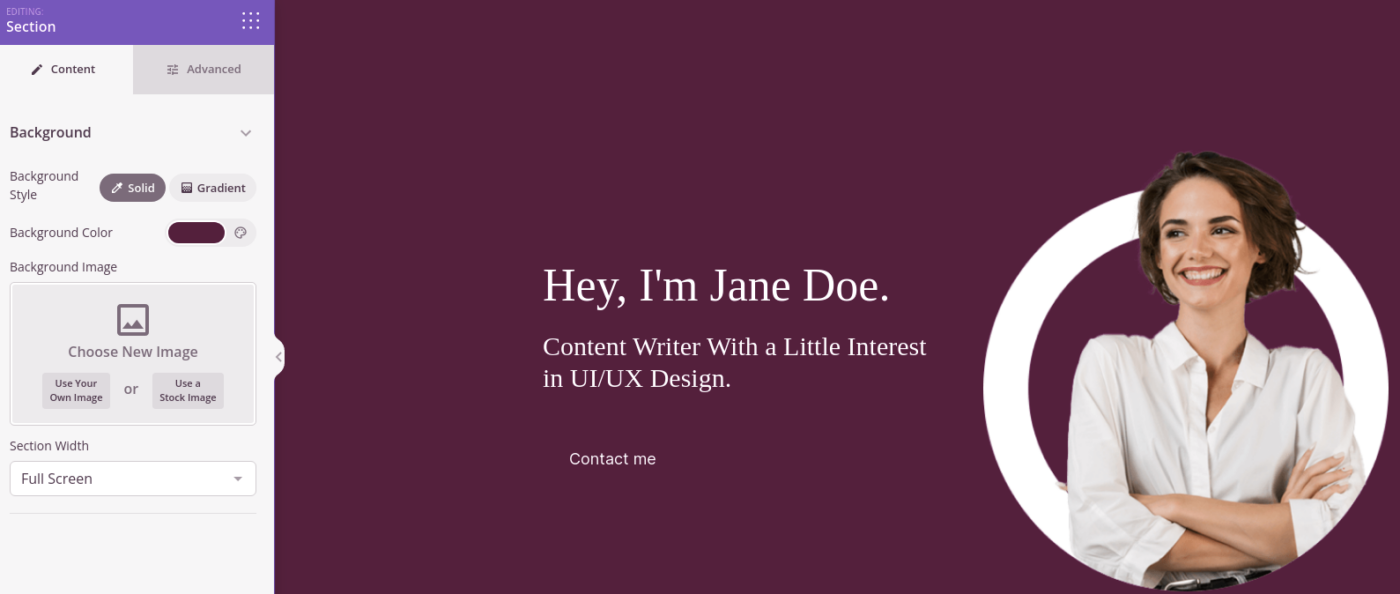
You can customize the hero section the same way we did earlier by choosing a different image and changing the headline and description. While you’re at it, add a call-to-action button that nudges visitors to buy from you.
Next, from the Sections tab, select the Testimonial heading, and choose a design you like. And just like that, you have a testimonials section on your landing page.
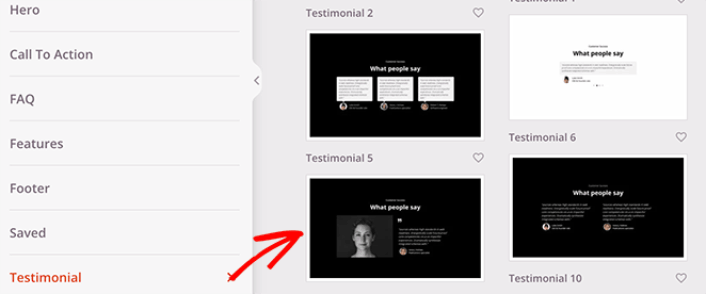
It’s so simple!
Step #4: Add a Push Button Notifications to Your Landing Page
Du kan også tilføje en klik for at abonnere-knap for at indsamle push-notifikationsabonnenter. Push-notifikationer er en god måde at øge din gentagne trafik på, få mere engagement og endda sælge officielle merchandise, hvis du har noget.
I SeedProd skal du blot trække og slippe modulet Brugerdefineret HTML fra sidebjælken.
Vi har placeret abonnementsknappen lige under e-mail-tilmeldingsformularen i den øverste del.
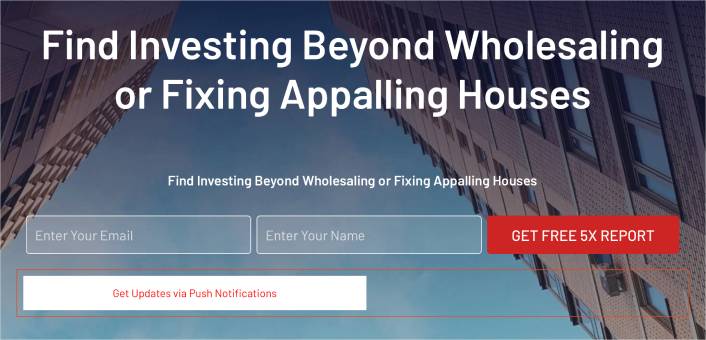
Men du kan indsætte knappen hvor som helst du vil.
Til denne del skal du have lidt erfaring med HTML og CSS. Eller du kan kopiere denne kode og indsætte den i din Brugerdefineret HTML-blok:
<button onclick="subscribeOnClickButton()" style="border: none; padding-left: 5%; padding-right:5%; text-align: center; display: inline-block; color: blue;">Get Updates via Push Notifications</button>Det er en standardknap i HTML med meget lidt styling. Det eneste smarte er onclick-funktionen i koden. Det betyder grundlæggende, at dine besøgende kan klikke på knappen for at abonnere på noget. Nu skal vi give knappen lidt ekstra kode for at give dine besøgende mulighed for at abonnere på push-notifikationer.
Gå til PushEngage hjemmeside og klik på knappen Kom i gang :

PushEngage er verdens førende plugin til push-notifikationer.
Push-notifikationer hjælper dig med at øge din webtrafik og dit engagement automatisk. Og hvis du driver en onlinebutik, hjælper PushEngage dig også med at øge dit salg ved at hjælpe dig med at oprette automatiserede e-handels-push-notifikationer.
Du kan komme i gang gratis, men hvis du er seriøs omkring at vækste din forretning, bør du købe en betalt plan. Før du køber en push-notifikationstjeneste, bør du også se denne guide til priser på push-notifikationer.
Her er et hurtigt overblik over, hvad du får med PushEngage:
- Højtkonverterende automatiserede kampagner
- Flere målretnings- og kampagneplanlægningsmuligheder
- Målsporing og avanceret analyse
- Smart A/B-test
- Push campaign templates
- Powerful segmentation options
- En dedikeret succesmanager
Du vil se, at PushEngage uden tvivl er det bedste valg, hvis du vil opbygge trafik, engagement og salg for din virksomhed. Og hvis du har et stramt budget, kan du altid være lidt kreativ med dine push-notifikationer.
NOTE: If you’re running a WordPress site, you should install and activate the PushEngage WordPress plugin.
Vælg derefter gratisplanen for at prøve PushEngage, eller vælg en betalt plan, hvis du er seriøs omkring at udvide din virksomhed. De betalte planer kommer med flere kampagnemuligheder og muligheden for at opbygge endnu større abonnentlister.
På dit PushEngage dashboard skal du gå til Sideindstillinger » Sideoplysninger og klikke på knappen Klik her for opsætningsinstruktioner. Under Enhver side får du din installationskode:

ADVARSEL: Du skal kopiere den kode, du får fra dit dashboard. Koden er unik for hver PushEngage-bruger. Du kan ikke kopiere koden på billedet og indsamle push-notifikationsabonnenter.
Når du har koden i dit PushEngage-dashboard, skal du tilføje dette uddrag til din kode:
<script> window._peq = window._peq || [];</script> <script>
function subscribeOnClickButton(){
window._peq.push(['subscribe',{}.pe,function(res){
if(res.statuscode==1)
{
// Code to return response
console.log(res);
}
}]);
}
</script>
Din endelige kode skal se nogenlunde sådan ud:
<script src="https://clientcdn.pushengage.com/core/02a6e92667ae2279fcba8932356c1d93.js" async></script>
<script> window._peq = window._peq || [];</script> <script>
function subscribeOnClickButton(){
window._peq.push(['subscribe',{}.pe,function(res){
if(res.statuscode==1)
{
// Code to return response
console.log(res);
}
}]);
}
</script>
Du vil gerne tilføje denne kode til HTML-blokken på din landingsside efter koden til knappen. Det skal se nogenlunde sådan ud:

Du er velkommen til at tilpasse stilarterne for knappen, som du vil. Når du er færdig med at tilpasse din landingsside, skal du blot trykke på Gem-knappen.
Step #4: Configure Your Page Settings
After you’re done designing your landing page, click the Connect tab at the top of your page builder, and select your email marketing provider to collect leads on your site.

Then, click the Page Settings tab at the top of your screen.

Her kan du tilføje et SEO-plugin og et Google Analytics-plugin til din landingsside. Du kan endda opsætte brugerdefinerede sporingskoder som en Facebook Pixel eller en Pinterest Pixel til at spore annoncepræstation.
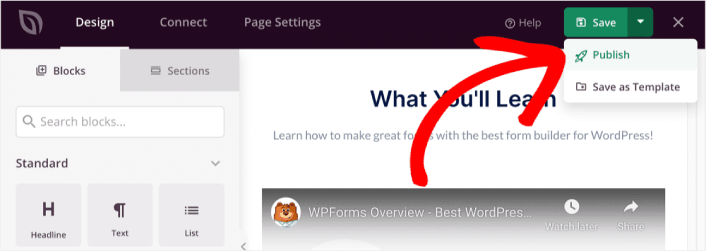
Step #5: Publish Your Landing Page in WordPress
Now let’s go ahead and publish your design. To do this, click the dropdown arrow next to the save button and click Publish.
You can then click the See Live Page button to see how it looks.
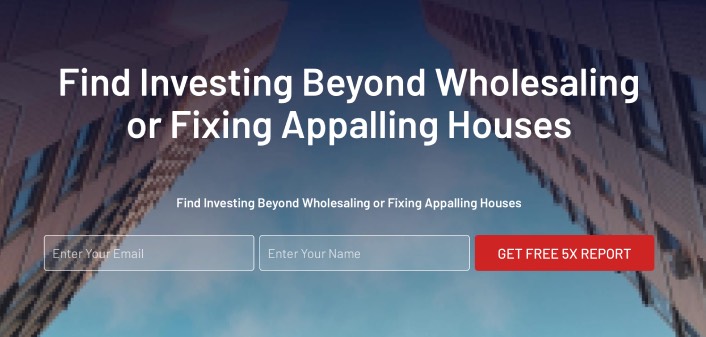
Congratulations! You just published your very first landing page.
What to do After You Add Push Button Notifications to Your Site
Now that your landng page is live, it’s time to work on your traffic, engagement, and sales. You should try using push notifications on your site. Push notifications are a great marketing tool that can help you grow your business.
Take a look at these epic resources and you’ll know what we mean:
- 7 Smarte Strategier til at Øge Kundeengagement
- Er Push-notifikationer Effektive? 7 Statistikker + 3 Eksperttips
- Sådan opsættes push-meddelelser om forladte indkøbskurve (nem vejledning)
Vi anbefaler at bruge PushEngage til at oprette dine push-notifikationskampagner. PushEngage er den #1 push-notifikationssoftware i verden. Så hvis du ikke allerede har gjort det, så kom i gang med PushEngage i dag!


