Looking for a quick and easy way to use dynamic segmentation for push campaigns?
It’s the worst feeling in the world when you get push notifications that simply aren’t relevant to you. Imagine you just bought a Spotify subscription and still got push notifications from Spotify to upgrade to their Premium plan. That would be really annoying, wouldn’t it?
Here’s the shocker: This happens a LOT more frequently than you might think. And not just with small businesses.
What happened in that instance was that Spotify forgot to take you off the ‘free users’ segment and bump you into their ‘paid users’ segment. Of course, doing that manually can be a real pain. So, you need to use dynamic segmentation for your business so that you don’t do the same thing to your subscribers.
Fortunately, there’s an easy way to dynamically segment push subscribers. In this article, we’re going to help you do it in less than 15 minutes.
Er du klar? Lad os dykke ned.
Why Use Dynamic Segmentation for Push Campaigns?
Dynamic segmentation is a super-smart way to send messages to people through apps and web push notifications.
Instead of sending the same message to everyone, you can use dynamic segmentation to send messages that fit each person’s interests and actions. It’s like having a chat that’s all about what you like and what you do!
Here’s why it’s awesome:
- It’s Personal: Imagine getting a message that’s just for you, talking about things you really like. Dynamic segmentation makes messages special for each person, which is way more exciting.
- Makes Sense: Ever get a message that feels random? With dynamic segmentation, messages match what you’re doing right then. So, if you were looking at shoes, you might get a message about shoes – not something totally different.
- Right Now Stuff: It’s like having a chat that knows what you’re doing right now. If you put something in your online shopping cart but didn’t buy it, dynamic segmentation might remind you about it later.
- Gets You Interested: When messages feel like they’re just for you, you’re more likely to read them and even click on them. It’s like getting a message from a friend – you want to see what they’re saying!
- Try New Things: Imagine if a message tells you about something you might really like, based on what you’ve done before. Dynamic segmentation helps you discover cool stuff you might not have found on your own.
- No Annoying Stuff: Have you ever felt bothered by too many messages? With dynamic segmentation, you only get messages when they’re important to you. So, no more annoying notifications!
- Finds You Where You Are: If there’s something cool happening near you, dynamic segmentation can tell you about it. Like a pop-up concert or a yummy food truck – things you wouldn’t want to miss!
- Helps You Buy More: If you buy something, dynamic segmentation might suggest something else that goes with it. Like if you got a new phone, it could suggest a cool case to protect it.
- Keeps You Happy: When messages feel like they’re just for you, you’re more likely to enjoy using the app. It’s like having a helpful friend who knows what you like.
So, dynamic segmentation is like magic for sending messages. It makes them special, useful, and just right for you. And it’s super easy to do with push campaigns.
How to Dynamically Segment Push Subscribers
Now that you know what dynamic segmentation is and why you should do it, let’s get started with how you can get it done. Before you get started, remember that dynamic segmentation for push subscribers only works if you have push subscribers.
Hvis du ikke allerede indsamler push-abonnenter, skal du stoppe med at gå glip af det lige nu. Vi anbefaler, at du bruger PushEngage til at begynde at indsamle push-abonnenter lige nu.

PushEngage er verdens førende plugin til push-notifikationer.
Push-notifikationer hjælper dig med at øge din webtrafik og dit engagement automatisk. Og hvis du driver en onlinebutik, hjælper PushEngage dig også med at øge dit salg ved at hjælpe dig med at oprette automatiserede e-handels-push-notifikationer.
Du kan komme i gang gratis, men hvis du er seriøs omkring at vækste din forretning, bør du købe en betalt plan. Før du køber en push-notifikationstjeneste, bør du også se denne guide til priser på push-notifikationer.
Her er et hurtigt overblik over, hvad du får med PushEngage:
- Højtkonverterende automatiserede kampagner
- Flere målretnings- og kampagneplanlægningsmuligheder
- Målsporing og avanceret analyse
- Intelligent A/B-test
- En dedikeret succesmanager
Du vil se, at PushEngage uden tvivl er det bedste valg, hvis du vil opbygge trafik, engagement og salg for din virksomhed. Og hvis du har et stramt budget, kan du altid være lidt kreativ med dine push-notifikationer.
Og meget mere!
Step #1: Install and Activate PushEngage
Nu er det tid til at oprette din PushEngage-konto. Start med at tilmelde dig med en e-mailadresse eller et Gmail-id:

Udfyld derefter dine kontooplysninger:

Og tilføj dine kreditkortoplysninger for at købe din plan:

Hvis du valgte gratis kontoen, vil dit kreditkort aldrig blive opkrævet penge, før du vælger at opgradere din plan. Og nu er du klar til at få adgang til dit PushEngage-dashboard. Klik blot på Gennemfør registrering og få øjeblikkelig adgang.
Hvis du har brugt OneSignal eller PushAlert før, vil du se, at PushEngage giver dig en meget renere oplevelse fra dashboardet. OneSignal-dashboardet er ikke beregnet til avancerede kampagner. Til det skal du bruge API'en mere end OneSignal-pluginet.
Step #2: Install the Web Notifications WordPress Plugin
NOTE: If you’re not running a WordPress site, you should check out our installation guides to get started. And if you’re running a WordPress site, install a web notifications WordPress plugin.
Du er færdig med at oprette din konto. Så gå til PushEngage-dashboardet og følg med:

Klik på Sideindstillinger » Sideoplysninger og klik på knappen Klik her for opsætningsinstruktioner:

Klik på fanen WordPress og klik på knappen Installer PushEngage WordPress Plugin for at installere pluginet på din hjemmeside.

Her er den fede del: Da du oprettede din PushEngage-konto, synkroniserede du allerede din hjemmeside med din PushEngage-konto. Så klik på installationslinket i PushEngage-dashboardet for automatisk at installere PushEngage WordPress-pluginet på din hjemmeside.
Step #3: Connect Your WordPress Website with PushEngage
Når du er færdig med at installere og aktivere PushEngage WordPress-pluginet, vil du se PushEngage-guiden:

Guiden er ret ligetil. Hvis du er ny bruger, skal du klikke på Ny? Gør krav på din gratis konto. Og hvis du allerede har tilmeldt dig, skal du klikke på Forbind din eksisterende konto.
Dernæst kan du vælge din side fra rullemenuen Vælg en side under Forbind en registreret side, hvis du allerede har registreret en side under tilmelding:

Eller du kan klikke på Registrer en ny side for at tilføje en ny side, hvis du har en Premium prisplan eller højere. I næste trin vil guiden bede dig om at installere andre nødvendige WordPress-plugins.

You’ll see this success message from the wizard if you followed every step correctly:

Du er nu klar til at oprette kampagner og push-underretningspop op-modaler.
Step #4: Create a Dynamic Segment for Your Push Campaigns
Før du opretter en kampagne, bør du opsætte segmenter og målgruppegrupper for at sende personlige push-beskeder.
Intet slår niveauet af personalisering, du kan opnå ved at oprette segmenter og målgruppegrupper til dine push-notifikationsabonnenter. Gå til PushEngage » Audience og begynd at oprette segmenter og målgruppegrupper med det samme.
Under fanen Segments kan du oprette nye segmenter eller redigere eksisterende:

Make sure to create a new segment and give it the name you want. For our example, we’re going with “Recent Conversions” as the name for our segment. You can name it anything you like.
NOTE: Before you add the dynamic segmentation code in your landing page, you must create a segment with the same name as the one in your code. If the names don’t match, that code snippet won’t work.
Step #5: Add the Dynamic Segmentation Code to Your Thank You Page
If your website doesn’t have a thank you page yet, go ahead and create one. In your thank you page, add an HTML block. Then, add this code to your HTML block:
<script>
var days = 15;
window._peq.push(["add-to-dynamic-segment", "Recent Conversions", days]);
</script>
You can use the dynamic segmentation code snippet to add subscribers who landed on the thank you page to a segment called “Recent Conversions”. The coolest bit is that every subscriber only stays there for 15 days.
Look at this part of the code that says:
var days =15;That one line dictates how long your subscribers are going to be in that segment when they visit that page. If you edit that line, you can set it to any custom day range you want. And once that day range is over, your subscribers are automatically removed from that segment and sent to a segment of all subscribers. If they’re also subscribed to other segments, that remains unaffected.
Now, look at this part of the code that says:
window._peq.push(["add-to-dynamic-segment", "Recent Conversions", days]);Here, you can change the name for your segment. Simply swap out “Recent Conversions” with the name for your segment.
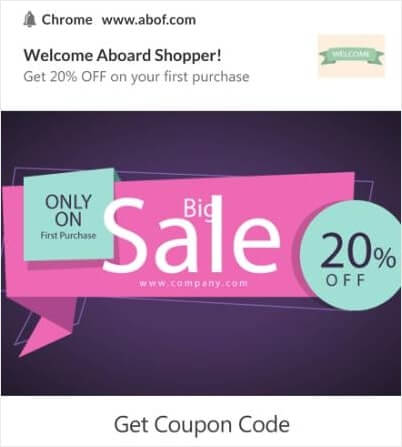
Also, you can create dynamic segments for ANY landing page you like. So, it’s not like you can only send eCommerce push notifications like this one:
Think of regular conversions on any site. You could try and send a free ebook to a dynamic segment:

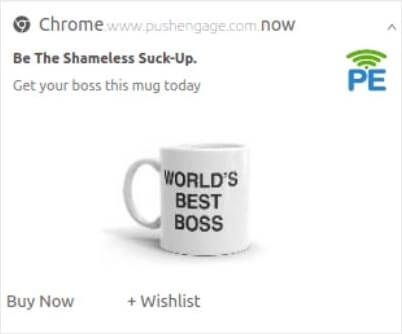
Or even send affiliate offers to a specific segment:
Send webinar invites:

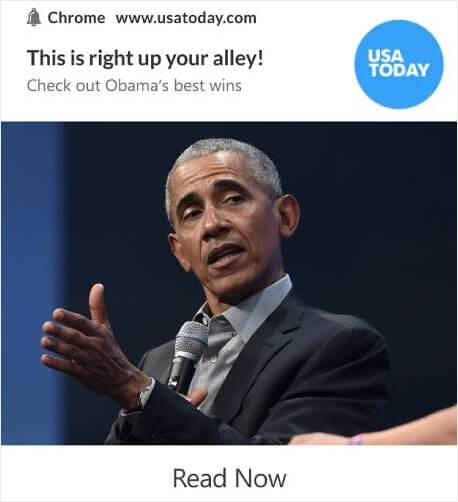
And even send content recommendations:
The next few parts of this article are about making the most of your dynamic segments. But if you need some inspiration for your push campaigns, check out this list of push notification examples.
How to Create a Targeted Push Notifications Campaign
Gå til PushEngage dashboard og gå til Campaign » Drip Autoresponders og klik på Create New Drip Autoresponder:

Navngiv derefter din kampagne (vi foreslår noget som "Velkomst Drip"), og under Content, vælg muligheden "Send notification immediately after user subscribes“:

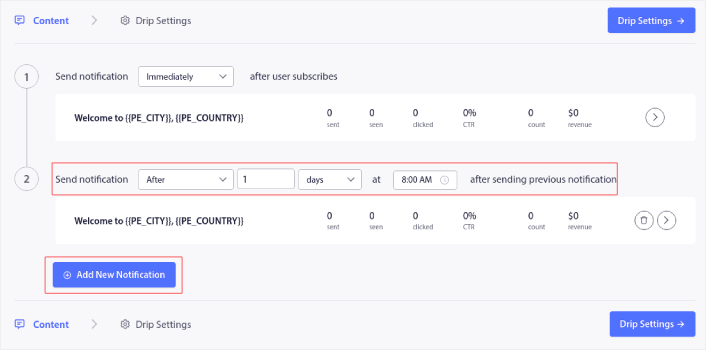
På dette tidspunkt kan du klikke på pilen ved siden af notifikationen for at redigere indholdet af din notifikation.
Hvis du har en Premium- eller Enterprise-plan med PushEngage, vil du kunne tilføje mere end én notifikation for at oprette en sekvens af automatiserede velkomstbeskeder. Klik blot på Add New Notification og rediger indholdet.
Når du er færdig, skal du klikke på Drip Settings og vælge muligheden for at sende din velkomstkampagne til alle abonnenter:

Rul derefter ned for at indstille dine egne UTM-parametre for at spore push-notifikationerne:

Og når du er færdig, rul op igen og klik på knappen Activate Autoresponder:

Og du er færdig!
How to Send a Targeted Push Notifications Broadcast
Gå til dit PushEngage dashboard og gå til Campaign » Push Broadcasts og klik på knappen Create a New Push Broadcast:

Under fanen Content, tilføj dit push-notifikationsindhold:

Og du kan opsætte en A/B-test for at øge dine klikrater, eller du kan planlægge dine push-udsendelser for at få flere visninger. I begge tilfælde bør du tjekke vores bedste praksis for push-notifikationer for de bedste resultater.
How to Create Push Notification Popup Modals
En push-notifikations popup-modal er et lille vindue, der vises oven på en hjemmeside eller mobilapp-grænseflade for at vise en besked eller notifikation til hjemmesidebesøgende.
Popup-modellen kan udløses af forskellige begivenheder. Du kan opsætte popups, der udløses ved sidebesøg, ved scroll-dybde og endda ved brugerdefinerede handlinger som f.eks. klik på knap.
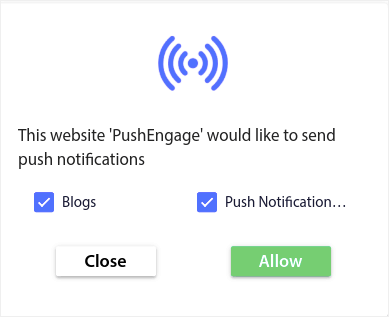
Normalt vil du se en opfordring til handling på popup-modellen, såsom "Abonner" eller "Tillad" for at få samtykke fra besøgende til at sende dem push-notifikationer. Hvis du følger denne vejledning, kan du oprette en popup som denne:
Du kan oprette popup-modalvinduer, der kan segmentere abonnenter direkte, eller oprette almindelige popups, der blot indsamler abonnenter med standardattributter som geolokation og browser.
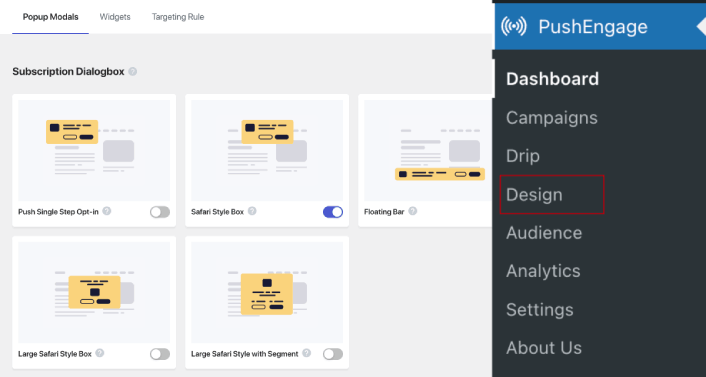
Gå tilbage til dit WordPress-dashboard. Gå til PushEngage » Design:
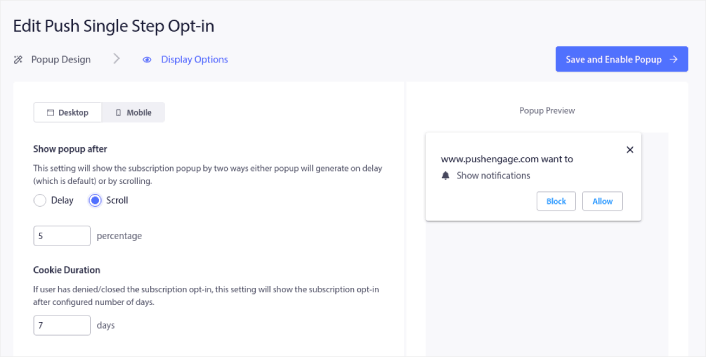
Og du kan opsætte så mange popup-modalvinduer, som du ønsker. Selvfølgelig kan du sørge for, at de udløses på forskellige tidspunkter under Visningsindstillinger for hvert popup-modalvindue.
Idéen her er at give dine besøgende en solid grund til at abonnere. Hvis du har brug for hjælp til det, kan du se vores artikel om hvordan man opretter en brugerdefineret push-notifikations-opt-in.
Og hvis du vil oprette mere målrettede popup-modalvinduer, kan du bruge målretningsreglerne under fanen Målretningsregel :
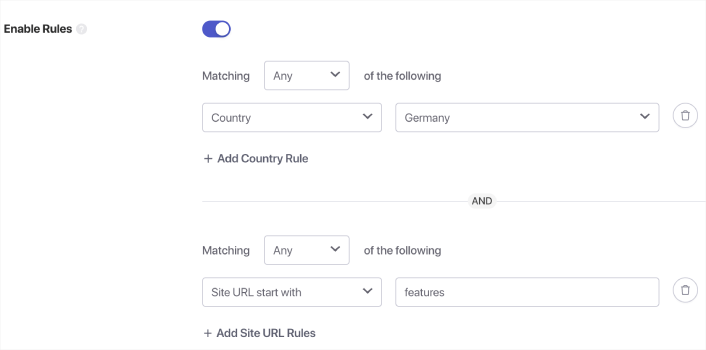
Dette er globale målretningsregler og vil have præference frem for målretningsregler for individuelle popup-modalvinduer. Men hvis du ønsker det, kan du oprette robuste målretningsregler for hvert modalvindue ved at redigere dem.
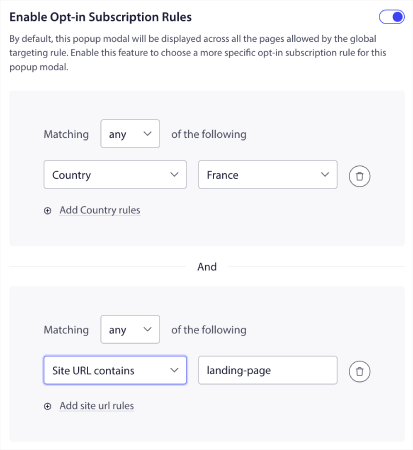
For eksempel kan du oprette popup-modalvinduer på forskellige sprog for at målrette besøgende fra forskellige lande.
Og hvis du gerne vil have nogle skabeloner med en høj klikrate til at komme i gang, bør du se denne artikel om konverteringsdygtige push-notifikations-opt-ins.
What to Do Before You Use Dynamic Segmentation
Du er næsten færdig.
Før du begynder at sende push-notifikationer, skal du opsætte en abonnements-opt-in for dit websted. Din opt-in vil konvertere webbesøgende til push-notifikationsabonnenter. Så dette er et kritisk element.
Hvis du har brug for inspiration, kan du se denne artikel om konverteringsdygtige push-notifikations-opt-ins. Når du er færdig med at opsætte opt-in, kan dit websted indsamle abonnenter. Men hvordan ved du overhovedet, at din opt-in fungerer korrekt?
And even before you start to use dynamic segmentation for bush campaigns, you should set up other push campaigns that are know to engage and convert.
Så det fornuftige er at opsætte en velkomst-push-notifikation.
Pro-tip: Du bør bruge noget tid på en fuldskala test af dine push-notifikationer. Dette vil fejlfinde de mest almindelige problemer, og du spilder ikke din tid på at forsøge at løse problemer senere.
What to Do After You Use Dynamic Segmentation
Det var alt for denne gang, folkens!
Hvis du fandt denne artikel nyttig, så sørg for at efterlade en kommentar nedenfor.
At komme i gang med målrettede push-notifikationer kan virke skræmmende. Men hvis du holder øje med målsporing og analyse, skal det nok gå. Endnu vigtigere, du vil tjene meget mere profit med hjælp fra push-notifikationskampagner. Her er et par seje ressourcer til at komme i gang:
- Sådan bruges retargeting push-notifikationer til at fordoble din omsætning
- Sådan sorteres dine push-notifikationer og finder vindende kampagner
- Sådan renses push-notifikationsabonnentlister (nemt)
- Sådan sendes RSS push-notifikationer automatisk
- Sådan bruges push-notifikationer til at promovere en nyhedsside
- Sådan bruges cross-selling push-notifikationer til at fordoble dit salg
- Sådan bruges browse abandonment push-notifikationer (4 trin)
Hvis du er ny til push-notifikationer, bør du prøve PushEngage. PushEngage er den #1 push-notifikationssoftware på markedet. Og dine kampagner vil være i sikre hænder.
Så hvis du ikke allerede har gjort det, kom i gang med PushEngage i dag!


