
Looking for a simple tutorial to add WordPress Open Graph meta tags to your site?
Open Graph is how Facebook handles metadata when you share your post or page on Facebook posts. It’s how Facebook automatically fetches the featured image and meta description just from the URL.
But adding it manually to your site can be a real pain.
For one thing, you’ll have to learn how Open Graph structured data is written. Then, you’d have to insert it into your WordPress theme files. And that’s super risky. You’ll have to edit files that help your entire site run properly. A single line out of place could crash your entire site.
In this article, we’re going to add WordPress Open Graph meta tags the easy way with zero coding involved.
دعنا نتعمق.
Step #1: Install All in One SEO
All in One SEO is the #1 WordPress SEO plugin in the world. It’s the perfect plugin to add WordPress Open Graph meta tags to your site without any coding.

All in One SEO (AIOSEO) is one of the most acclaimed SEO plugins in the WordPress community. The original version was completely revamped to add a ton of new features and addons. So, if you used AIOSEO in the past you need to check out the plugin once again.
لا يقتصر الأمر على أن AIOSEO قوي بما يكفي لتطبيق أحدث ممارسات تحسين محركات البحث، بل تحصل أيضًا على خيارات متقدمة لحل مشكلات تحسين محركات البحث المحددة فورًا. وهذا يشمل:
- وحدات تحسين محركات البحث المحلية للشركات الصغيرة ذات الجمهور المحلي
- تحسين محركات البحث لـ WooCommerce للمتاجر عبر الإنترنت
- محسن تحسين محركات البحث داخل محرر ووردبريس الخاص بك
- خرائط الموقع الذكية للفهرسة الفورية على محركات البحث
- إضافة Schema لجعل المحتوى الخاص بك يحتل مرتبة في المقتطفات الغنية
And a lot more! For a full list of All in One SEO’s features, check out our review of the plugin.
The first thing you need to do is install and activate the All in One SEO plugin. If you’re not sure how to do that, you should check out this guide on how to install WordPress plugins.
After you download and install the plugin, you get a Setup Wizard:
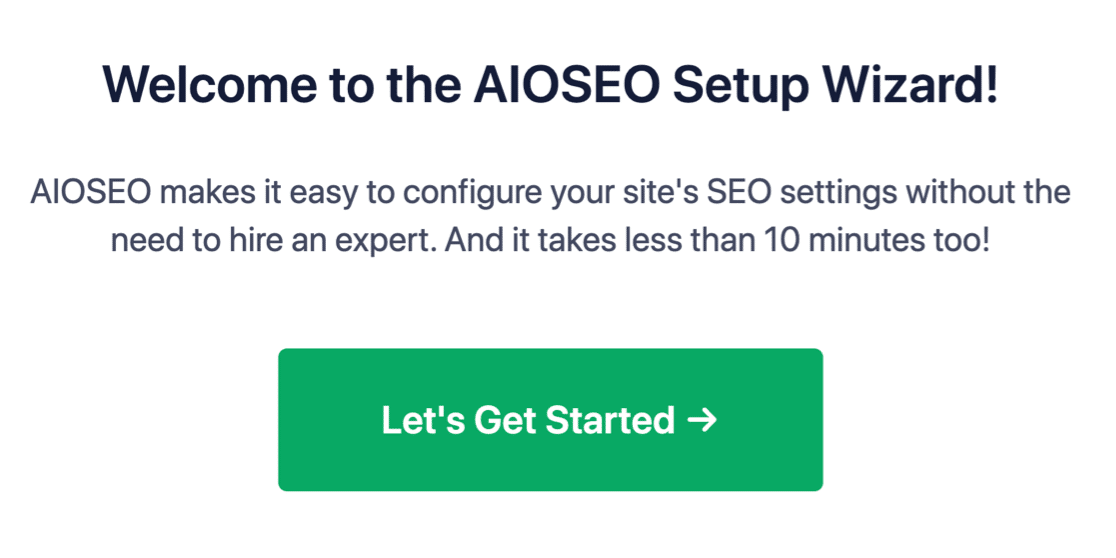
وستستغرق عملية الإعداد أقل من 10 دقائق.
ولكن ماذا لو كنت تنتقل من إضافة تحسين محركات بحث أخرى؟ كل إضافة تتعامل مع البيانات الوصفية بشكل مختلف. لذا، هل عليك القيام بكل شيء من البداية؟ هل كل جهودك السابقة ذهبت سدى؟
لا! إذا اكتشفت All in One SEO إضافة تحسين محركات بحث أخرى أثناء معالج الإعداد، فستعرض نسخ الإعدادات الأساسية لك:

في نهاية الإعداد، سيطلب منك معالج الإعداد إلغاء تنشيط إضافة تحسين محركات البحث القديمة الخاصة بك أيضًا. بهذه الطريقة، لا توجد تعارضات أو أخطاء في الإضافات:
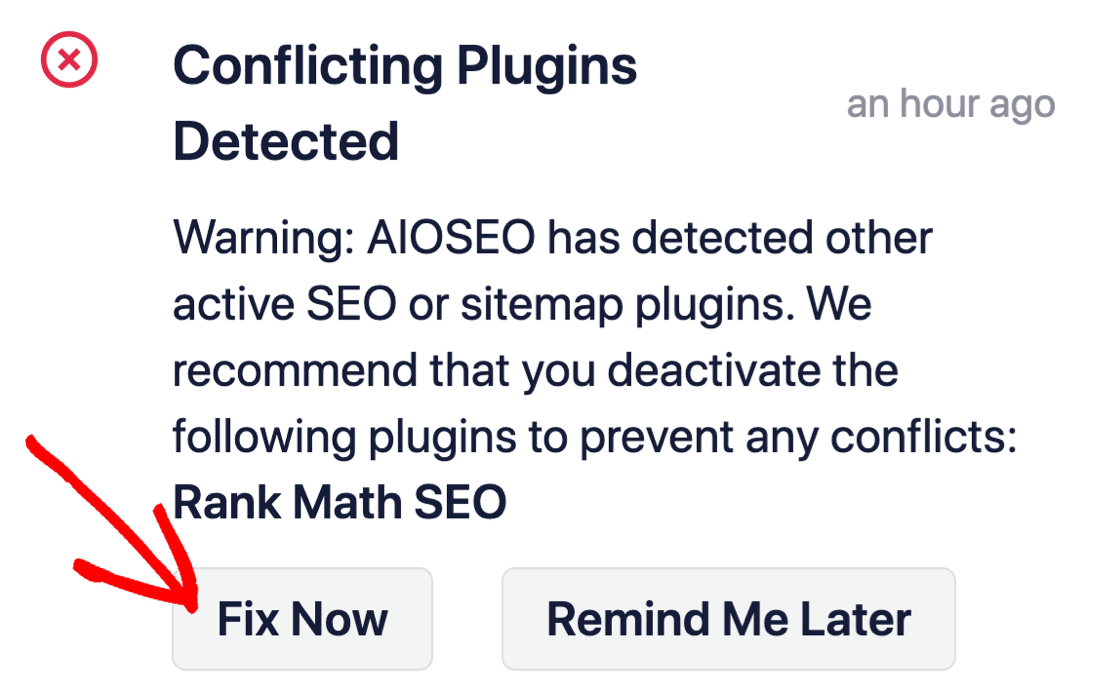
النقر على إصلاح الآن لن يحذف الإعدادات في إضافة تحسين محركات البحث القديمة الخاصة بك. إنه فقط يلغي تنشيط الإضافة لمنع التعارضات.
Step #2: Configure Social Media Settings
In your WordPress dashboard, go to All in One SEO » Social Networks » Social Profiles and add your social profiles to the site:
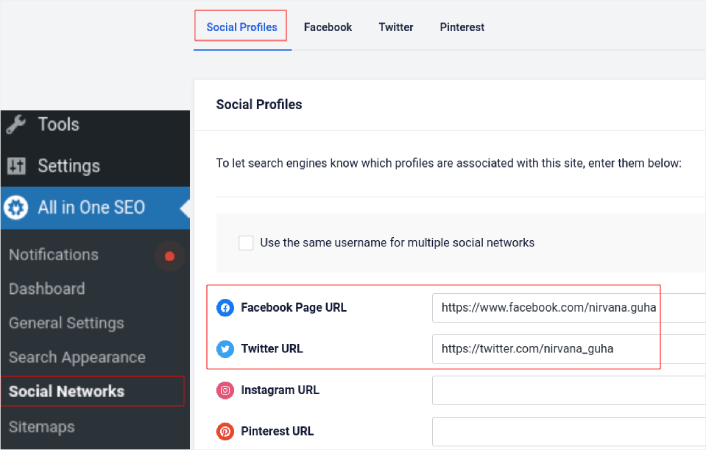
This step ensures that Search Engines such as Google and Bing know what social media profiles are associated with your site. At the same time, this helps you with your social media sharing settings as well. That’s up next.
Step #3: Edit Facebook General Settings
Go to All in One SEO » Social Networks and click on the Facebook tab. Here, you can configure your General Facebook Settings:
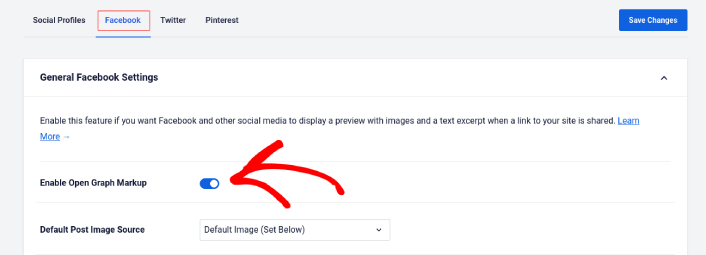
Toggle the Enable Open Graph Markup switch to activate it.
Here, you can set the Default Post Image Source and a Default Post Facebook Image:
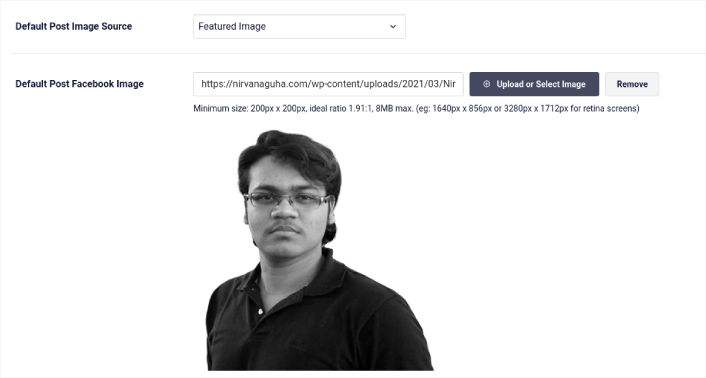
We recommend using the Featured Image option as the image source for your posts. But should check out the other options as well:

You can set the default Facebook image to be your logo or anything that represents your brand. Click on the Upload or Select Image button to change the default image. In our example, we’re using a personal brand. So, the default Facebook image is a photo of the author.
Once you’re done, hit the Save button.
And that’s it! You’re done. Once you save the changes, you can try sharing a post on your site to your Facebook page or profile.
What to do After You Add WordPress Open Graph Meta Tags
هذا كل شيء لهذا اليوم أيها الأصدقاء!
Next, you should start thinking of multiple ways to engage and convert the traffic you bring in from your social media accounts. A great way to do that is to use push notifications. Push notifications can be a powerful marketing tool to bring in traffic, engagement, and direct sales for your business.
If you’re not 100% convinced, you should check out these resources on how to effectively use push notifications:
- 7 استراتيجيات ذكية لزيادة تفاعل العملاء
- هل إشعارات الدفع فعالة؟ 7 إحصائيات + 3 نصائح خبراء
- كيفية إعداد إشعارات الدفع للسلات المتروكة (دليل سهل)
- كيفية إضافة إضافة إشعارات الويب لـ WordPress إلى موقعك
نوصي باستخدام PushEngage لإنشاء حملات إشعارات الدفع الخاصة بك. PushEngage هو البرنامج رقم 1 لإشعارات الدفع في العالم. لذا، إذا لم تكن قد قمت بذلك بالفعل، ابدأ مع PushEngage اليوم!


