
Looking for an easy way to add a WordPress blog subscription plugin?
You want to make it as simple as possible for your readers to subscribe to your blog. By having people subscribe to your blog, you can get repeat traffic, engagement, and sales. And the best way to do it is to use a widget to get more subscribers.
But how do you add a WordPress blog subscription plugin?
In this article, we’ll show you some of the easiest ways to add a WordPress blog subscription plugin. And there’s no coding involved.
دعنا نتعمق.
How to Add a Web Push WordPress Blog Subscription Plugin
Push notifications are among the best ways to get repeat traffic, engagement, and sales on your site. But the traditional way to get push notification subscribers is to use a simple push notification optin.
We recommend using a push notification subscription widget. The only problem is that there’s only one push notification service that allows you to create a push notification subscription widget in WordPress.
Step #1: Select a Push Notification Service
If you’re new to push notifications, you should get started with PushEngage.

PushEngage is the #1 push notifications plugin in the world.
تساعدك إشعارات الدفع على زيادة حركة مرور موقعك الإلكتروني ومشاركتك تلقائيًا. وإذا كنت تدير متجرًا عبر الإنترنت، فإن PushEngage يساعدك أيضًا على زيادة مبيعاتك من خلال مساعدتك في إنشاء إشعارات دفع آلية للتجارة الإلكترونية.
يمكنك البدء مجانًا، ولكن إذا كنت جادًا بشأن تنمية عملك، فيجب عليك شراء خطة مدفوعة. أيضًا، قبل شراء أي خدمة إشعارات دفع، يجب عليك الاطلاع على هذا الدليل حول تكاليف إشعارات الدفع.
إليك نظرة سريعة على ما تحصل عليه مع PushEngage:
- حملات آلية عالية التحويل
- خيارات استهداف وجدولة حملات متعددة
- تتبع الأهداف وتحليلات متقدمة
- اختبار A/B ذكي
- مدير نجاح مخصص
سترى أن PushEngage هو الخيار الأفضل بلا منازع إذا كنت ترغب في زيادة حركة المرور والمشاركة والمبيعات لعملك. وإذا كانت ميزانيتك محدودة، يمكنك دائمًا أن تكون مبدعًا بعض الشيء مع إشعارات الدفع الخاصة بك.
The best part is that you can use PushEngage to create subscription widget in WordPress.
Step #2: Create a WordPress Blog Subscription Widget
Head over to the PushEngage dashboard and go to Design » Widgets and enable the Subscription Management Widget:
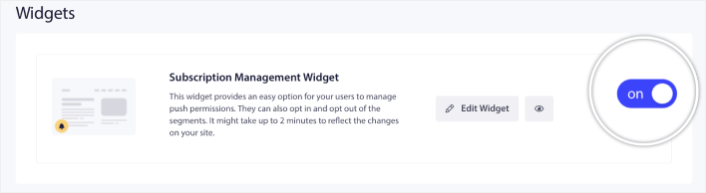
Click the Edit Widget button to customize your widget. Start by customising the look and feel of your widget to match your brand’s design language under Look and Design:
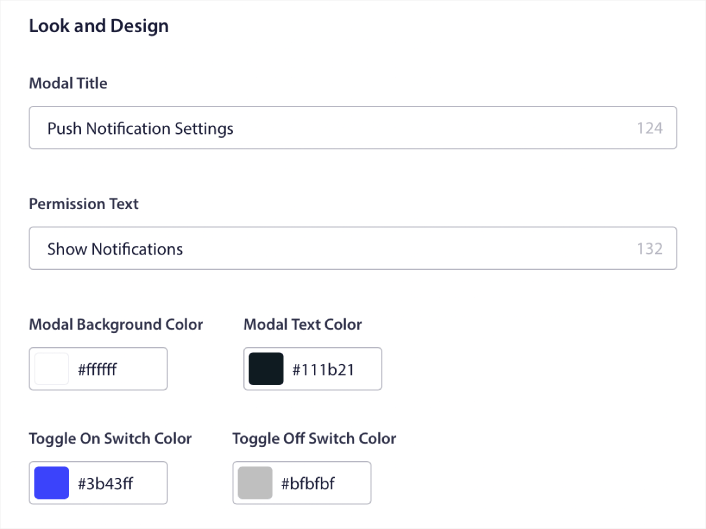
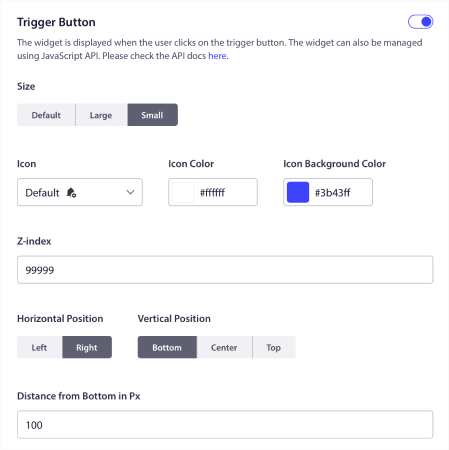
يمكنك إنشاء نافذة منبثقة مخصصة بالكامل تظل موجودة حتى عندما لا يشترك زوارك من خلال النافذة المنبثقة الافتراضية الخاصة بك. إذا كان حجم زر تشغيل النافذة المنبثقة يبدو غير مناسب لك، يمكنك تخصيص ذلك أيضًا ضمن زر التشغيل:
Step #3: Select Where to Show the WordPress Blog Subscription Plugin
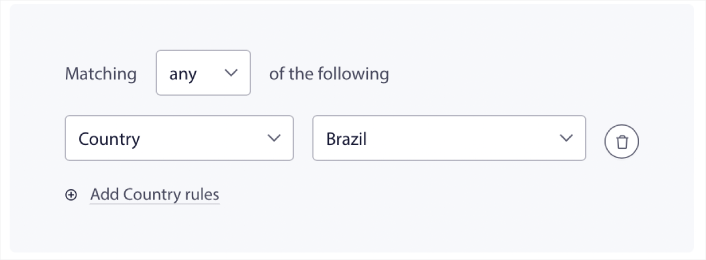
وأروع جزء هو أنه يمكنك أيضًا تحديد صفحات معينة لعرض الأداة ضمن قواعد عرض زر التشغيل:

بشكل افتراضي، سيتم عرض الزر عبر جميع الصفحات. ولكن يمكنك إنشاء قواعد استهداف مخصصة لعرض إصدارات معينة من الأداة عن طريق استهداف:
المواقع:
الأجهزة:
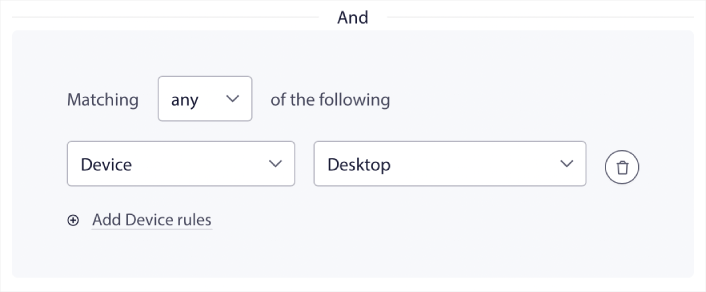
وعناوين URL على موقعك:

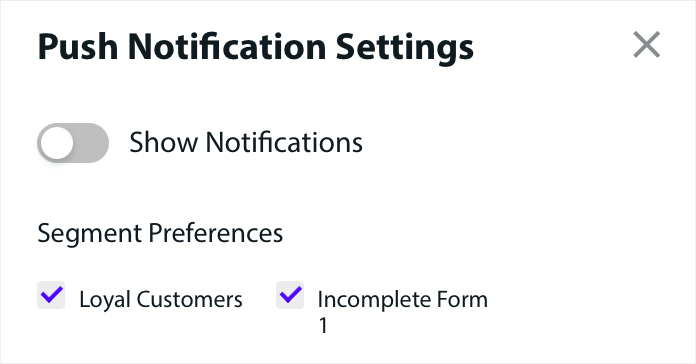
Step #4: Allow Subscribers to Set Push Notification Preferences
لأخذ الأمور إلى المستوى التالي، يمكنك أيضًا السماح للمشتركين لديك بتحديد أنواع الإشعارات التي يرغبون في تلقيها ضمن تفضيلات الشرائح:
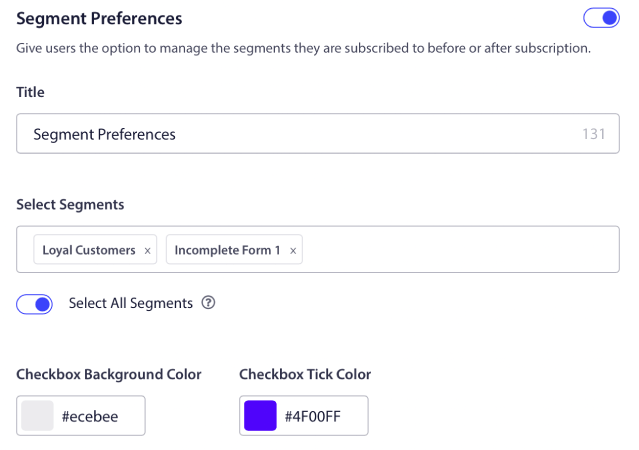
إذا قمت بتمكين تحديد الكل، فسيتم إضافة المشتركين تلقائيًا إلى جميع الشرائح المحددة افتراضيًا:
هذه ميزة قوية بشكل لا يصدق لمواقع الأخبار والمدونات.
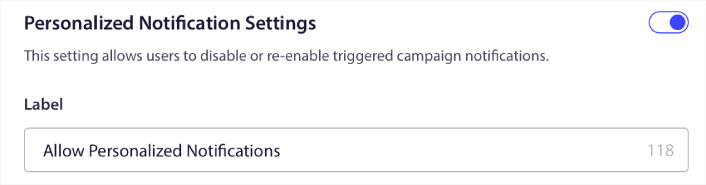
Step #5: Ask for Permission to Send Personalized Push Notifications
إذا كنت تدير إشعارات الدفع للتجارة الإلكترونية على موقعك، فسيكون الكثير منها إشعارات دفع مشغلة. وهذا يشمل:
- إشعارات الدفع للتخلي عن التصفح
- إشعارات الدفع للتخلي عن سلة التسوق
- تنبيهات انخفاض الأسعار
- تنبيهات عند نفاد المخزون
وحتى حملات إشعارات الدفع المخصصة المشغلة.
With our new Subscription Management Widget, you can now allow your subscribers to choose if they want to see personalised notifications:
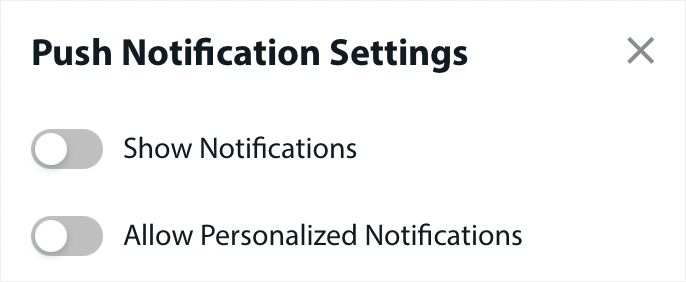
فقط قم بتمكين الخيار ضمن إعدادات الإشعارات المخصصة:
How to Add an Email WordPress Blog Subscription Plugin
Emails are a time-tested way to increase your traffic and sales. To date, email marketing remains one of the most affordable and effective methods of marketing. The cool part is that you can create an email subscription widget in WordPress using any of the best email services.
Let’s jump right into it.
Step #1: Selecting a Email Marketing Service
Hands down, the very best service for high-growth businesses is Constant Contact. It has all the features you need, comes with flexible pricing, and it’s super easy to use. You can also focus on the most important metrics. to grow your business right from the analytics dashboard.

Constant Contact is the best email marketing service to set up autoresponders for your business. It’s super easy to use and offers tons of automation features to improve your email campaigns.
إليك ما يجعل Constant Contact خيارًا رائعًا لإعداد الردود الآلية على البريد الإلكتروني:
- منشئ سحب وإفلات سهل لإنشاء رسائل البريد الإلكتروني
- مئات من قوالب البريد الإلكتروني المصممة مسبقًا
- Welcome messages, birthday offers and abandoned cart autoresponders
- أدوات بناء القوائم ونماذج الاشتراك لتنمية جمهورك
- اختبار A/B للبريد الإلكتروني المستهدف
- تكامل مع أنظمة إدارة علاقات العملاء (CRMs) والخدمات الخارجية
- دعم ممتاز عبر الدردشة الحية والهاتف
ناهيك عن أن Constant Contact لديها إضافة نماذج لووردبريس يمكنك استخدامها لجمع العملاء المحتملين ورعايتهم باستخدام الردود الآلية.
Step #2: Creating Your Email Subscription List
Once you’ve created your account, it’s time to set up your email list. Head over to your Constant Contact account and click on the Contacts button and then click the Create List button.

A popup window will now open. You’ll be asked to provide a name for your email list. It can be whatever you want, but let’s call it Newsletter for this example.
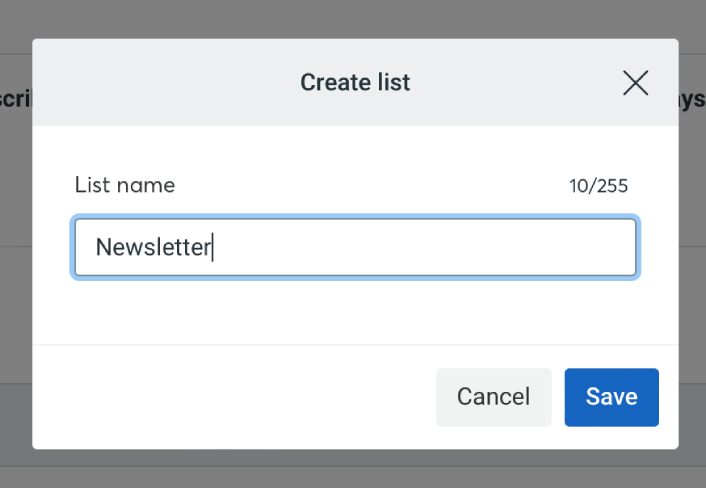
Don’t forget to click the ‘Save’ button when you’re done. Now you have a new list people can subscribe to.
Step #3: Creating a Contact Form in WordPress
We recommend using WPForms to create contact forms on your WordPress site.
WPForms is the #1 WordPress form builder plugin with over 3 million users. You get a drag and drop form builder, which means that you can create WordPress forms with incredible features in a matter of minutes.
You can also use WPForms Lite, which is the free version of WPForms. So, if you’re looking for a free form builder to get started with, you can use the Lite version. Later, when you need more powerful features for your forms, you can upgrade to the paid plans.
If you’re not sure how to create a form, check out this article on how to create a WordPress form for detailed instructions.
Once your signup form is ready, connect it Constant Contact. Simply click on the Marketing tab and select Constant Contact.
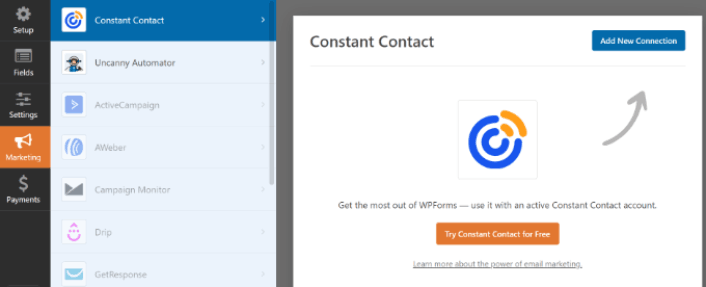
Click on the Add New Connection to create the connection. Then, click on the link that says Click here to register with Constant Contact.
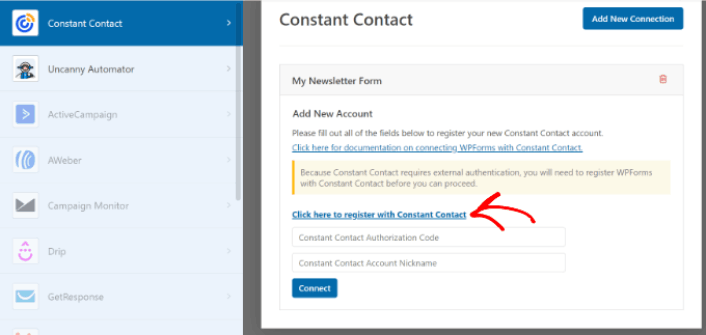
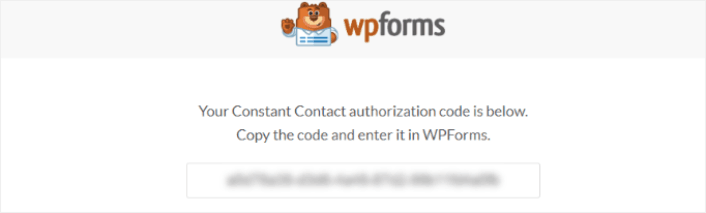
Once you click the link, a popup will prompt you to sign in to your Constant Contact account. Go ahead and sign in. You’ll be given a long authorization code to register your form. Make sure to copy the authorization code.
Paste the authorization code in WPForms settings and click on the Connect button to continue.
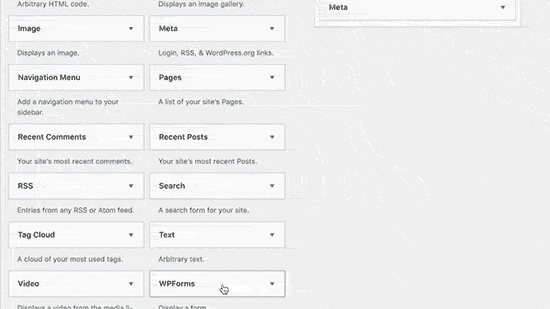
Step #4: Add Your Subscription Widget to Your WordPress Site
Go to the Appearance » Widgets page and drag and drop to add the WPForms widget block to your sidebar.
وأنت انتهيت!
What to do After You Add WordPress Blog Subscription Plugins
هذا كل شيء لهذا اليوم أيها الأصدقاء!
By now, you’ve created your first WordPress blog subscription plugin.
Now, all that’s left is generating traffic to your site so that your plugins can get to work. A simple way to do that is to start using push notifications.
Sending push notifications is a great way to generate repeat traffic for your site. If that’s something you’re interested in, you should check out these articles as well:
- تكلفة إشعارات الدفع: هل هي مجانية حقًا؟ (تحليل الأسعار)
- كيفية الحصول على المزيد من حركة المرور إلى مدونة ووردبريس الخاصة بك (9 طرق سهلة)
- كيفية زيادة معدل الاشتراك في إشعارات الدفع على الويب (7 طرق)
- كيفية إضافة إضافة إشعارات الويب لـ WordPress إلى موقعك
نوصي باستخدام PushEngage لإرسال إشعارات الدفع الخاصة بك. PushEngage هو البرنامج رقم 1 لإشعارات الدفع في العالم. لذا، إذا لم تكن قد قمت بذلك بالفعل، ابدأ مع PushEngage اليوم.


