Looking for a way to create a lightbox popup for your site?
A lightbox popup can be incredibly effective for capturing leads. They’re designed to convince and convert.
But having to code one from scratch is a real pain. For one thing, you’d have to know enough HTML, CSS, and Javascript to create the popup along with trigger rules for when to show it. Then, you’d have to create a manual integration with your email service provider. And finally, you’d have to deal with any privacy and security issues.
Good news: there’s a much simpler way.
In this article, we’re going to show you how to launch a lightbox popup with zero coding in less than 10 minutes.
دعنا نتعمق.
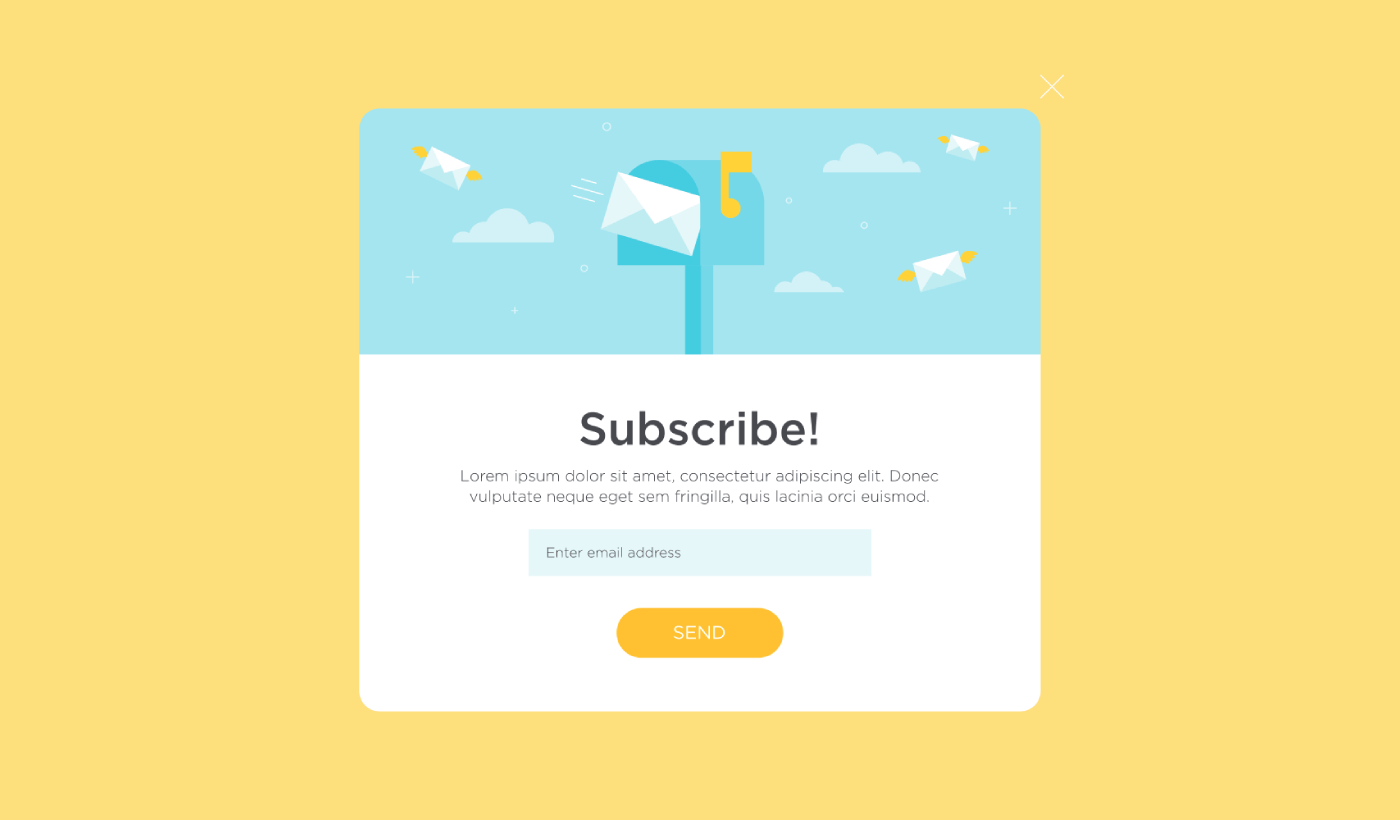
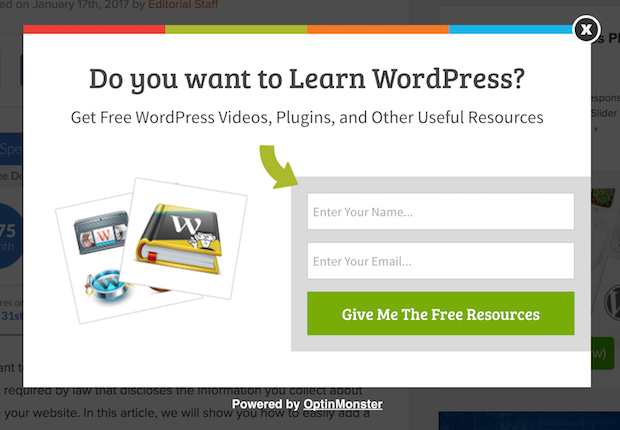
What is a Lightbox Popup?
A lightbox popup is an opt-in form that popups up with a cinematic effect. When a lightbox pops up, it blurs out the rest of the site in the background. This way, your entire focus is on the popup.
Originally, the concept of lightboxes come from outdoor advertising:
And then, some developers thought that this was a really cool effect and they created a Javascript library to recreate the same effect on web assets. Later on, the idea of using lightbox popups came into play.
Why Lightbox Popups Work
Lightbox popups capture more emails than a traditional email optin form.
But why do they work?
Let’s take a quick look at the main reasons why lightbox popups work so well.
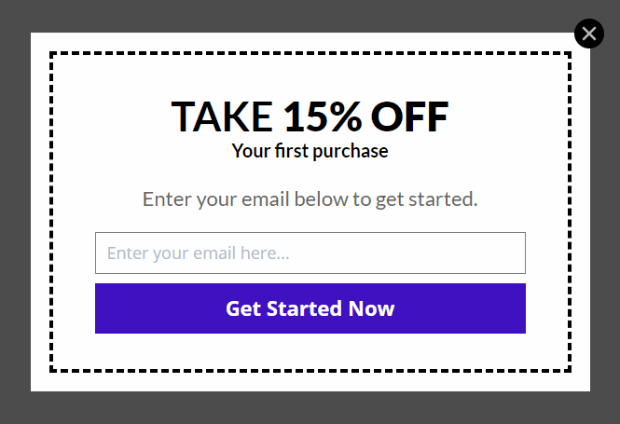
#1. Lightbox Popups Feature a Clear Call to Action
Most people believe that it’s a great thing to give their customers a lot of options.
But that’s not really true.
If you’re looking for direct conversions, you want a single, clear call to action that your audience can focus on. This way, you remove all distractions from the user’s mind. And lightbox popups do a great job of highlighting your core offer and getting people to focus on your call to action.
So, naturally, the conversion rates are pretty great.
#2. Lightbox Popups Are Impossible to Ignore
Lightbox popups take up the entire screen and blur out everything else. So, it’s practically impossible to ignore them.
This is especially true if they’re animated:
Of course, you have to ensure that your popups aren’t intrusive. And you can do that by customizing when to trigger different popups on your site. As long as your audience isn’t annoyed by the interruption, you can very easily convince and convert them.
#3. Lightbox Popups Have Personalized Triggers
You shouldn’t be showing the same offer to all your web visitors. If you’re running an eCommerce store, you’ll need very different offers for new and returning customers.
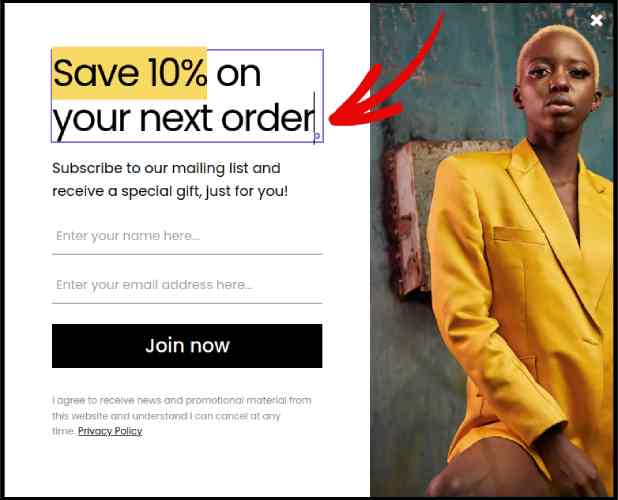
For a new customer, you can trigger a welcome campaign:
But for a returning customer, you may want to send them a different offer:
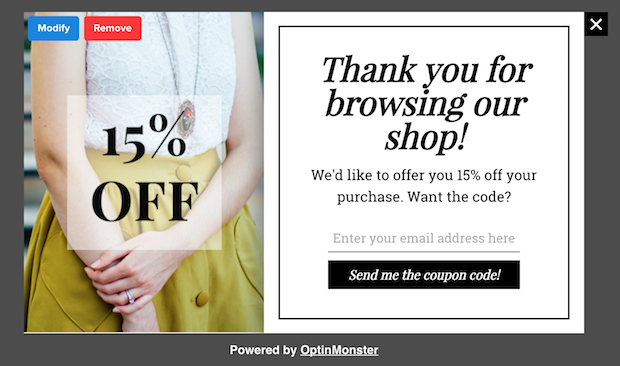
Notice how the discount amounts for both offers are exactly the same. But the way in which the offer is framed is drastically different. And this is super important because lightbox popups are built for theatrical effects. So, a more personalized approach will get you much better results for sure.
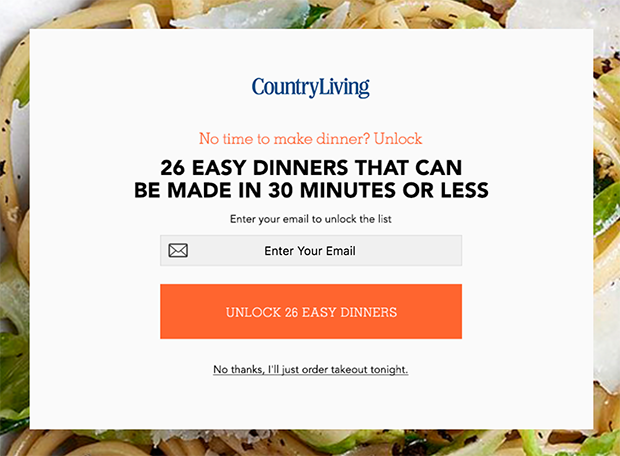
You could even personalize the offer based on your user’s content preferences. If they’re reading an article on dinner recipes, it makes more sense to show them an offer related to dinner recipes rather than showing them an offer for cars.
#4. Lightbox Popups Can Capture Abandoning Visitors
Lightboxes are just a method of displaying your popup. So, there’s really nothing stopping you from customizing the trigger to any extent you like. We recommend creating exit-intent lightbox popups.
Exit-intent popups get triggered when your visitors try to exit your website. As a result, you retain a huge number of visitors who would have otherwise abandoned your site. So, if you’re suffering from site abandonment, you should definitely create an exit-intent lightbox popup.
How to Create a Lightbox Popup
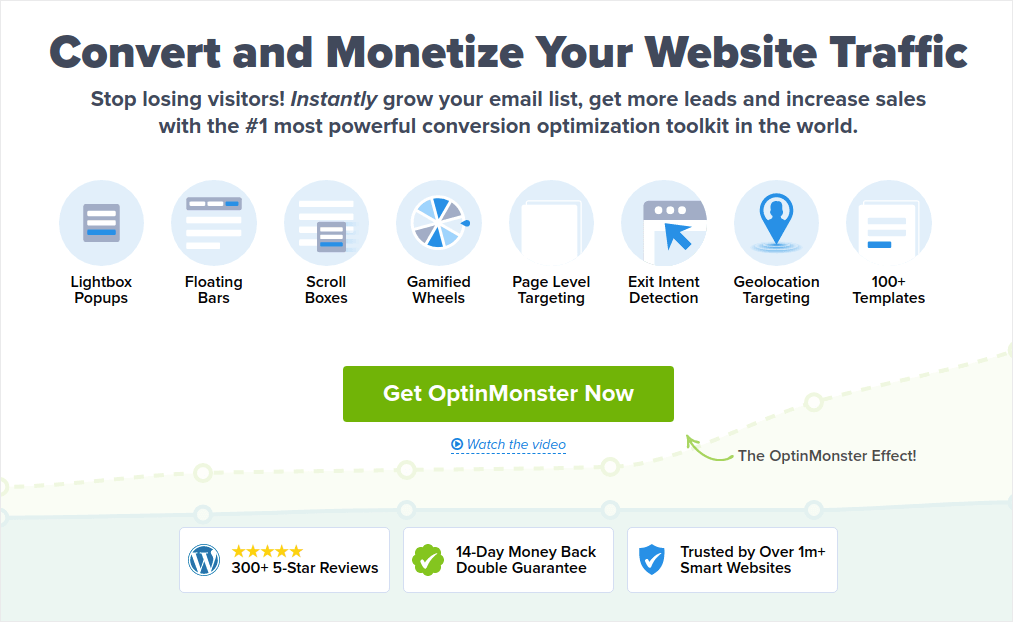
Now that you understand what a lightbox popup is and why you’d want to create one, how do you a lightbox popup? We recommend using OptinMonster to create your popups.
OptinMonster هي أداة التحويل رقم 1 في العالم وقد استخدمناها بأنفسنا. OptinMonster تجعل من السهل للغاية إنشاء نوافذ منبثقة قوية تحقق التحويل. ولن تحتاج أبدًا إلى استخدام أي ترميز على الإطلاق.
We even wrote a full review of OptinMonster.
You can check that out, or get started with your campaign right now. All you have to do is signup for OptinMonster and follow along with the rest of this article.
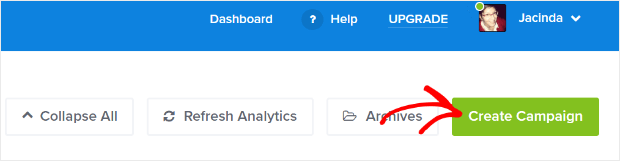
Step #1: Create a Campaign
توجه إلى لوحة تحكم OptinMonster الخاصة بك واضغط على زر إنشاء:
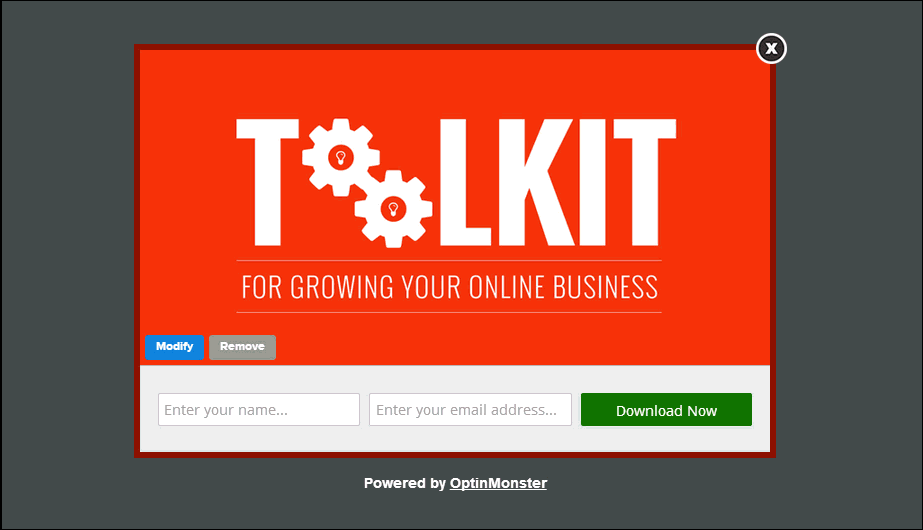
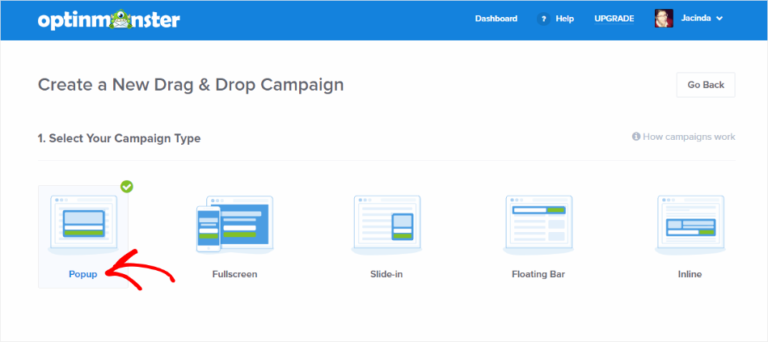
Select the Lightbox Popup campaign type:
Then, choose a campaign template. You can choose whatever template you like, but we’re going with the Simple campaign type for this tutorial.

Now, give your campaign a name. Remember, this campaign name is for you and you’ll likely create a whole bunch of these popups with different targeting options. So, give the campaign a meaningful name or you’ll end up really confused later on.
أيضًا، اعتمادًا على خطتك، يمكنك أيضًا استخدام OptinMonster على مواقع متعددة. لذا، حدد موقع الويب الذي تريد عرض حملتك عليه أيضًا.
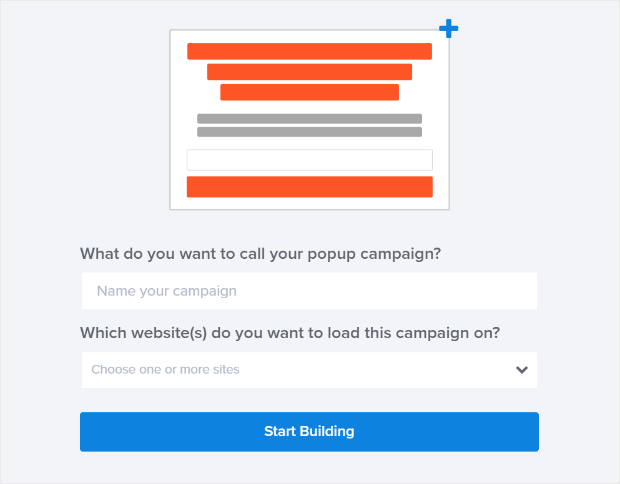
اضغط على ابدأ البناء عند الانتهاء.
Step #2: Edit Your Lightbox Popup
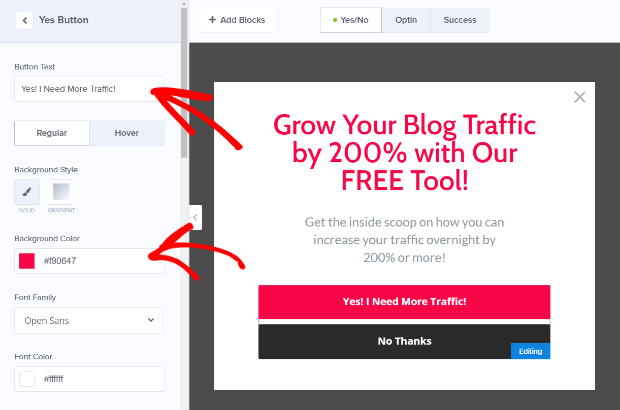
With OptinMonster, you’ll get a visual drag and drop popup builder. Once you’re done creating your campaign, you’ll be able to edit even the tiniest details about your popup. Start by editing your popup headline:
الجزء الأكثر روعة هنا هو أنك تنقر ببساطة على أي نص تريد تعديله وتغييره في مكانه. لا حاجة لملء نموذج أو تعديل أي كود HTML في النافذة المنبثقة.
And then, adjust your button text and appearance to create a clear call to action:
When you’re happy with your popup’s appearance, you can move on to more advanced settings.
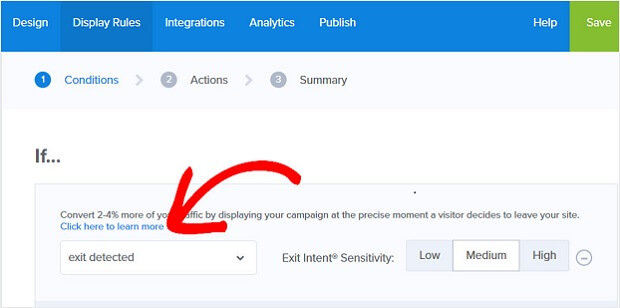
Step #3: Set Display Rules
Display rules are meant to define when your campaign shows up on your site and who sees it.
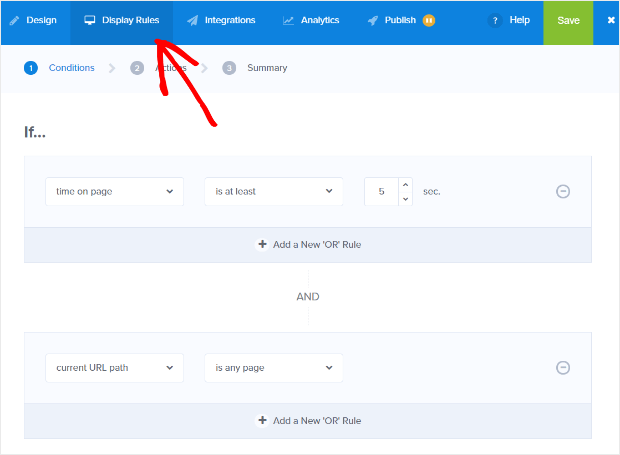
Our recommendation is that you change the trigger condition to exit-intent:
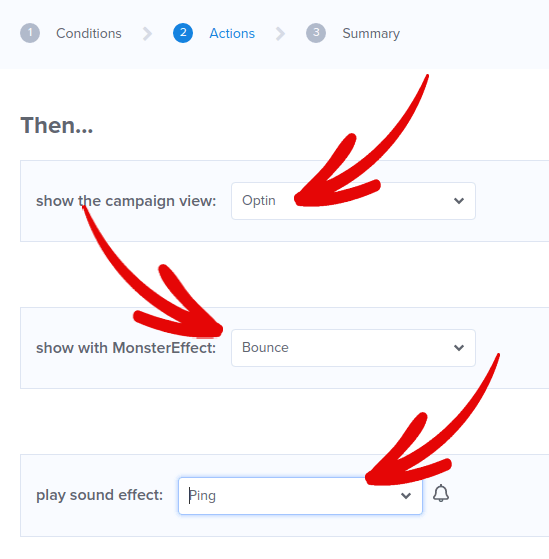
Click Next Step to choose the Action. Here, we recommend that you set Show the campaign view to Optin View, set the show with MonsterEffect to any entry animation you like, and play sound effect to any sound effect for your popup.
And then, click the Next Step button. You can see the full extent of your settings in the Summary tab.
Step #4: Setup Your Email Integration
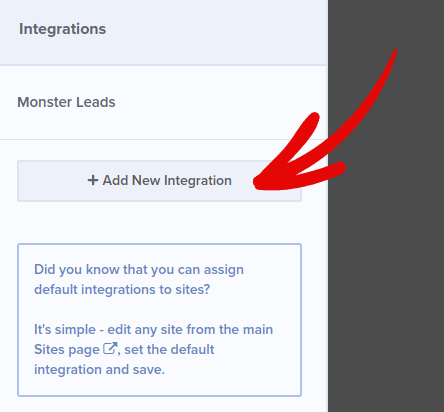
The next step is to set up your email integration. Click Add New Integration from the Integrations tab and select your email service provider:
We recommend using Drip for your email marketing if you don’t already have an email service provider.
Step #5: Publish Your Lightbox Popup
عند إنشاء حملة جديدة، تكون متوقفة مؤقتًا بشكل افتراضي.
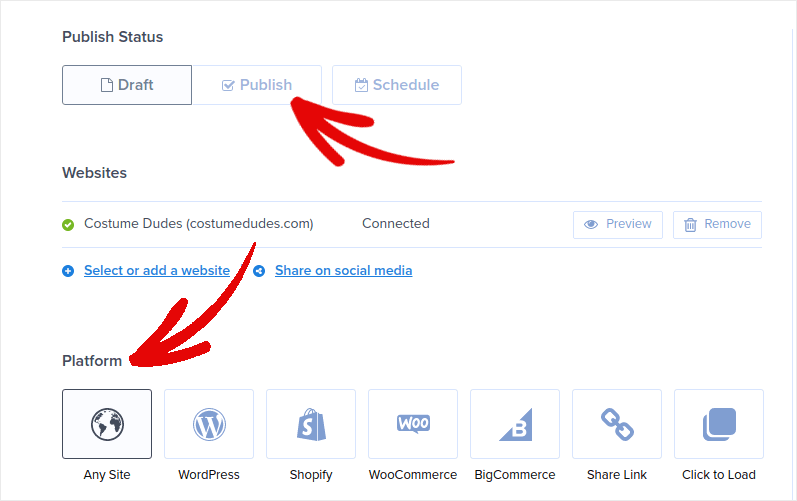
انتقل إلى علامة التبويب نشر من القائمة العلوية لرؤية خيارات النشر. ثم، قم بتعيين الحالة إلى نشر وحدد منصة موقع الويب:
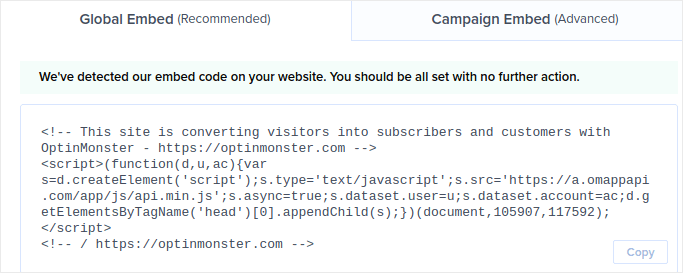
إذا كنت تدير موقع WordPress، فإن إضافة OptinMonster تقوم بالباقي تلقائيًا. الأمر نفسه ينطبق على Shopify و BigCommerce. لأي موقع آخر، انقر فوق أي موقع والصق رمز التضمين في رأس موقع الويب الخاص بك:
وأنت انتهيت!
BONUS: Collect Push Notification Subscribers from Your Popup
Push notifications help you grow your website traffic and engagement on autopilot. Web push notifications are an effective way to bring back users who may have abandoned their session or left the website. It helps in re-engaging users by notifying them of new content, offers, or events.
Push notifications also include clear and actionable messages and call to action buttons, encouraging users to take specific actions, such as reading an article, completing a purchase, or participating in an event.
يمكنك تخصيص إشعارات الدفع بناءً على تفضيلات المستخدمين وسلوكهم واهتماماتهم، للتأكد من أن الرسائل ذات صلة وقيمة لكل مستخدم. يجب على المستخدمين الموافقة على تلقي إشعارات الدفع عبر الويب. هذا يضمن عدم اعتبار الرسائل بريدًا عشوائيًا وأنها تُرسل بإذن المستخدمين.
The coolest part is that you can collect push notification subscribers from your email popup. So, just in case your site visitors don’t want to give up their email ID, you can still get them to subscribe using web push notifications.
And that’s what we’re going to work on.
الخطوة # 1: اختر خدمة إشعارات الدفع
We recommend using PushEngage to send web push notifications.

Here’s a quick glance at what you get with PushEngage:
- حملات آلية عالية التحويل
- Multiple targeting and campaign scheduling options
- تتبع الأهداف وتحليلات متقدمة
- Smart A/B testing
- مدير نجاح مخصص
يمكنك البدء مجانًا، ولكن إذا كنت جادًا بشأن تنمية عملك، فيجب عليك شراء خطة مدفوعة. أيضًا، قبل شراء أي خدمة إشعارات دفع، يجب عليك الاطلاع على هذا الدليل حول تكاليف إشعارات الدفع.
وإذا كنت تدير متجرًا عبر الإنترنت، فإن PushEngage يساعدك أيضًا على زيادة مبيعاتك من خلال مساعدتك في إنشاء إشعارات تجارة إلكترونية آلية.
سترى أن PushEngage هو الخيار الأفضل بلا منازع إذا كنت ترغب في زيادة حركة المرور والمشاركة والمبيعات لعملك. وإذا كانت ميزانيتك محدودة، يمكنك دائمًا أن تكون مبدعًا بعض الشيء مع إشعارات الدفع الخاصة بك.
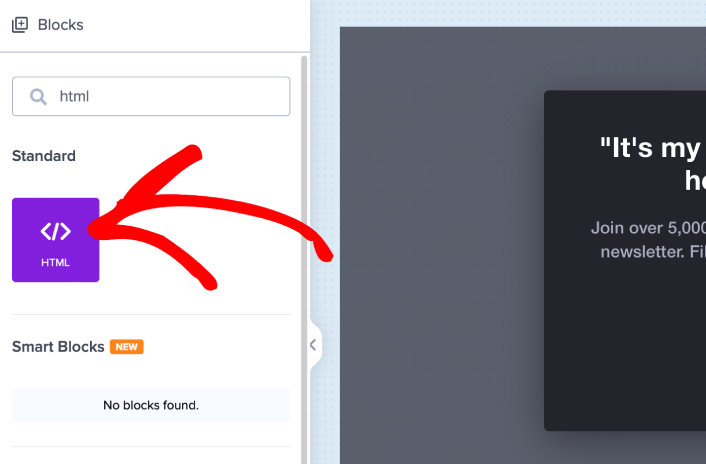
Step #2: Add an HTML Block to Your Popup
أولاً، أضف كتلة HTML إلى النافذة المنبثقة الخاصة بك من الشريط الجانبي في OptinMonster.
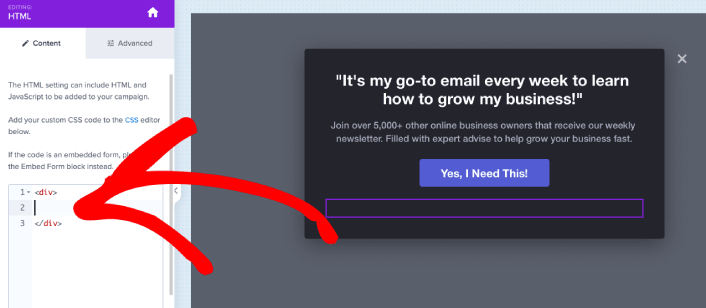
هذا هو المكان الذي سنضيف فيه الرمز لجمع مشتركين إشعارات الدفع. أولاً، الصق الرمز التالي لإنشاء زر قابل للنقر:
<button onclick="subscribeOnClickButton()" style="border: none; width: 100%; padding-left: 15%; padding-right:15%; text-align: center; display: inline-block; color: white;">Get Updates via Push Notifications Instead</button>الصق الكود حيث يُقال لك أنه يمكنك إضافة HTML:
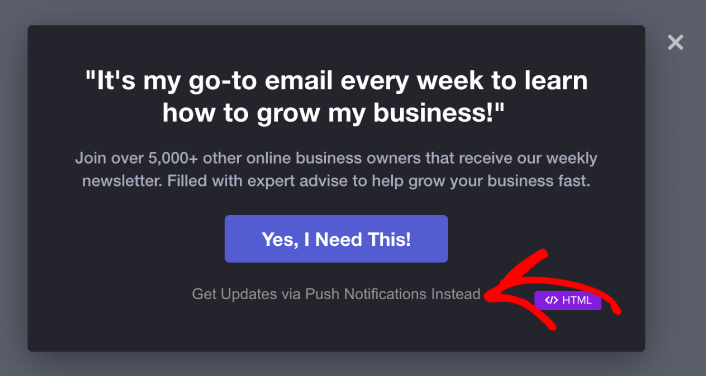
At this point, you should see a new button in your popup that says, “Get Updates via Push Notifications Instead” right below the email subscription button:
بالطبع، يمكنك اللعب بالأنماط لجعلها تبدو أكثر جاذبية. بعد ذلك، سنجعل الزر يجمع المشتركين في إشعارات الدفع عند النقر عليه.
Step #3: Get Subscription Code from PushEngage
توجه إلى الصفحة الرئيسية لـ PushEngage وانقر على زر البدء:

بعد ذلك، ستحتاج إلى تحديد الخطة المجانية لتجربة PushEngage أو اختيار خطة مدفوعة إذا كنت جادًا بشأن تنمية عملك. تأتي الخطط المدفوعة مع المزيد من خيارات الحملات والقدرة على بناء قوائم مشتركين أكبر.
في لوحة تحكم PushEngage الخاصة بك، انتقل إلى إعدادات الموقع » تفاصيل الموقع وانقر على زر انقر هنا لتعليمات الإعداد. ضمن أي موقع، ستحصل على كود التثبيت الخاص بك:

تحذير: تحتاج إلى نسخ الكود الذي تحصل عليه من لوحة التحكم الخاصة بك. الكود فريد لكل مستخدم PushEngage. لن تتمكن من نسخ الكود الموجود في الصورة وجمع المشتركين في إشعارات الدفع.
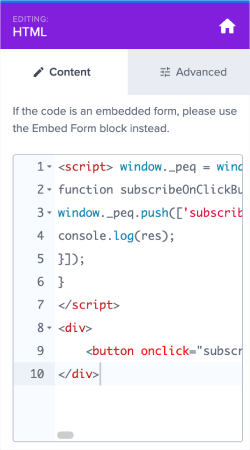
بمجرد حصولك على الرمز في لوحة تحكم PushEngage الخاصة بك، خذ النص البرمجي الثاني وأضف إليه بعض التعليمات البرمجية الإضافية. يجب أن يبدو الرمز النهائي الخاص بك شيئًا كهذا:
<script src="https://clientcdn.pushengage.com/core/02a6e92667ae2279fcba8932356c1d93.js" async></script>
<script> window._peq = window._peq || [];
function subscribeOnClickButton(){
window._peq.push(['subscribe',{}.pe,function(res){
console.log(res);
}]);
}
</script>
Step #4: Add Your Subscription Code to the HTML Block in Your Popup
Add this code to the HTML block in OptinMonster and you’re done!
When you’re done, just hit the Save and Publish buttons.
If you check out your website, you should now see the lightbox popup collecting both email and push notification subscribers:
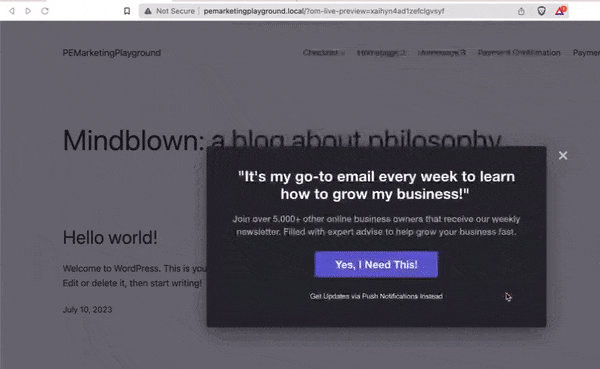
And just like that, you’re collecting push subscribers from your popup. Push notifications come with their own popup modals. But they’re a bit difficult to customize. So, you can create beautiful popups using OptinMonster and then use them as your push notification popups.
What to do After You Create a Lightbox Popup
هذا كل شيء لهذا اليوم أيها الأصدقاء!
Let us know if this article helped. Creating popups on your site can help you convert your traffic into email subscribers and genuine business leads. And we highly recommend that you start creating lightbox popups right away.
وإذا كنت تبحث عن طريقة ميسورة التكلفة لزيادة زياراتك، نوصي باستخدام إشعارات الدفع. يمكن أن تساعدك إشعارات الدفع في جلب المزيد من الزيارات المتكررة وتفاعل الموقع. يمكنك أيضًا إنشاء حملات إشعارات دفع آلية تولد مبيعات.
غير مقتنع؟ تحقق من هذه الموارد:
- 7 استراتيجيات ذكية لزيادة تفاعل العملاء
- هل إشعارات الدفع فعالة؟ 7 إحصائيات + 3 نصائح خبراء
- كيفية إعداد إشعارات الدفع للسلات المتروكة (دليل سهل)
We recommend using PushEngage to create your push notification campaigns. PushEngage is the #1 push notification software in the world. So, if you haven’t already, get started with PushEngage today!


