
Looking for a simple guide on how to install a WordPress Square plugin and accept online payments on your site?
Square allows you to accept credit card payments on any site. Whether you’re running a service site, an eCommerce store, or a membership platform, you need to allow credit card payments on your WordPress site. And Square is one of the most popular payment gateways to add multiple payment options on your site.
Integrating a payment gateway to your site can be a real hassle if you have to code it from scratch. So, what do you do when you don’t know how to code? Are Square plugins even worth looking into?
Short answer: Yes. Using a Square plugin can help you start accepting payments in a matter of minutes without a single line of code.
In this article, we’re going to go show you how to install a WordPress Square plugin and start accepting payment with writing a single line of code. And we’ll do it in less than 10 minutes.
Звучит неплохо? Давайте погрузимся.
Why Use a WordPress Square Plugin on Your Website?
Square allows credit card payments on your WordPress site. The best part is that the payment gateway allows multiple payment formats including recurring payments.
Credit cards are among the most popular modes of payment. If you’re planning to monetize your site without accepting credit card payments, you’re leaving money on the table.
Accepting credit card payments will improve your conversion rate. If you’re running an eCommerce site, this can reduce your cart abandonment rates as well.
Before you begin, you will need to enable HTTPS/SSL on your website so that you can securely accept credit card payments. If you’re not sure how to do that, you can follow this simple guide on how to get a free SSL certificate for your WordPress site.
How to Add a WordPress Square Plugin to Online Stores
Now that we understand why you should be using a WordPress Square plugin and the benefits of using Square, it’s time to add Square payments to your site. There are multiple WordPress plugins to integrate Stripe into your site.
We recommend using WPForms to accept Square payments on WordPress.

WPForms is the most powerful drag-and-drop WordPress form builder. It’s super easy to build a fully custom form for your WordPress site in a few minutes using the plugin. WPForms can help you create any type of contact form, payment form, survey form, registration form, and newsletter optin form you can think of.
They have over 300 templates in the Pro version that are proven to work. You can instantly import these templates and launch the form in minutes. WPForms is completely beginner-friendly. Anyone can use it to create powerful forms.
The plugin comes only with core essentials. So, if you need more functionality in your forms, you can always install an addon. This keeps the plugin lightweight and simple to use.
With WPForms, you get:
- A Beginner-Friendly Form Builder
- Order Forms
- Многошаговые формы
- Email Marketing Integrations
- Conditional Field Logic
- Кампании по брошенным формам
- Целевые страницы форм
- Popup Contact Forms
And more. The best part is that you can directly create WordPress payment forms that accept payments using Square. All you need is a Square account and the WPForms plugin to get started. Check out our WPForms review for more details or simply follow along.
Step #1: Install and Activate the WPForms Plugin
The first thing you need to do is install and activate the WPForms plugin. If you’ve never installed a WordPress plugin before, check out this guide on how to install a WordPress plugin.
Начните с перехода на WPForms и выбора плана:

После установки плагина перейдите в панель управления WPForms и скачайте плагин:
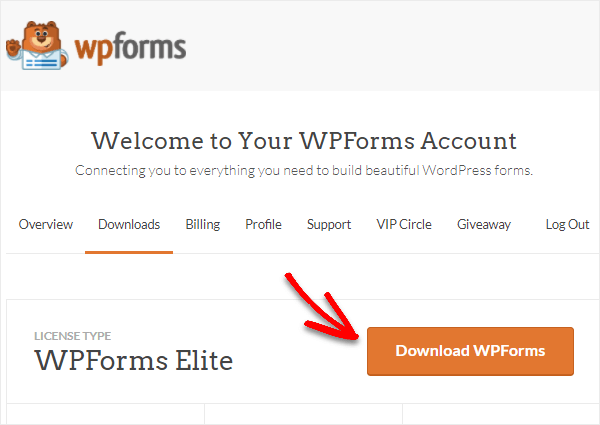
Затем загрузите zip-файл на свой сайт WordPress, и вы готовы к работе!
Step #2: Install and Activate the WPForms Square Addon
Head over to your WordPress dashboard and click WPForms » Addons:
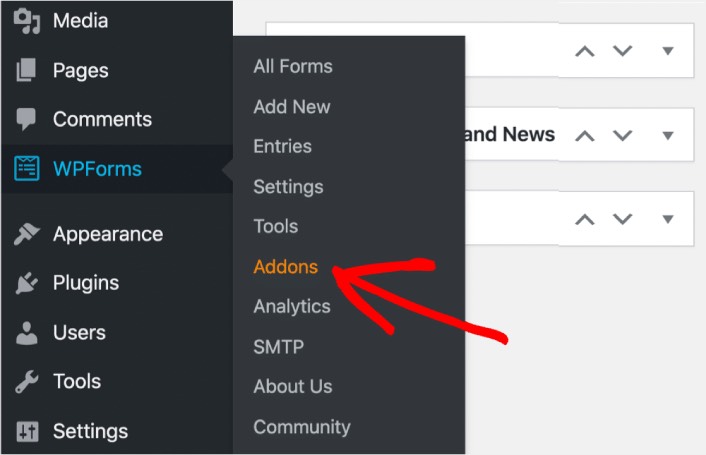
Scroll down to the Square addon and click on Install:

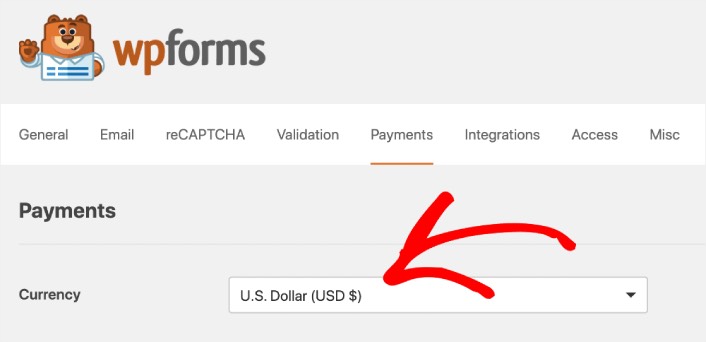
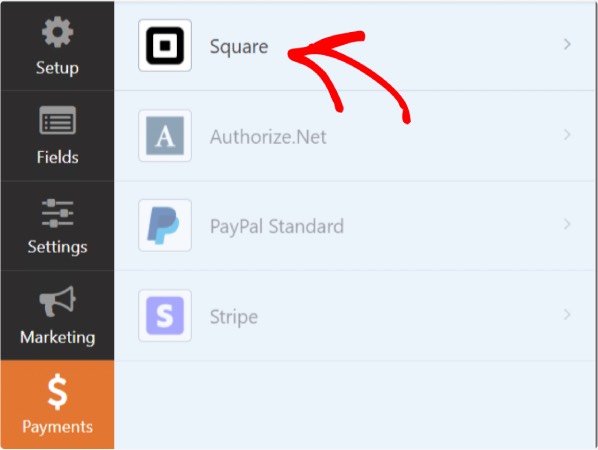
Once you’re done installing the addon, click on Activate. Next, we’re going to configure the payment settings. Go to your dashboard, click WPForms » Settings, then click the Payments tab. Under Currency, select your currency:
Next, we’re going to connect Square to WPForms.
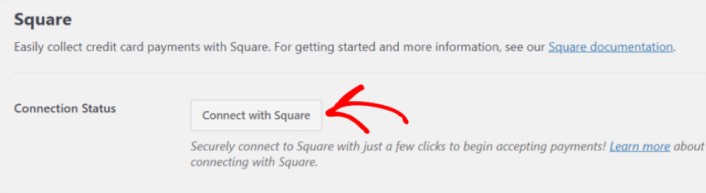
Step #3: Connect Your Square Account to Your WordPress Site
In the payment settings page, scroll down to the Square section and go to the Connection Status tab. Click the Connect with Square button:
Sign in to your Square account and allow WPForms access to the specific information that it requests:
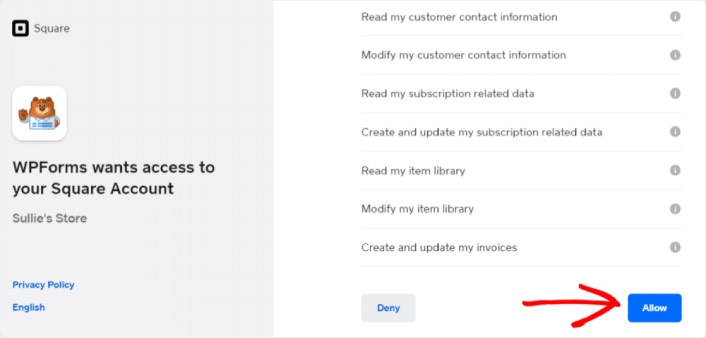
When it’s done, you will automatically get redirected back to the payment settings page and you should see the Connection Status as Active.

Step #4: Create a Square Payment Form
Now that WPForms is installed and activated, it’s time to create an order form. Head over to WPForms » Add New:

This will open the WPForms drag and drop form builder. To create a new form, give it a name and select your form template. To create an order form, we’re going to go ahead and select the Billing/Order Form template:

Next, you’ll want to modify what items are available to order. Scroll down to the Available Items section on the right that the template includes and click on it.
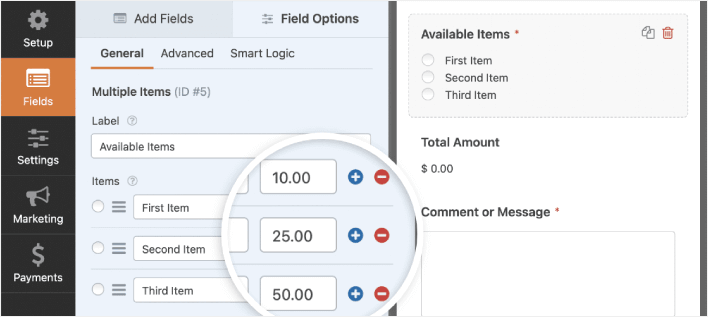
Это откроет параметры поля в левой панели. Здесь вы можете переименовать поле, добавить или удалить позиции заказа и изменить цены. Когда вы закончите настройку формы заказа WordPress, нажмите Сохранить.
Вы также можете сделать формы привлекательными, следуя шагам в нашей статье о том, как создать многошаговую форму в WordPress. Это отличный способ улучшить пользовательский опыт и снизить процент отказов от корзины. Но в этом руководстве мы останемся на одной странице.
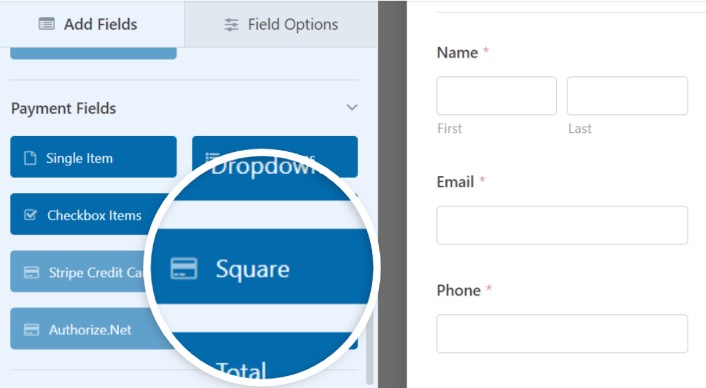
WPForms integrates with PayPal, Authorize.Net, Square, and Stripe for accepting credit card payments. We’ve already installed the Square addon. So, simply add a Square payment field:
As soon as you add the Square filed, you will see a popup message to enable the Square Payments.
Click on the OK button to close the pop-up.
Step #5: Enable Square Payments
In your WPForms dashboard, click on Payments » Square:
Simply toggle on the Enable Square Payment:

Fill in your payment details:
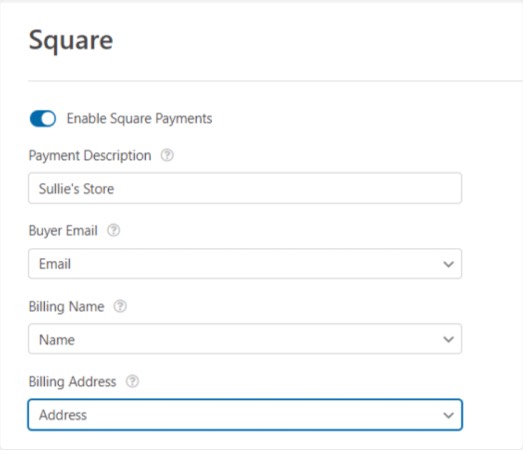
And you’re done! Don’t forget to hit Save.
Step #6: Configure Form Settings
Next, you’ll want to set up notifications and confirmations. Head over to Settings » Confirmations to configure confirmation settings:

Затем в том же меню перейдите в раздел Уведомления, чтобы настроить сообщения уведомлений:

По умолчанию уведомления отправляются на электронную почту администратора WordPress. Поэтому, если вы хотите, чтобы письма отправлялись куда-нибудь еще, например, на адрес электронной почты вашего руководителя отдела продаж, вы можете сделать это прямо здесь.
What to do After Installing a WordPress Square Plugin
На этом всё, друзья!
К настоящему времени вы создали форму заказа WordPress. Далее вам следует настроить отслеживание отказов от формы , чтобы снизить процент отказов от формы.
После этого все, что осталось сделать, — это привлечь трафик на ваш сайт, чтобы ваша форма начала работать и приносить конверсии. Простой способ сделать это — начать использовать push-уведомления. Отправка push-уведомлений — отличный способ генерировать повторный трафик на ваш сайт. Если вас это интересует, вам также стоит ознакомиться с этими статьями:
- Стоимость push-уведомлений: действительно ли это бесплатно? (Анализ цен)
- Как привлечь больше трафика на ваш блог WordPress (9 простых способов)
- Как повысить коэффициент согласия на получение push-уведомлений (7 способов)
- Как добавить плагин веб-уведомлений WordPress на ваш сайт
Мы рекомендуем использовать PushEngage для отправки ваших push-уведомлений. PushEngage — это программное обеспечение для push-уведомлений №1 в мире. Так что, если вы еще этого не сделали, начните работу с PushEngage сегодня.


