
Looking for a way to configure WordPress SMTP and send emails from your site?
By default, your WordPress site isn’t configured to send emails properly. Mostly, your site will use PHP mail or the wp_mail() PHP function to send emails. But your server most likely isn’t configured to use wp_mail() properly.
As a result, you’re going to get stuck with severe deliverability issues for any email that your site sends. This includes:
- フォーム送信アラート
- 自動化されたeコマースメール
- オプトインによって生成された自動化メール
And more. Missing form submissions that are sent to your inbox can lead to losing customers instantly. Automated emails are sent to your customers and if they don’t receive them, that is a very bad experience for them. Again, you’ll likely lose a bunch of customers.
The right way to resolve this issue is to configure an SMTP server to send all emails from your WordPress site.
In this article, we’re going to show you step by step how to set up WordPress SMTP and send emails in less than 30 minutes!
早速飛び込みましょう。
How to Configure WordPress SMTP to Send Emails
サイトでWordPressのメール送信機能を構成する最も簡単な方法は、WordPress SMTPプラグインを使用することです。SMTPプラグインは、サイトをSMTPサービスプロバイダーに接続します。その後、サービスプロバイダーがメールの送信を担当します。
サイトでWordPress SMTPを構成するには、WP Mail SMTPプラグインを使用することをお勧めします。

The WP Mail SMTP plugin will help you fix your email delivery issues in a few simple steps. And it’s not technical at all. It’s super simple and anyone can do it.
So, go ahead and install and activate the plugin. If you’re not sure how to do that, this tutorial will show you how to install a WordPress plugin.
Step #1: Configuring the WP Mail SMTP Plugin
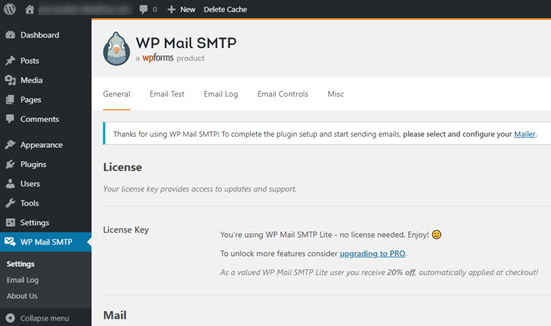
Once you’re done installing the plugin, go to your WordPress dashboard and click on WP Mail SMTP to configure the plugin:
After you enter your license key, enter your email and name in the Mail section:
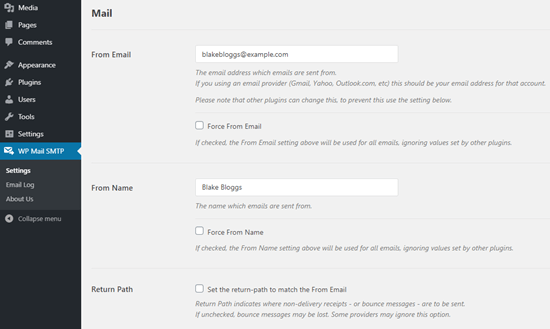
重要: 送信元メールアドレスは、SMTPサービスで使用するメールアドレスと同じである必要があります。異なるメールアドレスを使用すると、メールサービスプロバイダーのダッシュボードからエラーが継続的に発生します。
WPFormsなどの他のWordPressプラグインで別のメールアドレスを使用している場合でも、心配しないでください。WP Mail SMTPは、SMTPサービスの設定に使用するメールアドレスを自動的に使用するように他のプラグインを強制します。
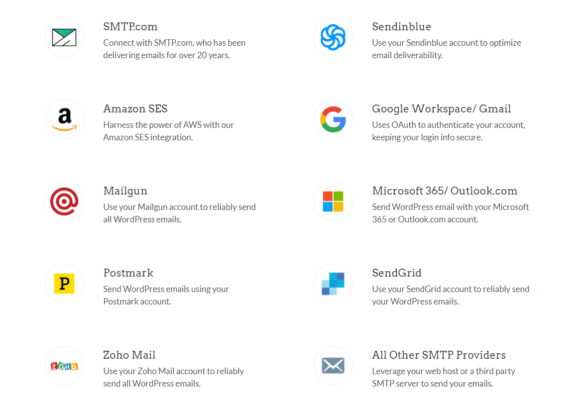
Step #2: Selecting an Email Service Provider
Next, you’ll need to choose an SMTP mailing service for your site.
We recommend using SMTP.com. But you can find a lot of different services listed in WP Mail SMTP’s integrations.
Head over to your WordPress dashboard and go to WP Mail SMTP » Settings.
Then, under Mailer, select a service provider. You can choose between a whole host of options:
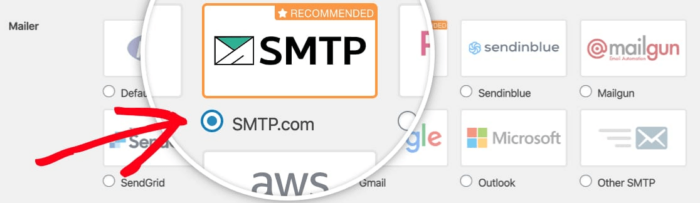
To finish setting up the WP Mail SMTP plugin, you’ll have to create an account with SMTP.com next. It’s a super popular SMTP service that allows you to send bulk emails with high delivery rates.
Step #3: Creating an SMTP Account
新しいアカウントを作成してください:

SMTP.comは、この時点で複数のメールを送信します。それらのメールの1つに、アクティベーションリンクをクリックするように求められます。アクティベーションリンクをクリックしてアカウントをアクティベートしてください。次に、WP Mail SMTPプラグインに移動して、SMTPアカウントをプラグインに接続します。
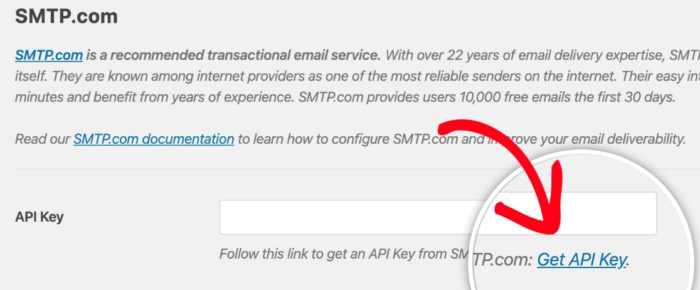
ポップアップでAPIキーを求められます。これはSMTP.comダッシュボードから取得できます。APIキーを取得リンクをクリックしてください(直接アクセスするにはこのリンクをクリックしてください):
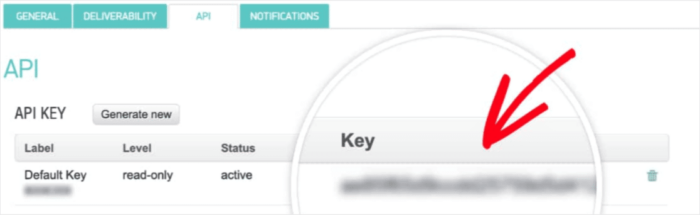
You should see a table under the API tab. SMTP should have automatically generated an API Key for you.
Copy the API Key in the Key column (do NOT use the serial number in the Default Key column):
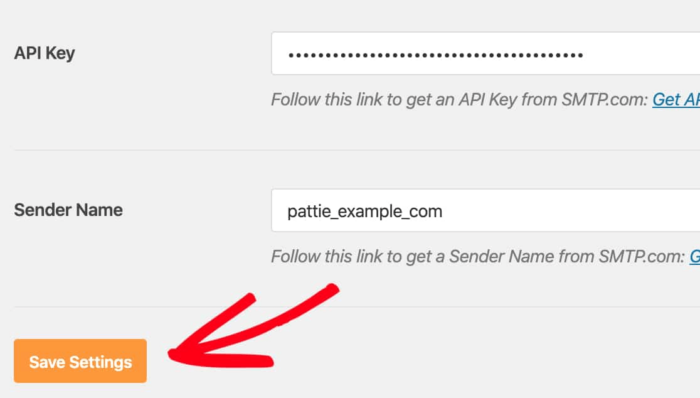
次に、WP Mail SMTPのAPIキーフィールドにAPIキーを貼り付けます:

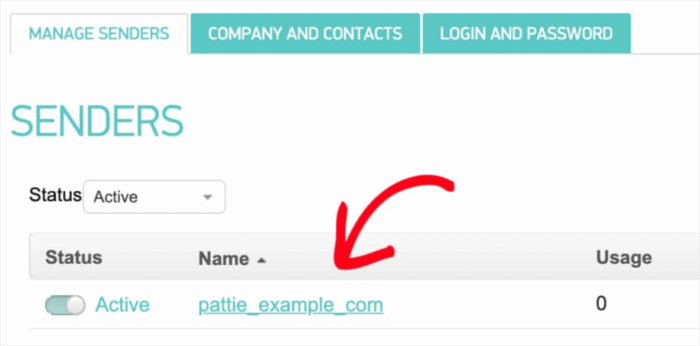
最後に、送信者名フィールドの下にある送信者名を取得リンクをクリックします:

開いたページで、送信者の管理タブの下に別のテーブルが表示されます。名前列の名前をコピーします:
And paste it into the Sender Name field in WP Mail SMTP. Then hit Save Settings:
Step #4: Adding the SPF Record to Your DNS
次に、DNSレコードにSPFレコードを追加する必要があります。送信者ポリシーフレームワーク(SPF)は、SMTP.comがメールを認証する方法です。このステップを実装することで、サイトから送信されたメールが自動的に迷惑メールフォルダに振り分けられるのを防ぐことができます。
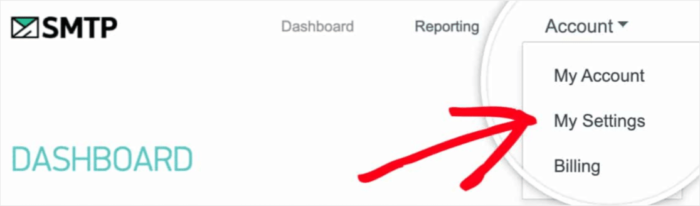
SMTP.comアカウントのナビゲーションメニューに移動し、アカウント »マイ設定をクリックします:
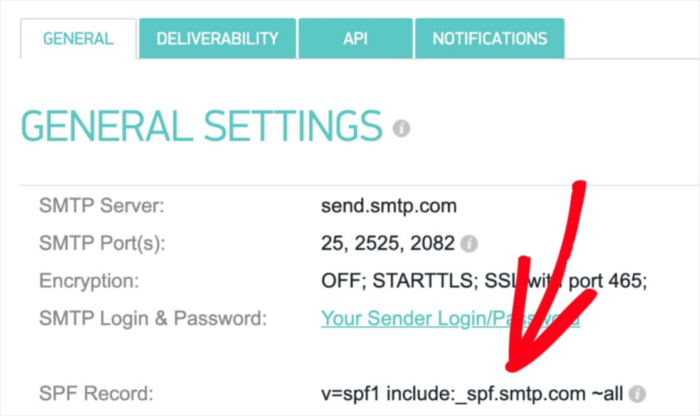
一般タブで、一般設定に移動し、SPFレコードフィールドを確認します:
このSPFレコードをサイトのDNS設定に追加する必要があります。DNS設定に新しいレコードを追加するプロセスは、ホスティングプロバイダーごとに異なります。方法がわからない場合は、SPFレコードの追加方法に関するこの記事を参照してください。
Pro Tip: In the DNS settings, you’ll see a field called TTL (Time To Live). The default value is usually 1 hour. If you can change this record, we recommend changing it to 1 day or 86400 seconds. This will allow the server to cache this information for a full day.
ステップ#5:SPFレコードの検証
SPFレコードを追加した場合、変更が更新されたことを検証する必要があります。変更が反映されるまで最大48時間かかる場合があります。そのため、次のステップに進む前に結果を検証することをお勧めします。
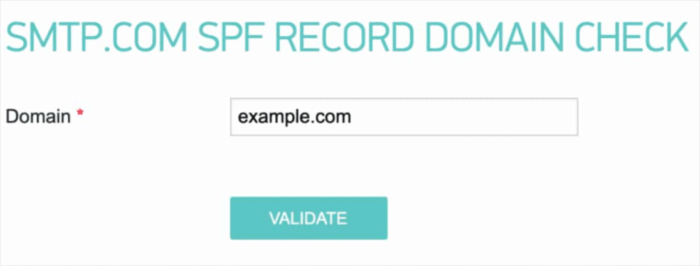
このリンクをクリックし、SMTP.com SPFレコードドメインチェックというセクションに移動します。ドメインフィールドにウェブサイトのURLを入力し、検証をクリックします。
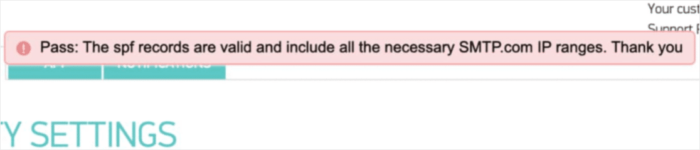
すべてのステップに従った場合、この合格メッセージが表示されます。
これで完了です!
ステップ#6:テストメールの送信
WP Mail SMTPの設定は完了です。しかし、すべてが正常に機能していることを常に確認および検証する必要があります。WordPressダッシュボードのWP Mail SMTPに戻り、メールテストタブをクリックします。
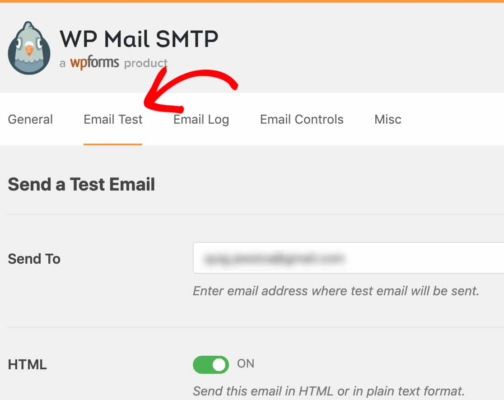
アクセスできるメールアドレスを入力し、テストメールを送信します。すべてうまくいった場合、この成功メッセージが表示されるはずです。
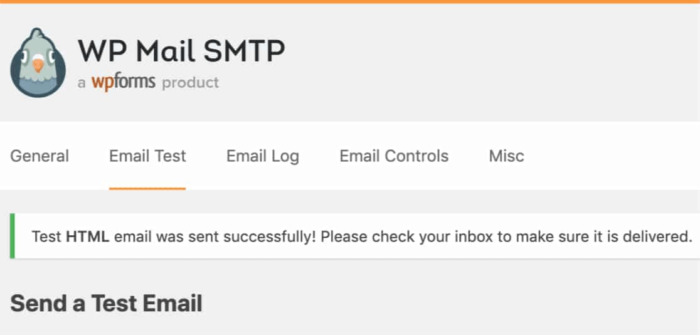
Check and confirm that you received the email in your Primary inbox. If it was sent successfully, you know that the email is getting delivered. Finally, all you have to do is verify that the email went through your SMTP.com account.
SMTP.comの配信設定ページに移動します。このように合格通知が表示された場合、素晴らしい仕事をしたことになります。

ステータスフィールドに「合格」と表示されない場合は、どこかでミスをしています。ステップ1〜4を再確認し、何か見落としがないか確認してください。
まとめ
今回は以上です、皆さん!
WP Mail SMTPプラグインをインストールすることを強くお勧めします。これにより、WordPressのSMTP設定が非常に簡単になります。これらすべてを手動で行うのは、時間と費用がかかる可能性があります。
WordPressのメール配信の問題が解決したら、安心してトラフィック、エンゲージメント、売上の増加に戻ることができます。ところで、プッシュ通知はもう試しましたか?プッシュ通知は、あらゆるビジネスのトラフィック、エンゲージメント、売上を増加させるための優れた方法です。
また、プッシュ通知を始めたばかりの場合は、PushEngageの使用をお勧めします。PushEngageは、市場でNo.1のプッシュ通知ソフトウェアです。このプラグインは、中小企業が大企業と競争できるように構築されています。
したがって、ビジネスを開始、成長、または拡大したい場合でも、あらゆる成長段階に適しています。
プッシュ通知を始めたばかりの場合は、これらの記事もいくつか確認してください。
- 顧客エンゲージメントを高めるための7つのスマートな戦略
- WordPressブログへのトラフィックを増やす方法(簡単な9つの方法)
- ウェブプッシュ通知のオプトイン率を高める方法(7つの方法)
- Web通知WordPressプラグインをサイトに追加する方法
まだの方は、今すぐPushEngageを始めて次のレベルに進みましょう!


