
Looking for a quick and easy tutorial on how to add a tweet button to WordPress?
Click-to-tweet buttons make it easy for website visitors to share your content on Twitter. That way, you can reach your target audience with content designed to generate interest, leads, and potential customers.
In this article, we’re going to show you how to add a tweet button to WordPress step-by-step in 2 different ways.
さあ、始めましょう。
Why Add a Tweet Button to WordPress?
Twitter marketing is one of the most effective ways to bring your target audience to your website. Twitter is home to over 217 million active users. So, by adding a tweet button to your WordPress site, you can get your blog readers to share your content on Twitter. That in turn brings in more website traffic to your content.
An effective way to reach people who don’t follow you on Twitter is to add a Tweet button to your website.
When users visit your website, a tweet button will encourage them to share your content on their personal Twitter timelines. As a result, their followers will see your content and can then like, comment, and retweet it to their followers.
How to Add a Tweet Button in WordPress
Now that you know why Twitter buttons can benefit your business let’s look at how to add one to your WordPress site. There are several ways to add a click-to-tweet box or button to your website; however, some are much easier than others.
Add a WordPress Tweet Button Using a WordPress Landing Page Builder
You can use a WordPress landing page builder to directly add a WordPress tweet button. We recommend using SeedProd to create your landing pages in WordPress.

SeedProd is a visual landing page builder that helps you create landing pages that convert really well. It’s a page builder with super powerful features that work with any WordPress theme.
Also, it’s not like a child theme that only extends the theme defaults with some additional styling. SeedProd gives you a full-scale drag-and-drop page builder where you can create custom pages no matter what your theme styles are.
人気の機能には以下が含まれます:
- Pre-built conversion-focused landing page templates
- Easy design customization options
- Global design settings such as brand palette and brand fonts
- Advanced page blocks to integrate powerful marketing software directly into your landing page
- WooCommerce blocks to customize all eCommerce pages in your conversion funnel
- One-click deployment for coming soon pages, Maintenance mode, login page, and 404 page
- Custom page rules to limit access to your landing pages
- メールマーケティング連携
- Instant domain mapping to launch landing pages on any domain you feel like
And more! SeedProd is the #1 WordPress landing page builder in the market.
If you’re looking for ways to grow or scale your business, you should definitely invest in one of the premium plans for SeedProd. For the money, you get a lot of features that can help you launch a professional, conversion-optimized site very quickly.
Go ahead and install and activate the SeedProd WordPress plugin.

Then, edit any page or post using the SeedProd editor:
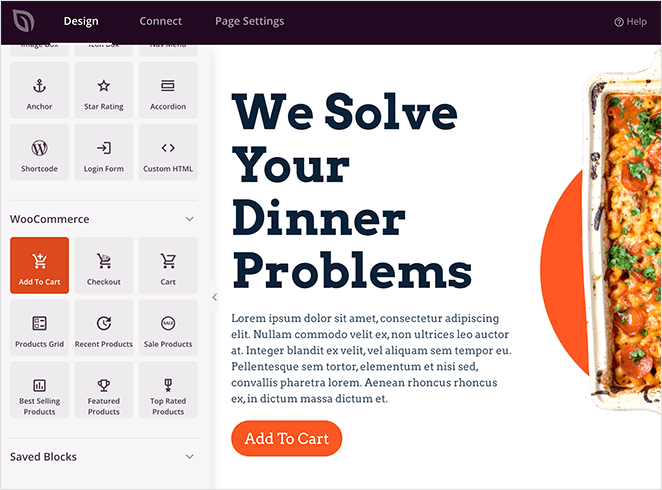
From the blocks in the left, you can drag and drop a Tweet button WordPress block anywhere on your content:
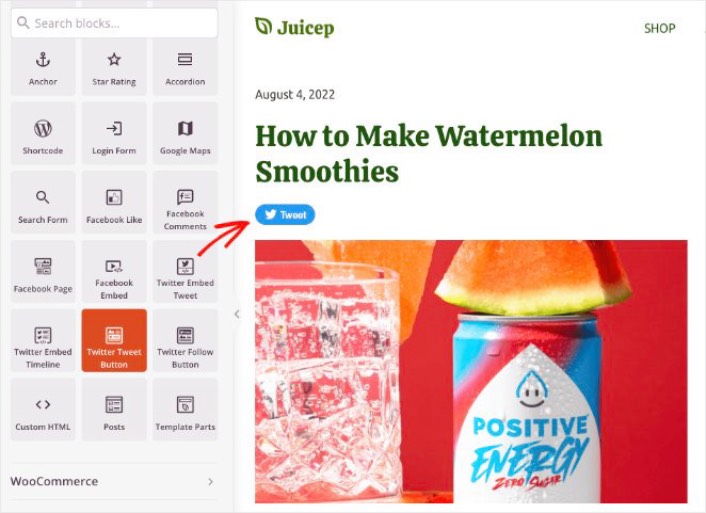
And you’re done! It’s that simple. If you followed along step by step, you can see a tweet button in your WordPress site like this one:

Add a Tweet Button to WordPress Manually
You can add a tweet button to WordPress manually. To get started, go to the Twitter Publish tool website and choose the Twitter Buttons embed type.
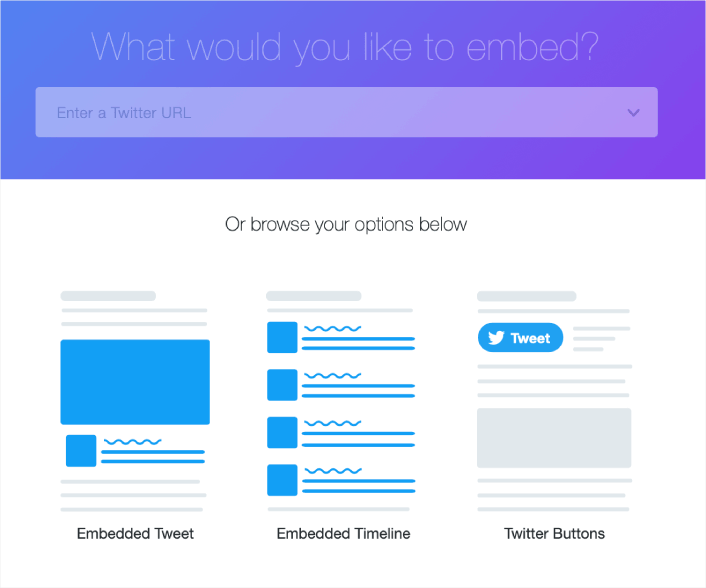
Next, a window will pop up asking you to choose a button type:
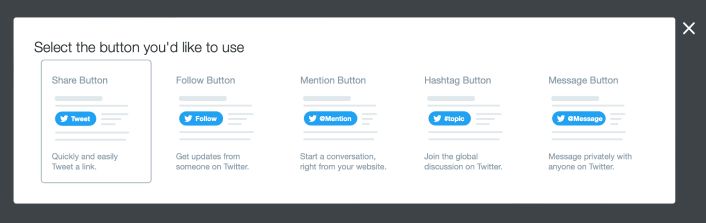
After clicking your button type, you get an embed code to create a Tweet button in WordPress:
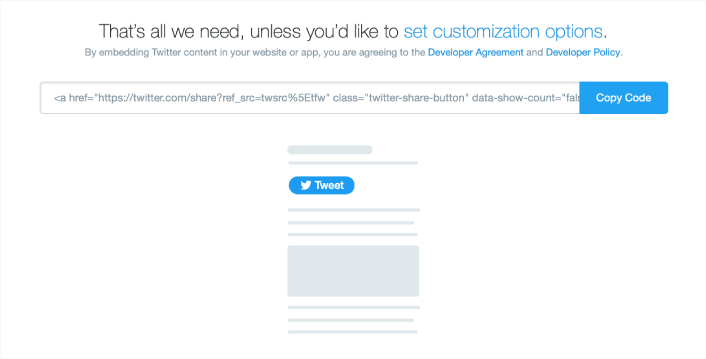
Click the button to copy the embed code, then head back to your WordPress site. You can add a Custom HTML block in your WordPress site and simply paste the tweet button code.
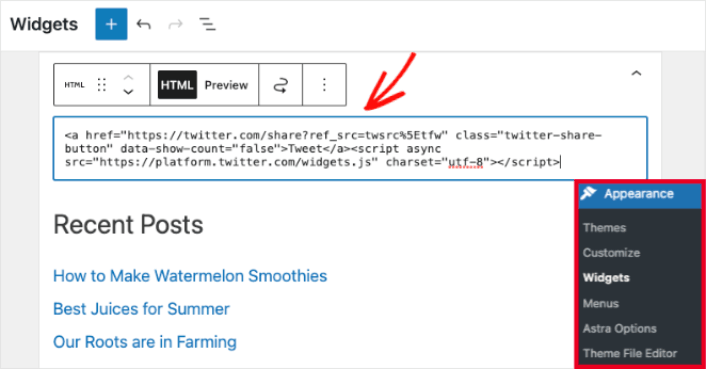
If you add the code in your sidebar widgets, it should look something like this:

And again, it’s that simple.
What to do After You Add a Tweet Button in WordPress
今回は以上です、皆さん!
また、WordPressにInstagramの写真を埋め込む方法もチェックしてください。ソーシャルメディアのフォロワーを増やしたい場合は、バイラルプレゼント企画を設定することをお勧めします。
その後、残りはサイトへのトラフィックを生成して、より多くのリードと売上を獲得することです。簡単な方法は、プッシュ通知の使用を開始することです。プッシュ通知の送信は、サイトへのリピートトラフィックを生成するための優れた方法です。それに興味がある場合は、これらの記事もチェックしてください。
- プッシュ通知のコスト:本当に無料なの?(価格分析)
- WordPressブログへのトラフィックを増やす方法(簡単な9つの方法)
- ウェブプッシュ通知のオプトイン率を高める方法(7つの方法)
- Web通知WordPressプラグインをサイトに追加する方法
プッシュ通知の送信にはPushEngageの使用をお勧めします。PushEngageは世界No.1のプッシュ通知ソフトウェアです。まだお済みでない場合は、今すぐPushEngageを使い始めましょう。


