
Want to make an online event registration form for your WordPress site?
A registration form is a great way to sell tickets to your event and skyrocket sales and attendance.
In this article, you’re going to see step-by-step how to make an online event registration form in WordPress. The beauty of it is that you’re not going to spend a single second on coding.
さあ、始めましょう。
Why You Need an Online Event Registration Form
An event registration form on your WordPress site allows you to manage attendees and save their information right within your WordPress dashboard. Most importantly, you can sell tickets to your events directly on your site.
Social media sites are great for promotions, but creating a signup flow can be really difficult. This is why we recommend that podcasters create a podcast landing page as well.
The coolest bit is that you can collect contact information for your fans directly on your site. Later, if you want to promote your official merchandise or info products, you have an email list ready that you can reach out to.
You can even use a WordPress calendar plugin to display your event dates on your site.
How to Create an Online Event Registration Form
オンラインイベント登録フォームを作成するために、WPFormsという非常に人気のあるWordPress用フォームビルダープラグインを使用します。
The best part about using WPForms isn’t how easy it is to create a form. It’s the fact that you don’t need an eCommerce plugin such as WooCommerce or Easy Digital Downloads to sell tickets to your event online.
ステップ#1:新しいWordPressフォームを作成する
まず、WPFormsをインストールして有効化する必要があります。

WPFormsは、世界No.1のWordPressフォームビルダープラグインです。WPFormsのインストール方法がわからない場合は、WordPressでプラグインをインストールする方法に関するこのステップバイステップガイドを確認してください。
次に、WPFormsダッシュボードに移動し、[ダウンロード]にアクセスしてプラグインを取得します。
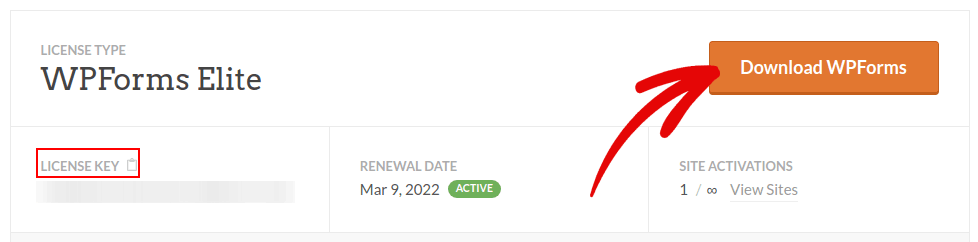
次に、サイトにプラグインをインストールして有効化します。同じタブでライセンスキーをコピーします。
最後に、WordPressダッシュボードに移動し、[WPForms » 設定]にアクセスしてライセンスキーを貼り付けます。
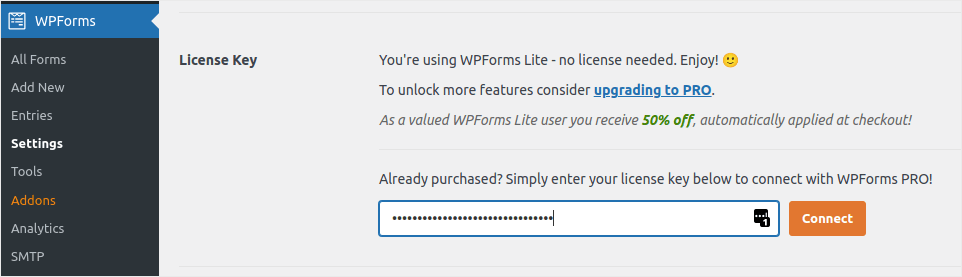
完了したら、[接続]をクリックします。
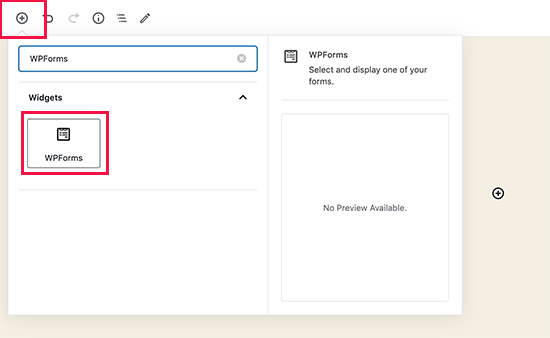
WPFormsがインストールされ有効化されたので、最初のフォームを作成する時間です。[WPForms » 追加]に移動します。

これにより、WPFormsのドラッグアンドドロップフォームビルダーが開きます。
Step #2: Select WordPress Event Registration Form Template
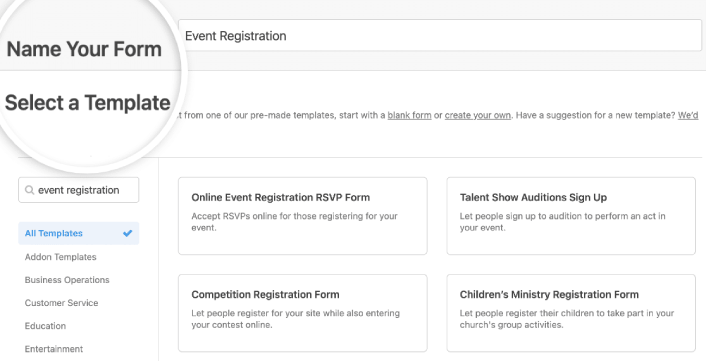
新しいフォームを作成するには、名前を付けてフォームテンプレートを選択します。
WPFormsでは、ワンクリックでインポートして自由にカスタマイズできる、あらかじめデザインされたフォームテンプレートがたくさん用意されています。全機能の詳細については、WPFormsのレビューをご覧ください。
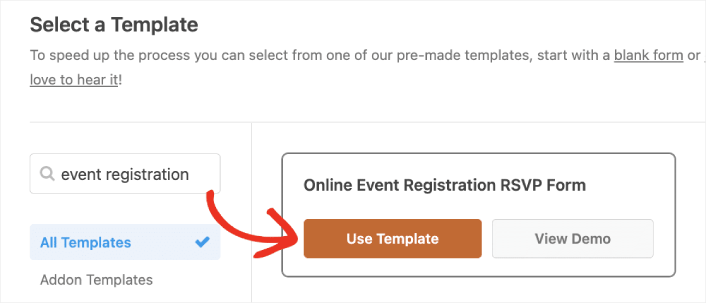
Type “event registration” into the search bar and you’ll see several options for all kinds of events. Click on Use Template to load one in the form builder:
Step #3: Customize Your Online Event Registration Form
By now, you should see the WPForms drag-and-drop form editor. Here, you can customize your online event registration form using design blocks:

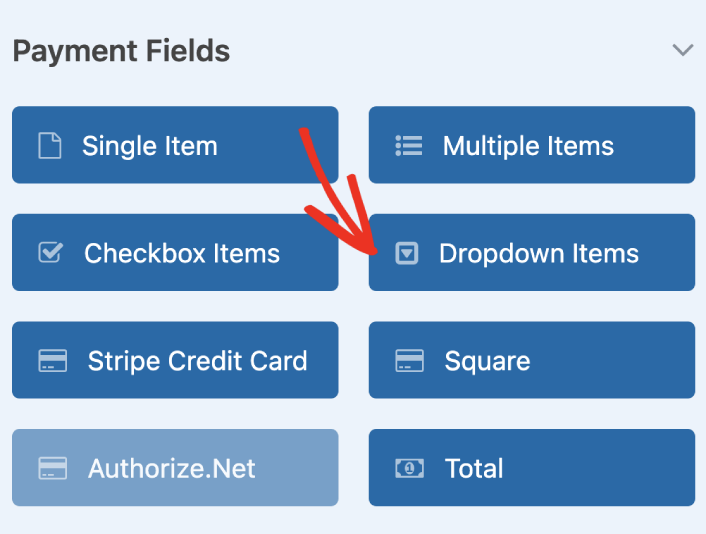
To do this, delete the dropdown menu from your form in the right-hand panel of the form editor.

Then, scroll down to the Payment Fields and add a Dropdown Items form field to your form.
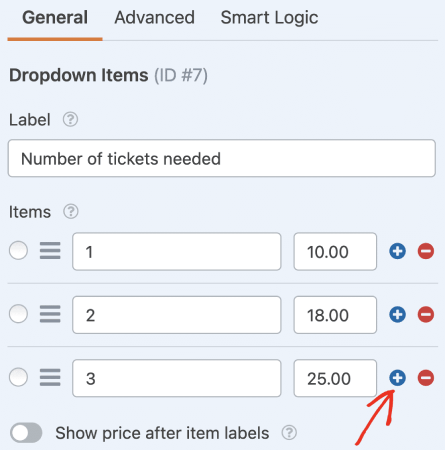
You can set custom payment options for multiple ticket purchases by clicking on the plus (+) option:
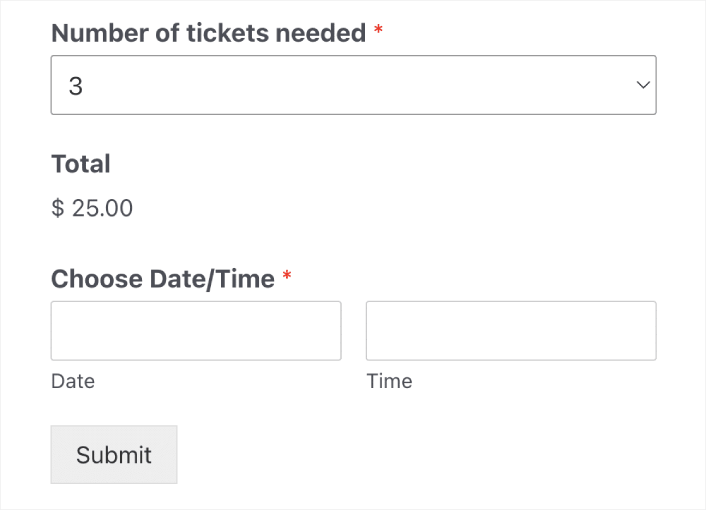
You can also add a Total field to show your visitors the total amount they have to pay:
When you’re done customizing your online event registration form, click Save.
Step #4: Configure Your Online Event Registration Form Settings
次に、通知と確認を設定します。
通知は、誰かがフォームに記入したときに受信するメールです。確認は、ユーザーがフォームを正常に記入したことを知らせるためのものです。通常は「ありがとうございます」というメッセージですが、ユーザーを専用ページにリダイレクトすることもできます。
確認設定を構成するには、設定 » 確認に移動します。

次に、同じメニューで通知に移動して、通知メッセージを構成します。

デフォルトでは、通知はWordPress管理者のメールに送信されます。したがって、営業部長のメールアドレスなど、別の場所にメールを送信したい場合は、ここで実行できます。
Step #5: Configure WordPress Event Registration Payment Settings
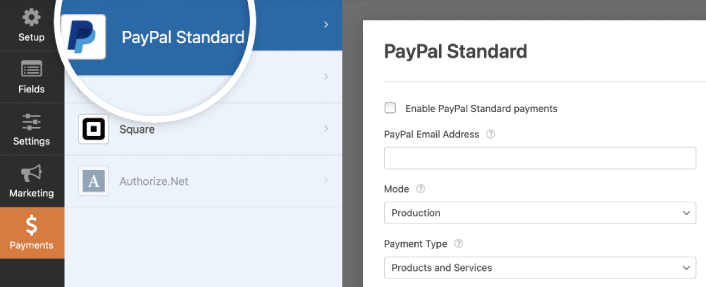
次に、オンラインイベントフォームを通じて支払いを受け付けられるようにします。WPFormsは、PayPal、Authorize.Net、Square、Stripeと統合されており、クレジットカード決済を受け付けることができます。そのため、WPForms用の支払いアドオンをインストールするだけです。
次に、フォームエディターの[支払い]タブをクリックし、セットアップした統合を選択します。
支払い設定の構成が完了したら、[保存]をクリックして変更を保存します。
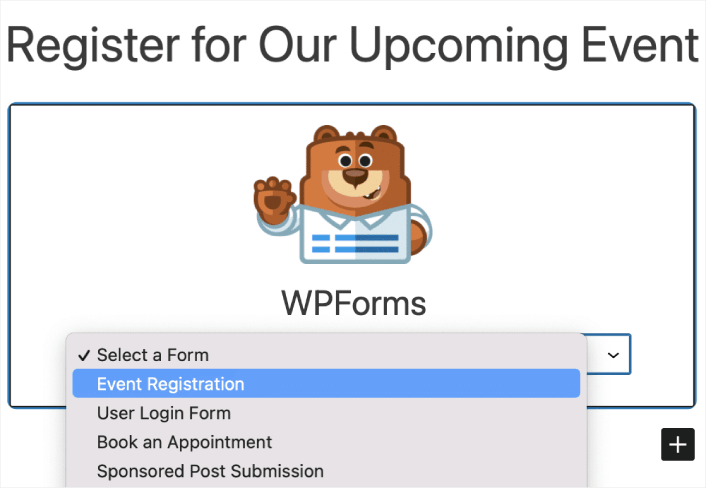
Step #6: Add Event Registration Form to Your Site
WPForms WordPressブロックを使用して、オンラインイベント登録フォームをサイトのどこにでも追加できます。
Select your Event Registration Form:
これで完了です!
How to Promote Your Online Event Registration Form in WordPress
今回は以上です、皆さん!
By now, you’ve created a WordPress online event registration form. Next, you should set up form abandonment tracking to reduce your form abandonment rates.
その後は、コンタクトフォームが機能するようにサイトへのトラフィックを生成するだけです。その簡単な方法は、プッシュ通知の使用を開始することです。プッシュ通知の送信は、サイトのリピートトラフィックを生成するための優れた方法です。もしそれが興味のあることであれば、これらの記事も確認してください。
- プッシュ通知のコスト:本当に無料なの?(価格分析)
- WordPressブログへのトラフィックを増やす方法(簡単な9つの方法)
- ウェブプッシュ通知のオプトイン率を高める方法(7つの方法)
- Web通知WordPressプラグインをサイトに追加する方法
プッシュ通知の送信にはPushEngageの使用をお勧めします。PushEngageは世界No.1のプッシュ通知ソフトウェアです。まだお済みでない場合は、今すぐPushEngageを使い始めましょう。


