
Looking for a quick guide to add local business Schema in WordPress?
If you’re running a brick and mortar business and marketing on search engines to get more footfalls to your store, then local business Schema is going to be super helpful for you. But, how do you do it?
Isn’t Schema a lot of code snippets? Do you need to write code to add Schema to your site? Should you hire a developer?
The short answer is: No!
You can simply install a WordPress plugin to add local business Schema. And in this article, we’re going to show you how.
始めましょう。
Step #1: Select a Local Business Schema WordPress Plugin
Before you can add local business Schema to your WordPress site, you need to pick a WordPress plugin. We recommend using All In One SEO.

All in One SEO(AIOSEO)は、WordPressコミュニティで最も高く評価されているSEOプラグインの1つです。元のバージョンは、多くの新機能とアドオンを追加するために完全に作り直されました。したがって、過去にAIOSEOを使用したことがある場合は、もう一度プラグインを確認する必要があります。
AIOSEOには、最新のSEOベストプラクティスを実装するのに十分強力なSEO機能があるだけでなく、特定のSEOの問題をすぐに解決するための高度なSEO設定も利用できます。これには以下が含まれます:
- ローカルオーディエンスを持つ中小企業向けのローカルSEOモジュール
- オンラインストア向けのWooCommerce SEO
- WordPressエディター内のSEOオプティマイザー
- 検索エンジンでの即時インデックス作成のためのスマートサイトマップ
- リッチスニペットでコンテンツをランク付けするためのスキーマプラグイン
その他多数!
要するに:All in One SEOを使用すると、専門家を雇うことなく、WordPress SEOを適切に設定できます。All in One SEOの300万以上の顧客(私たち自身も含む)が信じられるなら、AIOSEOはあらゆるSEO要件に対応する素晴らしい検索エンジン最適化ソフトウェアです。
専門家を雇う必要なくSEOを管理できるため、ブロガーや中小企業のオーナーに最適です。
Remember: You can only integrate the Google Search Console with All in One SEO. If you need more detailed website analytics, you should consider installing the MonsterInsights plugin to install Google Analytics to your WordPress site.
Step #2: Add Location Schema (Single Location Business)
Once you’ve installed AIOSEO, go to the AIOSEO menu » Local SEO. This will open a page where you can input your location and business information.
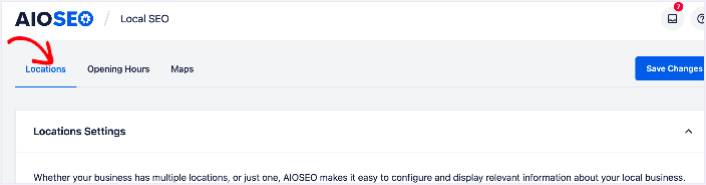
Next, you need to select whether your business is in one location or many.
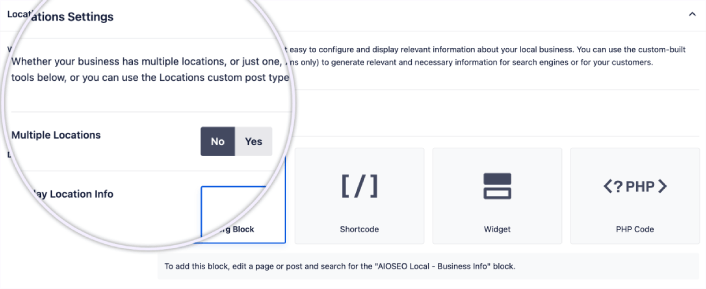
If yours is a single-location business, leave the Multiple Locations toggle set to No.
You can also choose whether you want your location information to be displayed as a:
- Gutenberg Block
- Shortcode
- ウィジェット
- PHP code
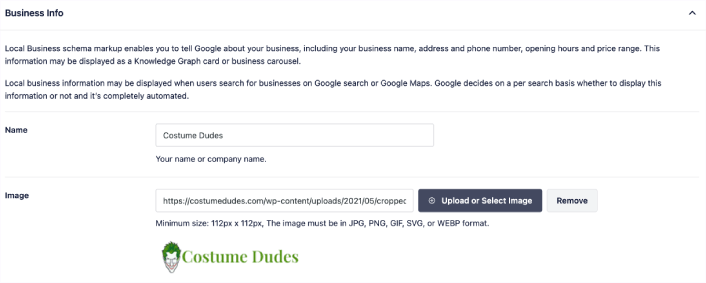
Then, add other business information like name, logo (image), business type, and address.
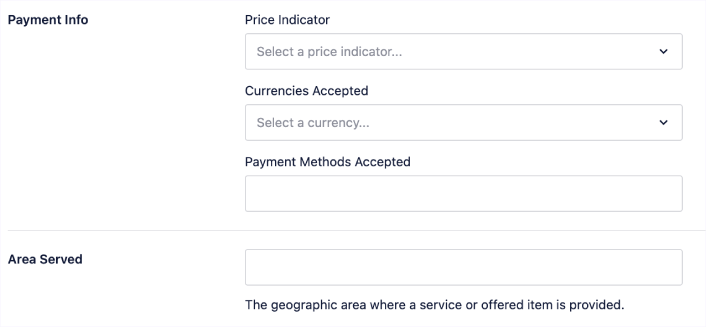
You can also add other information like a map of your location (more on this in a moment), contact information, VAT and Tax IDs, payment information, and the areas you serve.
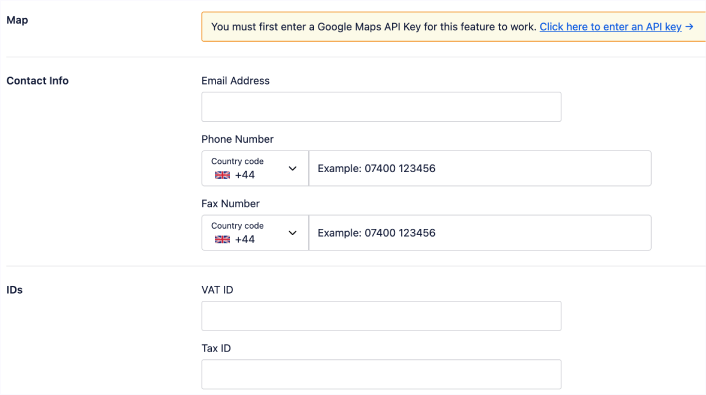
You can also add your payment info under Payment Info and showcase your store locations under Areas Served.
When you’re done, go ahead and hit the Save Changes button.
Step #3: Add Opening Hours
The next step to adding Local Business schema is to add your business hours. Go to the AIOSEO menu » Local SEO » Opening Hours. This will open a window where you can add your opening hours.
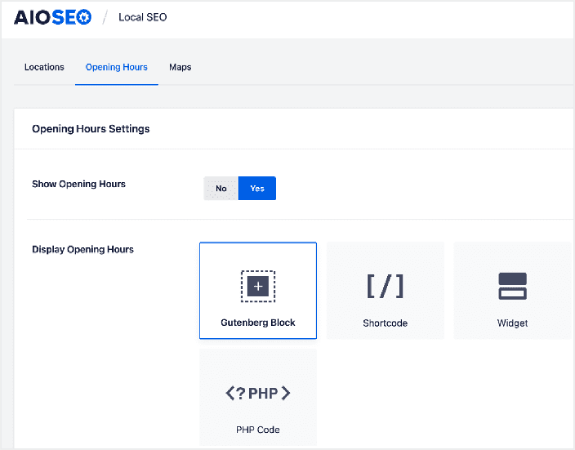
Set the Show Opening Hours toggle to Yes, and you can get options for displaying your opening hours.
If your business is open 24 hours, you can set the toggle to Open 24/7, and that’s it. You’ve added business hours to your Local Business schema.
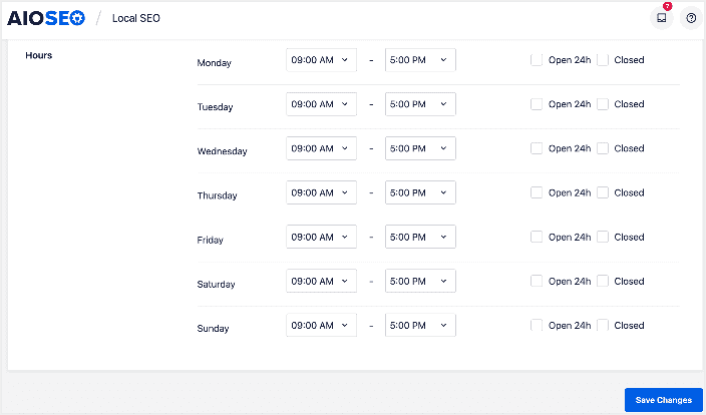
Once you’re done, click Save Changes, and your operating hours will be set.
Step #4: Add Google Maps
The final step to setting your Local Business schema is adding Google Maps, so you can visually display your location. To do that, go to the AIOSEO menu » Local SEO » Maps.
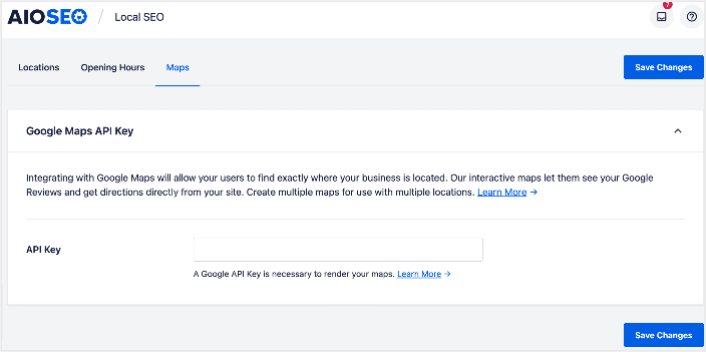
You’ll have to add a Google Maps API key in the API Key field for search engines to render your map.
Once done, click Save Changes.
And that’s it!
What to do After Adding Local Business Schema in WordPress
Adding local business schema is only one part of the puzzle. Our top recommendation is to use All in One SEO to optimize your website content. The right tools can help you with getting repeat traffic, engagement, and sales. For that, we recommend using push campaigns.
プッシュ通知は、ビジネスを成長させるための強力なマーケティングツールになり得ます。まだ確信が持てませんか?これらの素晴らしいリソースをご覧ください。
プッシュ通知キャンペーンを作成するためにPushEngageの使用をお勧めします。PushEngageは世界No.1のプッシュ通知ソフトウェアです。まだお済みでない場合は、 今すぐPushEngageを使い始めましょう!


