
Looking for a resource on how to sell online yoga classes?
適切なプラットフォームの選択、eコマースサイトの構築、販売する商品の作成、価格設定モデルの検討など、多くのことをすでに経験してきました。しかし、オンラインでデジタル製品を販売するには、実にさまざまな方法があることに気づくでしょう。
WordPressでデジタルダウンロードを販売するのに役立つプラグインはたくさんあります。
しかし、販売を開始するために適切なプラグインをどのように選択しますか?プラグインは無料ですか?必要な機能はすべて揃っていますか、それとも実際に販売を開始するために後で他のプラグインを購入する必要がありますか?
最も混乱する部分は…です。
検討しているプラグインは、そもそもデジタルダウンロード用ですか?それとも、主に物理的な商品を販売するための一般的なストアプラグインであり、必要のない多くの不要な設定に悩まされることになりますか?
Don’t worry. In this article, we’re going to show you step by step how to make money selling documents on WordPress. The best part? You can complete the setup in 10 minutes or less!
さあ、始めましょう。
How to Sell Online Yoga Classes from Scratch
Now that we understand why you should sell yoga classes online, it’s time to show you how to get started. Don’t worry if you’ve never done this before. This article is meant for complete beginners. All you have to do is follow along.
- Step #1: How to Set Up Your Hosting Server
- Step #2: How to Install WordPress on Your Server
- Step #3: How to Create a Website Theme
- Step #4: Setting Up Easy Digital Downloads
- Step #5: How to Sell Online Yoga Classes as Digital Products
- Step #6: How to Customize Your Website
- Step #7: How to Integrate Your Email Marketing Service with Your Site
- Step #8: Add a Click to Subscribe Button to Your Landing Page
- Step #9: How to Publish Your Site
- How to Sell Online Yoga Classes Even Faster
始めましょう。
Step #1: How to Set Up Your Hosting Server
Before you create a website, you need to get:
- A domain name
- Web hosting
- An SSL certificate
You might run into videos and articles online that talk about building a free website. Believe us when we say it, there’s no such thing as a truly free website. Most free hosting sites offer extremely bad hosting, no technical support, and slap their branding on your website.
If you’re testing themes for web development or looking to experiment with a web page and its design, that’s fine. But for any self-respecting business owner, “free websites” are a horrible way to go.
Select a Hosting Service
Most modern hosting services will offer a custom domain name, web hosting, and an SSL certificate. But we recommend using one of these three hosting providers to start building:
All three hosting services are completely optimized for WordPress. And you get a free domain name and SSL certificate when you buy website hosting. For this article, we will show you how to get started using Bluehost. But it’s a somewhat similar process for our other recommended hosting services.
NOTE: These are all paid hosting services. You can create a website for free using free hosting. But if you’re serious about building a business, we recommend using hosting services that take your business seriously.
Sign Up for WordPress Hosting
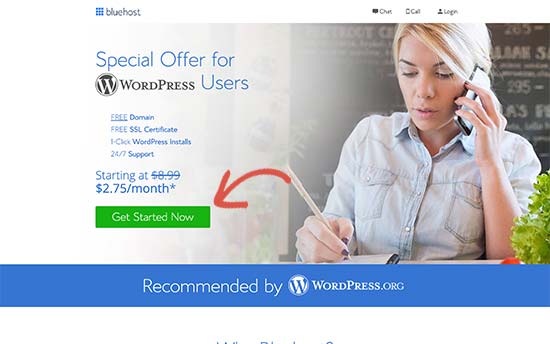
Head over to Bluehost and click on Get Started:
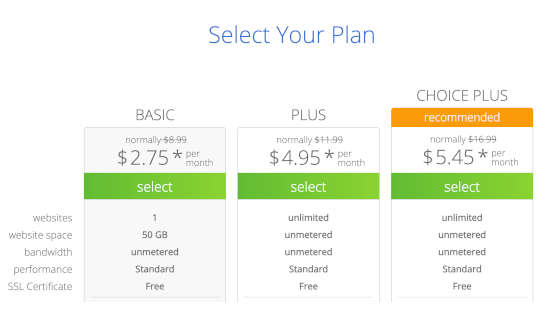
Then, choose your hosting plan on the next screen. We recommend getting the Plus plan if you’re looking to scale the business. But if you’re just looking to get started, even the Basic plan should be fine for you.
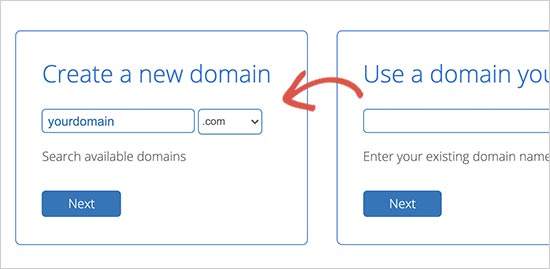
After that, you’ll choose the domain name for your website.
Finally, Bluehost will confirm your order and try to upsell you some added services such as Domain Privacy Protection. It’s entirely up to you whether you want to get this extra stuff. We don’t recommend it for small businesses, but if you think that the upsells are worth it, go ahead and add them to your cart.

After that, you complete the checkout process.
Step #2: How to Install WordPress on Your Server
Once you’re done with the checkout, Bluehost will send you an email to log in to your cPanel account. The cPanel is your web hosting control panel. From there, you can manage your email inboxes and FTP accounts, get support from Bluehost, and more.
When you log in to cPanel, you’ll see that Bluehost has already installed WordPress for you. WordPress is a website builder and content management system (CMS) to create and publish content on your website. It’s open-source software that anyone can use to make any kind of website imaginable.
Why Choose WordPress?
It started out as a blogging platform in 2003 but soon transformed into a CMS and later a full-fledged website building platform. Today it powers more than 38% of all websites on the internet.
If you want to build an eCommerce website, then you have a choice between Wix, Shopify, Squarespace and WooCommerce. These are the most popular apps to create a new website for an online store.
We recommend using WooCommerce over other platforms as it’s the leading eCommerce website software in the world and unlike most other services, it’s free. The cool part is that WooCommerce acts like a WordPress plugin and is based on WordPress. So, even if you want to build an eCommerce store, we recommend getting started with WordPress.
Log In to Your WordPress Site
To get into your WordPress dashboard, all you have to do is click on the Log in to WordPress button:

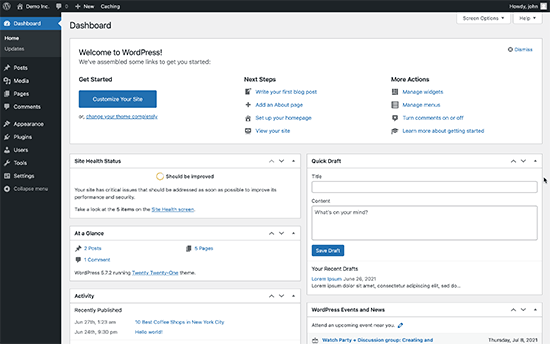
Your WordPress dashboard will look something like this:
NOTE: The WordPress installation process is different for different hosting services. You may have to manually install WordPress if you’re not using Bluehost, depending on your hosting service. Mostly, you’ll need to locate a software installer inside your cPanel called Softaculous. Softaculous is a setup wizard that will help you install WordPress on your server.
Configure Your WordPress Settings
When you first log in to your WordPress dashboard, you’ll want to take care of a few small details before launching your product.
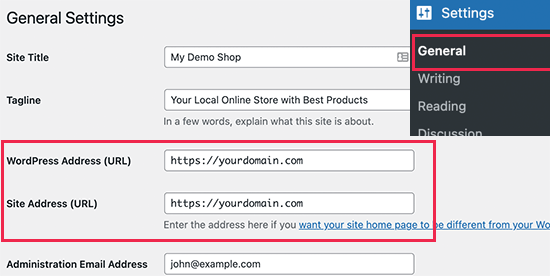
Head over to Settings » General to set the website title and description tags:
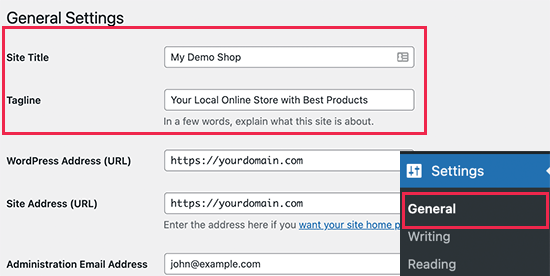
Then, change your WordPress Address and Site Address to their HTTPS versions to use SSL on your site:
When you’re done, hit the Save Changes button at the bottom.
Step #3: How to Create a Website Theme
Before you can dive into building a lead generating machine, you need to design your website. The traditional way is to hire a designer to design a website with an amazing user experience for you.
But you can skip this step altogether and use a WordPress theme instead. Most WordPress themes come with design templates that you can use straight away and customize according to your need.
What is a Theme?
A WordPress theme allows you to create pages and posts on your site with zero coding. WordPress themes are template files written in PHP, HTML, CSS, and JavaScript. Each file works together to create the design and functionality of your WordPress site.
A typical WordPress theme will include some, if not all, of the following theme files:
- footer.php
- header.php
- index.php
- page.php
- sidebar.php
- archive.php
WordPress themes also include a functions.php file and style.css file.
If you’re not sure what any of this means, don’t worry. You don’t need to be a coding expert to install and use a WordPress theme.
Selecting a WordPress Theme
There are tons of free and paid WordPress themes that can help you create a website easily. We recommend using a theme builder such as SeedProd.

SeedProd is the #1 drag-and-drop WordPress website builder.
You get a drag-and-drop landing page builder that’s packed with options to build product sites and landing pages. Unlike WordPress website builders, you can customize every inch of your landing page including navigation menus, footers, fonts, and styles. SeedProd also works with any WordPress theme and creates mobile-friendly landing pages.
With SeedProd, you get pre-built website templates for high-converting landing pages that you can publish instantly. This includes templates for:
- 販売ページ
- 近日公開ページ
- 404ページ
- FAQページ
- メンテナンスページ
- アプリのランディングページ
- ログインページ
- ありがとうございますページ
- ウェビナーページ
- ビデオページ
And lots more! You can even create your own theme using the SeedProd Theme Builder. The best part is that any website you build with SeedProd looks just as good on a mobile device. Check out the full list of features in our SeedProd review.
Install and Activate SeedProd
Go ahead and install and activate the SeedProd plugin.

If you’re not sure how to do that, check out this article on how to install a WordPress plugin.
Create a WordPress Theme Without Coding
Then, in your WordPress dashboard, head over to SeedProd » Theme Builder:
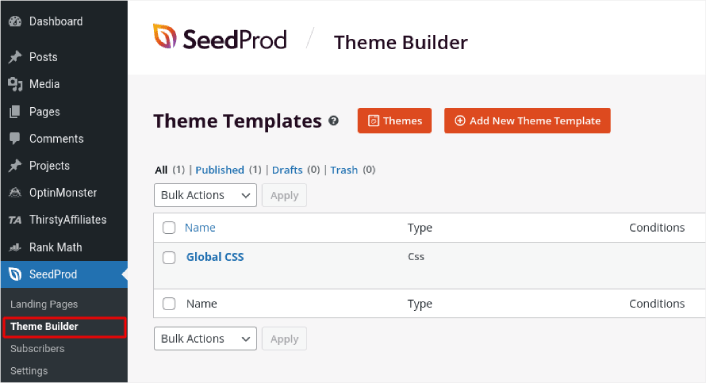
This is where you can create all the individual parts that make up your theme, including:
- Header
- フッター
- Single Post
- Single Page
- Archive (Blog Page)
- Home Page
- Sidebar
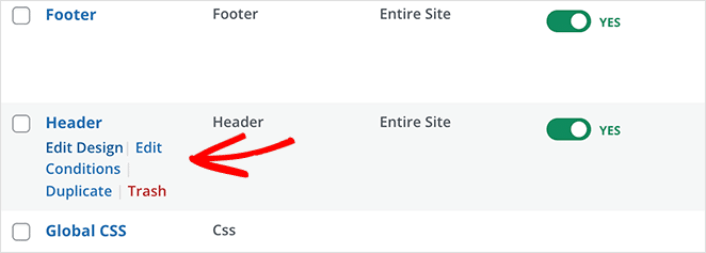
You can create each of these theme parts individually by clicking the Add New Theme Template button. And then, you can edit each of these elements using a drag-and-drop visual builder.
Or, you can use one of the many fully designed themes in SeedProd by clicking on the Themes button. Just choose any theme that matches your business closely to get started:
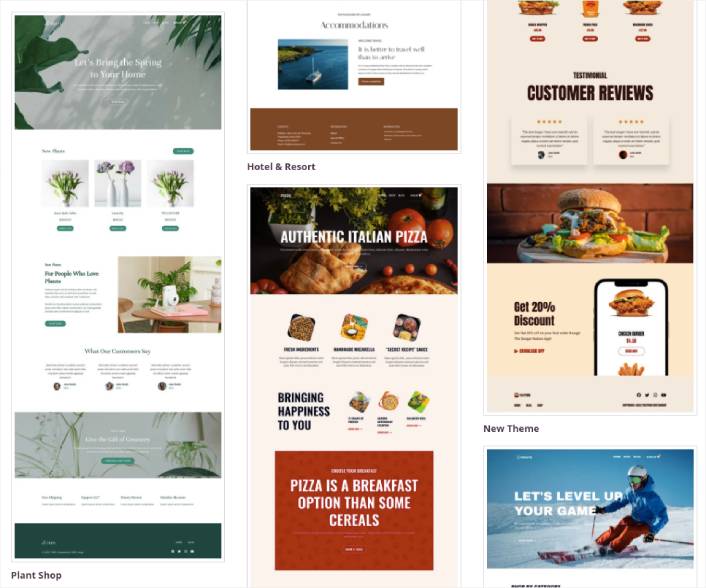
It doesn’t have to be an exact match. You can even select one based on the design. You can edit everything about these themes including fonts, the web design, and the overall user experience. But you can also check for a template for yoga classes.
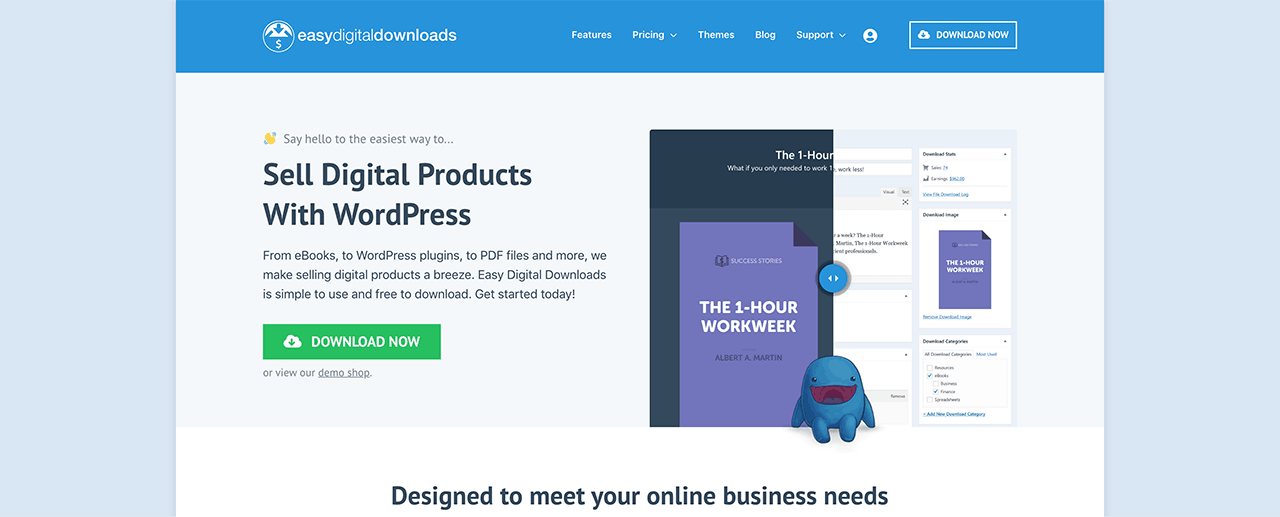
Step #4: Setting Up Easy Digital Downloads
WordPressで最も人気のあるeコマースプラグインはWooCommerceです。物理的な商品を販売している場合は、間違いなくWooCommerceを使用すべきです。しかし、あなたは物理的な商品を販売しているわけではありません。
この記事は、WordPressでデジタル商品を販売する方法についてすべて説明しています。デジタル製品の場合、Easy Digital Downloadsよりも優れたeコマースプラグインはありません。
Easy Digital Downloadsは、デジタル製品の販売に完全に焦点を当てています。そのため、WooCommerceにある不要なオプションやUIに対処する必要はありません。Easy Digital Downloadsを使用してオンラインストアをセットアップするのは非常に簡単で、プラグインを使用して以下を含むあらゆるデジタル製品を販売できます:
- Online classes and courses
- ソフトウェア
- 電子書籍とPDF
- ドキュメント
- ビデオ
- オーディオおよび音楽ファイル
- 写真、グラフィックデザイン、デジタルアート
そして、太陽の下にあるほぼすべての種類のメディアファイル。また、次のような多くのクールな機能も利用できます:
- 複数の支払いゲートウェイ統合
- プラグインやゲームなどのライセンスモデル用のソフトウェアライセンス作成ツール
- サブスクリプションモデルビジネス向けの定期支払い
- マーケットプレイスサイト向けのマルチベンダープラットフォーム
- より速く成長するためのメールマーケティング統合
- フリーランサー向けのカスタム納品物
- アフィリエイトおよびマーケットプレイスベンダー向けの手数料
- 製品レビュー
- 顧客向けのカスタムウォレット
- インスタント製品比較表
- 製品ショーケース
その他。機能の全リストと、これらの機能をどれだけ簡単に使用できるかについては、Easy Digital Downloadsのレビューをご覧ください。
Easy Digital Downloads を使用する理由がわかったところで、プラグインの設定方法を見ていきましょう。まず、プラグインをインストールしてください。方法がわからない場合は、WordPress プラグインのインストール方法に関するこの記事をご覧ください。
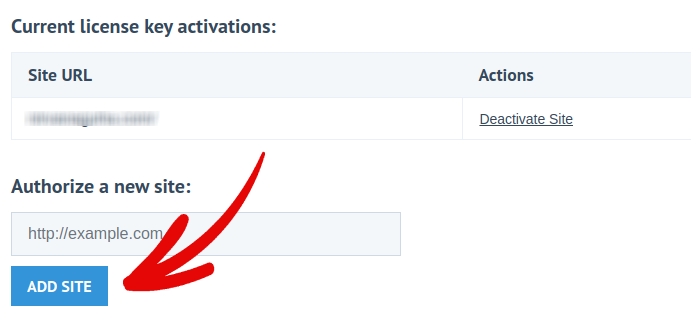
次に、Easy Digital Downloads のダッシュボードに移動し、ライセンスキーに移動して、サイトの管理をクリックします。
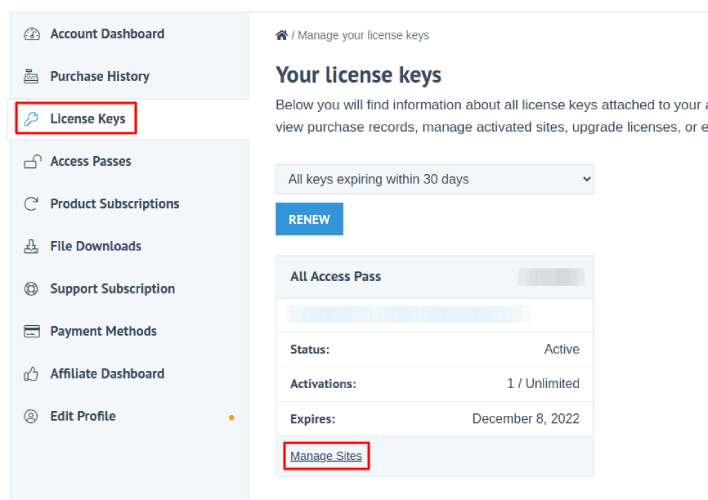
そして、ダッシュボードにサイトを追加します。
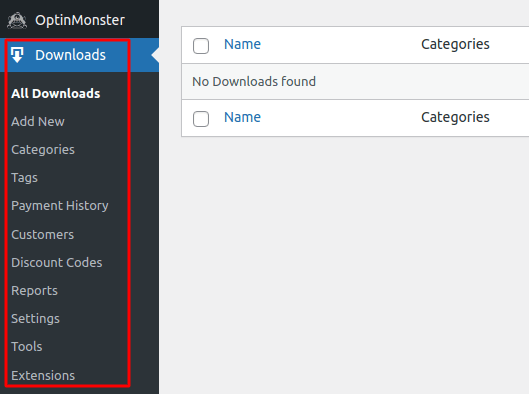
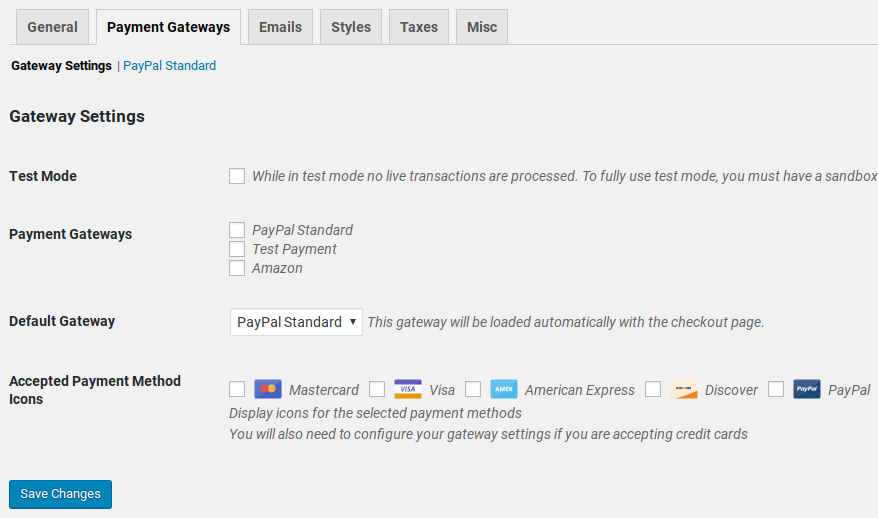
その後、支払い処理業者を設定するだけです。WordPress のダッシュボードに戻ります。WordPress のダッシュボードに ダウンロード という新しいセクションが表示されるはずです。
ダウンロード » 設定 をクリックし、次に 支払いゲートウェイ タブをクリックして、支払いゲートウェイを選択して設定します。
これで完了です!
Step #5: How to Sell Online Yoga Classes as Digital Products
Now that your store is ready, it’s time to start adding yoga classes to your store.
By default, Easy Digital Downloads will create and set up pages for your eCommerce store. The primary checkout page, success page, failed transaction page, and purchase history page is pre-defined. So, you’re ready to start uploading your products to your store.
ダウンロード » 追加 に移動します。
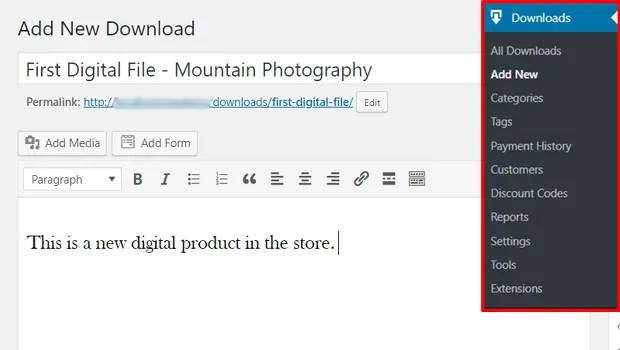
まず、製品のタイトルと説明を入力します。次に、下にスクロールして ダウンロード価格 セクションで製品の価格を設定します。次に、製品のファイルをアップロードします。
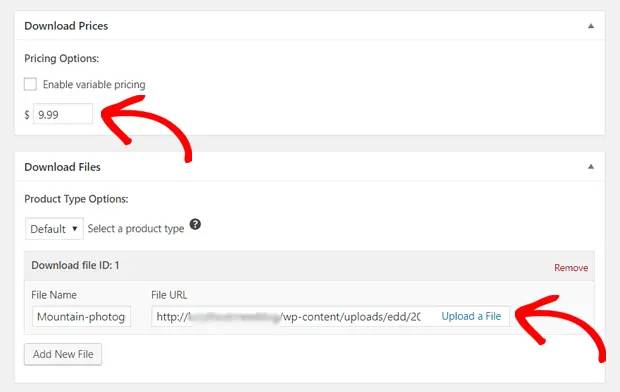
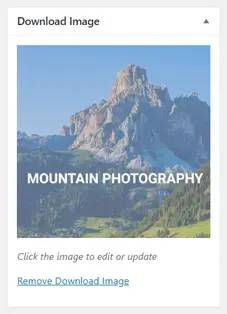
次に、製品の素敵なアイキャッチ画像をアップロードします。これは製品リストに表示される画像です。非常に魅力的なデザインをアップロードして、価値を高めましょう。
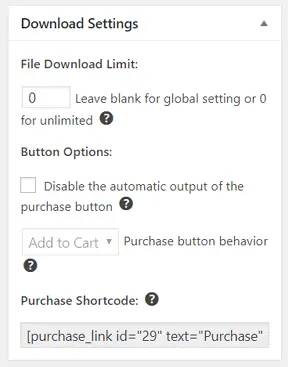
Then, scroll up to Download Settings and review the download options. If you’re selling documents as a limited edition product, you can set a limit on the product downloads. If not, go with the default options:
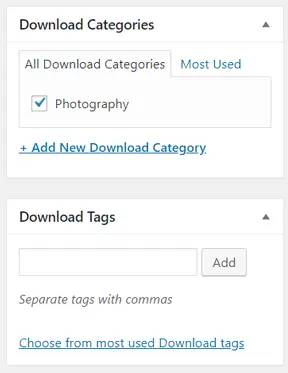
最後に、製品に適した製品カテゴリまたはタグを追加します。
これで完了です!公開 をクリックして、最初のデジタル製品を公開してください。
カスタマイズなしの場合、製品ページは次のようになります。

今すぐページをカスタマイズしてください。
Step #6: How to Customize Your Website
Now that you have a theme to get you started, you’ll want to edit that theme to suit your business. This is super easy to do.
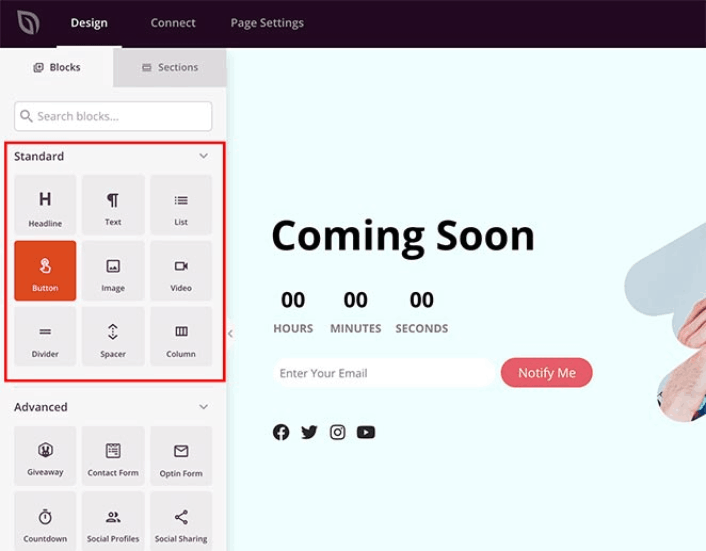
SeedProd’s page builder comes with various content blocks in a drag and drop editor. Even if you’re never used a page builder before, you’re going to find it super easy to use. Just drag and drop different design elements from the sidebar:
これらのブロックを使用して、次のような非常にインタラクティブなランディングページを作成できます。
- RafflePressのプレゼント企画で、ローンチ前にサイトのエンゲージメントを増やしましょう
- お問い合わせフォームで、サイトのリード情報を収集しましょう
- カウントダウンタイマーで、リリースに関するFOMO(取り残されることへの恐れ)と期待感を高めましょう
- ソーシャルボタンで、ソーシャルメディアでの共有を獲得しましょう
- FAQ blocks for better Search Engine Optimization
その他多数!
You can edit any of the content blocks on the page by simply clicking on them. This includes the navigation menu or the blog posts on your site. Once you lock down your website’s design, you can build your website any way you want it.
Step #7: How to Integrate Your Email Marketing Service with Your Site
工事中ページの設計が完了したら、ページビルダーの上部にある「接続」タブをクリックし、メールマーケティングプロバイダーを選択して、サイトのリード情報を収集します。

Marketing tools and integrations can help build your online presence. So, we highly recommend setting up an email list.
We recommend using Constant Contact as your email marketing service. It’s a robust service that allows you to create powerful email marketing campaigns easily.
When you’re done configuring your email marketing service, click the Page Settings tab at the top of your screen as an added bonus.

ここで、ランディングページにSEOプラグインとGoogle Analyticsプラグインを追加できます。広告パフォーマンスを追跡するために、FacebookピクセルやPinterestピクセルなどのカスタムトラッキングコードを設定することもできます。
Pro Tip: You should also set a blog subscription widget on your site. It doesn’t matter if you’re running a personal blog or a business website.
Step #8: Add a Click to Subscribe Button to Your Landing Page
プッシュ通知購読者を収集するために、クリックして購読ボタンを追加することもできます。プッシュ通知は、リピートトラフィックを増やし、エンゲージメントを高め、公式グッズがあれば販売するためにも役立ちます。
SeedProdでは、サイドバーからカスタムHTMLモジュールをドラッグアンドドロップするだけです。
最初の折り目のメールサインアップフォームのすぐ下に、購読ボタンを配置しました。

しかし、ボタンは好きな場所に挿入できます。
For this part, you need some experience with HTML and CSS. Or, you can copy this code and paste it into your Custom HTML block:
<button onclick="subscribeOnClickButton()" style="border: none; padding-left: 5%; padding-right:5%; text-align: center; display: inline-block; color: blue;">Get Updates via Push Notifications</button>That’s a standard button in HTML with very little styling. The only fancy bit is the onclick function in the code. It basically means that your visitors can click on the button to subscribe to something. Now, we need to give the button some extra code to allow your visitors to subscribe to push notifications.
PushEngageのホームページにアクセスし、開始するボタンをクリックします。

次に、PushEngage を試すために無料プランを選択するか、ビジネスの成長に真剣に取り組んでいる場合は有料プランを選択します。有料プランには、より多くのキャンペーンオプションと、さらに大きな購読者リストを構築する機能が付属しています。
あなたのPushEngageダッシュボードで、サイト設定 »サイト詳細に移動し、セットアップ手順を表示するにはここをクリックボタンをクリックします。「任意のサイト」の下に、インストールコードが表示されます。

警告:ダッシュボードから取得したコードをコピーする必要があります。コードはPushEngageユーザーごとに固有です。画像内のコードをコピーしてプッシュ通知購読者を収集することはできません。
PushEngage ダッシュボードでコードを取得したら、このスニペットをコードに追加します。
<script> window._peq = window._peq || [];</script> <script>
function subscribeOnClickButton(){
window._peq.push(['subscribe',{}.pe,function(res){
if(res.statuscode==1)
{
// Code to return response
console.log(res);
}
}]);
}
</script>
最終的なコードは次のようになります。
<script src="https://clientcdn.pushengage.com/core/02a6e92667ae2279fcba8932356c1d93.js" async></script>
<script> window._peq = window._peq || [];</script> <script>
function subscribeOnClickButton(){
window._peq.push(['subscribe',{}.pe,function(res){
if(res.statuscode==1)
{
// Code to return response
console.log(res);
}
}]);
}
</script>
You’ll want to add this code to the HTML block in your landing page after the code for the button. It should look something like this:

Feel free to customize the styles for the button any way you please. When you’re done customizing your webinar landing page, go ahead and hit the Save button. You should check out eCommerce push notifications if you’re still wondering how to sell online yoga classes.
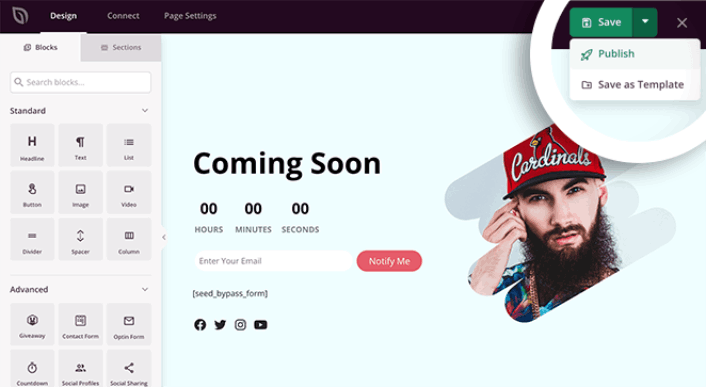
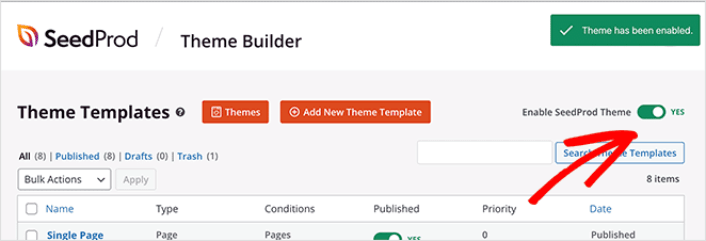
Step #9: How to Publish Your Site
When you’re done editing your WordPress site, go ahead and publish it by clicking on Save » Publish:
Then, go back to your Theme Builder and click on Enable SeedProd Theme:
これで完了です!
How to Sell Online Yoga Classes Even Faster
Now that your product is up, it’s time to selling documents online.
売上を増やす素晴らしい方法は、自動プッシュ通知キャンペーンを作成することです。プッシュ通知は、サイトへのリピートトラフィック、エンゲージメント、および売上を増やすための非常に優れたツールになります。プッシュ通知キャンペーンに慣れていない場合は、より速く成長するのに役立つこれらの素晴らしいリソースを確認してください。
- コンバージョン率の高いプッシュ通知オプトインの7つの例
- ウェブサイトでWebプッシュ通知を設定する方法
- Webプッシュ通知を使用して購読者を購入者に転換する方法
- Web通知WordPressプラグインをサイトに追加する方法
プッシュ通知キャンペーンには PushEngage の使用をお勧めします。PushEngage は世界No.1のプッシュ通知ソフトウェアです。そのため、キャンペーンは安全な手に委ねられ、プッシュ通知で非常にクリエイティブになることができます。この例のように:

ビジネスの成長に真剣に取り組んでいるなら、PushEngageに投資すべきです。


