
Looking for a simple and easy tutorial on how to edit footer in WordPress?
The footer appears at the very end of every page on your WordPress site. By default, WordPress gives you a footer. But it’s really not that great. In order to create a compelling footer, you need to be able to edit it.
But how do you do it? Do you need coding experience? What kind of customization can you do? Do you need to pay a developer to do it for you?
The good news is that you can do it yourself even if you don’t have any coding experience. In this article, we’re going to give you 2 simple ways on how to edit the footer in WordPress.
始めましょう!
DISCLAIMER: These are not the only two methods to customize a WordPress footer. You can also edit the footer.php file for your WordPress to modify the footer. But that involves custom coding and we don’t recommend that method unless you’re a seasoned coder.
Method #1: How to Edit Footer in WordPress with SeedProd
If you want to create a custom footer in WordPress using a drag-and-drop visual builder, then you should use SeedProd. You can do the same thing with a few themes such as Divi. But SeedProd works for absolutely any theme. So, you can customize your WordPress footer no matter what theme you’re using.

SeedProdは最高のWordPressランディングページビルダーです。開発スキルなしでコンバージョン率の高いランディングページを作成したい企業、ブロガー、ウェブサイト所有者に最適です。
SeedPreedを使用すると、すぐに公開できるコンバージョン率の高いランディングページ用の既製テンプレートを入手できます。これには、次のテンプレートが含まれます。
- 販売ページ
- 近日公開ページ
- 404ページ
- メンテナンスページ
- スqueezeページ
- ログインページ
- ありがとうございますページ
- ウェビナーページ
- ビデオページ
And lots more! We love using SeedProd and we even wrote an in-depth review of the SeedProd plugin. Go ahead and check that out. And then, get started with how to edit footer in WordPress using SeedProd.
ステップ#1. SeedProdテーマビルダープラグインをインストールする
まず、WordPressサイトにSeedProdをインストールしてアクティブ化します。その方法がわからない場合は、ステップバイステップの説明については、ランディングページを作成する方法の記事をご覧ください。プラグインをアクティブ化した後、プラグインライセンスキーを入力するには、SeedProd » Settingsページに移動します。

Click the Verify key button and you’re ready to create a custom footer in WordPress.
ステップ#2. スターターテーマテンプレートを選択する
WordPressダッシュボードのSeedProd » Theme Builderに移動します。
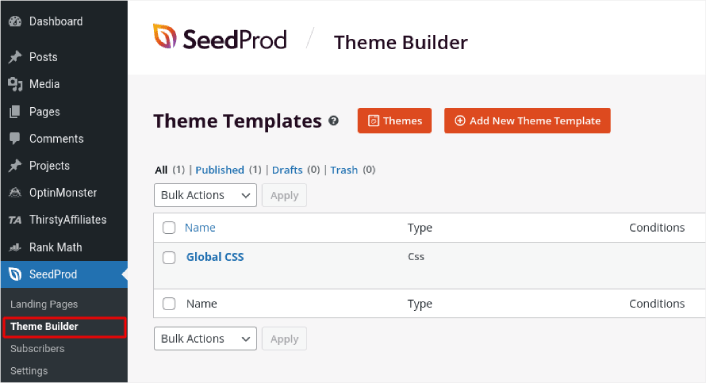
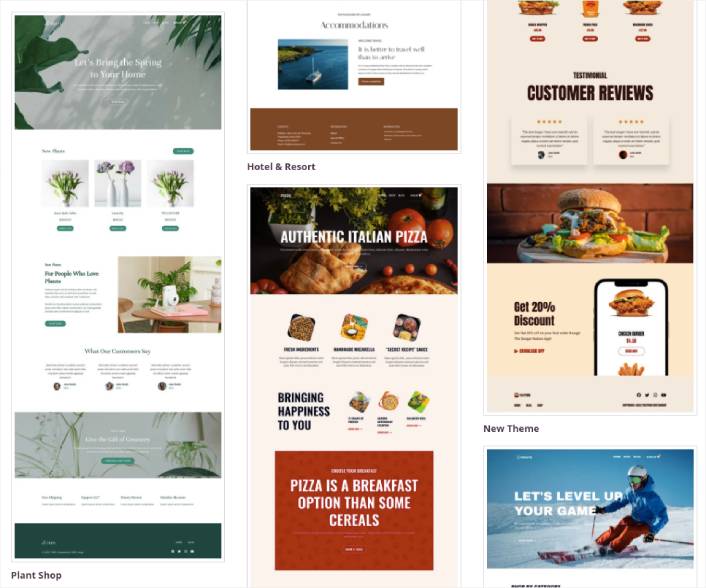
ここでは、SeedProdでスターターテーマを選択できます。SeedProdを使用してカスタムテーマを非常に簡単に作成できます。しかし、今回は、既製テンプレートを選択します。Themesボタンをクリックして、スターターテーマを選択してください。
テーマを選択すると、SeedProdはすべてのテーマテンプレートを自動的に作成します。ここから、ドラッグアンドドロップエディターを使用して各テンプレートを編集できます。
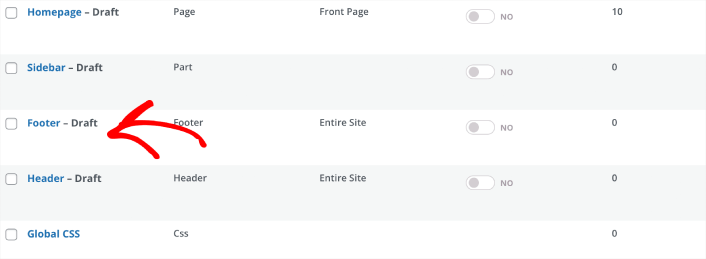
Step #3. How to Edit Footer in WordPress
To edit your footer with SeedProd, go to the Footer template and click the Edit Design link:
You should see the SeedProd visual builder open up. This is where you can drag and drop design elements from the sidebar to customize your site footer:
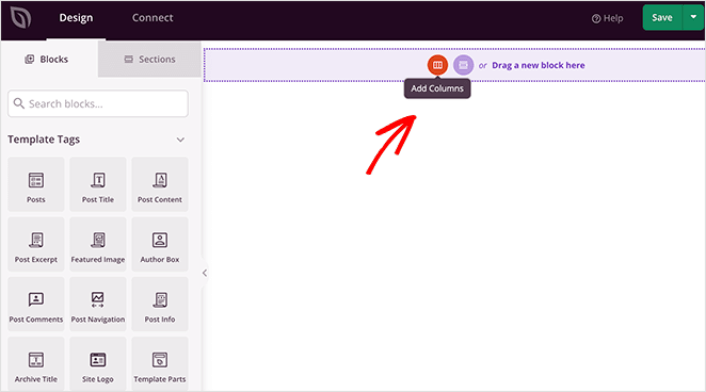
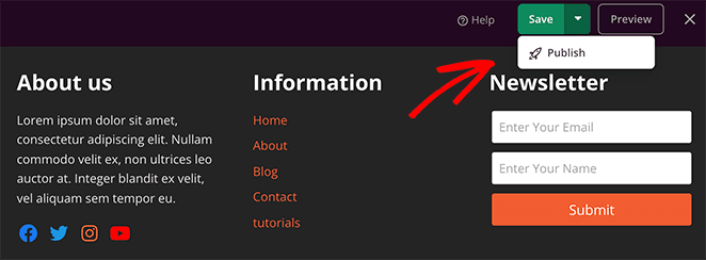
You can customize colors, fonts, background, spacing, and more. When you’re done customizing your site footer, click the Save button in the top-right corner.
Step #4. Publish Your Custom WordPress Footer
In SeedProd, you can launch your custom footer whenever you want. All you have to do is go to SeedProd » Theme Builder and click on the Enable SeedProd Theme toggle button.
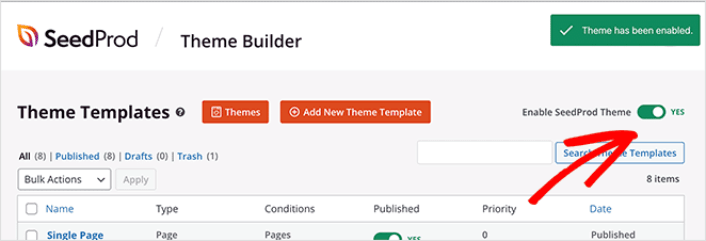
SeedProd will automatically replace your theme with your SeedProd theme and start using all your custom templates. This includes your WordPress footer as well. Once you go live with your new footer, you will be able to see it on your site:
And that’s it! You now know how to customize footers in WordPress using SeedProd.
Method #2: How to Edit Footer in WordPress with Theme Customizer
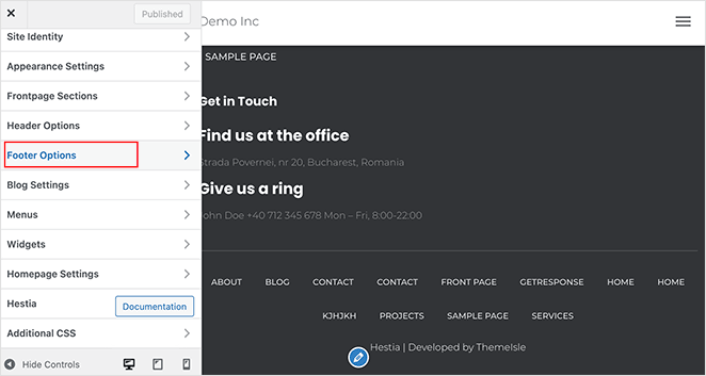
WordPress themes will typically give you some settings to customize your footer. It’s not usually a very flexible set of customization options. Go to Appearance » Customize from your WordPress admin area. Then click the Footer Options heading from the list in the left column.
You can then edit the footer text under Footer Credits.
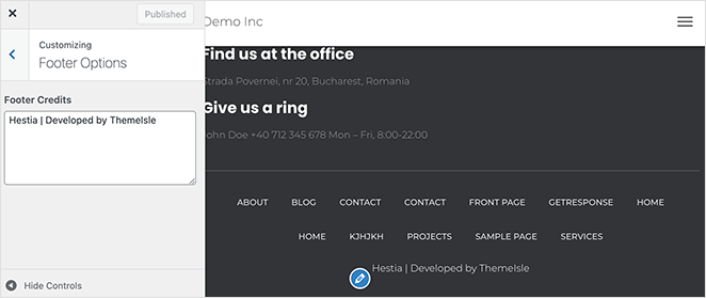
NOTE: This is an example using the Hestia theme. Every WordPress theme will offer different options. If you want to stick to your current theme and customize your WordPress footer, you should check out the theme documentation.
Now That You Know How to Edit Footer in WordPress
今回は以上です、皆さん!
Now that you know how to edit footer in WordPress, it’s time to optimize your footer to increase conversions. Ideally, you want your footer to lead your site visitors to click on your most important links.
トラフィックを増やすための手頃な方法を探している場合は、プッシュ通知の使用をお勧めします。プッシュ通知は、より多くのリピートトラフィックとサイトエンゲージメントをもたらすのに役立ちます。売上を生み出す自動プッシュ通知キャンペーンを作成することもできます。
まだ納得できませんか?これらのリソースを確認してください。
- 顧客エンゲージメントを高めるための7つのスマートな戦略
- プッシュ通知は効果的ですか?7つの統計情報+3つの専門家のアドバイス
- 放棄されたカートのプッシュ通知を設定する方法(簡単なチュートリアル)
- Web通知WordPressプラグインをサイトに追加する方法
プッシュ通知キャンペーンを作成するためにPushEngageの使用をお勧めします。PushEngageは世界No.1のプッシュ通知ソフトウェアです。まだお済みでない場合は、 今すぐPushEngageを使い始めましょう!


