Looking for a detailed tutorial on how to create a sitemap for WordPress?
Sitemaps help search engines to crawl and index your website with ease. In simple terms, a sitemap is a list of all the links on your site. This includes pages, posts, categories, and even media files.
Having a sitemap on your site makes it easy for search engines to discover your site content. But how do you do it?
Simple answer: You can add a WordPress SEO title from any SEO plugin at all. In this article, we’ll show you how to create a sitemap for WordPress in less than a minute with zero coding.
さあ、始めましょう。
What Is a Sitemap for WordPress?
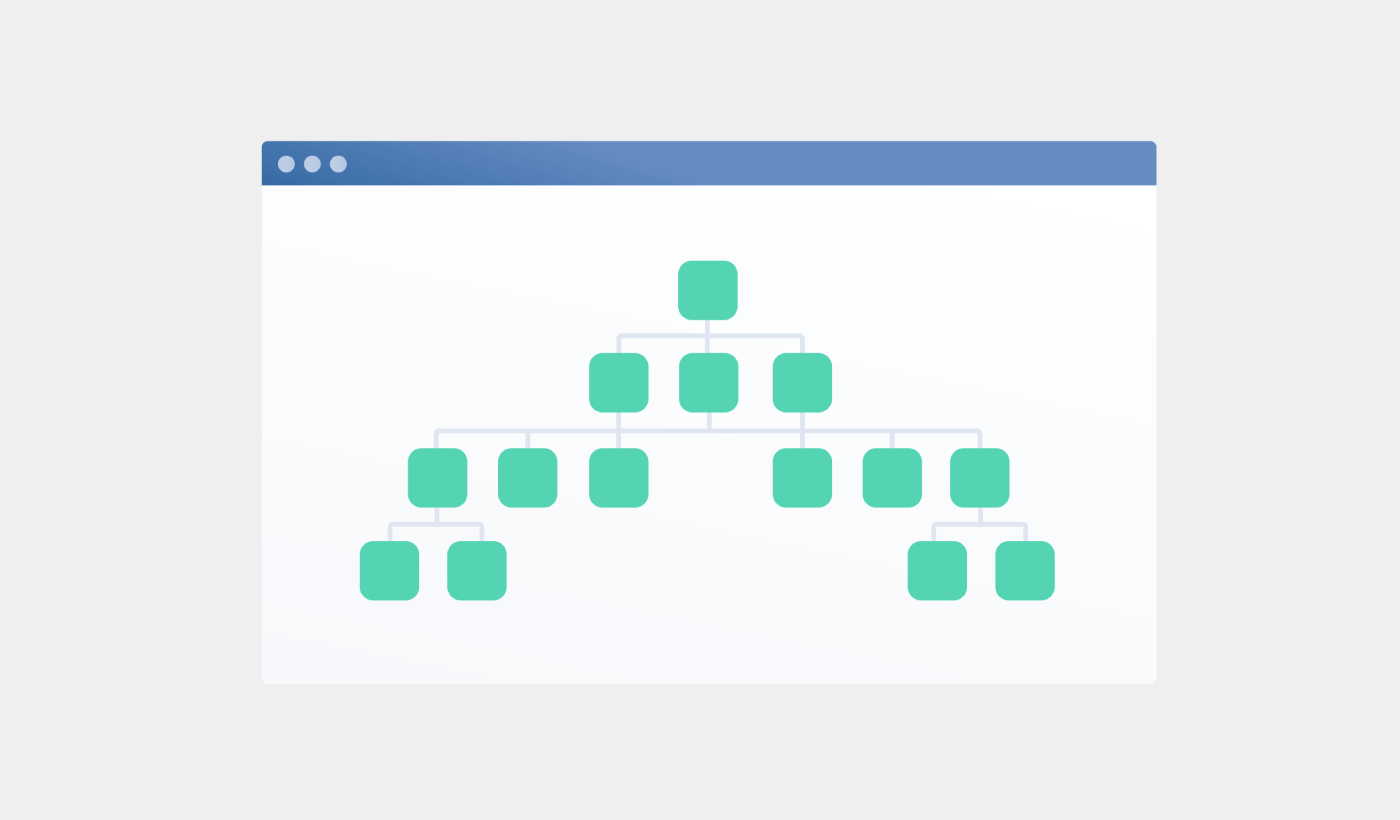
A WordPress sitemap is an XML (extensible markup language) file that contains a list of all (or most of) the pages of your website.
A sitemap tells Google, Bing, DuckDuckGo, and other search engines where your content is located, when was the page last updated, how important is the page for your website, and more information.
If you have no backlinks to your content, it’s difficult for search engines to find your content. Sitemaps get search engines started with indexing your content. And if you use a WordPress SEO plugin, you can easily create an XML sitemap for your WordPress site.
How to Create a Sitemap for WordPress
The simplest way to create a sitemap for WordPress is to use an SEO plugin. WordPress generates a basic sitemap on its own, but it includes anything that you might have no-indexed. There’s also no way to customize the default WordPress sitemap unless you know PHP code.
So, the default WordPress sitemap is usually full of errors. We recommend using AIOSEO as your WordPress SEO plugin.

All In One SEOは、世界最高のWordPress SEOプラグインです。
AIOSEOは最新のSEOベストプラクティスを実装するのに十分強力であるだけでなく、特定のSEOの問題をすぐに解決するための高度なオプションも利用できます。これには以下が含まれます:
- ローカルオーディエンスを持つ中小企業向けのローカルSEOモジュール
- オンラインストア向けのWooCommerce SEO
- WordPressエディター内のSEOオプティマイザー
- 検索エンジンでの即時インデックス作成のためのスマートサイトマップ
- リッチスニペットでコンテンツをランク付けするためのスキーマプラグイン
そしてもちろん、サイト上の任意のページまたは投稿のWordPressタイトルタグを追加、編集、最適化できます!私たちのAIOSEOのレビューから詳細をご覧ください。
ステップ1:All in One SEOプラグインの設定
プラグインをダウンロードしてインストールすると、セットアップウィザードが表示されます:
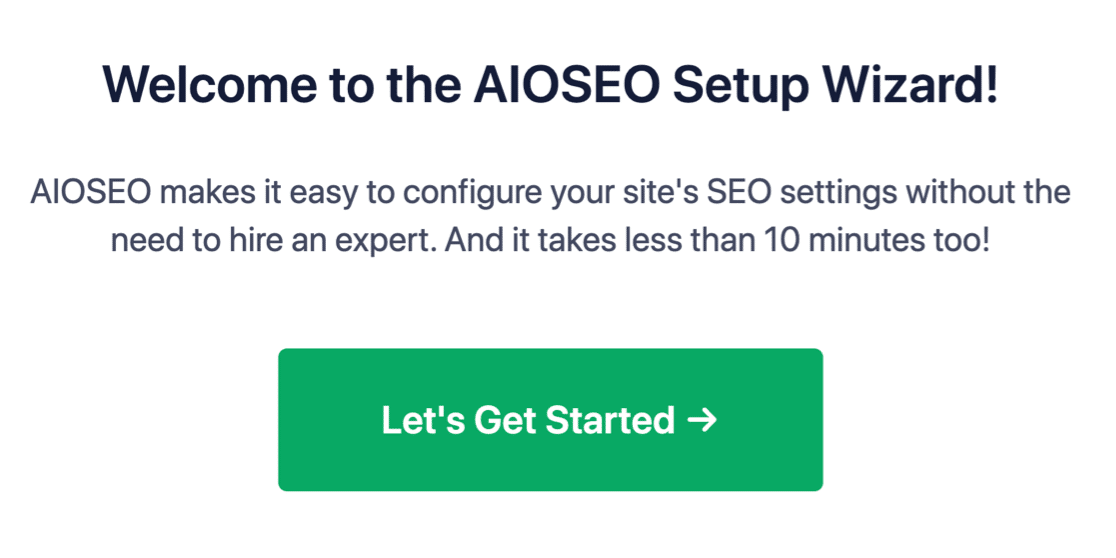
そして、セットアッププロセスは10分もかかりません。
しかし、他のSEOプラグインから移行する場合はどうでしょうか?各プラグインはメタデータを異なる方法で処理します。したがって、すべてをゼロから行う必要がありますか?以前のすべての努力は無駄ですか?
いいえ!All in One SEOがセットアップウィザード中に他のSEOプラグインを検出した場合、基本的な設定をコピーするように求められます:

セットアップの最後に、セットアップウィザードは古いSEOプラグインを非アクティブ化するように求めます。これにより、プラグインの競合やエラーが発生しなくなります:
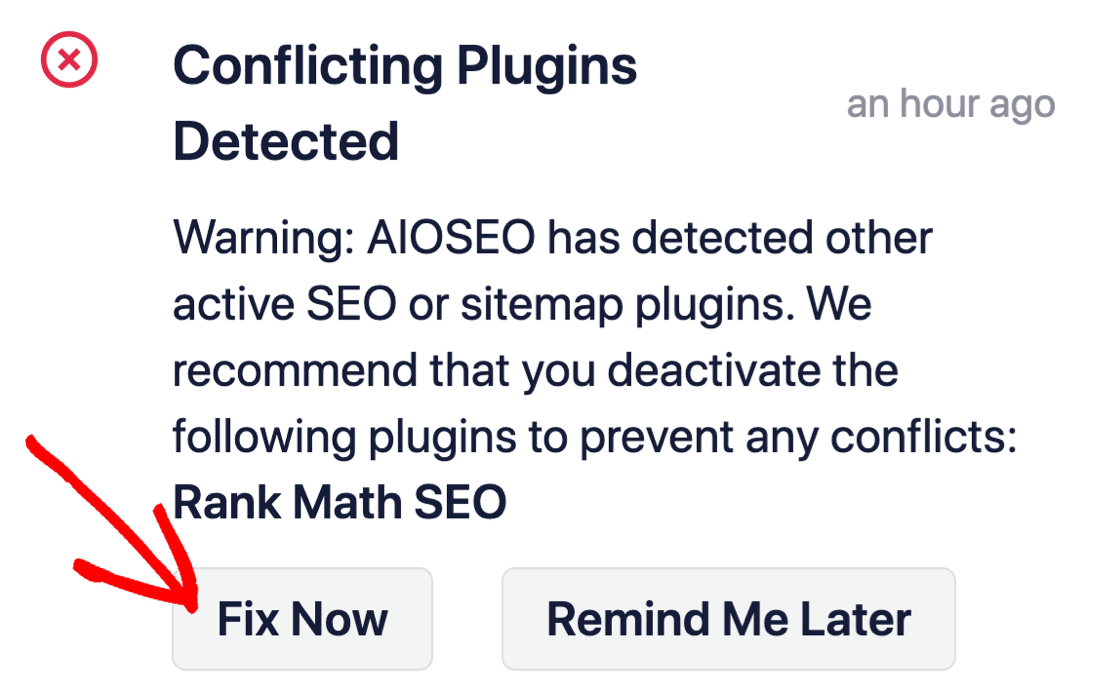
今すぐ修正をクリックしても、古いSEOプラグインの設定は削除されません。競合を防ぐためにプラグインを非アクティブ化するだけです。
Step #2: View Enabled Sitemap in All in One SEO
The best part of the All in One SEO plugin is that the sitemap is enabled by default. So, all you have to do is install the plugin and you’re all set. But if you’re switching SEO plugins, you should double-check that the sitemap is enabled.
Go to All in One SEO » Sitemaps from your WordPress dashboard. Then, go to the Enable Sitemap option and check if the toggle button is set to enabled mode:
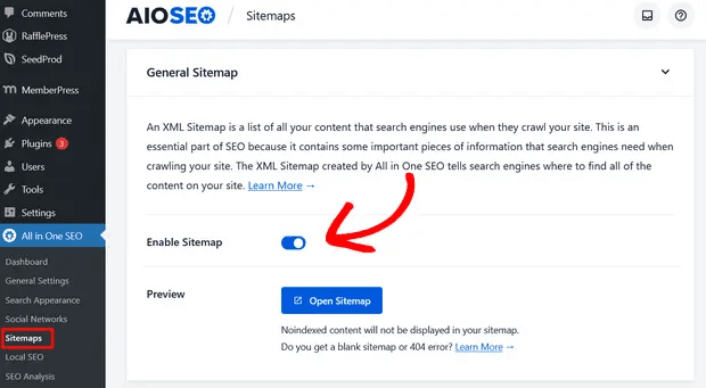
これで完了です!
Step #3: Verify Your Site’s Sitemap
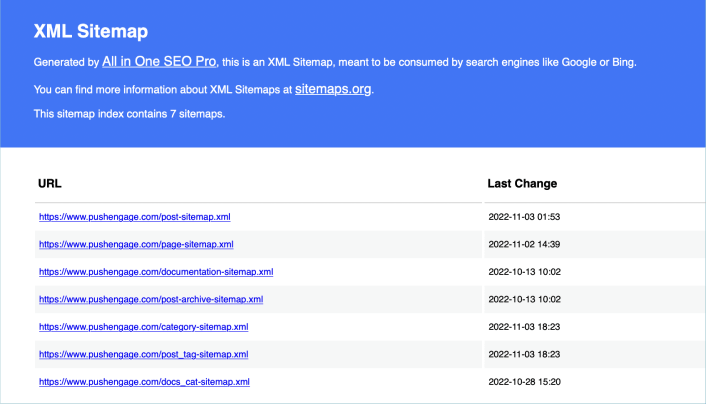
After making sure the sitemap is enabled, you can verify your website’s sitemap. Just click on the Open Sitemap button:
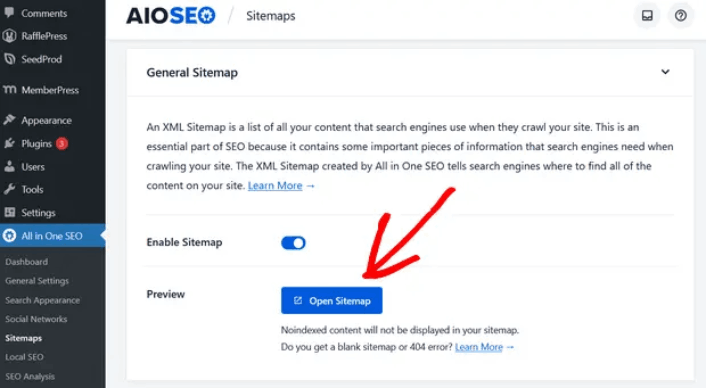
If everything goes well, you should see an XML sitemap like this one:
By default, All in One SEO will create sitemaps for your posts, pages, and categories. And if you have an online store like a eCommerce store or have any products listed, then it will set up a sitemap for them as well.
What to do Once You Know How to Create a Sitemap for WordPress
Now that you know how to create a sitemap for WordPress, it’s time to learn how to get even more traffic to your site. SEO is a great way to bring in fresh traffic to your site using just content. But you also need to bring in repeat traffic, website engagement, and sales.
That’s where push notifications can be super useful for your site.
If you’re not 100% convinced, you should check out these resources on how to effectively use push notifications:
- 顧客エンゲージメントを高めるための7つのスマートな戦略
- プッシュ通知は効果的ですか?7つの統計情報+3つの専門家のアドバイス
- 放棄されたカートのプッシュ通知を設定する方法(簡単なチュートリアル)
- Web通知WordPressプラグインをサイトに追加する方法
プッシュ通知キャンペーンを作成するためにPushEngageの使用をお勧めします。PushEngageは世界No.1のプッシュ通知ソフトウェアです。まだお済みでない場合は、 今すぐPushEngageを使い始めましょう!


