Looking for a guide on how to create a FAQ page for your WordPress site?
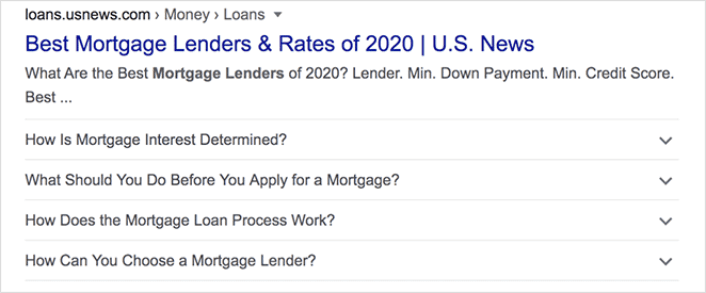
FAQ pages can address sales objections in potential customers. At the same time, it can bring in search traffic straight from Google’s “People Also Ask” featured snippets.
The coolest part is that you can use a FAQ page as a landing page that redirects visitors to product and sales pages.
In this article, we’re going to show you how to create a FAQ page for your WordPress site the easy way. Then, we’ll show you how to optimize your page to generate a ton of search traffic.
The best part? It’s perfectly fine if you’ve never done this before. This article is meant for complete beginners.
さあ、始めましょう。
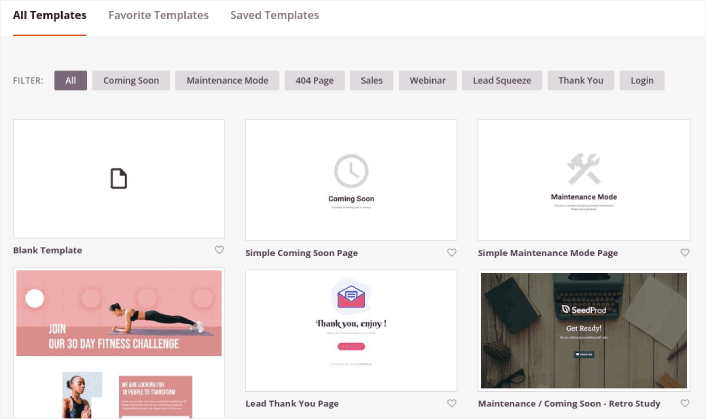
What the Best FAQ Pages Have in Common
Before we jump into our tutorial on how to create a FAQ page, here’s a checklist that will come in handy when you’re writing the content for your FAQ page:
- Does the FAQ page have a clear structure that’s easy to navigate?
- Are the answers clear and concise?
- Are there links to more comprehensive guides when needed?
- Does the business update the FAQ pages as it grows?
- Is it easy to search and find queries?
- Does the FAQ page include a search bar for users to find answers quickly?
- Is there a call to action for users to buy the product or service?
If you’re just getting started with FAQ pages yourself, you should also consider all these factors before you create one. And if you already have a FAQ page, you should consider updating it so that it follows these best practices. Also, you can check out our list of epic FAQ pages from six-figure businesses.
How to Create a FAQ Page in WordPress
Now that you know what kinds of FAQ pages work well, it’s time to create your own FAQ page. The easiest way to add a FAQ page to your WordPress site is with a drag-and-drop page builder plugin. We did a breakdown of the most powerful landing page builders and compared the best in the world.
Our recommendation is that you use SeedProd.

SeedProd is the best website builder for WordPress. It lets you create WordPress themes, landing pages, and flexible layouts for your WordPress site without code.
If you need the quick version of why you should use SeedProd, here it is:
- SeedProd works with any WordPress theme. There’s no messy transition and if you switch themes, you won’t break your landing pages completely.
- The designs are mobile-friendly and you actually get a mobile preview of your page. Seeing as most people use the internet from mobile devices rather than PCs, this is pretty important.
- SeedProdは、そのスピードと軽量性を誇りにしています。そのため、サイトの読み込み速度が遅くなることはありません。そして、サーバーリソースを大量に消費することも絶対にありません。
For a more detailed look at the features, you should check out our review of SeedProd. With this plugin, you can quickly launch your FAQ pages. The best part is that you can customize your entire page in the visual editor. This saves a lot of time and money you’d otherwise have spent on custom development.
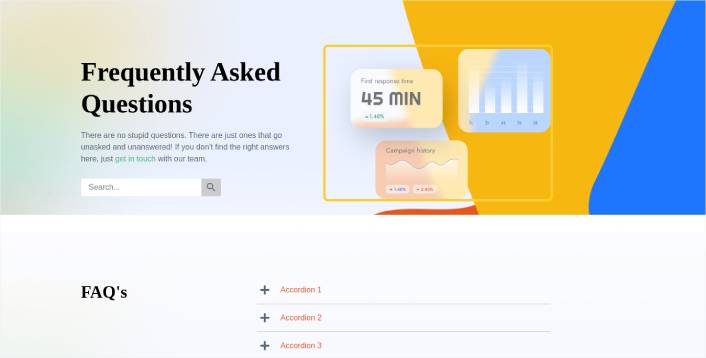
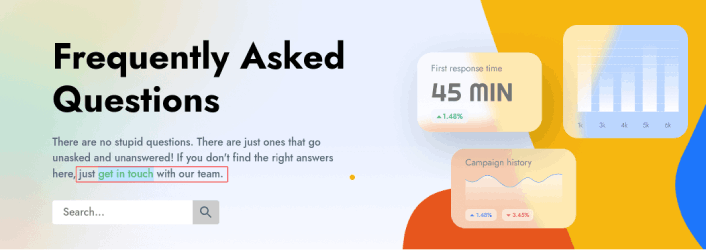
If you follow every step in this tutorial, you should be able to create a FAQ page just like this one:
Step #1: Install the SeedProd Plugin on Your Site
まず、SeedProd Proプラグインを入手して有効化します。方法がわからない場合は、WordPressプラグインのインストール方法に関するこの記事をご覧ください。次に、WordPressダッシュボードのSeedProd » Settingsに移動して、Proバージョンを有効化します。

次に、SeedProdのランディングページダッシュボードの概要を確認するために、SeedProd » Pagesに移動します。ここで、SeedProdを使用して作成できるさまざまな種類のランディングページを確認できます。

Keep in mind that these are all special pages with pre-built functionality and design templates. For an FAQ page, you don’t want to use ANY of these special landing pages. Instead, you’re going to create a custom landing page.
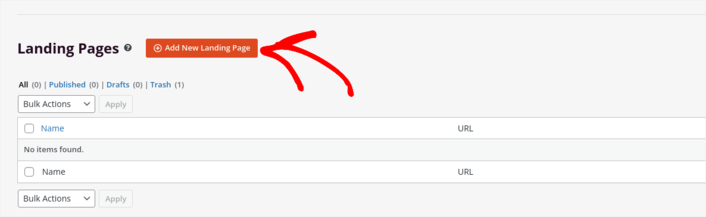
さらに下にスクロールして、新しいランディングページを追加ボタンをクリックして開始してください。
Step #2: Create a FAQ Page with SeedProd
新しいランディングページを追加ボタンをクリックすると、SeedProdのランディングページテンプレートライブラリが表示されます。これらは、完全にレスポンシブな、専門的にデザインされたランディングページテンプレートです。
次に、これらのテンプレートのいずれかを選択して開始できます。テンプレートはあくまで出発点であることを忘れないでください。後でページのすべての要素をカスタマイズできます。まずは、適合すると思われるテンプレートを見つけてください。
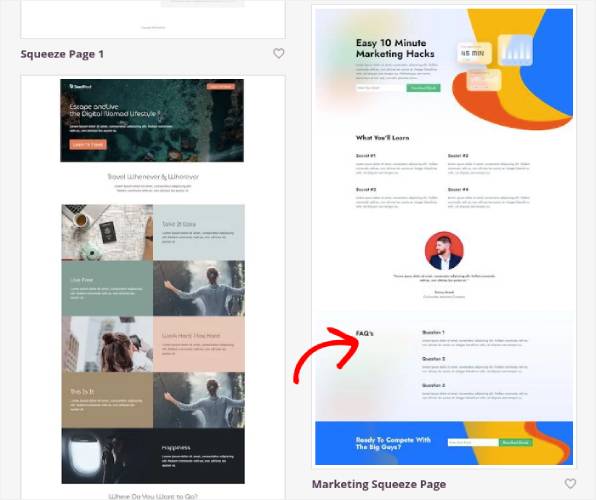
We’re using the Marketing Squeeze Page template for this tutorial because it already has a FAQ section in it. But you can select any template you like. The template is mostly a place to start your page design.
If you find an exact match for your page, that’s great. For instance, in our podcast landing page tutorial, we found an exact template built especially for podcast landing pages. If you don’t find an exact match, it’s still perfectly fine because we’re going to customize our page anyway.
Step #3: Customize the FAQ Page Template
SeedProdのビジュアルビルダーを使用すると、ドラッグアンドドロップのコンテンツブロックを使用してランディングページをカスタマイズできます。
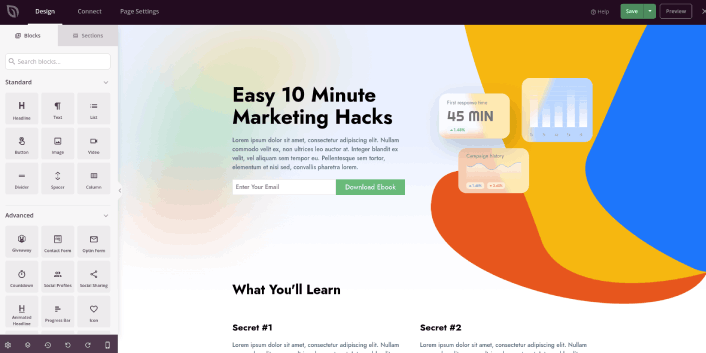
The first thing you should do is edit the headline for the page. You want it to be super clear and to the point. Just click on the headline in the preview and start editing it:
Next, add a little body copy in the exact same way:
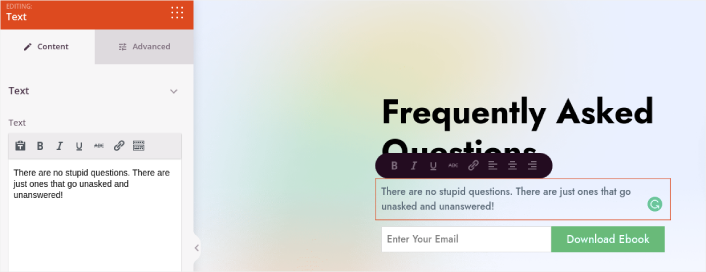
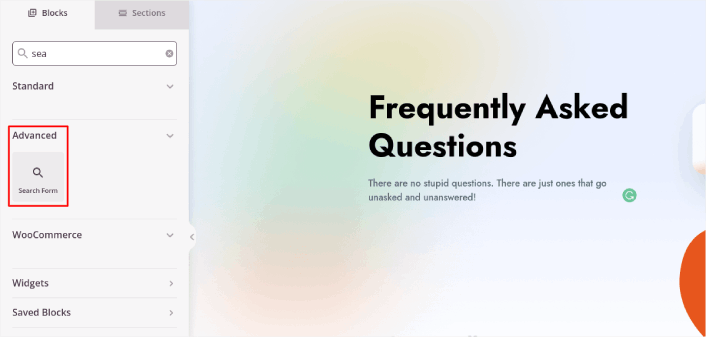
In the template, you can see a call to action (CTA) that says Download Ebook. Of course, for an FAQ page, you don’t necessarily want to collect leads in the first 10 seconds. So, you can click on the email optin and delete it. Instead, we highly recommend using a search bar in the hero section.
Just drag and drop the Search Form content block from the sidebar on the left onto your page preview section:
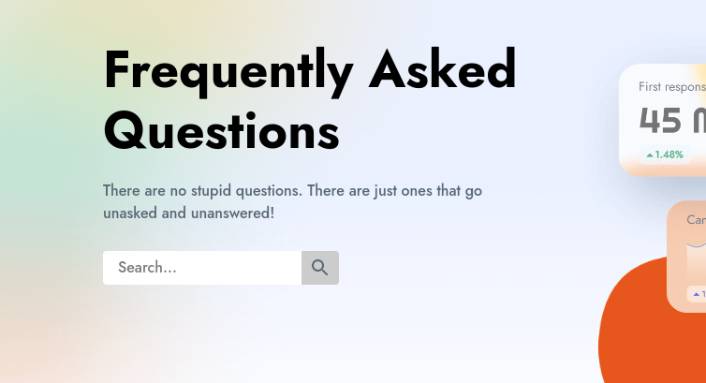
次のようになります。
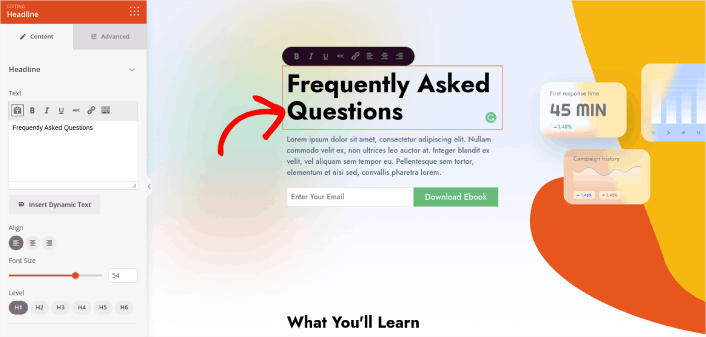
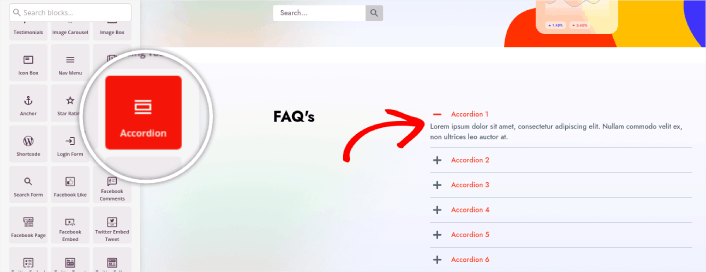
You can get rid of all the other blocks in the hero section and keep only the FAQs section. In the FAQs section, you’ll see a simple Q&A format with normal headers and paragraphs. You can keep this if you like the style. But we recommend using the Accordion module for your FAQ section:
After that, all you have to do is fill out the content. And there you have it!
Your basic FAQ page is done. If you want to supercharge it, you can also add a few tweaks to it. For instance, you can create a link to the contact page in the body copy of your hero section.
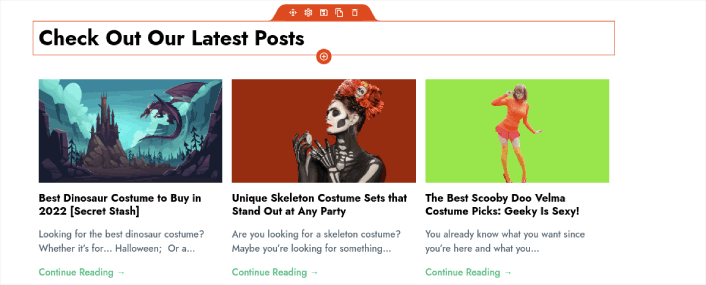
You can also add a blog section below the FAQs to redirect visitors to your latest posts using the Post block:
Finally, modify the CTA section at the bottom to collect email leads if that’s one of your marketing objectives:

You can do a lot more in terms of design and all from drag-and-drop content blocks. Once you’re happy with the overall look and feel of your FAQ page, it’s time to connect your email marketing service.
Step #4: Connect Your Email Marketing Service
After you’re done designing your FAQ page, click the Connect tab at the top of your page builder, and select your email marketing provider to collect leads on your site.

次に、画面上部にある「ページ設定」タブをクリックします。

ここで、ランディングページにSEOプラグインとGoogle Analyticsプラグインを追加できます。広告パフォーマンスを追跡するために、FacebookピクセルやPinterestピクセルなどのカスタムトラッキングコードを設定することもできます。
WordPress SEOプラグインとしてAll in One SEOの使用をお勧めします。

AIOSEOとSeedProdを併用する場合、ページ設定 » SEO » スキーマに移動して、ページにFAQスキーマを設定するだけです。
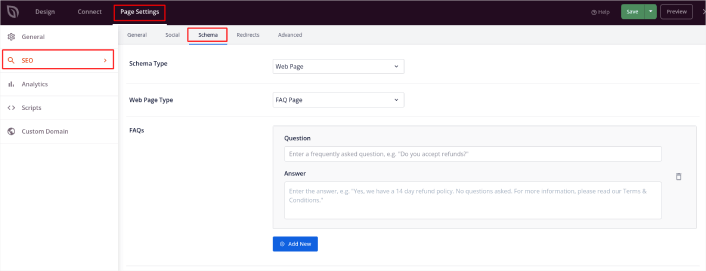
スキーマタイプをWebページに、WebページタイプをFAQページに設定します。次に、FAQを下のFAQフィールドに貼り付けるだけです。
Step #5: Publish Your Landing Page
Now let’s go ahead and publish your design. To do this, click the dropdown arrow next to the save button and click Publish. You can then click the See Live Page button to see how it looks.
And you’re done! If you followed every step, your FAQ page should look something like this:
Bonus Step: Add a Click to Subscribe Button to Your FAQ Page
プッシュ通知購読者を収集するために、クリックして購読ボタンを追加することもできます。プッシュ通知は、リピートトラフィックを増やし、エンゲージメントを高め、公式グッズがあれば販売するためにも役立ちます。
SeedProdでは、サイドバーからカスタムHTMLモジュールをドラッグアンドドロップするだけです。
最初の折り目のメールサインアップフォームのすぐ下に、購読ボタンを配置しました。

しかし、ボタンは好きな場所に挿入できます。
For this part, you need some experience with HTML and CSS. Or, you can copy this code and paste it into your Custom HTML block:
<button onclick="subscribeOnClickButton()" style="border: none; padding-left: 5%; padding-right:5%; text-align: center; display: inline-block; color: blue;">Get Updates via Push Notifications</button>That’s a standard button in HTML with very little styling. The only fancy bit is the onclick function in the code. It basically means that your visitors can click on the button to subscribe to something. Now, we need to give the button some extra code to allow your visitors to subscribe to push notifications.
PushEngageのホームページにアクセスし、開始するボタンをクリックします。

次に、PushEngage を試すために無料プランを選択するか、ビジネスの成長に真剣に取り組んでいる場合は有料プランを選択します。有料プランには、より多くのキャンペーンオプションと、さらに大きな購読者リストを構築する機能が付属しています。
あなたのPushEngageダッシュボードで、サイト設定 »サイト詳細に移動し、セットアップ手順を表示するにはここをクリックボタンをクリックします。「任意のサイト」の下に、インストールコードが表示されます。

警告:ダッシュボードから取得したコードをコピーする必要があります。コードはPushEngageユーザーごとに固有です。画像内のコードをコピーしてプッシュ通知購読者を収集することはできません。
PushEngage ダッシュボードでコードを取得したら、このスニペットをコードに追加します。
<script> window._peq = window._peq || [];</script> <script>
function subscribeOnClickButton(){
window._peq.push(['subscribe',{}.pe,function(res){
if(res.statuscode==1)
{
// Code to return response
console.log(res);
}
}]);
}
</script>
最終的なコードは次のようになります。
<script src="https://clientcdn.pushengage.com/core/02a6e92667ae2279fcba8932356c1d93.js" async></script>
<script> window._peq = window._peq || [];</script> <script>
function subscribeOnClickButton(){
window._peq.push(['subscribe',{}.pe,function(res){
if(res.statuscode==1)
{
// Code to return response
console.log(res);
}
}]);
}
</script>
You’ll want to add this code to the HTML block in your landing page after the code for the button. It should look something like this:

Feel free to customize the styles for the button any way you please. When you’re done customizing your FAQ page, go ahead and hit the Save button.
What to Do Once You Know How to Create a FAQ Page
You just learned how to create a FAQ page that looks awesome and converts really well. The only challenge you have left is to send traffic to it.
トラフィックを増やすための手頃な方法を探している場合は、プッシュ通知の使用をお勧めします。プッシュ通知は、より多くのリピートトラフィックとサイトエンゲージメントをもたらすのに役立ちます。売上を生み出す自動プッシュ通知キャンペーンを作成することもできます。
まだ納得できませんか?これらのリソースを確認してください。
- 顧客エンゲージメントを高めるための7つのスマートな戦略
- プッシュ通知は効果的ですか?7つの統計情報+3つの専門家のアドバイス
- 放棄されたカートのプッシュ通知を設定する方法(簡単なチュートリアル)
- Web通知WordPressプラグインをサイトに追加する方法
プッシュ通知キャンペーンを作成するためにPushEngageの使用をお勧めします。PushEngageは世界No.1のプッシュ通知ソフトウェアです。まだお済みでない場合は、 今すぐPushEngageを使い始めましょう!


