
Looking for a quick and easy way to create a contact form in WordPress?
WordPress has a lot of plugins and themes that you can use. The biggest challenge in creating a contact form in WordPress is actually compatibility. How do you create a contact form that doesn’t break because of plugin conflicts or your theme’s default settings?
What’s even the point of using WordPress if you have to site and code contact forms in HTML and CSS? On top of that, you’d have to manually code a way to connect your form to an email service provider.
And then, you’d have to resolve any email delivery issues.
Don’t worry. There’s a much simpler way that works with any theme and there’s zero coding involved.
In this article, we’re going to give you a WordPress contact form plugin that resolves all these issues right out of the box. We’ll even show you how to create your very first contact form using that plugin. And it will take you less than 10 minutes to create a form.
さあ、始めましょう。
Why You Should Create a Contact Form on Your WordPress Site
Before we get started with building your contact form, let’s talk about why you would want a contact form on your WordPress site in the first place. Isn’t it much easier to have a button that opens up Outlook and allows your web visitors to email you directly?
Short answer: NO!
But this is a perfectly reasonable question to ask. You’re probably thinking that it takes way too long to code a contact form and then put it up manually across all your money-making pages.
And you’re right. It does take a long time to create a contact form manually using code. But we’re not going to use any code in this article.
Besides, a contact form is way better than displaying your email in public. A well-designed contact form:
- Protects your inbox from spam: Spam bots scrape “mailto” tags on your site to automatically collect email addresses to spam. Having a contact form with Captcha protection can prevent that.
- Gathers data in a consistent, readable pattern: When you leave it up to your prospects to email you, they will often leave out crucial information that you may need. So, there’s no consistency in the data you gather. But you can design your contact form to gather all the important data you need and then email the response to you in a structured, readable way.
- Automates onboarding processes: You can actually create contact forms that redirect to a different page when someone submits their form. This is a great way to inform your leads and prospects about the next steps in their onboarding journey.
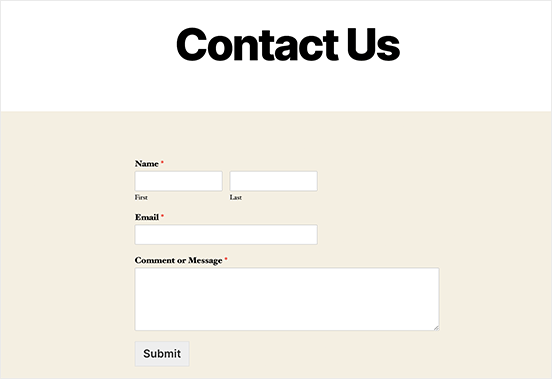
Here’s a quick look at the form that we’re going to create in this article:
We’re going to do it all using one of the best WordPress form plugins in the world.
始めましょう。
How to Add Contact Form in WordPress
The first thing you need to do is choose a WordPress contact form plugin.
Of course, a quick Google search will show you that there are way too many contact form plugins to choose from. So, we went ahead and found the best plugin for you.
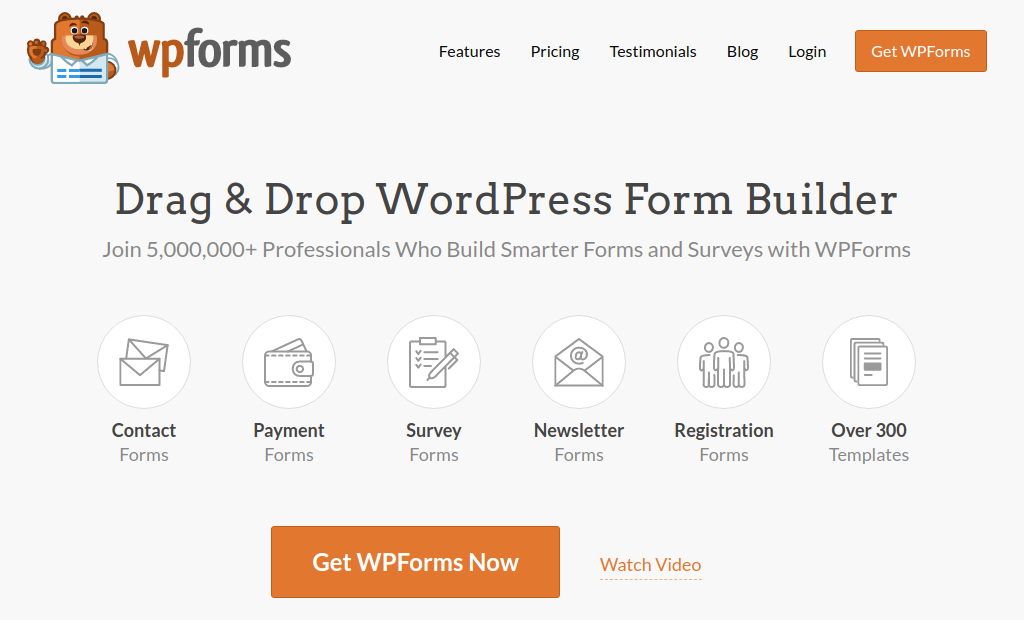
We recommend using WPForms to create contact forms on your WordPress site.
WPFormsは、300万以上のユーザーを持つ、WordPressのナンバーワンフォームビルダープラグインです。ドラッグ&ドロップのフォームビルダーを備えているため、わずか数分で驚くほど機能的なWordPressフォームを作成できます。
WPFormsの無料版であるWPForms Liteも使用できます。したがって、使い始めるための無料フォームビルダーを探している場合は、Liteバージョンを使用できます。後で、フォームにさらに強力な機能が必要になった場合は、有料プランにアップグレードできます。
Step 1: Install WPForms on Your Site
Let’s start by installing WPForms on your site. Head over to the site and click on Get Started to sign up for the plugin. Then, head over to your WPForms dashboard and go to Downloads to get your plugin:
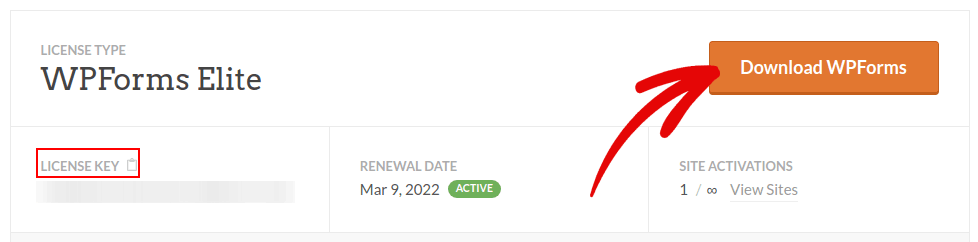
次に、サイトにプラグインをインストールして有効化します。同じタブでライセンスキーをコピーします。
NOTE: If you need more step-by-step instructions, you should check out this article on how to install WordPress plugins.
最後に、WordPressダッシュボードに移動し、[WPForms » 設定]にアクセスしてライセンスキーを貼り付けます。
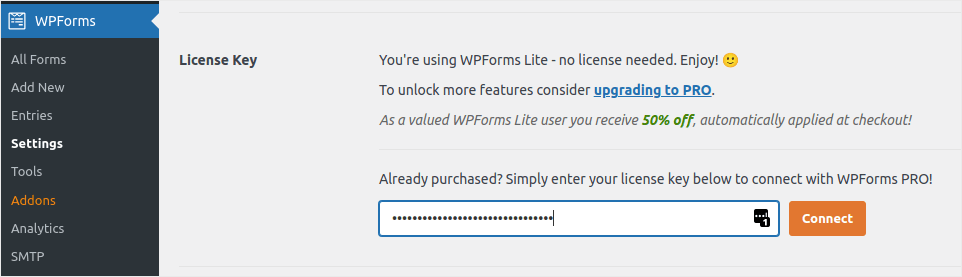
When you’re done, click Connect. And you’re done!
Step 2: Create a Contact Form in WordPress
WPFormsがインストールされ有効化されたので、最初のフォームを作成する時間です。[WPForms » 追加]に移動します。

これにより、WPFormsのドラッグアンドドロップフォームビルダーが開きます。
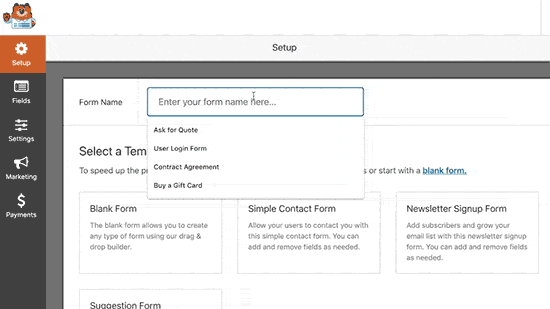
新しいフォームを作成するには、名前を付けてフォームテンプレートを選択します。
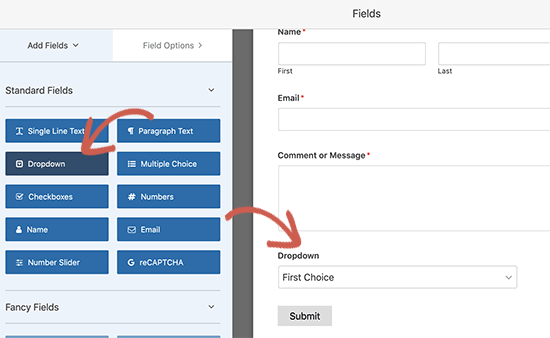
これで完了です!連絡先フォームのフィールドを追加または編集したい場合は、サイドバーから行うことができます。新しいフィールドを追加するにはドラッグアンドドロップでフィールドを移動し、既存のフィールドをクリックして編集します。
完了したら、保存をクリックします。
Step 3: Configure Notifications and Confirmations
次に、通知と確認を設定します。
通知は、誰かがフォームに記入したときに受信するメールです。確認は、ユーザーがフォームを正常に記入したことを知らせるためのものです。通常は「ありがとうございます」というメッセージですが、ユーザーを専用ページにリダイレクトすることもできます。
確認設定を構成するには、設定 » 確認に移動します。

次に、同じメニューで通知に移動して、通知メッセージを構成します。

デフォルトでは、通知はWordPress管理者のメールに送信されます。したがって、営業部長のメールアドレスなど、別の場所にメールを送信したい場合は、ここで実行できます。
Step 4: Add Your WordPress Contact Form
これでWordPressのコンタクトフォームの設定は完了です。それでは、ページに追加しましょう。WPFormsコンタクトフォームをWordPressサイトに追加するには、3つの基本的な方法があります。それぞれ見ていきましょう。
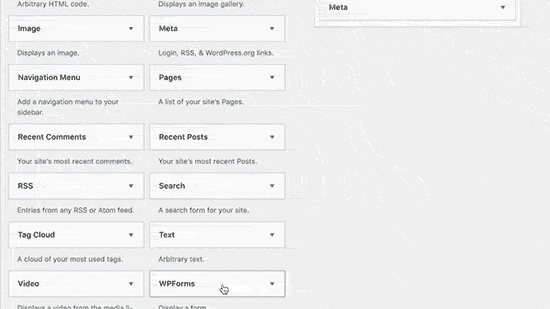
方法1:ブロックエディターを使用してフォームを追加する
コンタクトフォームを追加したいページに移動し、新しいWPFormsブロックを追加します。
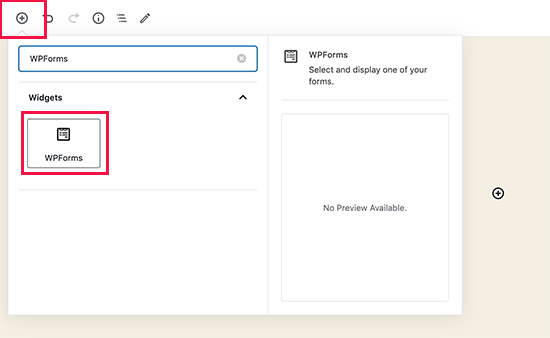
次に、ドロップダウンメニューを使用して新しく作成したフォームを選択します。
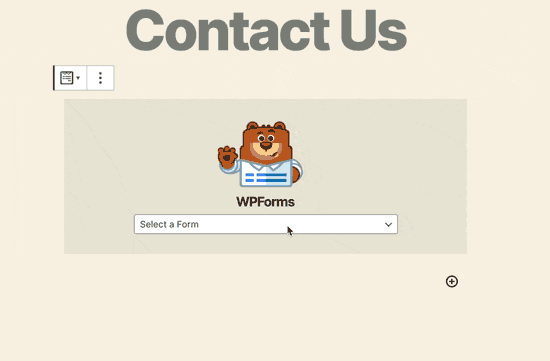
これにより、コンタクトフォームがページに自動的に挿入されるはずです。
保存して公開を押すだけで、WordPressフォームが動作しているのを確認できます。
方法2:WPFormsショートコードを使用してコンタクトフォームを追加する
WPFormsは、各WordPressコンタクトフォームのショートコードも生成します。WPForms » すべてのフォームにアクセスして、コンタクトフォームのショートコードをコピーできます。
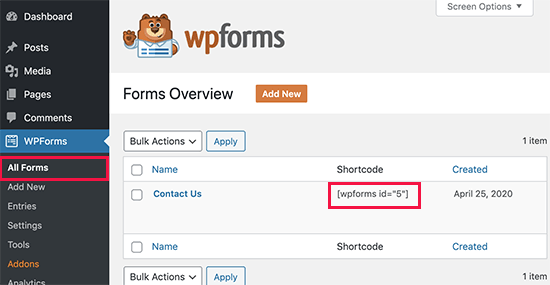
And then, paste the shortcode in any post or page you want. It’s that simple.
ショートコードに慣れていない場合は、WordPressサイトにショートコードを追加する方法に関するこの記事を確認してください。
Method #3: Add Your Contact Form in the Sidebars
サイドバーは、ほとんどのWordPressサイトで最も過小評価されている機能の1つです。サイトのサイドバーにコンタクトフォームを挿入することを強くお勧めします。WordPressダッシュボードの外観 » ウィジェットに移動し、WPFormsウィジェットをサイドバーに追加します。
これで完了です!
How to Track Your WordPress Form Conversions
Once you’re done creating your form and adding it to different pages, you should also set up a good way to track and measure conversions. We recommend using MonsterInsights to track your form analytics.

MonsterInsights is the #1 Google Analytics plugin and we love the software.
The plugin is super easy to set up and you can track your form conversion analytics using MonsterInsights reports:
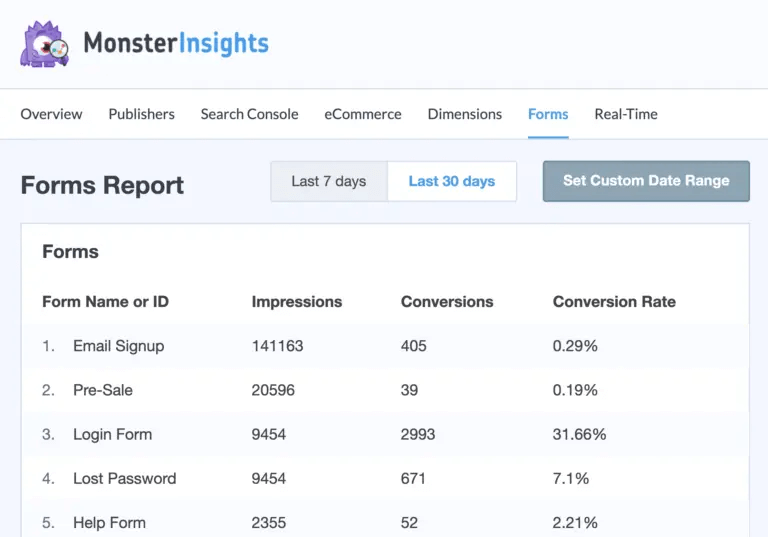
And it integrates seamlessly with WPForms.
まとめ
今回は以上です、皆さん!
By now, you’ve created your first WordPress contact form and set up conversion analytics for it.
Now, all that’s left is generating traffic to your site so that your contact forms can get to work. A simple way to do that is to start using push notifications. Sending push notifications is a great way to generate repeat traffic for your site. If that’s something you’re interested in, you should check out these articles as well:
プッシュ通知の送信にはPushEngageの使用をお勧めします。PushEngageは世界No.1のプッシュ通知ソフトウェアです。まだお済みでない場合は、今すぐPushEngageを開始してください。


