Looking for a tutorial on how to create a blog page on WordPress?
Creating a separate page for your blog makes it easier for visitors to find your latest posts. But if you’ve never made a blog page before, how do you even get started? Do you need a plugin to do it? Or can you do it from WordPress default settings as is?
In this article, we’re going to show you how to create a blog page on WordPress step by step and in the simplest way possible.
よさそうですね?さあ、始めましょう。
What Is a WordPress Blog Page?
A WordPress blog page is a page on a WordPress website that displays posts in reverse chronological order, with the most recent post at the top of the page. The page is usually called the “blog” or “news” page and is often the main page of a WordPress website.
You can use a blog page to share updates, news, stories, and other information with website visitors. A blog posts page typically includes the following web design elements:
- Navigation menu
- Blog posts list
- フッター
We also recommend having a sidebar to showcase your most popular posts, a newsletter subscription form, and even ads from Google AdSense or Google AdSense alternatives.
Blog pages are a common feature of WordPress websites and are easy to set up and customize. You can use the built-in WordPress editor to add and format your blog posts. But if you want to customize the blog page itself, you can use WordPress plugins to add features and functionality.
Why Create a Blog Page on WordPress?
There are many reasons why you might want to create a blog page on your WordPress website. Here are a few:
- Share updates and news with your audience: A blog page is a great way to share updates, news, and other information with your website visitors. You can use it to keep them informed about what’s going on with your business, organization, or personal life.
- Engage with your audience: By allowing comments on your blog posts, you can encourage your visitors to share their thoughts and ideas with you and with each other.
- Improve your website’s search engine rankings: Search engines, like Google, tend to favor websites that have fresh, regularly-updated content. By regularly publishing blog posts, you can help your website rank higher in search engine results.
- Establish yourself as an authority in your field: If you are knowledgeable about a particular topic, a blog can be a great way to share your expertise with others and establish yourself as an authority in your field.
- Monetize your website: If you have a large and engaged audience, you may be able to monetize your blog by selling advertising space or promoting products or services.
In short, a blog page can be a valuable addition to any WordPress website, whether you are using it for personal or professional purposes. If you’re not sure where to get started, you should check out our article on how to create a website.
How to Create a Blog Page on WordPress with a Page Builder
One of the easiest ways to create a blog page on WordPress is to use a WordPress page builder plugin. We recommend using SeedProd.

SeedProd は、コンバージョンにつながるランディングページを作成するための最高のWordPressプラグインです。
ドラッグ&ドロップのランディングページビルダーが利用でき、eコマースページやランディングページを構築するためのオプションが満載です。WordPressのウェブサイトビルダーとは異なり、ナビゲーションメニュー、フッター、スタイルなど、ランディングページのあらゆる部分をカスタマイズできます。SeedProdは、あらゆるWordPressテーマと連携し、モバイルフレンドリーなランディングページを作成します。
SeedPreedを使用すると、すぐに公開できるコンバージョン率の高いランディングページ用の既製テンプレートを入手できます。これには、次のテンプレートが含まれます。
- 販売ページ
- 近日公開ページ
- 404ページ
- メンテナンスページ
- アプリのランディングページ
- ログインページ
- ありがとうございますページ
- ウェビナーページ
- ビデオページ
その他多数!私たちはSeedProdの使用を気に入っており、SeedProdプラグインの詳細なレビューも作成しました。ぜひチェックしてみてください!
Step #1: Install the SeedProd Plugin on Your Site
First, you’ll need to visit the SeedProd website and purchase the plugin. Then, you can download the plugin file to your computer. Then, copy the plugin license key from your SeedProd dashboard.
Next, you’ll have to log into your WordPress dashboard and install the plugin. If you need detailed instructions, check out this step-by-step guide to installing a WordPress plugin. Head over to the SeedProd plugin welcome screen on WordPress and verify your license key:

After your account is verified, you’re ready to create a blog page on WordPress.
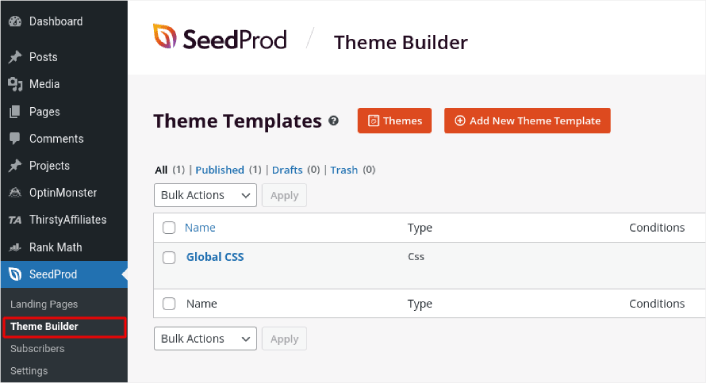
ステップ#2. スターターテーマテンプレートを選択する
WordPressダッシュボードのSeedProd » Theme Builderに移動します。
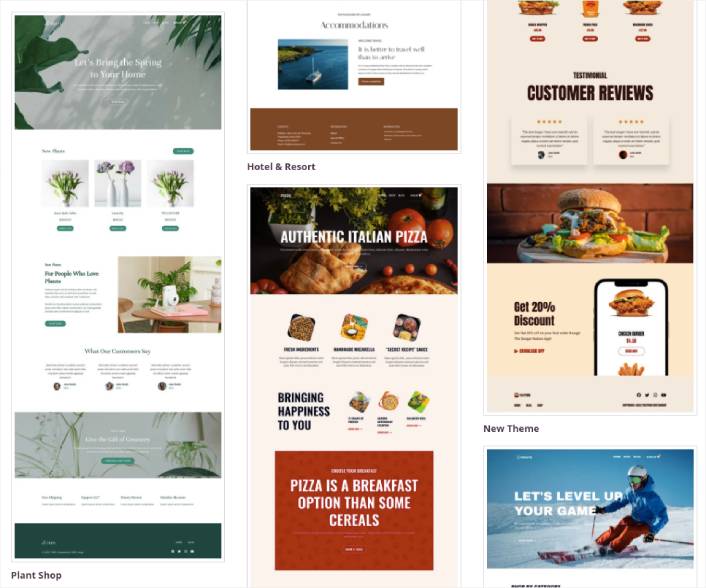
ここでは、SeedProdでスターターテーマを選択できます。SeedProdを使用してカスタムテーマを非常に簡単に作成できます。しかし、今回は、既製テンプレートを選択します。Themesボタンをクリックして、スターターテーマを選択してください。
After choosing a theme, SeedProd will automatically create all the theme templates. From here, you can edit each template using the drag-and-drop editor. Each page is set up automatically with an attractive layout and placeholder content ready for you to customize.
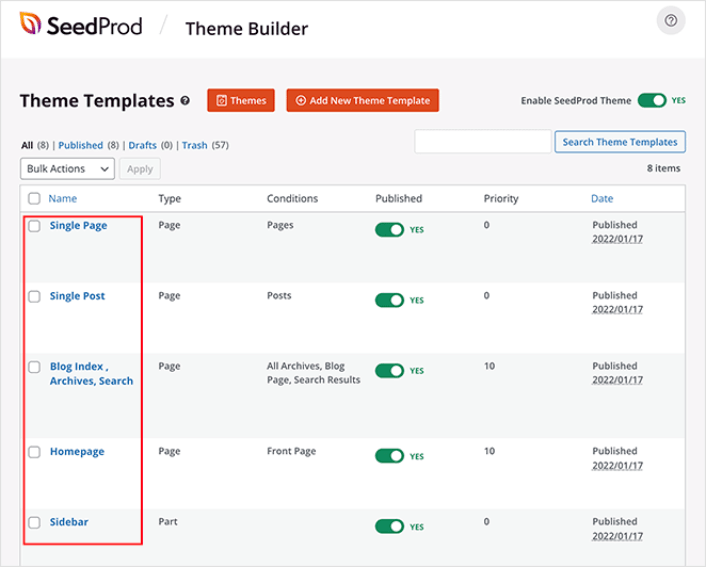
Here, you can choose to customize every part of your theme. We recommend customizing your home page first, but for this article, we’re going to skip ahead and go straight for the blog page.
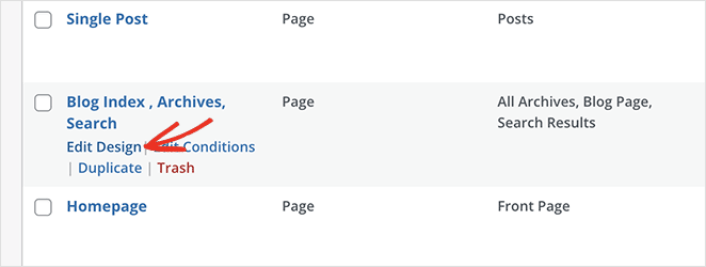
Step #3. Customize Your Blog Page
SeedProd’s theme builder comes with many ways to customize your blog page. Click the Edit Design link on the Blog Page template file to get started:
It’s super easy to customize the blog page using the SeedProd builder. All you have to do is click on an element and edit it:
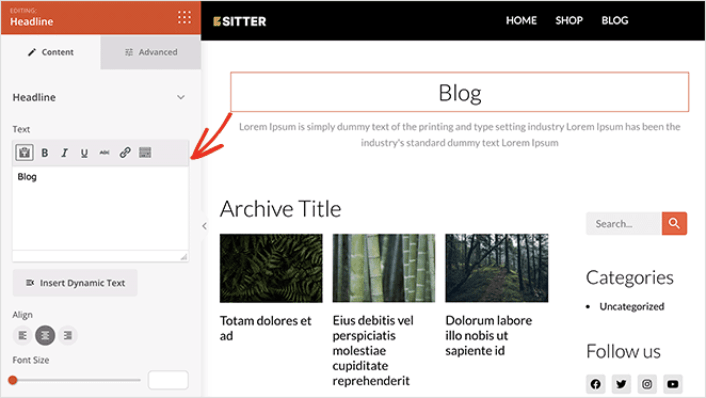
SeedProd offers several blocks you can use on your blog page. The most important is the Posts block which shows a list of recent blog posts.

You can change the layout of the Posts block easily by clicking it and choosing different settings in the left-hand panel.
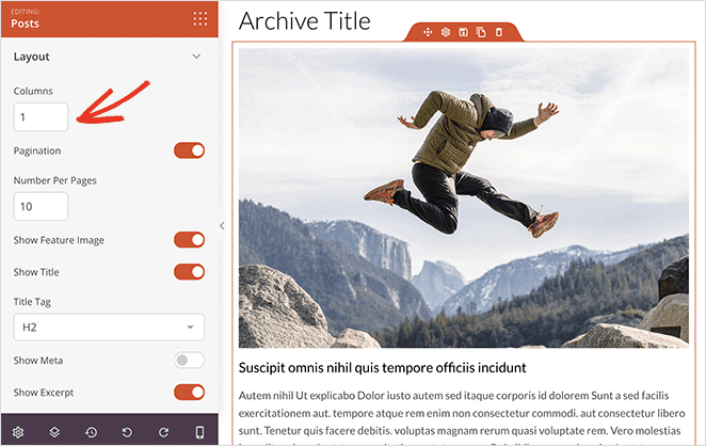
If you scroll through the block settings, you’ll see other toggles to show or hide:
- Featured image
- Read more text
- Pagination
- Meta information
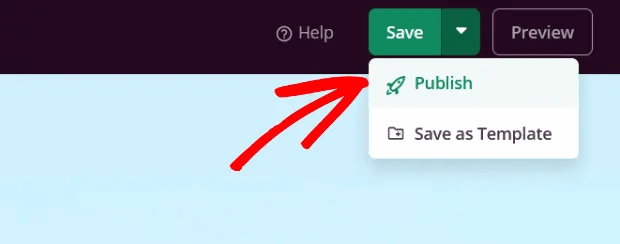
These settings allow you to display your blog posts to best suit your target audience. When you’re done customizing your page, click on Save. Then, click on the dropdown arrow next to the Save button and hit Publish:
Step #4: Add a Click to Subscribe Button to Your Blog Page
You can also add a click to subscribe button to collect push notification subscribers. Push notifications are a great way to increase your repeat traffic, get more engagement and even sell official merch if you have some.
In SeedProd, just drag and drop the Custom HTML module from the sidebar.
We’ve put the subscribe button directly underneath the blog title in the first fold.
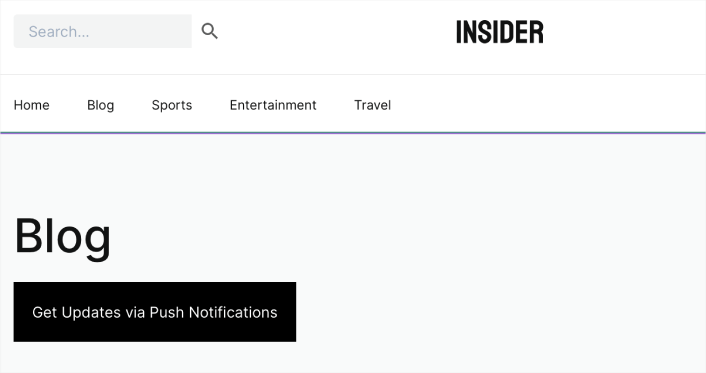
But you can insert the button anywhere you like.
For this part, you need some experience with HTML and CSS. Or, you can copy this code and paste it into your Custom HTML block:
<button onclick="subscribeOnClickButton()" style="border: none; padding-left: 5%; padding-right:5%; text-align: center; display: inline-block; color: blue;">Get Updates via Push Notifications</button>That’s a standard button in HTML with very little styling. The only fancy bit is the onclickfunction in the code. It basically means that your visitors can click on the button to subscribe to something. Now, we need to give the button some extra code to allow your visitors to subscribe to push notifications.
PushEngageのホームページにアクセスし、開始するボタンをクリックします。

次に、PushEngage を試すために無料プランを選択するか、ビジネスの成長に真剣に取り組んでいる場合は有料プランを選択します。有料プランには、より多くのキャンペーンオプションと、さらに大きな購読者リストを構築する機能が付属しています。
あなたのPushEngageダッシュボードで、サイト設定 »サイト詳細に移動し、セットアップ手順を表示するにはここをクリックボタンをクリックします。「任意のサイト」の下に、インストールコードが表示されます。

警告:ダッシュボードから取得したコードをコピーする必要があります。コードはPushEngageユーザーごとに固有です。画像内のコードをコピーしてプッシュ通知購読者を収集することはできません。
PushEngage ダッシュボードでコードを取得したら、このスニペットをコードに追加します。
<script> window._peq = window._peq || [];</script> <script>
function subscribeOnClickButton(){
window._peq.push(['subscribe',{}.pe,function(res){
if(res.statuscode==1)
{
// Code to return response
console.log(res);
}
}]);
}
</script>
最終的なコードは次のようになります。
<script src="https://clientcdn.pushengage.com/core/02a6e92667ae2279fcba8932356c1d93.js" async></script>
<script> window._peq = window._peq || [];</script> <script>
function subscribeOnClickButton(){
window._peq.push(['subscribe',{}.pe,function(res){
if(res.statuscode==1)
{
// Code to return response
console.log(res);
}
}]);
}
</script>
You’ll want to add this code to the HTML block in your landing page after the code for the button. It should look something like this:

Feel free to customize the styles for the button any way you please. When you’re done customizing your blog page, go ahead and hit the Save button.
What to do After You Create a Blog Page on WordPress
Now that you know how to create a blog page on WordPress, all that’s left is to send traffic to your site and watch your business grow.
トラフィックを増やすための手頃な方法を探している場合は、プッシュ通知の使用をお勧めします。プッシュ通知は、より多くのリピートトラフィックとサイトエンゲージメントをもたらすのに役立ちます。売上を生み出す自動プッシュ通知キャンペーンを作成することもできます。
まだ納得できませんか?これらのリソースを確認してください。
- 顧客エンゲージメントを高めるための7つのスマートな戦略
- プッシュ通知は効果的ですか?7つの統計情報+3つの専門家のアドバイス
- 放棄されたカートのプッシュ通知を設定する方法(簡単なチュートリアル)
- Web通知WordPressプラグインをサイトに追加する方法
プッシュ通知キャンペーンを作成するためにPushEngageの使用をお勧めします。PushEngageは世界No.1のプッシュ通知ソフトウェアです。まだお済みでない場合は、 今すぐPushEngageを使い始めましょう!


