Notice: There is no legacy documentation available for this item, so you are seeing the current documentation.
Default Campaigns are pre-built, one-time setup automations that PushEngage runs for your Shopify store automatically once enabled. There are three types: a welcome notification for new subscribers, a new product listing alert for your catalog, and a full suite of order status notifications. You turn them on, customize the message, and PushEngage handles the rest
This guide walks you through finding Default Campaigns, enabling each one, and customizing the notification copy.
Before You Start
- PushEngage is installed on your Shopify store. If not, see Guide to Add Push Notifications on Your Shopify Store with PushEngage.
- At least one subscriber has opted in to push notifications from your store.
Finding Default Campaigns
- Log in to your PushEngage dashboard.
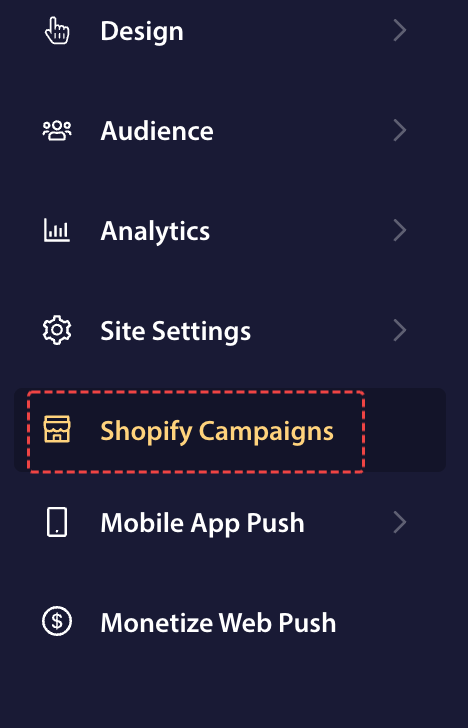
- In the left navigation menu, go to Shopify Campaigns.
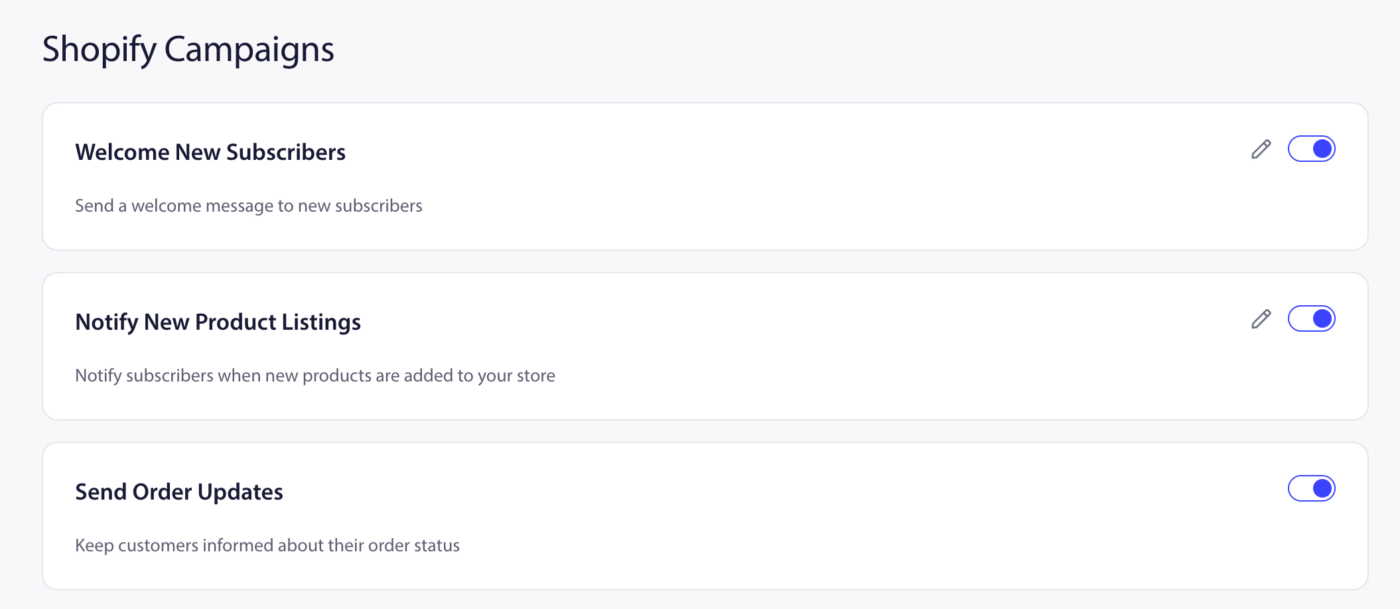
You will see the three default campaign cards: Welcome New Subscribers, Notify New Product Listings, and Send Order Updates.
1. Welcome New Subscribers
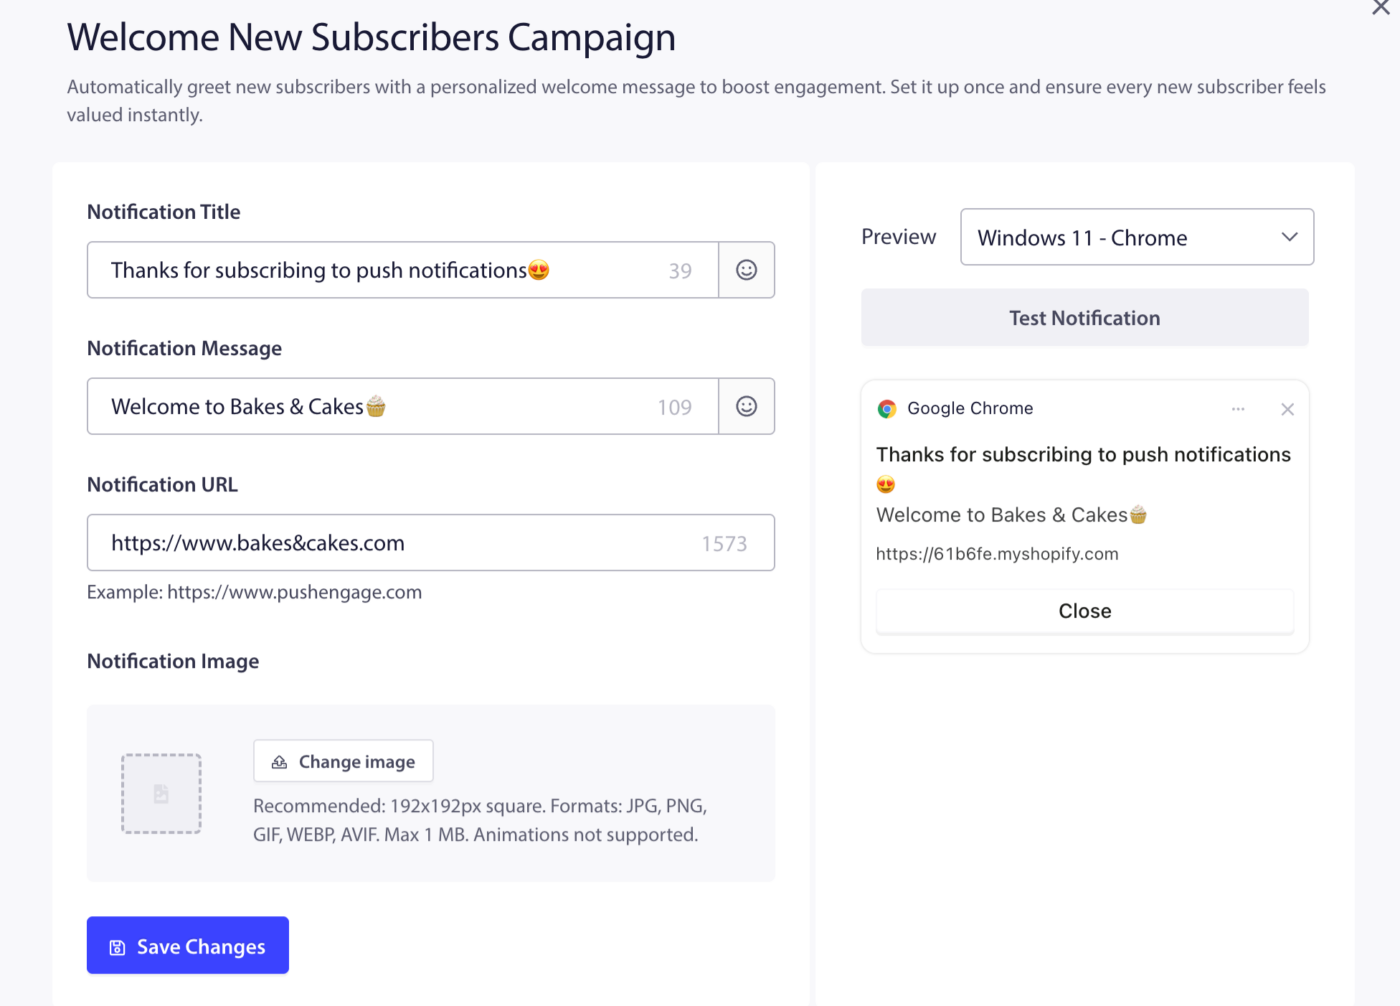
It sends a single welcome push notification to every new subscriber the moment they opt in to your store’s push notifications. It runs as a drip campaign with one notification step. First impressions matter. A welcome notification confirms the subscription, builds trust, and is an opportunity to bring the subscriber back to your store right away.
- On the Shopify Campaigns page, find the Welcome New Subscribers card.
- Toggle the switch to On.
The campaign activates immediately for all new subscribers going forward.
2. Notify New Product Listings
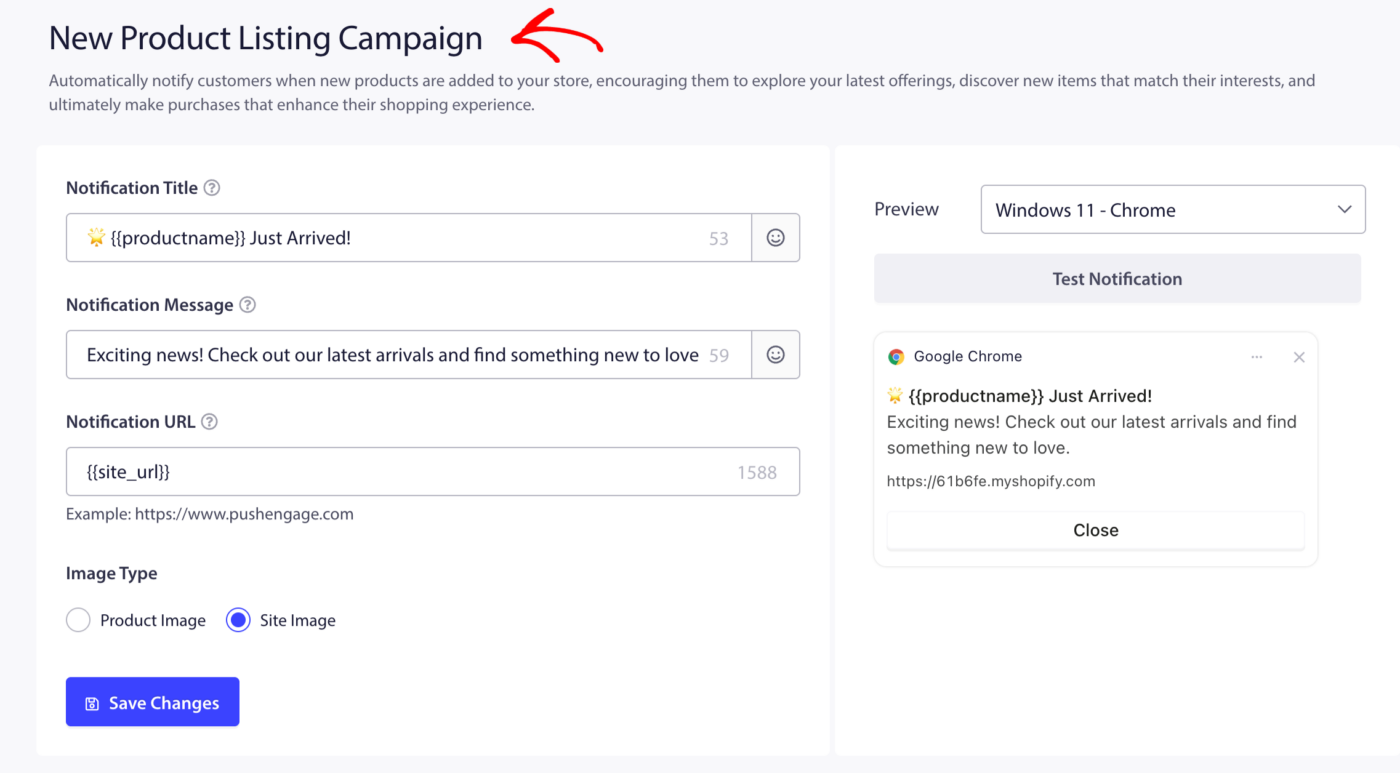
It Automatically sends a push notification to all subscribers whenever you publish a new product in your Shopify store. It turns your product catalog into a re-engagement channel. Subscribers who haven’t visited in a while get an automatic reason to come back.
- On the Shopify Campaigns page, find the Notify New Product Listings card.
- Toggle the switch to On.
Available Placeholders
You can insert dynamic values into the Notification Title and Notification Message by using these placeholders. PushEngage replaces them with real product data when the notification is sent.
| Placeholder | What it inserts |
|---|---|
{{productname}} | Name of the newly listed product |
{{price}} | Price of the new product |
{{site_url}} | Your Shopify store URL |
For the Notification URL field, you can use:
| Placeholder | What it inserts |
|---|---|
{{site_url}} | Your Shopify store URL |
Example title using placeholders:
New arrival: {{productname}} — now only {{price}}
3. Send Order Updates
It sends automated push notifications to customers at each stage of their order lifecycle. This is a parent toggle that reveals six individual order status campaigns, each of which can be enabled or disabled independently. Order updates are among the most opened push notifications in ecommerce – customers are actively waiting for this information. Enabling them reduces support inquiries and builds post-purchase trust.
- On the Shopify Campaigns page, find the Send Order Updates card.
- Toggle the Send Order Updates switch to On.
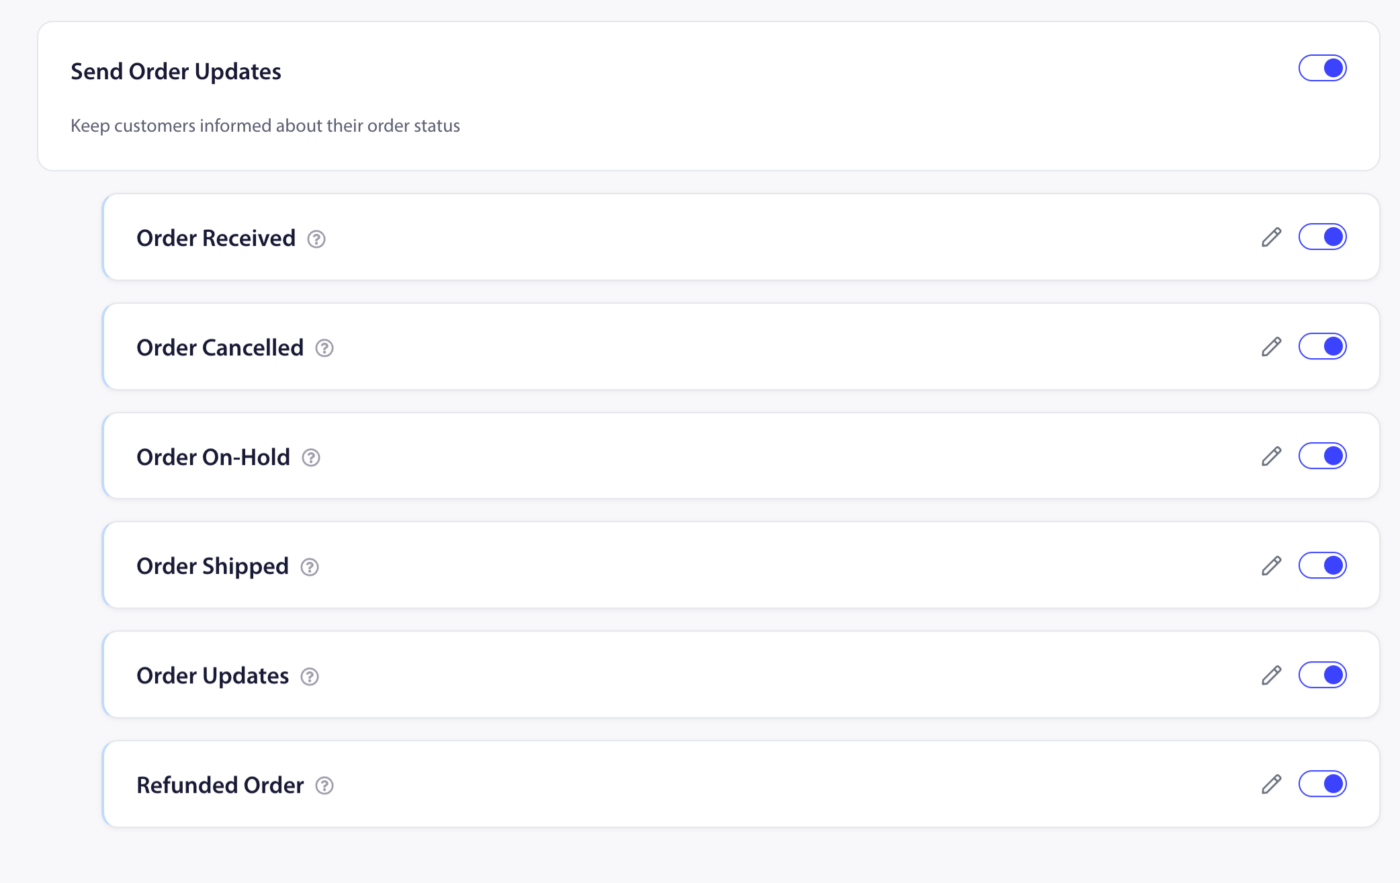
Order Status Campaigns
You can enable each status notification independently. All six share the same edit workflow: click the pencil icon on the card, customize the notification, and save.
| Campaign | Trigger |
|---|---|
| Order Received | Fires when a customer places a new order |
| Order Cancelled | Fires when an order is cancelled |
| Order On-Hold | Fires when an order is placed on hold |
| Order Shipped | Fires when an order’s fulfillment is marked as shipped |
| Order Updates | Fires when any other update is made to an order |
| Refunded Order | Fires when a refund is processed for an order |
To enable or disable any individual status, toggle its switch. To disable all order notifications at once, toggle off the parent Send Order Updates switch.
Available Placeholders
For Notification Title and Notification Message, the following placeholders are available across the order status campaigns. Note that availability varies by campaign type.
| Placeholder | What it inserts | Available in |
|---|---|---|
{{order_billing_full_name}} | Customer’s full billing name | All order status campaigns |
{{order_id}} | The order ID number | All order status campaigns |
{{order_date}} | The date the order was placed | All order status campaigns |
{{order_url}} | Direct link to the customer’s order page | Order Received, Cancelled, Shipped, Updates |
{{site_url}} | Your Shopify store URL | All order status campaigns |
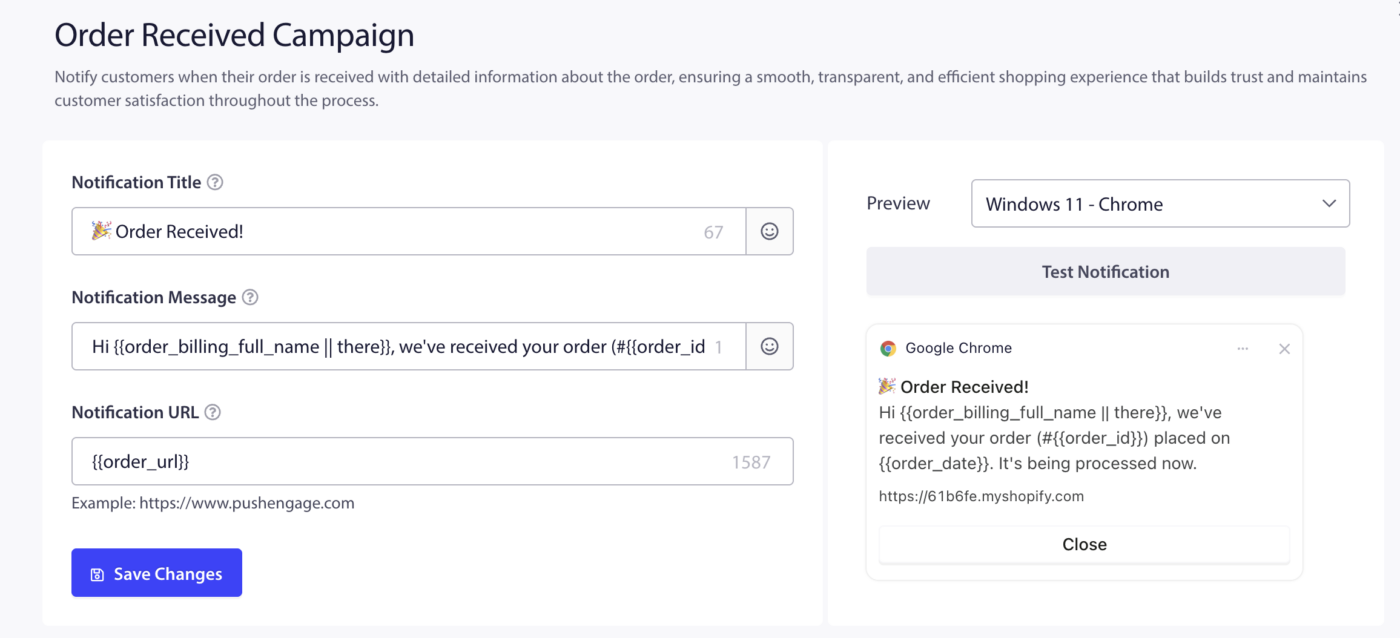
For the Notification URL field, you can use:
| Placeholder | Available in |
|---|---|
{{order_url}} | Order Received, Cancelled, Shipped, Updates |
{{site_url}} | All order status campaigns |
Example title using placeholders:
Hi {{order_billing_full_name}}, your order #{{order_id}} has shipped!
Example message using placeholders:
Your order placed on {{order_date}} is on its way. Click to track.
Frequently Asked Questions
Can I turn off one order status without disabling all of them?
Yes. Each of the six order status cards has its own toggle. You can enable only the ones you want — for example, enabling Order Received and Order Shipped while leaving the others off.
Does the Welcome notification fire for existing subscribers?
No. The Welcome New Subscribers campaign only fires for subscribers who opt in after you enable it. It does not send retroactively to existing subscribers.
Can I use the same placeholder in both the title and message?
Yes. Placeholders work in any text field (title, message) and independently in the URL field.
What happens if a placeholder has no data?
If an order notification fires and a placeholder value is empty (for example, no order URL exists), PushEngage will leave that field blank. Always test with a real order to confirm your message reads correctly.
If you run into any issues, please feel free to contact us by clicking here. Our support team will be able to help you.


