
Looking for a WP Mail SMTP review to make up your mind about the plugin?
You’re in the right place, for sure.
WP Mail SMTP can help you cut down on spam emails from your WordPress site.
But is it really the #1 WordPress SMTP plugin? Why would you need an SMTP plugin in the first place? WordPress has its own PHP mailer. Why invest in buying an SMTP plugin that also helps you send emails?
In this article, we’re going to answer all these questions and more.
Most importantly, we’re going to put WP Mail SMTP to the test and find out if it’s really worth buying.
Lad os dykke lige ned i det.
What Is WP Mail SMTP?
WP Mail SMTP is a plugin that helps you improve your WordPress email deliverability. The plugin bypasses the default wp_mail() function and forces your site to use SMTP settings instead.
In simple terms: You can use any email deliverability service provider including Gmail to send emails. But more on that later.
Using WP Mail SMTP removes some of the biggest email deliverability issues in WordPress. The default method for WordPress sites to send email can get flagged as spam. And that’s if they get delivered in the first place.
WP Mail SMTP can also come in handy when:
- your hosting doesn’t support the mail() function and WordPress can’t send email
- your server isn’t configured properly to deliver mail from your WordPress site
- you want to send your business emails via Gmail or Google Apps
- enquiry messages from your WordPress forms never get sent to your inbox
And here’s the thing: Nearly ALL WordPress websites suffer from the same problem.
So, even if you’re running a personal blog and collecting emails to send out a newsletter or if you’re a plumber who accepts bookings on a tiny business site, you’re going to have the exact same problem with emails on WordPress.
If you’ve been suffering from email deliverability issues from WordPress or WooCommerce already and you know what we’re talking about, you should definitely get started with WP Mail SMTP today.
Don’t even think about it. Just go get the plugin right now.
But if you’d like to understand the problem more deeply and get a clearer picture of what WP Mail SMTP has to offer, keep reading.
Why Use WP Mail SMTP?
Most WordPress hosting providers aren’t really configured properly to send emails. As a result, you may not even get notified of contact form submissions. Using WP Mail SMTP allows you to bypass the default wp_mail() function and forces your site to use SMTP settings instead.
This way, even if your web host isn’t properly configured to send emails, you will still be able to send automated emails and email notifications from your site.
Don’t even get us started on what a nightmare this is for WooCommerce stores!
WordPress handles user registration emails using built-in PHP code called the wp_mail() function:

This is a big problem because not all WordPress hosts offer servers configured properly to use PHP mail.
And even if the servers are configured properly, Gmail and other email service providers use strict spam filters. These spam filters try to authenticate that your email is coming from your business and not a fraudulent third party. That’s where most of your emails get blocked or flagged as spam.
You can work your way around this problem using WP Mail SMTP.
How to Set Up WP Mail SMTP on Your Site
In this section, we’re going to show you how to use an SMTP service to ensure your email delivery. We’ll show you what SMTP service we use too, but no matter which SMTP service you choose, you need to install the WP Mail SMTP plugin.
So, go ahead and install and activate the plugin. If you’re not sure how to do that, this tutorial will show you how to install a WordPress plugin.
Step #1: Configure the Plugin
Once you’re done installing the plugin, head over to your WordPress dashboard and click on WP Mail SMTP to configure the plugin:
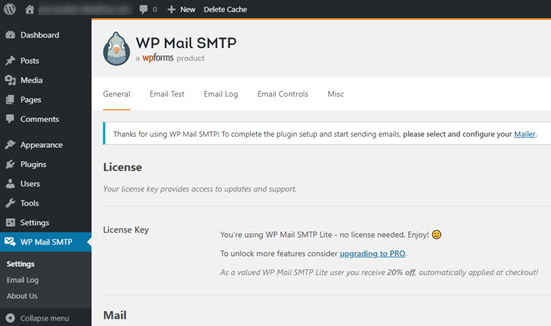
After you enter your license key, start filling out the Mail section:
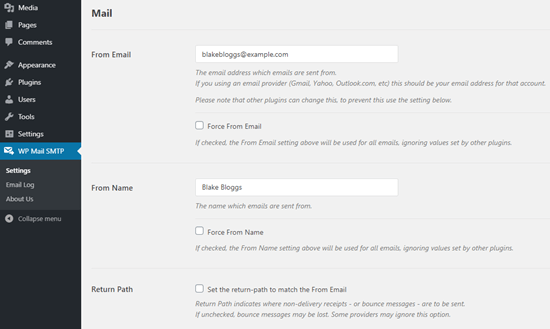
NOTE: Make sure that you enter the same email address as the one you’ll be using for your SMTP service. If there are conflicting emails, you’ll keep getting errors from the SMTP service dashboard.
The best part about this plugin is that even if your other WordPress plugins such as WP Forms use other email addresses, WP Mail SMTP can force them to use this email address.
That’s all for now.
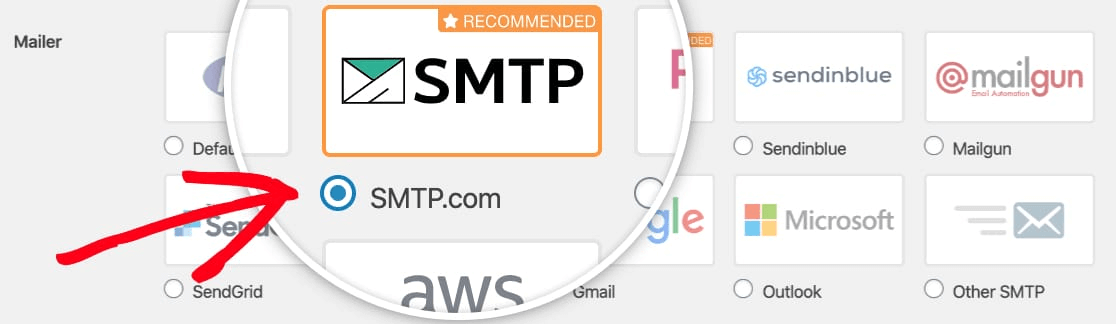
Next, you’ll need to choose an SMTP mailing service for your site. We recommend using SMTP.com. But you can find a lot of different services in there.
To finish setting up the WP Mail SMTP plugin, you’ll have to create an account with SMTP.com next. It’s a very popular SMTP service that allows you to send bulk emails with high delivery rates.
Step #2: Update the WP Mail SMTP Plugin
Go to the WP Mail SMTP plugin and click on WP Mail SMTP » Settings.
Then, under Mailer, select a service provider. You can choose between a whole host of options:

We recommend using SMTP.com:
Step #3: Create an SMTP Account
Go ahead and create a new account:

Once you’ve signed up, you’ll be asked to click on an activation link via email and confirm your identity. So, keep an eye out for multiple emails.
And then, go back to the WP Mail SMTP plugin to connect your SMTP account to the plugin.
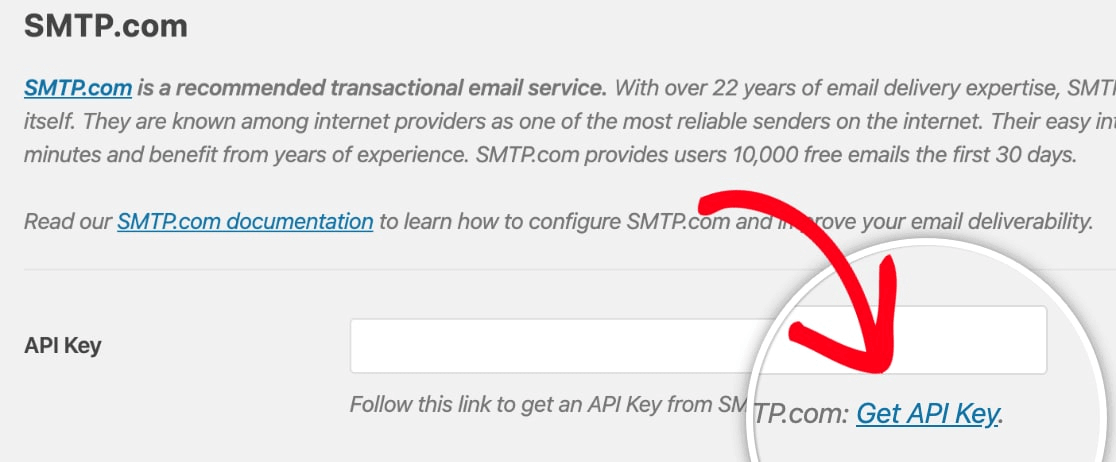
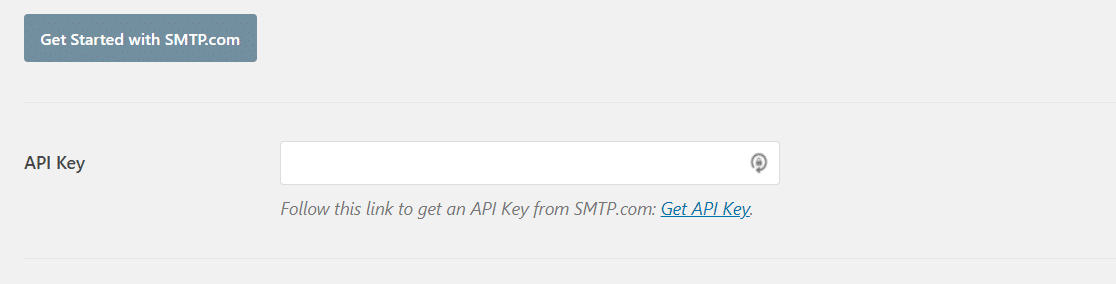
The popup will ask for an API key which you can get from your SMTP.com dashboard. Click on the Get API Key link (click on on this link to get there directly):
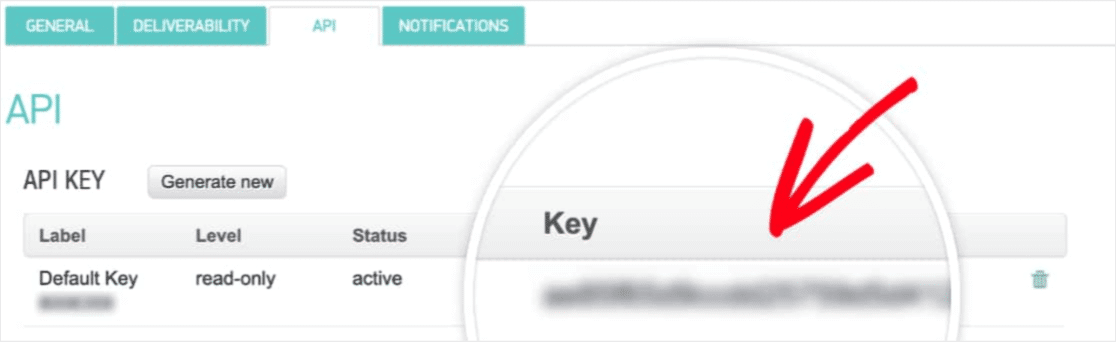
You should see a table on this page. Copy the API Key in the Key column:
Then paste this API key in WP Mail SMTP:
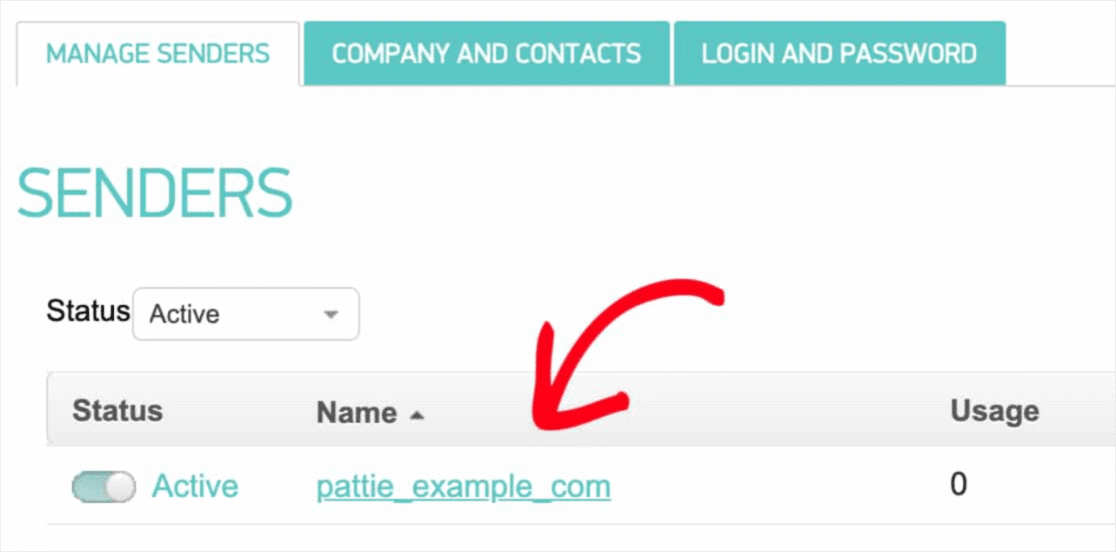
Finally, in the Sender Name field, click on the Get Sender Name link:

Copy the name in the Name column:
And paste it in WP Mail SMTP.
Tryk derefter på Gem indstillinger:

Trin #4: Tilføj SPF-posten til dine DNS-poster
Efter godkendelsen begynder din vigtigste opgave: Tilføjelse af SPF-posten til dine DNS-poster. Hvis tingene blev alt for tekniske for dig alt for hurtigt, så fortvivl ikke. Det er en simpel proces.
Sender Policy Framework (SPF) er, hvordan SMTP.com godkender dine e-mails. Inkludering af dette trin sikrer, at dine e-mails ikke strander i spam-indbakken.
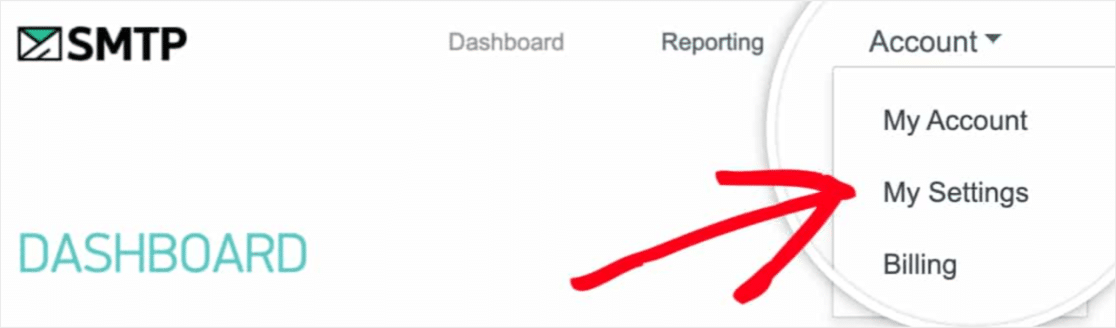
Gå til navigationsmenuen på din SMTP.com-konto, og klik på Konto » Mine indstillinger:
Gå til Generelle indstillinger og kig under SPF-post:
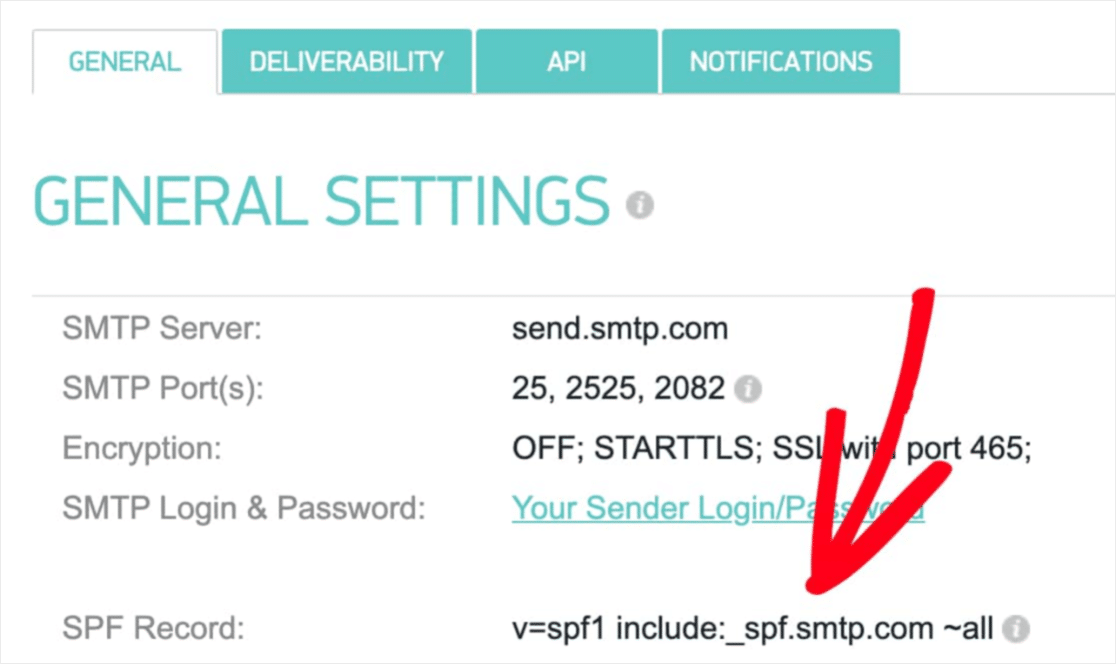
Du skal tilføje denne SPF-post til DNS-indstillingerne for dit websted. Hvis du ikke ved, hvordan du gør dette, kan du se denne artikel om hvordan man tilføjer SPF-poster.
BEMÆRK: I DNS-indstillingerne vil du se et felt kaldet TTL (Time To Live). Standardværdien er normalt 1 time. Hvis du kan ændre denne post, anbefaler vi at ændre den til 1 dag eller 86400 sekunder. Dette vil give serveren mulighed for at cache disse oplysninger i en hel dag.
Trin #5: Valider dine SPF-poster
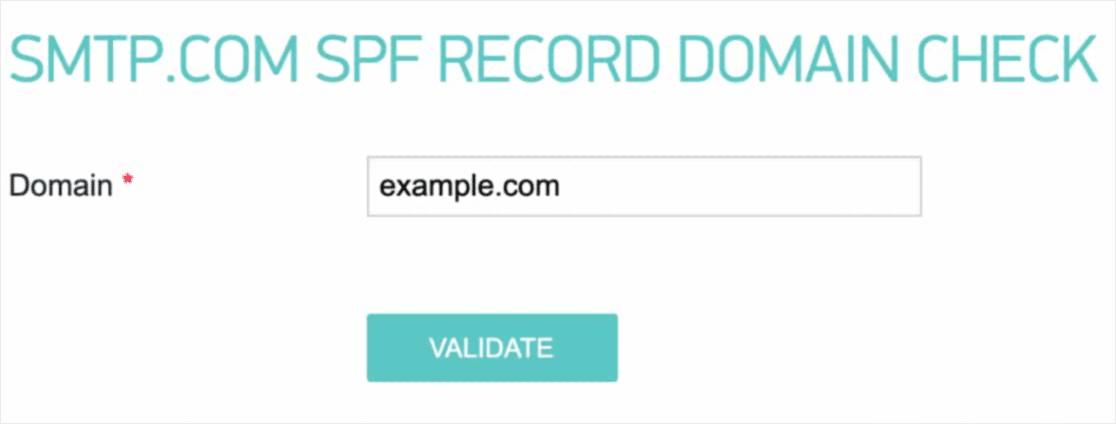
Hvis du har tilføjet SPF-posten, er det tid til at validere, at ændringerne er blevet opdateret. Det kan tage op til 48 timer, før ændringerne afspejles. Så det er en god idé at validere resultaterne, før du går videre til næste trin.
Klik på dette link og gå til sektionen, der siger SMTP.com SPF Record Domain Check.
I feltet Domæne skal du indsende din hjemmesides URL og klikke på Valider:
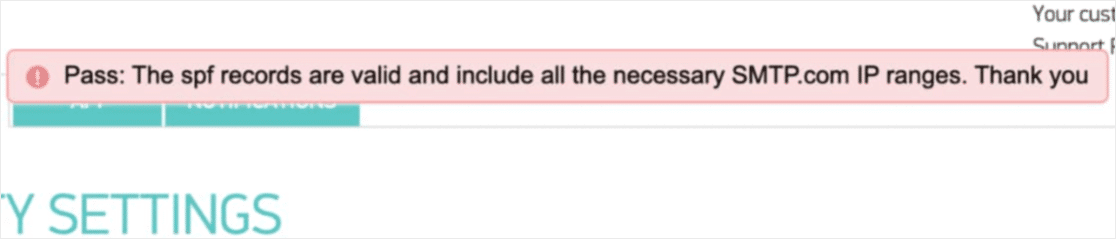
Hvis alt gik godt, bør du se denne Bestået-besked:
Og du er færdig!
Trin #6: Send en test-e-mail
Du er klar. Dette er det sidste trin, hvor du verificerer, at alt fungerer, som det skal. Heldigvis har WP Mail SMTP en indbygget 'Test-e-mail'-funktion.
Gå til WP Mail SMTP og klik på fanen E-mail-test:
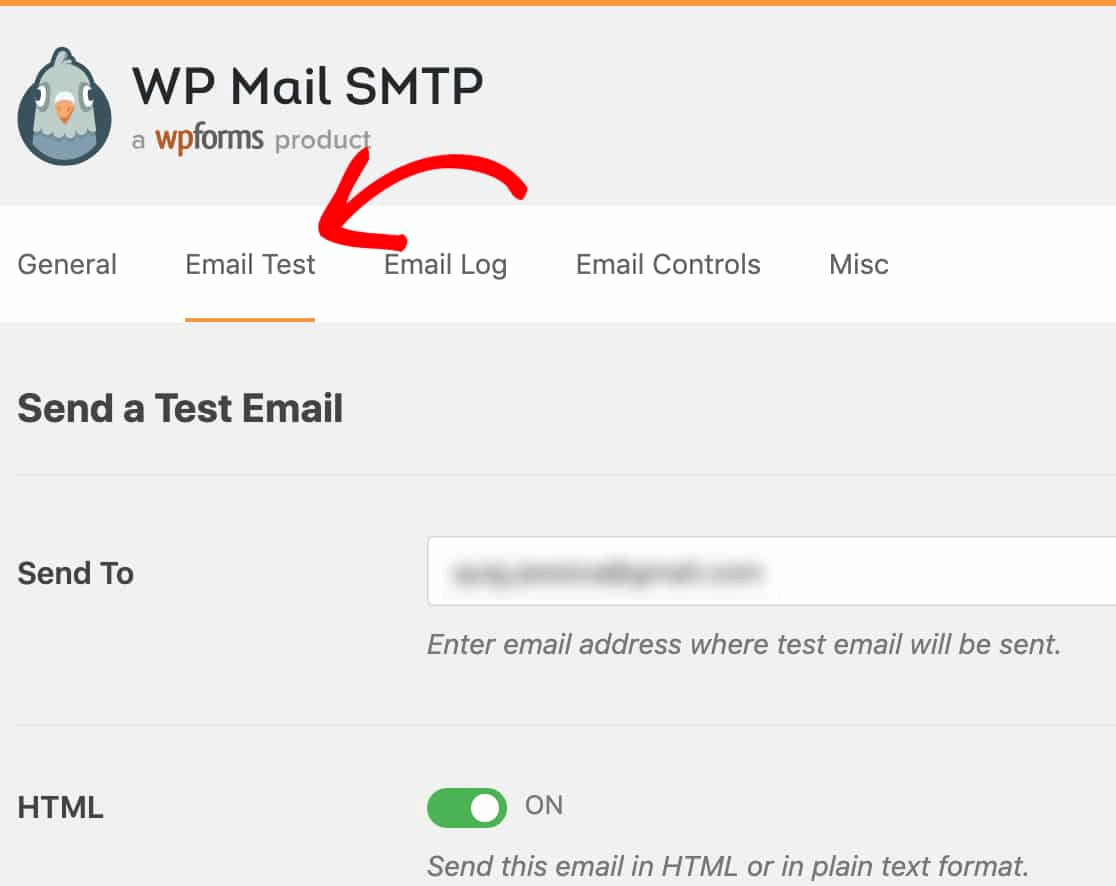
Indtast en hvilken som helst e-mailadresse, du har adgang til, og send en test-e-mail. Hvis alt gik godt, bør du se denne succesbesked:

Tjek nu din indbakke og bekræft, at du har modtaget e-mailen i din primære indbakke. Vi er meget sikre på, at du finder den der.
Endelig skal du bare verificere, at e-mailen gik igennem din SMTP.com-konto. Klik på dette link for at gå til siden Leveringsdygtighedsindstillinger. Hvis du ser 'Bestået'-notifikationen som denne, har du gjort et godt stykke arbejde:
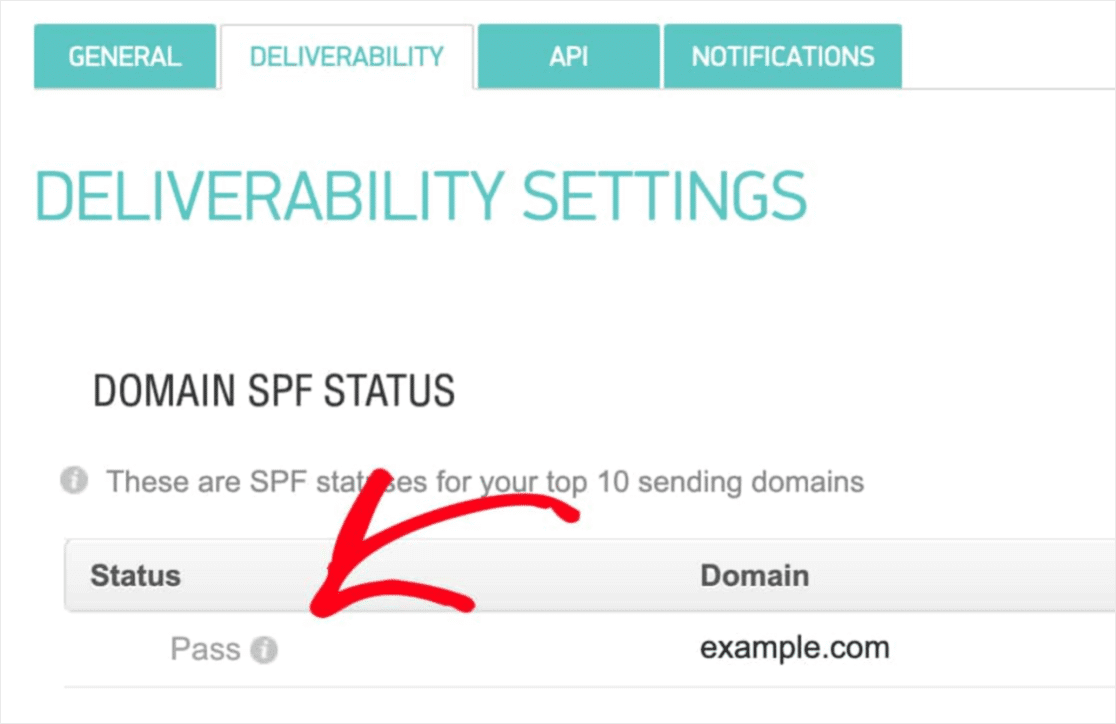
Hvis du ikke ser en 'Bestået'-status, så har du lavet en fejl. Gå tilbage til forrige sektion og gennemgå trin 1-4 og sørg for, at du ikke har overset noget.
Priser
Den endelige overvejelse her er prissætning.
Det er ret tydeligt, at WP Mail SMTP er mere rettet mod at løse et almindeligt problem uden nogen kodning.
Når du går efter de højere pakker, får du meget mere værdi fra WP Mail SMTP.
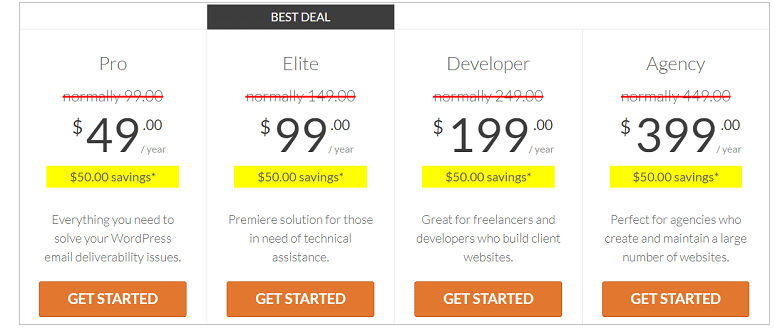
WP Mail SMTP kommer under 4 forskellige prisklasser:
- Pro-plan: Tilgængelig for $49/år. Den tilbyder et års gratis downloads, support og opdateringer.
- Elite Plan: Tilgængelig for 99 USD/år. Denne plan inkluderer gratis White Glove-opsætning og prioriteret support.
- Udviklerplan: Tilgængelig for 199 USD/år. Du får et års gratis downloads, support og opdateringer. Du kan tilføje op til 20 forskellige websteder.
- Bureauplan: Tilgængelig for 399 USD/år. Denne licens inkluderer alt fra Udviklerplanen, og du kan tilføje op til 100 websteder.
Hvilken passer bedst til dine behov? Skriv en kommentar og lad os det vide.
Afslutning
Det var alt for denne gang, folkens!
Vores dom? WP Mail SMTP er helt sikkert en god investering for voksende virksomheder.
Som vi sagde, kan ethvert WordPress-websted potentielt lide under det samme problem med e-mails. Selvom du driver en rigtig lille virksomhed, kan du ende med at ødelægge din omsætning, fordi dit websted ikke lod dig vide, hvornår en kunde stillede en forespørgsel.
Gør ingen fejl, den lethed, hvormed du kan løse problemer med e-mail-levering med WP Mail SMTP, er uovertruffen. Og hvis du overvejer prisen, er den endnu mere tiltalende.
Efter vores mening er WP Mail SMTP helt klart det bedste SMTP-plugin til WordPress. Og hvis du er klar til at løse problemet, bør du få pluginnet lige nu.
Hvis du ikke er klar til at løse sådanne problemer endnu, bør du fokusere mere på marketing. En god måde at få mere trafik, engagement og konverteringer på ville være at bruge push-notifikationer til dit websted. Vi anbefaler at bruge PushEngage til at oprette dine push-notifikationskampagner.
PushEngage er verdens førende software til push-notifikationer. Så hvis du ikke allerede har gjort det, kom i gang med PushEngage i dag!


