Looking for a simple way to enable and disable Firefox notifications?
Browser push-notifikationer hjælper dig med at holde kontakten med brands, som du elsker. Og du kan vælge push-notifikationer ret nemt. Men hvordan begynder du at modtage browser push-notifikationer?
In this article, we’re going to show you step-by-step how to enable or disable Firefox notifications.
Lyder godt? Lad os dykke ned.
How to Get Firefox Notifications from Any Site
Let’s start by check out how you can receive Firefox notifications from any site.
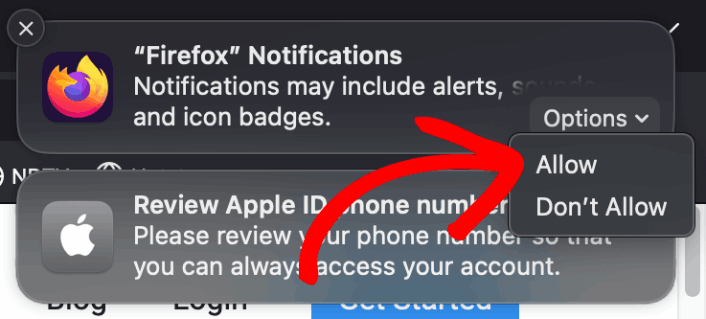
The first time you install Firefox, you’ll get a popup to allow or disallow web push notifications on Firefox. Just click on Options » Allow to receive Firefox notifications:
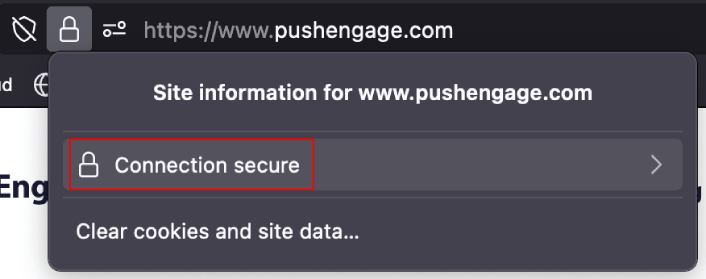
By default, Firefox blocks push notification optins. So, if you want to get Firefox notifications from a site, go to the URL bar and click on the padlock. In the dropdown, click on Connection Secure:
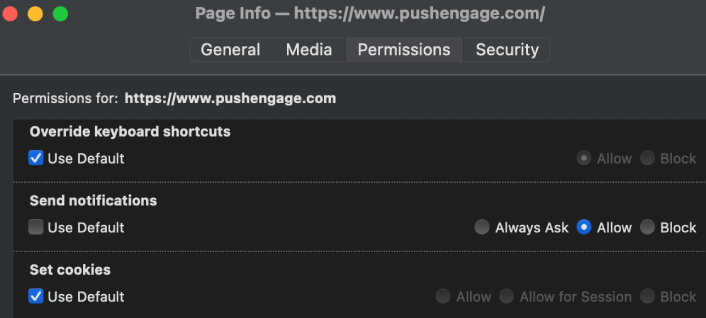
Here, you can set permissions for the site. Go to Permissions, scroll down to Send notifications, uncheck the Use Default checkbox, and click on Allow:
Now, you can get Firefox notifications from that site.
Sådan aktiveres eller deaktiveres Firefox-notifikationer
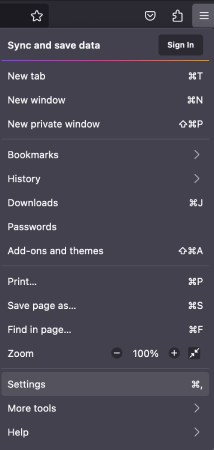
Firefox has settings and preferences built in that can enable or disable push notifications. The simplest way to enable or disable Firefox notifications is to head over to the menu bar and go to Settings:
Then, go to Privacy & Security » Notifications » Settings:
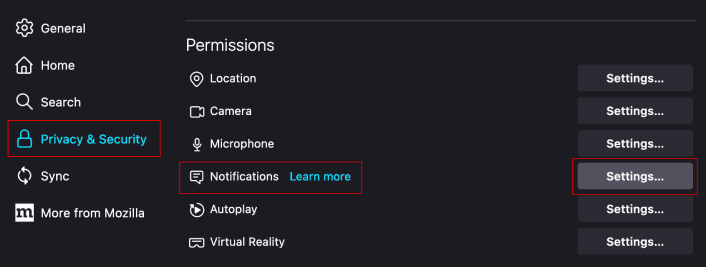
Here, you can allow or deny push notifications from any site simply by changing the permission next to the website.
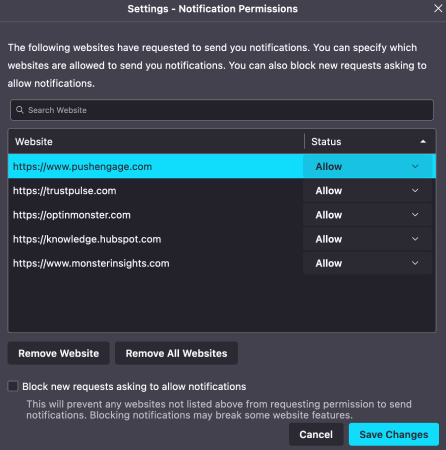
If you want to enable Firefox push notifications from a site, set it to Allow. If you don’t want notifications from a site, set the permission to Block.
You can remove all permissions by clicking on Remove All Websites. Or, if you want to remove just one website from the list of approved websites that can send you notifications, you can also click on Remove Website.
What to do After You Enable Firefox Push Notifications
Bare fordi du elsker indholdet i de push-notifikationer, du modtager, betyder det ikke, at du skal abonnere på dem. Før du abonnerer på flere push-notifikationer, bør du tjekke GDPR-overholdelsesreglerne og finde ud af, om dine push-notifikationer er sikre.
Og hvis du synes, Safari push-notifikationer er seje, bør du også se, hvordan du kommer i gang med push-notifikationer til din virksomhed.
Push-notifikationer er en fantastisk måde at organisk udvide din fanbase på. Og det er virkelig nemt at opsætte push-kampagner. Hvis du er ny til push-notifikationer, bør du også tjekke disse episke ressourcer ud:
- Sådan tilføjer du en blogabonnements-widget i WordPress
- Sådan får du mere trafik til din WordPress-blog (9 nemme måder)
- Push-meddelelsesomkostninger: Er det virkelig gratis? (Prisanalyse)
- Sådan øger du din opt-in-rate for web push-meddelelser (7 måder)
- Sådan bruger du push-notifikationshandlingsknapper til at fordoble klik
Vi anbefaler at bruge PushEngage til at oprette dine push-notifikationskampagner. PushEngage er den førende push-notifikationssoftware på markedet, og dine kampagner vil være i sikre hænder.
Så hvis du ikke allerede har gjort det, så kom i gang med PushEngage i dag.


