Looking for a way to add Blogger push notifications to your blog?
That’s a really great decision.
Push notifications can help you generate a lot of traffic, engagement, and sales on autopilot and with very little effort. And it’s really easy to add push notifications to a Blogger site. So, it’s really a quick win.
In this article, we’ll show you how to add push notifications to a Blogger blog even if you’ve never done it before.
For this article, we’re going to use PushEngage to set up push notifications on your Blogger blog. PushEngage is the #1 push notification software in the world. So, your campaigns will be in good hands.
But even if you’re not using PushEngage, this process should be fairly similar to other vendors.
Lad os dykke ned.
How to Install Blogger Push Notifications
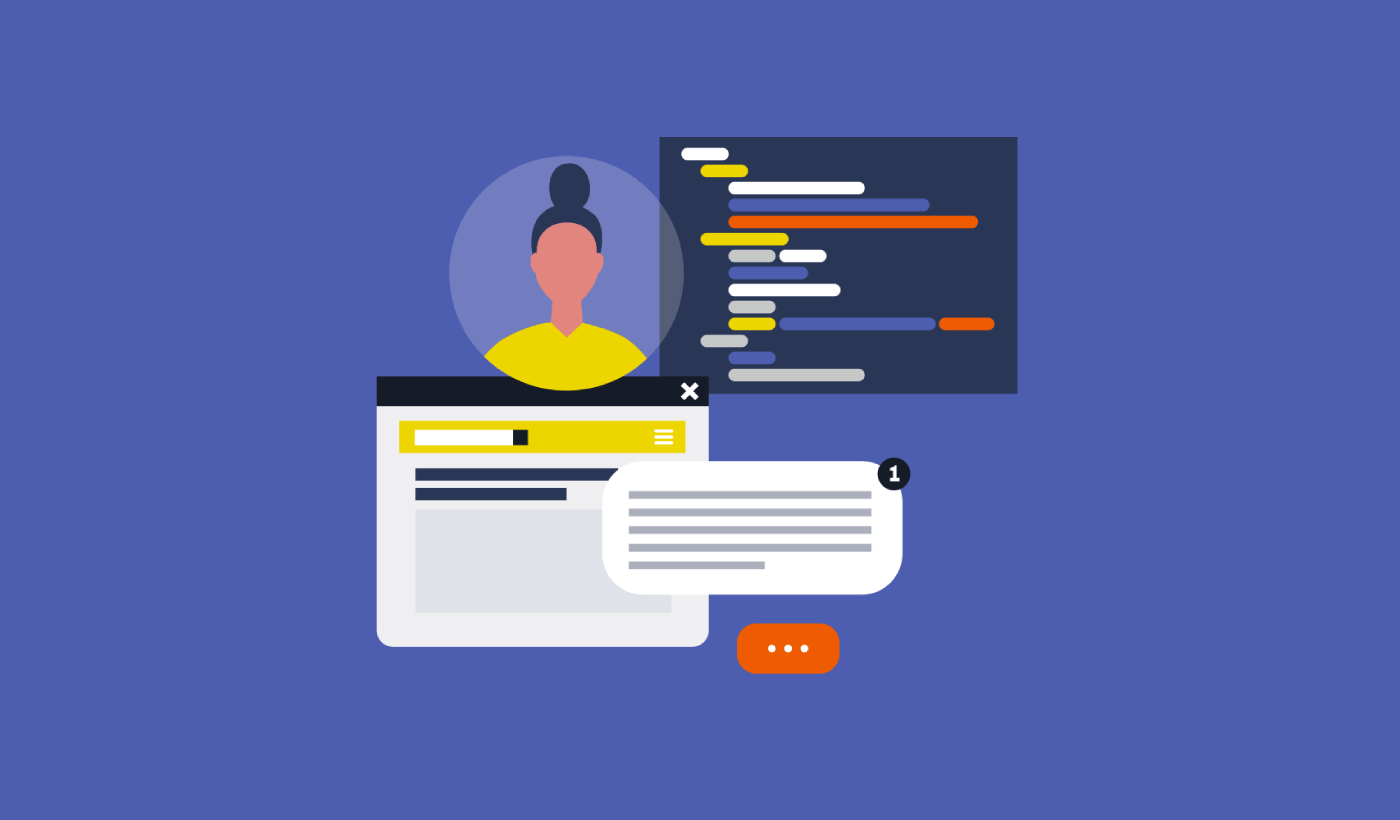
Installing push notifications on Blogger is a really quick and easy process. Just follow these steps and by the end of this article, you should be able to send push notifications from your site like this one:

And you don’t have to be a giant like Zomato to leverage the power of push notifications. You can do the same thing very effectively even if you’re running a small business site with very little traffic.
Lad os dykke ned.
Step #1: Set Up Your PushEngage Account
Gå til PushEngage-hjemmesiden og klik på knappen Kom i gang:

You can select the free plan to try out PushEngage, or choose a paid plan if you’re serious about growing your business. The paid plans come with more campaign options and the ability to build even bigger subscriber lists.
Once you’ve signed up for your PushEngage account, head over to your PushEngage dashboard and go to Site Settings » Site Details:

You can set your logo, site name, and site URL here. It’s really important to sort this stuff out right now so that you can test your entire setup later.
Step #2: Get the Installation Code from PushEngage
To install push notifications, you’ll need to get an installation code. In your Site Settings screen, scroll down and click on the Click Here For Setup Instruction button:

Then, click on the Any Site tab:

You can use the Javascript code to start sending push notifications.
Step #3: Place the Installation Code in Your Blogger Blog
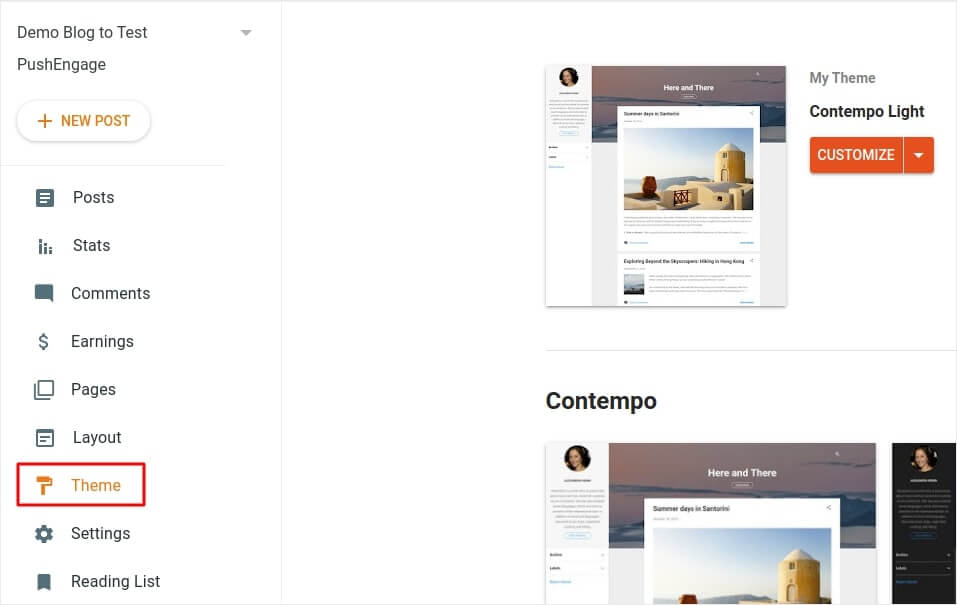
Log in to your Blogger Dashboard and click on Theme:
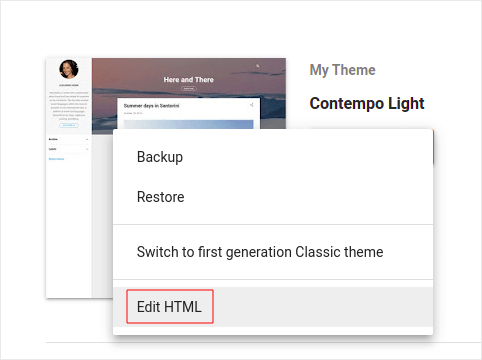
And click on Customize » Edit HTML:
And in the code editor, paste your PushEngage code snippet inside the <head> tag:

When you’re done, hit Save.
Step #4: Configuring the PushEngage Opt-In
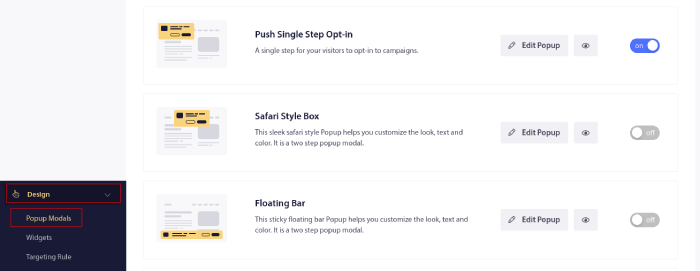
Now, head back to your PushEngage dashboard. Go to Design » Popup Modals and select the optin of your choice:
From here, you can customize your push notification opt-in. If you need help with that, you should check out this article on how to create a custom push notification opt-in.
If you need some inspiration, you can check out this article on high-converting push notification opt-ins.
Step #5: Create a Welcome Notification
Når du er færdig med at opsætte tilmeldingen, kan dit websted indsamle abonnenter.
Men hvordan ved du, om dine push-notifikationer fungerer korrekt?
Vi anbefaler, at du opretter en velkomst-push-notifikation for at teste, om din opsætning gik glat. En velkomstnotifikation er en push-notifikation, du sender til en ny abonnent for at bekræfte deres abonnement og byde dem velkommen ombord.
Gå til PushEngage dashboard og gå til Campaign » Drip Autoresponders og klik på Create New Drip Autoresponder:

Navngiv derefter din kampagne (vi foreslår noget som "Velkomst Drip"), og under Content, vælg muligheden "Send notification immediately after user subscribes“:

På dette tidspunkt kan du klikke på pilen ved siden af notifikationen for at redigere indholdet af din notifikation.
Hvis du har en Premium- eller Enterprise-plan med PushEngage, vil du kunne tilføje mere end én notifikation for at oprette en sekvens af automatiserede velkomstbeskeder. Klik blot på Add New Notification og rediger indholdet.
Når du er færdig, skal du klikke på Drip Settings og vælge muligheden for at sende din velkomstkampagne til alle abonnenter:

Rul derefter ned for at indstille dine egne UTM-parametre for at spore push-notifikationerne:

Og når du er færdig, rul op igen og klik på knappen Activate Autoresponder:

Og du er færdig!
Du har med succes opsat Blogger push-notifikationer på din blog. Det er tid til at vende tilbage til dit PushEngage dashboard og begynde at oprette dine push-notifikationskampagner.
Hvad du skal gøre efter installation af Blogger push-notifikationer
Det var alt for denne gang, folkens!
Hvis du er ny til push-notifikationer, bør du følge en fuld push-notifikationstestproces, før du går live. Det vil hjælpe dig med at fejlfinde almindelige problemer, før dine besøgende ser dem og begynder at klage over en dårlig brugeroplevelse.
At komme i gang med målrettede push-notifikationer kan virke skræmmende. Men hvis du holder øje med målsporing og analyse, skal det nok gå. Endnu vigtigere, du vil tjene meget mere profit med hjælp fra push-notifikationskampagner. Her er et par seje ressourcer til at komme i gang:
- Sådan bruges retargeting push-notifikationer til at fordoble din omsætning
- Sådan sorteres dine push-notifikationer og finder vindende kampagner
- Sådan renses push-notifikationsabonnentlister (nemt)
- Sådan sendes RSS push-notifikationer automatisk
- Sådan bruges push-notifikationer til at promovere en nyhedsside
- Sådan bruges cross-selling push-notifikationer til at fordoble dit salg
- Sådan bruges browse abandonment push-notifikationer (4 trin)
Og hvis du ikke allerede har gjort det, så prøv PushEngage. PushEngage er den #1 push-notifikationstjeneste i verden. Så hvis du er seriøs omkring at vækste din virksomhed, bør du investere i PushEngage.


Tak for at dele dette informative indlæg.