Leder du efter en guide til, hvordan du sender automatiserede notifikationer?
Automatiserede notifikationer er enkelte web push-notifikationer eller en serie af push-notifikationer, der fortsætter med at køre i baggrunden. I modsætning til udsendte push-notifikationer fungerer de uden nogen manuel handling fra din side. Du kan simpelthen opsætte dem én gang, og de vil køre for evigt.
Men hvilke notifikationer skal du sende? Hvordan ved du, om de vil fungere for din virksomhed? Og hvordan kommer du i gang?
I denne artikel vil vi vise dig, hvordan du bruger enkle, handlingsrettede tricks til at skaffe trafik og salg på autopilot.
Lyder det godt? Lad os bare dykke lige ned i det.
Udsendelser vs. Udløste vs. Automatiserede Notifikationer
Udsendelser er push-notifikationer, som du sender ud som en enkelt notifikation. Du kan planlægge dem, men de vil kun blive sendt én gang. Udløste kampagner involverer opsætning af en push-notifikation, definering af en udløser til at aktivere den og en arbejdsgang til at styre dens planlægning. Automatiserede notifikationer er en serie af notifikationer, der aktiveres automatisk på bestemte tidspunkter eller når specifikke betingelser er opfyldt.
Til alle formål ser de ens ud udefra. Den afgørende forskel er, at udløste kampagner er langt mere fleksible og tilpasselige. Hvis du tager i betragtning, at push-notifikationer koster langt mindre end de fleste andre kanaler, så er udløste kampagner vejen frem.
Dog kræver de fleste udløste kampagner en vis erfaring med udvikling. Du skal bruge en API for at få mest muligt ud af udløste notifikationer. Hvis du er nysgerrig, kan du tjekke vores artikel om eCommerce push-notifikationer for at få en bedre idé.
Hvilken tjeneste skal du bruge til at sende automatiserede notifikationer?
Lad os starte med at sige, at de fleste af de "gratis push-notifikationstjenester" derude faktisk er gratis prøveversioner. Nogle af de udbydere, vi har listet her, er prøvesoftware, mens andre har en evigt gratis plan, som du kan vælge.
Der er nogle andre freemium-muligheder som Firebase Cloud Messaging (FCM), men det er slet ikke en god mulighed. Du kan læse mere om, hvorfor FCM ikke kan konkurrere med en tjenesteudbyder som PushEngage. Men for nu, tag vores ord for det, og spring videre til de bedre muligheder.
Vi anbefaler at bruge PushEngage.

PushEngage er den bedste push-notifikationstjeneste i verden. Og vi taler ikke kun om gratisversionen. Den giver dig mulighed for at forbinde med besøgende, efter de har forladt dit websted, med målrettede push-beskeder.
Hvorfor? Det er…
- Super nemt for både begyndere og avancerede brugere at opsætte;
- Effektivt på HTTP- og HTTPS-websteder;
- Har en masse automatiserede push-notifikationskampagner, du kan bruge (i betalingsversionerne);
- Fuld af muligheder for at sende personlige push-notifikationer (i betalingsversionen);
- Udstyret med målfølgning og avanceret analyse (i betalingsversionen);
Og dette er kun lige begyndelsen. Tjek PushEngages fulde liste over funktioner, før du går videre.
Men den mest attraktive del af PushEngage er, at du kan komme i gang med en evigt gratis plan. Og du kan bruge den til rent faktisk at vækste din forretning ved hjælp af flere tilpasningsmuligheder.
Den gratis version tillader op til 200 abonnenter og 30 livstidsnotifikationer. Det er godt nok til at få din forretning til et punkt, hvor du nemt har råd til de betalte planer, der starter fra $9/måned for 100.000 abonnenter.
Og bare rolig, hvis du absolut intet ved om kodning. Du kan installere PushEngage ved hjælp af en af de mange installationsvejledninger til enhver hjemmeside og CMS.
Sådan sender du automatiserede notifikationer
Nu hvor du ved, hvad automatiserede notifikationer er, og hvilken tjeneste du skal bruge for at sende dem, er det tid til at se på, hvordan du sender forskellige notifikationer. Af praktiske årsager taler vi ikke om brugerdefinerede udløste kampagner, som du kan oprette ved hjælp af en API-tjeneste her. Hvis du er mere interesseret i brugerdefinerede notifikationer, bør du tjekke vores dokumentation.
#1. Automatisk velkomst-push-notifikation
En velkomstnotifikation er en simpel push-notifikation, der er beregnet til at værdsætte enhver ny abonnent.
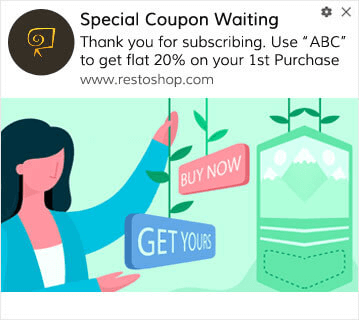
Du kan også give et tilbud eller en gave for at abonnere på dine push-notifikationer. Dette er ret almindeligt hos mange af vores kunder. Du kan bruge dine velkomst-push-notifikationer til at:
- Dele en velkomstkupon
- Tilbyde premium-funktioner
- Sende gratis levering
- Tilbyde gratis gaver
- Onboard din abonnent med en gennemgang
Lad os nu opsætte din første velkomst-push-notifikation ved hjælp af PushEngage.
Her er, hvordan du aktiverer velkomstnotifikationer i PushEngage. Gå til PushEngage-dashboard og gå til Kampagne » Drip Autoresponders og klik på Opret ny Drip Autoresponder:

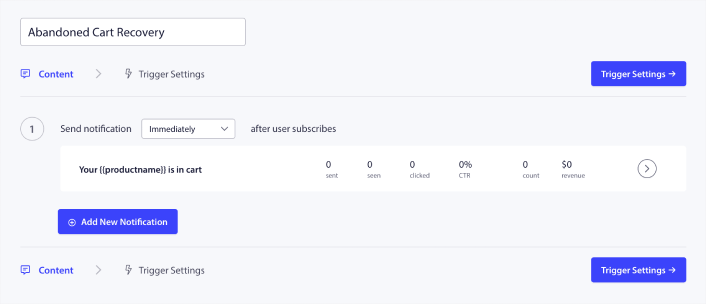
Navngiv derefter din kampagne (vi foreslår noget som "Velkomst Drip"), og under Content, vælg muligheden "Send notification immediately after user subscribes“:

På dette tidspunkt kan du klikke på pilen ud for notifikationen for at redigere indholdet af din notifikation. Hvis du har en Premium- eller Enterprise-plan med PushEngage, vil du kunne tilføje mere end én notifikation for at oprette en sekvens af automatiserede velkomstbeskeder. Klik blot på Tilføj ny notifikation og rediger indholdet.
Når du er færdig, skal du klikke på Drip Settings og vælge muligheden for at sende din velkomstkampagne til alle abonnenter:

Rul derefter ned for at indstille dine egne UTM-parametre for at spore push-notifikationerne:

Og når du er færdig, rul op igen og klik på knappen Activate Autoresponder:

Nu ved du, hvorfor velkomst-push-notifikationer er vigtige. Du ved også, hvordan du opsætter dem. Gå videre og aktiver velkomst-push-notifikationer for at genengagere nye abonnenter, eller tjek denne artikel om velkomstbeskeder på hjemmesiden for inspiration.
#2. Kampagner for forladte indkøbskurve
Shoppingkurv-forladelse sker, når en potentiel kunde tilføjer et produkt til indkøbskurven og ikke fuldfører checkout-processen.
Din opgave er at reducere forladte indkøbskurve så meget som muligt.
En måde at genvinde dine tabte salg på er at bruge push-notifikationskampagner for forladte indkøbskurve. Kampagner til genvinding af forladte indkøbskurve målretter abonnenter med en forladt indkøbskurv og sender dem opfølgninger, påmindelser, tilbud, kuponer og rabatter.

Det er en simpel idé: Få så mange mennesker som muligt til at købe noget.
Push-notifikationer for forladte indkøbskurve har en meget reel indvirkning på din bundlinje. For eksempel får WickedWeasel $2.000 – $4.000 om ugen i ekstra salg fra deres push-kampagne for forladte indkøbskurve.
Lad os nu gå i gang med at opsætte din allerførste kampagne for forladte indkøbskurve med PushEngage.
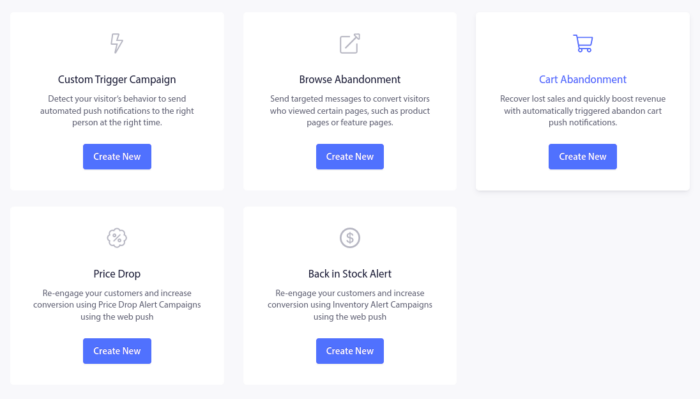
Gå til PushEngage-dashboardet og gå til Kampagne » Udløste kampagner og klik på Opret ny udløst kampagne:

Vælg derefter skabelonen Indkøbskurv forladt og klik på Opret ny:
Og du kan begynde at udarbejde en autoresponder for forladte indkøbskurve. Under fanen Indhold kan du oprette en række push-notifikationer:
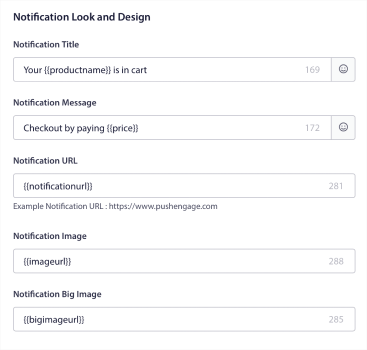
For at redigere en notifikation skal du blot klikke på pilen ved siden af den, og du kan tilpasse push-notifikationen:
For en mere detaljeret vejledning, tjek denne artikel om hvordan man opsætter push-notifikationer for forladte indkøbskurve.
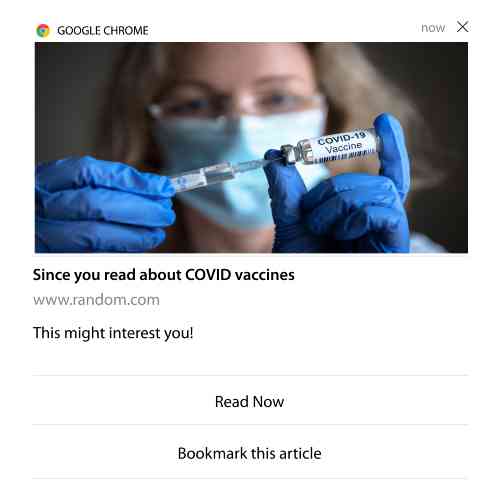
#3. Kampagner for forladt browsing
Browse abandonment is exactly what it sounds like. It’s when a website visitor is browsing your website and decides to suddenly go away. These incidents are also known as funnel abandonment by other vendors.
Browse abandonment is a really common occurrence in almost every industry.
And it’s really difficult to reduce or control because there’s no way to incentivize a random user to stay on your website. This is where browse abandonment campaigns are so powerful.
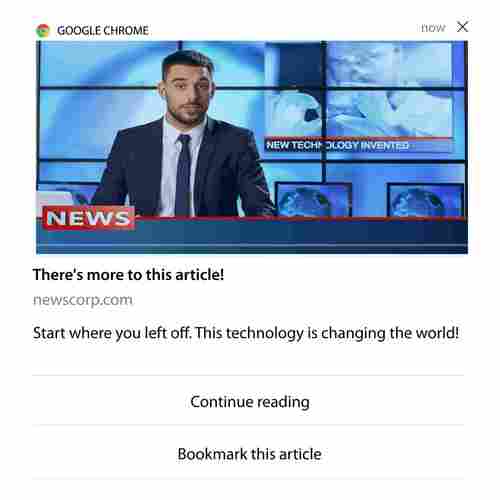
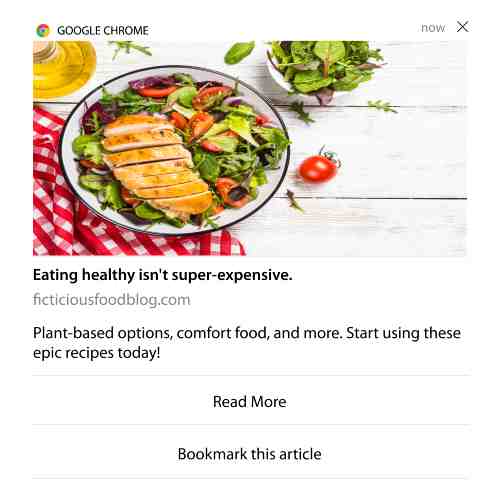
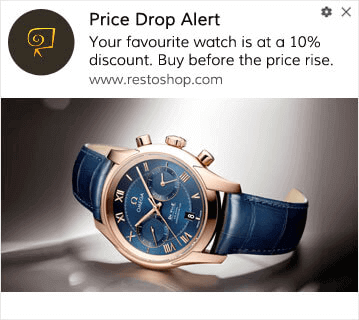
Here’s an example of browse abandonment push notifications for a publisher:
The impressive part about PushEngage is that you can set up campaigns for pretty much any industry. So, you can send browse abandonment push notifications for SaaS and travel websites as well.
So, how do you set up browse abandonment campaigns?
With cart abandonment, there’s a very clear parameter to fire your push notifications. For browse abandonment, you may want to consider parameters such as:
- Added the product to Wishlist
- Looked at the same product more than X times
- Browsed more than X products in the same category
- Søgt på siden efter et specifikt produkt
- Stayed on site for at least X minutes before bouncing
The idea behind this campaign for an eCommerce site is to get the subscriber to add the product to their cart. For publishers, it could be a click or a download on the article they were reading.
Head over to the PushEngage dashboard again and go to Campaign » Triggered Campaigns to create a new triggered campaign:

Then, create a new Browse Abandonment campaign by click on the Create New button:

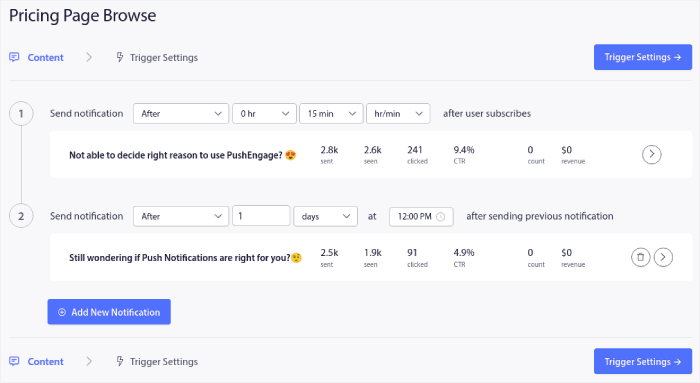
Next, you’ll be able to set up your entire sequence of push notifications along with a delay in between each notification:
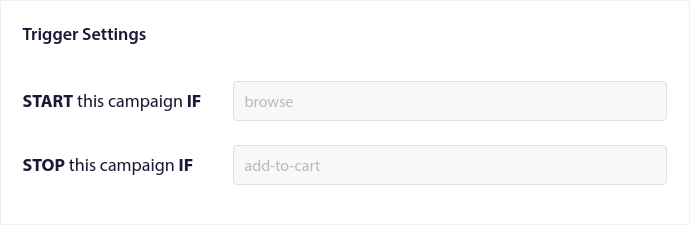
If you’re new to push notifications, you should check out our article on push notification best practices. When you’re happy with your push notification content, click on Trigger Settings. You’ll see that the conditions for a browse abandonment campaign have been pre-configured into the sequence.
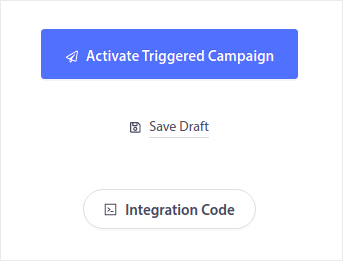
Click on the Integration Code button to get the code snippet you need to embed the browse abandonment campaign on your site.
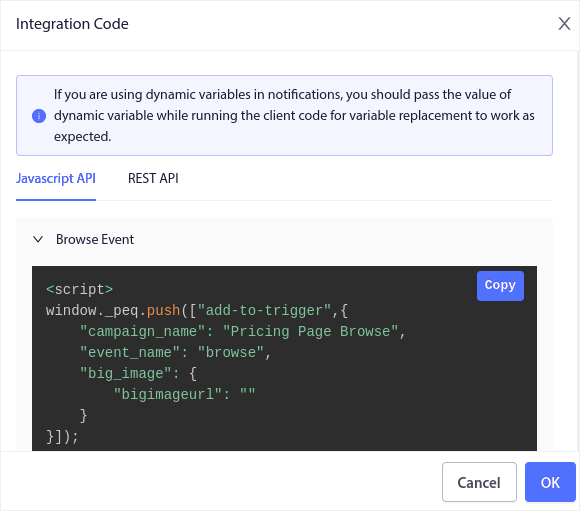
Then, copy the code and paste it into your site. You want to paste that code into the HTML <head> section of the page that you want to track. Finally, click on the Activate Triggered Campaign button:
Og du er færdig!
#4. RSS Feed Campaigns
RSS Auto Push allows you to automate your notifications via RSS.
PushEngage checks every 10 minutes for a new post added to your RSS feed. If a new post is found, PushEngage converts it into a push notification and sends it out to all your subscribers. The best part is that it happens on complete autopilot.
RSS Feed campaigns are perfect for publishers and news sites:
If you’re a big publisher and you publish more than 1 post every 30 minutes, PushEngage keeps a delay of 5 minutes between 2 post notifications.
Before we go any further, you should check out this article on how to use RSS feeds for more epic tips and tricks.
Now, let’s go set up an RSS feed campaign on PushEngage.
Head over to Campaign » RSS Auto Push and just turn it on:
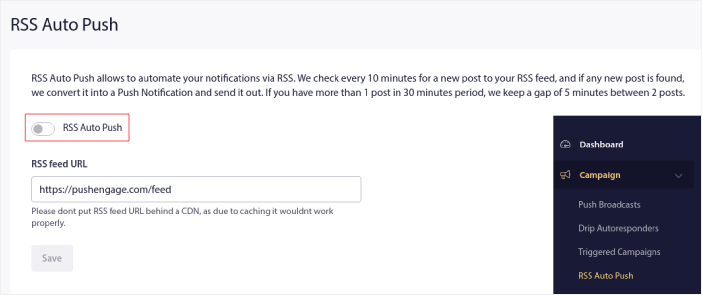
You’ll have to paste in your RSS feed URL. For a WordPress site, it’s usually in the format of:
Then, click on Verify RSS. And finally, click on Save.
That’s it! You’re all set. Every time you publish a new post, it will automatically go to all your subscribers.
#5. Automated Re-engagement Notifications
You can set up automated re-engagement campaigns for subscribers who haven’t engaged with your content for a while.
But why would you do it in the first place?
How about this:
- The cost of acquiring new customers is 5 times more than the cost of retaining existing customers
- It’s easy to target and remarket to a known audience whose personal preferences we already understand.
- In the long run, engaged customers give more business to the company than someone who barely connects with your brand.
Ofertia was able to increase their repeat users by 39% using push notifications offering personalized deals. They’re not the only ones either. You can use this for an eCommerce website to great effect:
There are lots of ways to re-engage your subscribers.
But one of the most effective ways is to use Segmentation. Using dynamic segments, you can figure out a lot about your subscribers and send them personalized content that they’ll love.
In your PushEngage dashboard, head over to Segmentation and create a new Segment:
This allows you to create segments based on behavior and browsing patterns. You can actually set up a sequence of AND/OR operations that decide when certain segments receive automated push notifications.
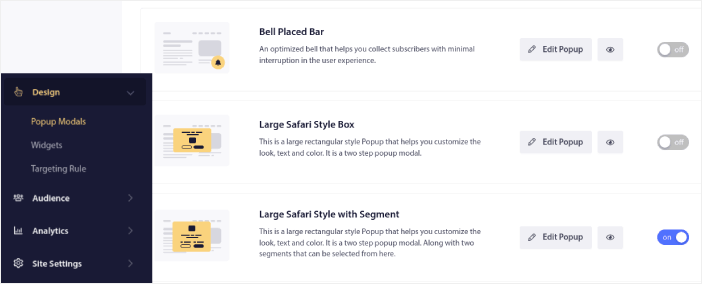
You can even segment your users when they subscribe to push notifications. Head over to Design » Popup Modals and select the Large Safari Style with Segment.
If you need even more ways to segment your users, you can create custom segments based on user actions using the PushEngage Javascript API.
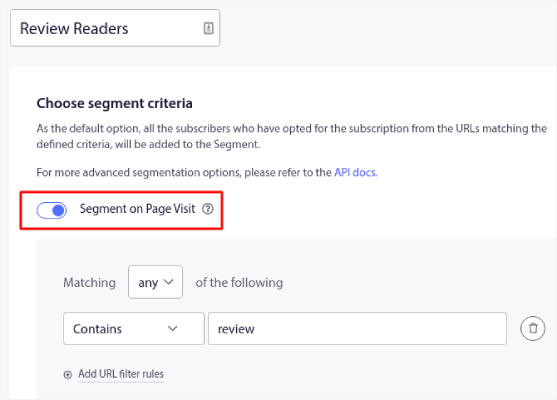
#6. Page Visit Trigger Campaigns
Page visit triggers are an extension of push notification segments. All you have to do is create a segment when a web visitor browses a URL with a particular phrase or pattern.
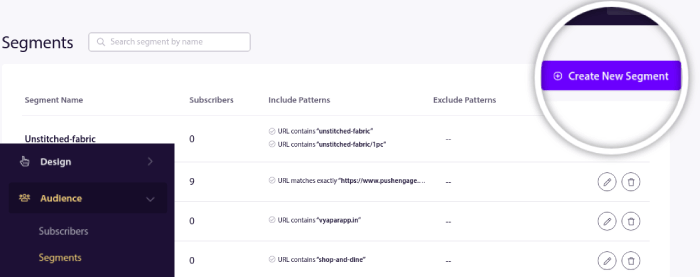
Then, you just head over to Audience » Segments and set your audience to a specific segment:
This allows you to create really personalized and automated push notifications.
And the best part is that you can create custom segments in PushEngage in a couple of minutes.
#7. Automated Push Notifications from Click-Through
You can’t create push notifications that get triggered when your subscribers click on a delivered notification using PushEngage.
But there’s a very clever workaround.
Du kan oprette et segment baseret på den URL, som en bestemt notifikation fører til. Hver gang nogen lander på denne URL, bliver de tilføjet til segmentet, og du kan bruge dette segment til at sende målrettede notifikationer.
Push-notifikationsklik-kampagner er essentielt en udvidelse af den standard målgruppesegmentering for drypkampagner.
Se denne vejledning om hvordan man opretter en klik-til-abonner-knap.
#8. Gentagende automatiserede push-notifikationer
Forestil dig, at du har…
- Et ugentligt udsalg for et loppemarked;
- Eller et weekendudsalg;
- Eller et lageroprydningsudsalg;
- Eller et månedligt flash-udsalg.
Hvor upraktisk ville det være at skulle oprette push-notifikationer for hver begivenhed manuelt?
Heldigvis kan du indstille gentagende notifikationer med PushEngage.
Gentag notifikationer er planlagte og automatiserede push-notifikationer for en tilbagevendende begivenhed. Du kan opsætte dem én gang, angive en tidsplan, og du er færdig.
Det er blot én af de måder, hvorpå MyDeal bruger push-notifikationer. Sørg for at læse hele casestudiet!
Gå til Kampagne og tilføj en automatiseret notifikation i dit PushEngage-dashboard. Rul derefter ned til planlægningssektionen og gå til fanen Send/Planlæg:
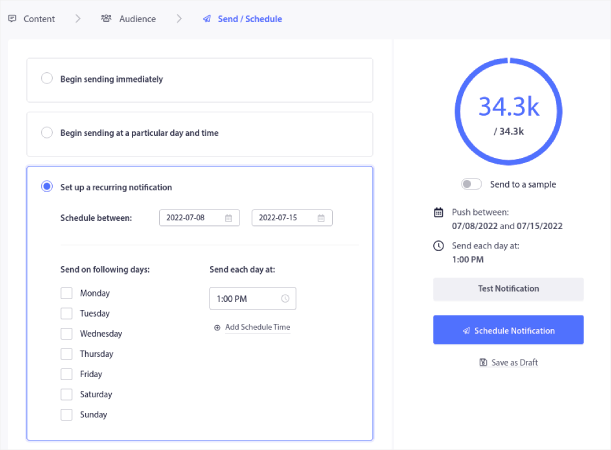
Bare indstil tidspunktet, og du er færdig!
#9. Abonnent Tidszone Notifikationer
Abonnent tidszone notifikationer er præcis, hvad de lyder som. Du sender automatiserede push-notifikationer til dine abonnenter i deres tidszone.
Hvorfor er dette så stor en sag?
Abonnent tidszone notifikationer har højere åbningsrater. Typisk leveres enhver push-notifikation, selvom din abonnent er offline. Disse notifikationer hober sig op og bliver ignoreret, når din abonnent endelig kommer online.
På den anden side leveres abonnent tidszone notifikationer, når du VED, at din abonnent mest sandsynligt er online.
Pro-tip: Brug A/B-test til at finde det perfekte tidspunkt at sende dine abonnenter en push-notifikation.
Abonnent tidszone notifikationer føles meget mere personlige. Og hvis du er smart omkring det, kan du kombinere det med geolokaliseringsdata for at personliggøre dine notifikationer endnu mere. Dette er præcis hvad Phooto gjorde, da de brugte lokale sprog til at skyrocket deres åbningsrater.
Lad os opsætte abonnent tidszone notifikationer i PushEngage nu.
Når du opretter en ny notifikation, skal du gå til planlægningsmulighederne og klikke på afkrydsningsfeltet, der siger Send Notifikationer i Abonnent Tidszone:
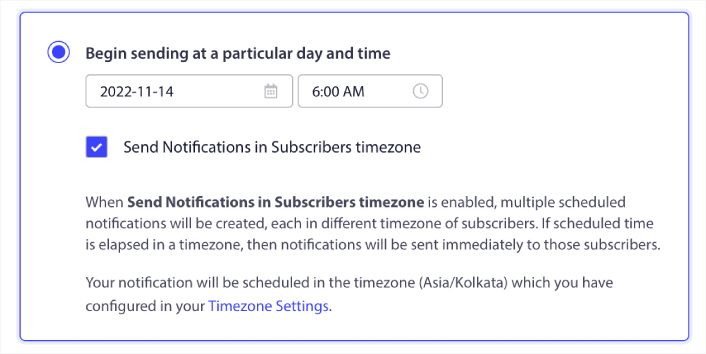
Det er alt! Du bliver nødt til at gøre det samme for dine drypkampagner, men resultaterne er indsatsen værd at klikke på én knap for hver kampagne.
Pro-tip: De sidste to taktikker handlede om planlægning af push-notifikationer. Men disse to er ikke de eneste måder at planlægge automatiserede push-notifikationer på. Tjek vores artikel om hvordan man planlægger push-notifikationer for flere episke tricks.
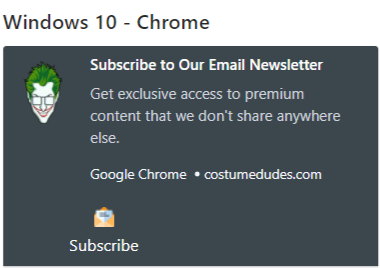
#10. E-mail Opt-In Notifikationer
Email marketing has long since been the best way to generate and nurture leads. The best part about automated push notifications is that you can generate more email subscribers using them.
It’s really simple to set up and using a combination of email and push notifications is way more effective than using one or the other.
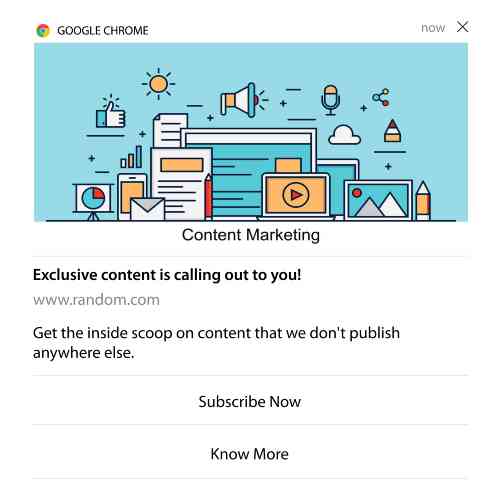
All you have to do is send a trigger notification that asks the user to opt for email notifications.
Just create a custom call to action (CTA) button and insert a subscription link as the button’s URL. That’s really all you need to. If you’re not sure how to get a subscribe button, just follow along.
In any notification, you can scroll down and turn on Multi-action buttons:
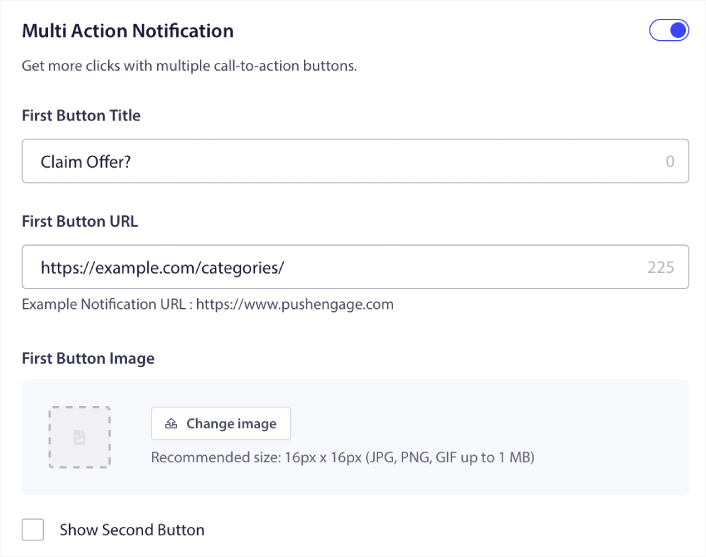
The URL should be a link to an email signup form. You can create one using pretty much any email service provider such as Drip. All you have to do is click on the sharing options for the signup form and copy that URL. Then, paste it into the button URL for your push notification.
Check out our tutorial on multi-action buttons for more details. You can even add an email icon to your button to make it super-clear that you’re asking your users to subscribe to your email notifications:
Pro-tip: You can use the same idea to grow your YouTube channel as well. Just add ‘?sub_confirmation=1’ at the end of your channel URL and paste it into your push notification button URL.
Every time someone clicks on the subscribe button on your push notification, they will get redirected to your YouTube channel and get prompted to subscribe to it.
What to do After You Set Up Automated Notifications
Automated notifications don’t guarantee success. As with any marketing tool, you need to test and improve your messaging and your segments. Unfortunately, you can’t A/B test automated notifications directly. But these resources will help you get on the fast track:
- How to Install a Web Notifications WordPress Plugin to Your Site
- Sådan udføres A/B-test af push-meddelelser (bedste praksis)
- 7 bedste praksisser for push-meddelelser for at få øjeblikkelig trafik
- 21 Best eCommerce WordPress Plugins in 2022 (Free and Paid)
- 7 Best WordPress News Plugins in 2022 (Compared)
Also, PushEngage comes with its fair share of integrations. You can even set up some custom triggers using Zapier. These are fairly advanced campaigns and we recommend setting them up only once you’re familiar with our other built-in automation.
You should also know that the PushEngage Javascript API is very flexible and you can set up custom triggers for pretty much any action on your website.
Once you go through all these resources, you’ll realize that PushEngage is the #1 push notifications software in the market.
So, if you haven’t already, get started with PushEngage today!


