Looking for a way to create push button notifications and collect push notification subscribers?
Anlıyoruz. Bazen abonelerinizi büyütme şeklinizde biraz esnekliğe sahip olmak çok daha uygundur.
Endişelenmeyin. Size yardımcı olacağız.
In this article, we’re going to show you step-by-step how to create your own push button notifications.
Hazır mısınız? Başlayalım.
How to Create Push Button Notifications in WordPress
Before you create push button notifications in WordPress, you need to create a landing page to collect push subscribers. We highly recommend using SeedProd to create your landing pages.

SeedProd is the best WordPress landing page builder. It’s perfect for businesses, bloggers, and website owners looking to build high-converting landing pages without any development skills.
With SeedPreed, you get pre-built templates for high-converting landing pages that you can publish instantly. This includes templates for:
- Satış sayfaları
- Yakında gelecek sayfalar
- 404 sayfaları
- Bakım sayfaları
- Sıkıştırma sayfaları
- Teşekkür sayfaları
- Web semineri sayfaları
- Video sayfaları
Ve çok daha fazlası!
Adım #1: SeedProd'u Yükleyin ve Etkinleştirin
Öncelikle, SeedProd Pro eklentisini alıp etkinleştirmeniz gerekecek. Bunu nasıl yapacağınızdan emin değilseniz, bir WordPress eklentisinin nasıl kurulacağına dair bu makaleye göz atın. Ardından, WordPress kontrol panelinizde SeedProd » Ayarlar bölümüne gidin ve Pro sürümünü etkinleştirin:

Son olarak, SeedProd’un açılış sayfası kontrol paneline genel bakış için SeedProd » Sayfalar bölümüne gidin. SeedProd ile oluşturabileceğiniz farklı türdeki açılış sayfalarını burada görebilirsiniz:

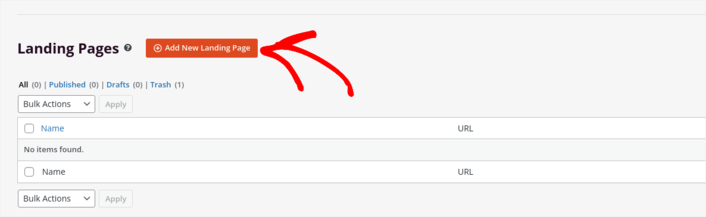
Keep in mind that these are all special pages with pre-built functionality and design templates. For a landing page, you don’t want to use ANY of these special landing pages. Instead, you’re going to create a custom landing page.
Scroll further down and click the Add New Landing Page button to get started:
Step #2: Create a New Landing Page for Push Button Notifications
After clicking the Add New Landing Page button, you’ll see SeedProd’s library of landing page templates. These are professionally designed landing page templates that are completely responsive.
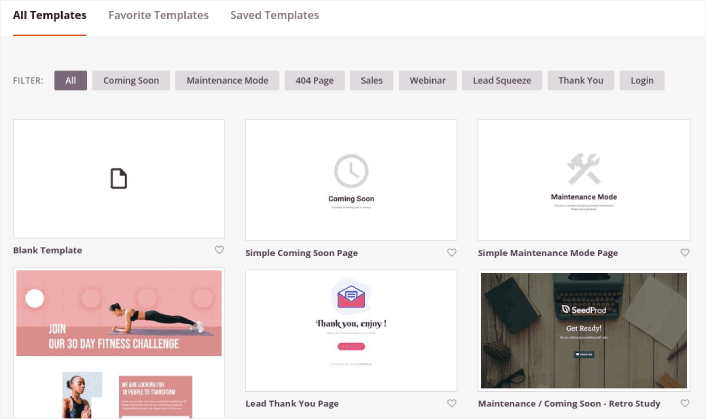
Next, you can select one of these templates to help you get started.
Remember, the template is just a starting point. you can customize everything about the page later on. For now, find a template that you think will fit. When the templates page opens, you can click Squeeze Page to filter the list:

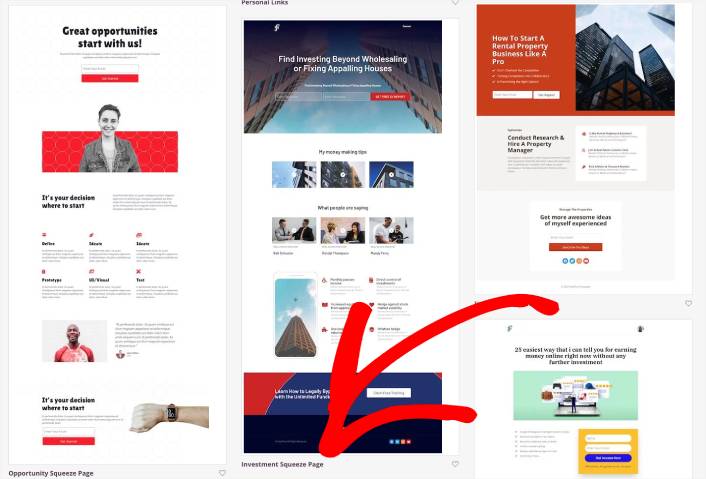
For this guide, we’ll select the Investment Squeeze Page.
A squeeze page has only one objective. It’s to “squeeze” you just enough to get your email address. Know anyone in the investment and personal finance space? Yeah, they can squeeze for sure!
Go ahead and click on it now.
Next, we’re going to customize the landing page.
Step #3: Customize Your Landing Page Design
SeedProd’s visual builder allows you to customize your landing page using drag-and-drop content blocks.
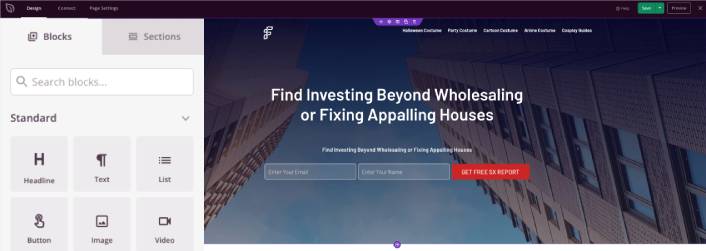
You can create a fully customized header for your landing page in a matter of minutes. You can even add custom elements to convince and convert your traffic. For instance, you can create a video module and embed a YouTube video to convince your visitors to buy your product or service.
It’s also super easy to add a section with a brief description of your product or service . Head over to the Sections tab in the visual builder and under the Hero section, you’ll find several pre-built templates that you can import with a single click.
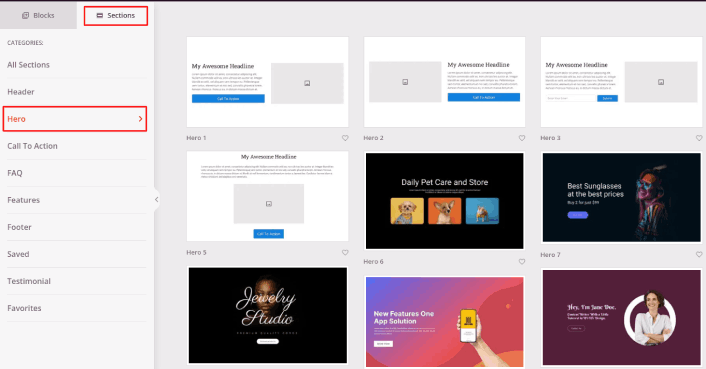
Go ahead and select one that you like.
Don’t worry about the colors or the content. You can edit all of it. What you should look for is a layout that goes well with your template.
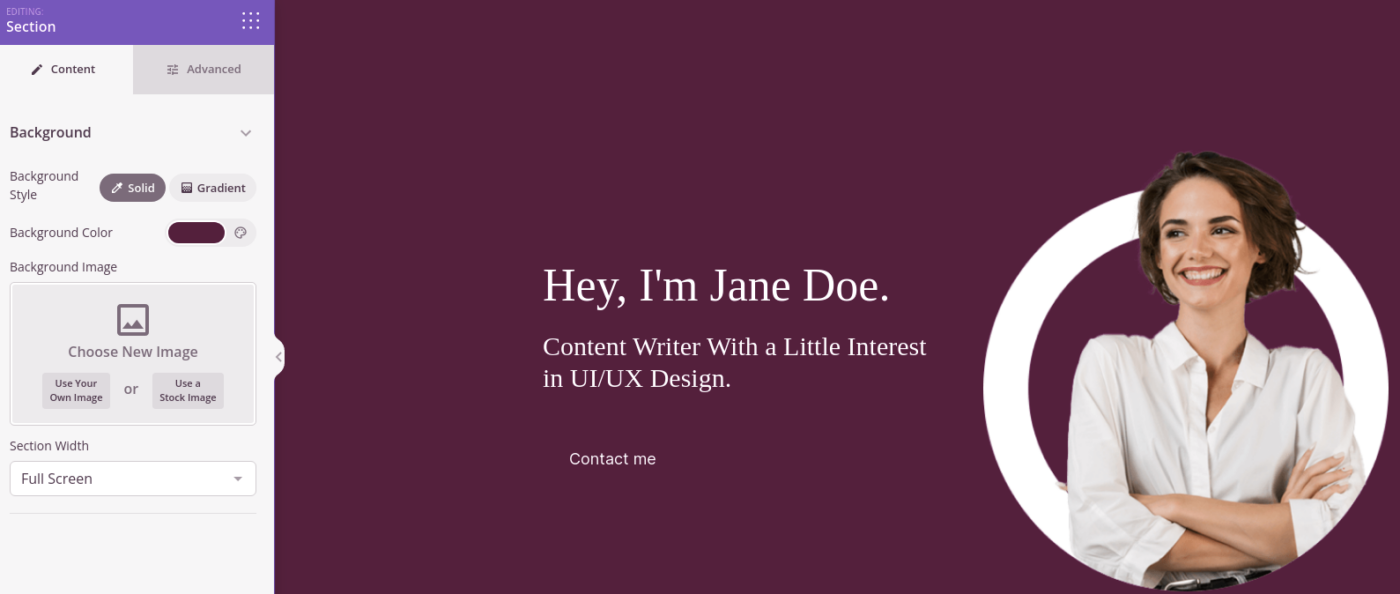
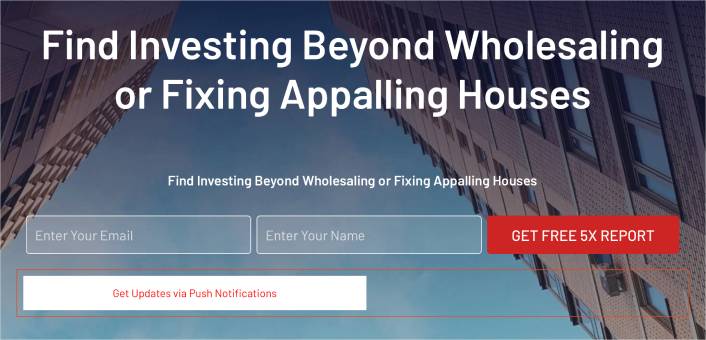
You can customize the hero section the same way we did earlier by choosing a different image and changing the headline and description. While you’re at it, add a call-to-action button that nudges visitors to buy from you.
Next, from the Sections tab, select the Testimonial heading, and choose a design you like. And just like that, you have a testimonials section on your landing page.
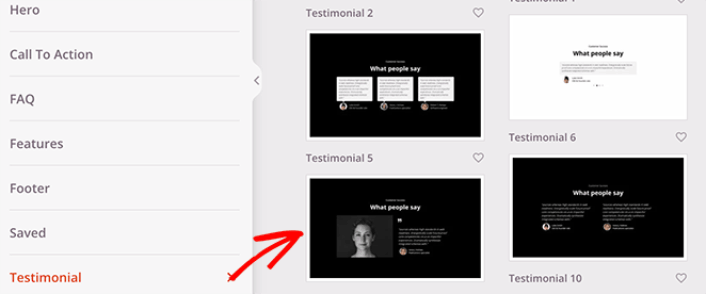
It’s so simple!
Step #4: Add a Push Button Notifications to Your Landing Page
You can also add a click to subscribe button to collect push notification subscribers. Push notifications are a great way to increase your repeat traffic, get more engagement and even sell official merch if you have some.
In SeedProd, just drag and drop the Custom HTML module from the sidebar.
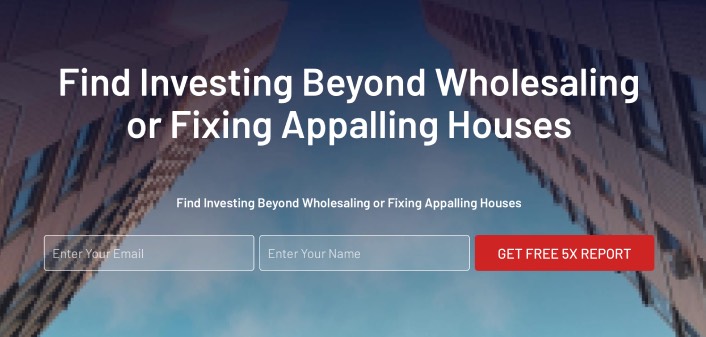
We’ve put the subscribe button directly underneath the email signup form in the first fold.
But you can insert the button anywhere you like.
For this part, you need some experience with HTML and CSS. Or, you can copy this code and paste it into your Custom HTML block:
<button onclick="subscribeOnClickButton()" style="border: none; padding-left: 5%; padding-right:5%; text-align: center; display: inline-block; color: blue;">Get Updates via Push Notifications</button>That’s a standard button in HTML with very little styling. The only fancy bit is the onclick function in the code. It basically means that your visitors can click on the button to subscribe to something. Now, we need to give the button some extra code to allow your visitors to subscribe to push notifications.
PushEngage ana sayfasına gidin ve Başlayın düğmesine tıklayın:

PushEngage, dünyadaki 1 numaralı anlık bildirim eklentisidir.
Anlık bildirimler, web sitesi trafiğinizi ve etkileşiminizi otomatik olarak artırmanıza yardımcı olur. Ve bir çevrimiçi mağaza işletiyorsanız, PushEngage ayrıca otomatik e-ticaret anlık bildirimleri oluşturmanıza yardımcı olarak satışlarınızı artırmanıza da yardımcı olur.
Ücretsiz başlayabilirsiniz, ancak işletmenizi büyütme konusunda ciddiyseniz, ücretli bir plan satın almalısınız. Ayrıca, herhangi bir anlık bildirim hizmeti satın almadan önce, anlık bildirim maliyetleri hakkındaki bu kılavuza göz atmalısınız.
PushEngage ile nelerin geldiğine hızlı bir bakış:
- Yüksek dönüşüm sağlayan otomatik kampanyalar
- Birden fazla hedefleme ve kampanya zamanlama seçeneği
- Hedef takibi ve gelişmiş analizler
- Akıllı A/B testi
- Anlık kampanya şablonları
- Güçlü segmentasyon seçenekleri
- Özel Bir Başarı Yöneticisi
İşletmeniz için trafik, etkileşim ve satış oluşturmak istiyorsanız, PushEngage'in tartışmasız en iyi seçenek olduğunu göreceksiniz. Ve bütçeniz kısıtlıysa, anlık bildirimlerinizle biraz yaratıcı olabilirsiniz.
NOT: WordPress siteniz varsa, PushEngage WordPress eklentisini kurmalı ve etkinleştirmelisiniz.
Ardından, PushEngage'i denemek için ücretsiz planı seçmek isteyeceksiniz veya işletmenizi büyütme konusunda ciddiyseniz ücretli bir planı seçin. Ücretli planlar daha fazla kampanya seçeneği ve daha büyük abone listeleri oluşturma olanağı sunar.
PushEngage kontrol panelinizde, Site Ayarları » Site Detayları bölümüne gidin ve Kurulum Talimatları İçin Buraya Tıklayın düğmesine tıklayın. Herhangi Bir Site altında, kurulum kodunuzu alacaksınız:

UYARI: Kontrol panelinizden aldığınız kodu kopyalamanız gerekir. Kod, her PushEngage kullanıcısı için benzersizdir. Görüntüdeki kodu kopyalayarak anlık bildirim aboneleri toplayamazsınız.
Kodunuzu PushEngage kontrol panelinizde aldıktan sonra, bu kod parçasını kodunuza ekleyin:
<script> window._peq = window._peq || [];</script> <script>
function subscribeOnClickButton(){
window._peq.push(['subscribe',{}.pe,function(res){
if(res.statuscode==1)
{
// Code to return response
console.log(res);
}
}]);
}
</script>
Nihai kodunuz şuna benzer görünmelidir:
<script src="https://clientcdn.pushengage.com/core/02a6e92667ae2279fcba8932356c1d93.js" async></script>
<script> window._peq = window._peq || [];</script> <script>
function subscribeOnClickButton(){
window._peq.push(['subscribe',{}.pe,function(res){
if(res.statuscode==1)
{
// Code to return response
console.log(res);
}
}]);
}
</script>
You’ll want to add this code to the HTML block in your landing page after the code for the button. It should look something like this:

Feel free to customize the styles for the button any way you please. When you’re done customizing your landing page, go ahead and hit the Save button.
Step #4: Configure Your Page Settings
After you’re done designing your landing page, click the Connect tab at the top of your page builder, and select your email marketing provider to collect leads on your site.

Ardından, ekranınızın üst kısmındaki Sayfa Ayarları sekmesine tıklayın.

Burada, açılış sayfanıza bir SEO eklentisi ve bir Google Analytics eklentisi ekleyebilirsiniz. Reklam performansını izlemek için Facebook Pikseli veya Pinterest pikseli gibi özel izleme kodları bile ayarlayabilirsiniz.
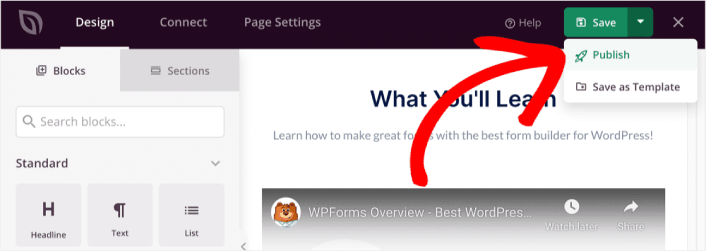
Step #5: Publish Your Landing Page in WordPress
Now let’s go ahead and publish your design. To do this, click the dropdown arrow next to the save button and click Publish.
You can then click the See Live Page button to see how it looks.
Congratulations! You just published your very first landing page.
What to do After You Add Push Button Notifications to Your Site
Now that your landng page is live, it’s time to work on your traffic, engagement, and sales. You should try using push notifications on your site. Push notifications are a great marketing tool that can help you grow your business.
Bu epik kaynaklara bir göz atın ve ne demek istediğimizi anlayacaksınız:
- Müşteri Etkileşimini Artırmak İçin 7 Akıllı Strateji
- Anlık Bildirimler Etkili mi? 7 İstatistik + 3 Uzman İpucu
- Terk Edilmiş Sepet Anlık Bildirimleri Nasıl Ayarlanır (Kolay Eğitim)
Anlık bildirim kampanyalarınızı oluşturmak için PushEngage'ı kullanmanızı öneririz. PushEngage, dünyanın 1 numaralı anlık bildirim yazılımıdır. Bu nedenle, henüz yapmadıysanız, bugün PushEngage'ı kullanmaya başlayın!


