If email open rates are dropping and your social posts are getting buried, it might be time to try something different. A web push notification campaign could be exactly what you need.
Web push is fast, direct, and shows up right when your subscriber is online. No inbox. No algorithm. Just a quick message that brings people back to your site when it matters most.
In this guide, I’ll show you how to set up your first web push notification campaign using PushEngage. It’s easier than you might think, and you’ll see how even a simple campaign can drive real results.
Låter bra? Låt oss bara dyka rakt in.
Send Web Push Notifications Today!
Push-notiser är ett super effektivt, billigt marknadsföringsverktyg som hjälper dig att öka din återkommande trafik, ditt engagemang och din försäljning automatiskt.
Why Web Push Works (Even When Other Channels Don’t)
Web push notifications cut through the noise in a way that email and social just can’t.
- You don’t need a phone number or email address to grow your list
- Messages show up while your subscriber is actively browsing
- You can automate everything — from cart recovery to product drops
- It works across devices and browsers (no app required)
It’s like having your own private traffic channel… one that actually gets noticed. Think about it… when was the last time you ignored a browser notification that popped up with your name, a juicy headline, and a call to action you cared about?
⚡ Instant Visibility: Unlike emails that sit unread for days, push notifications hit instantly. Right on the user’s screen. Desktop, mobile, doesn’t matter. You’re not waiting for them to open an inbox. You’re showing up exactly when it matters.
🧠 Zero Memory Required: Users don’t need to remember your website. Or your product. Or even their login.
Once they subscribe, you can re-engage them anytime — no forms, no friction, no fuss. It’s like having a fast lane straight into their attention span.
📈 Stupid-High Engagement: Web push CTRs often 2–3x email. Why? Because it’s short. Unexpected. And native to how people browse. Plus, no one’s inbox is drowning in push notifications (yet). So you stand out.
💸 You Own the Channel: No algorithms. No bidding. No social feed shenanigans. Push subscribers are yours. You decide what they see and when. It’s your audience, not rented from Meta or Google.
🧪 Perfect for Testing: Need to know if a headline works? If people care about a new feature? Push is the fastest A/B testing tool you didn’t know you had. Send a headline variation. See which one gets more clicks. Learn fast. Move faster.
Web push is the rare channel that’s cheap, high-converting, and brutally effective when used right.
And the best part… it takes under 10 minutes to launch your first campaign.
Let’s build one.
A Breakdown of Web Push Notification Campaign Types
In the broadest sense, there are 3 types of web push notification campaigns:
- Broadcast notifications
- Drip web push notification campaigns
- Triggered web push notification campaigns
Broadcasts are push notifications that you send out as a single notification. You can schedule them, but they will only fire off once. Triggered campaigns involve setting up a push notification, defining a trigger to set it off, and a workflow to control its scheduling. Automated drip notifications are a series of notifications that set off automatically at specific times or when specific conditions are met.
For all intents and purposes, triggered campaigns and automated drip campaigns look the same from the outside. The critical difference is that trigger campaigns are way more flexible and customizable. If you consider that push notifications cost way less than most other channels, it makes perfect sense to use a combination of all three to grow your business.
If you’re new to push notifications, we strongly recommend starting your journey using proven templates.
NOTE: Most triggered campaigns need some development experience. You’d need to use an API to make the best use of triggered notifications. However, there are some triggered notifications that you can send straight off the rack. If you’re curious, check our article on eCommerce push notifications for a better idea.
The Best Service to Send a Web Push Notification Campaign
Let’s start things off by saying that most of the “free push notification services” out there are actually free trials. Some of the providers we’ve listed here are trial software, while others have a forever-free plan that you can opt for.
There are some other freemium options, such as Firebase Cloud Messaging (FCM), but that’s not really a good option at all. You can read more about why FCM can’t compete with a service provider like PushEngage. But for now, just take our word for it and jump into the better options.
Vi rekommenderar att använda PushEngage.

PushEngage är det främsta pluginet för push-notiser i världen.
Pushnotiser hjälper dig att öka din webbplatstrafik och engagemang automatiskt. Och om du driver en onlinebutik hjälper PushEngage dig också att öka din försäljning genom att hjälpa dig att skapa automatiserade e-handelspushnotiser.
Du kan komma igång gratis, men om du menar allvar med att växa ditt företag bör du köpa en betald plan. Innan du köper någon pushmeddelandetjänst bör du också kolla in den här guiden till kostnader för pushmeddelanden.
Här är en snabb överblick över vad du får med PushEngage:
- Högkonverterande automatiserade kampanjer
- Flera målriktnings- och kampanjplaneringsalternativ
- Målspårning och avancerad analys
- Smart A/B-testning
- Push-kampanjmallar
- Kraftfulla segmenteringsalternativ
- En dedikerad framgångschef
Och detta är knappt att skrapa på ytan. Kolla in PushEngages fullständiga lista över funktioner innan du går vidare.
Men den mest attraktiva delen av PushEngage är att du kan komma igång med en gratis plan för alltid. Och du kan använda den för att faktiskt växa din verksamhet med flera anpassningsalternativ.
Du kommer att se att PushEngage är utan tvekan det bästa valet om du vill bygga trafik, engagemang och försäljning för ditt företag. Och om du har en budget kan du alltid vara lite kreativ med dina pushmeddelanden.
OBS: Om du driver en WordPress-webbplats bör du installera och aktivera PushEngage WordPress-plugin.
Gratisversionen tillåter upp till 200 prenumeranter och 30 livstidsaviseringar. Det räcker gott för att få ditt företag till en punkt där du enkelt har råd med de betalda planerna som börjar på 9 USD/månad för 100 000 prenumeranter.

Och oroa dig inte om du inte kan någonting om kodning. Du kan installera PushEngage med hjälp av en av de många installationsguiderna för alla webbplatser och CMS.
Pushengage’s AI-powered optimization helps you craft better titles and messages, leading to increased engagement and campaign success. Ever wished that your push notifications would write themselves? Well, now they can!
In all likelihood, you can cut down campaign creation time for push broadcasts, drip campaigns, and automated trigger campaigns by as much as 50% while improving the quality of your copywriting.
The PushEngage AI uses high-performing campaigns as a reference point for all copywriting and will always stick to best practices by default.
And the best part is that it works for web push, Android native notifications, iOS native notifications, Flutter notifications, and React Native notifications from the same dashboard!
You can use AI text generation for any campaign type. For this example, I’m using a push broadcast to demonstrate the capabilities. But if you want to see its full potential in action, watch this video!
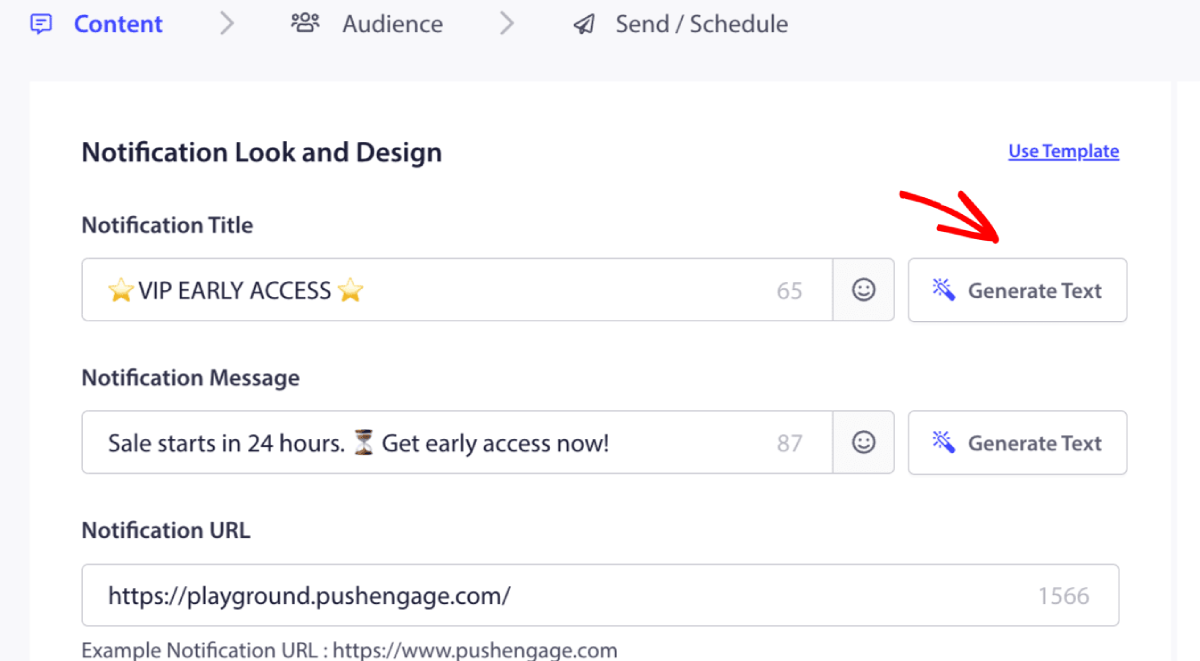
Create a new campaign or choose any from the Templates. You can then click on Generate Text Button.
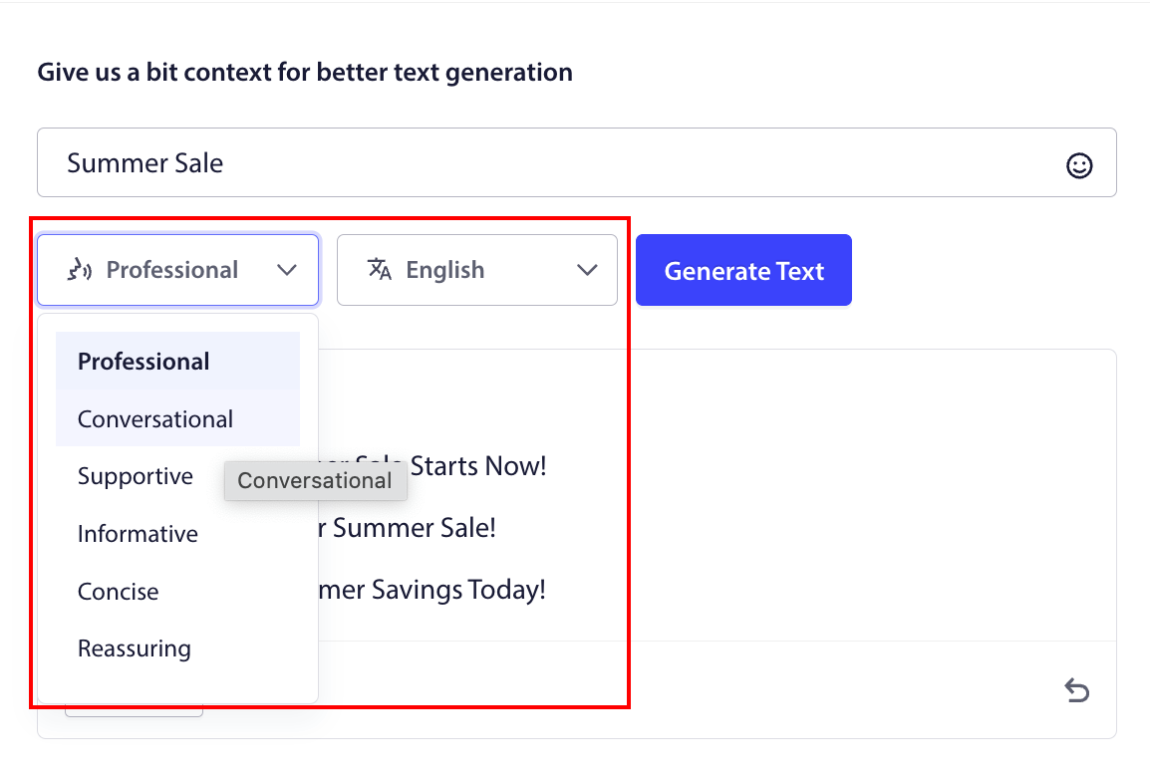
It will open up a small window for the web push notification campaign title & message. You can start by adding any keywords that will act as a prompt for the AI. The prompt can be as detailed as you like.
You can also set the tone for the web push notification campaign title or message. The tone of the conversation is very important in deciding the type of campaign that will be created. Make sure that it resonates with your brand style.
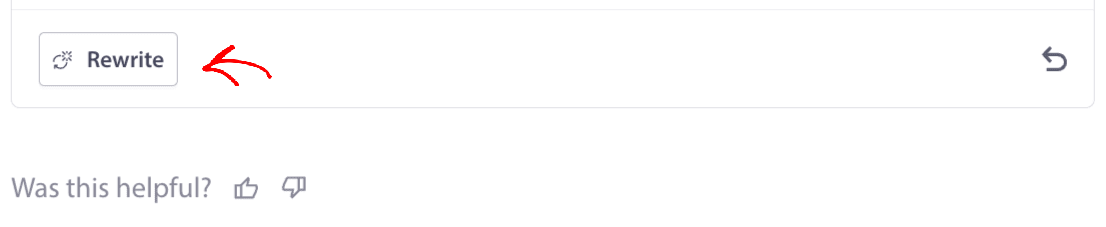
Once it’s set, you can click on the Generate Text button. Not happy with the generated text? Simply click the Rewrite button!
You can actually craft copy in ANY LANGUAGE!
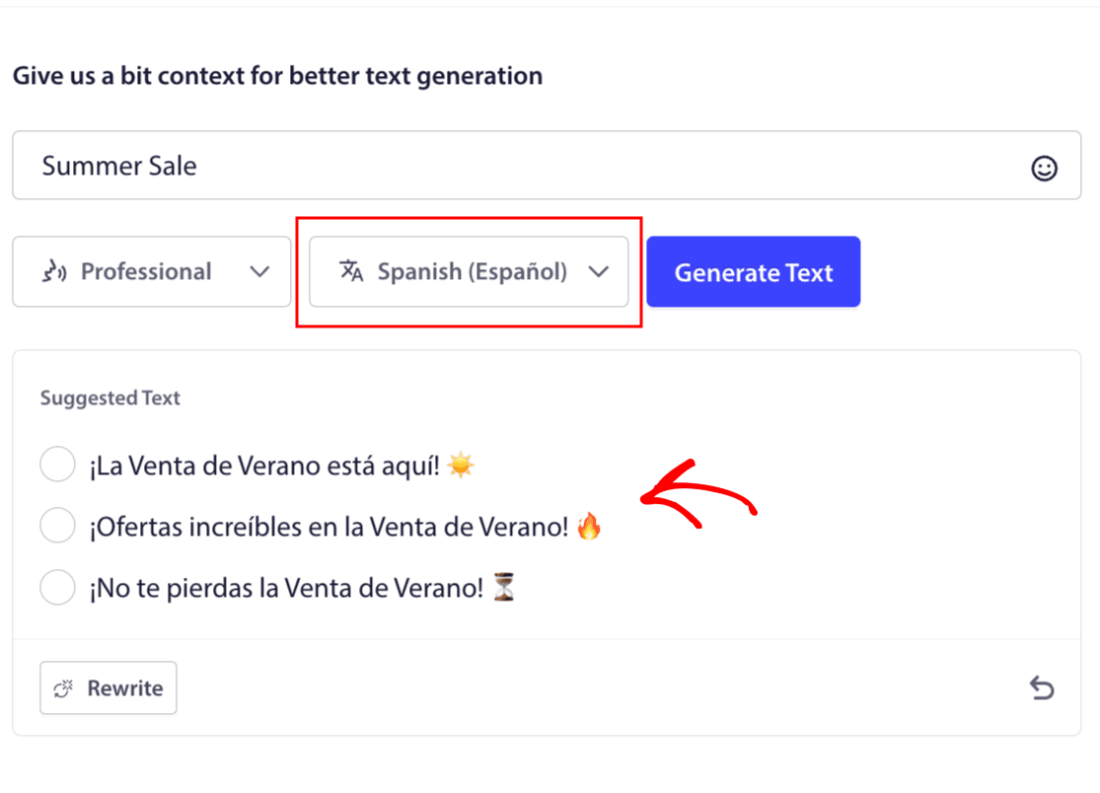
This level of built-in multi-language support simply doesn’t exist in any other push notification software. And don’t worry, the translations are dead on! So, you can send geo-specific campaigns very easily now. Select the right Audience Group, select the language, and let our AI do its magic.
How to Send a Web Push Notification Campaign
Now that you know what a web push notification campaign is and what service you need to send them, it’s time to check out how to send different notifications.
Here’s what web push campaigns look like in the wild:
🛒 E-commerce:
- Welcome discount: “Thanks for subscribing! Here’s 10% off.”
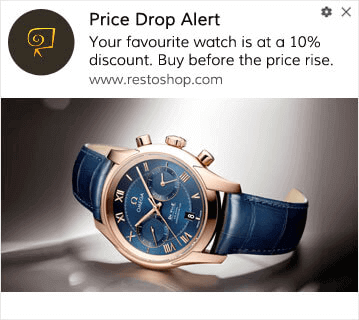
- Price drop alert: “The jacket you liked? It’s finally on sale.”
- Product drops: “New arrivals just landed. Be the first to shop.”
📚 Publishers & Bloggers:
- New post alert: “Don’t miss this week’s breakdown on [Topic].”
- Weekly digest: “Your Friday readlist is here.”
- Lead magnet delivery: “Here’s your free guide. Let us know what you think.”
💼 SaaS & Tools:
- Feature updates: “We just launched something new. Try it free.”
- Trial reminders: “Your free trial ends tomorrow.”
- Abandoners: “Still thinking it over? Here’s 20% off to try us out.”
Start small. Steal these. Tweak them to match your tone. Done.
For practical purposes, we aren’t talking about custom triggered campaigns you can create using an API service here. If you’re more interested in custom notifications, you should check out our documentation.
#1. Welcome Web Push Notification Campaign
A welcome web push notification campaign is a simple push notification meant to welcome any new subscriber.
You can also send an offer or a gift for subscribing to your push notifications. This is pretty common with a lot of our customers. You can use your welcome push notifications to:
- Dela en välkomstkupong
- Erbjud premiumfunktioner
- Skicka gratis leverans
- Erbjuda gratis gåvor
- Onboarda din prenumerant med en genomgång
Nu ska vi konfigurera din första välkomstpushavisering med PushEngage.
Here is how to Enable Welcome Notifications in PushEngage. Go to the PushEngage dashboard and head over to Campaign » Drip Autoresponders and click on Create New Drip Autoresponder:

Namnge sedan din kampanj (vi föreslår något som Välkomst-drip), och under Innehåll, välj alternativet som säger, “Skicka meddelande omedelbart efter att användaren prenumererar“):

Vid det här laget kan du klicka på pilen bredvid notisen för att redigera innehållet i din notis. Om du har en Premium- eller Enterprise-plan med PushEngage kan du lägga till mer än en notis för att skapa en sekvens av automatiserade välkomstmeddelanden. Klicka bara på Lägg till ny notis och redigera innehållet.
När du är klar, klicka på Drip-inställningar och välj alternativet att skicka din välkomstkampanj till alla prenumeranter:

Rulla sedan ner för att ställa in dina egna UTM-parametrar för att spåra push-notiserna:

Och när du är klar, rulla upp igen och klicka på knappen Aktivera auto-svarare:

Now you know why setting up a welcome push notification campaign is important. You also know how to set it up. Go ahead and activate welcome push notifications to re-engage new subscribers, or check out this article on website welcome messages for inspiration.
#2. Abandoned Cart Web Push Notification Campaign
Övergivna kundvagnar uppstår när en potentiell kund lägger en produkt i kundvagnen och inte slutför köpprocessen.
Ditt jobb är att minska antalet övergivna kundvagnar så mycket som möjligt.
One way to recover your lost sales is to use a cart abandonment web push notification campaign. Cart abandonment recovery campaigns target subscribers with an abandoned cart and send them follow-ups, reminders, offers, coupons, and discounts.

Det är en enkel idé: Få så många människor som möjligt att köpa något.
Pushaviseringar för övergivna kundvagnar har en mycket verklig inverkan på din resultatrad. Till exempel får WickedWeasel 2 000–4 000 USD per vecka i extra försäljning från sin kampanj med pushaviseringar för övergivna kundvagnar.
Nu ska vi konfigurera din allra första kampanj för övergivna kundvagnar med PushEngage.
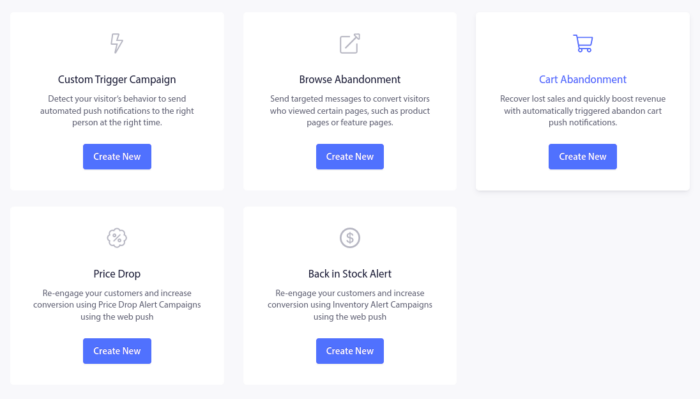
Go to the PushEngage dashboard and head over to Campaign » Triggered Campaigns, and click on Create New Triggered Campaign:

Välj sedan mallen Kundvagnsavbrott och klicka på Skapa ny:
Och du kan börja skapa en automatisk svarare för övergivna kundvagnar. Under fliken Innehåll kan du skapa en serie pushaviseringar:
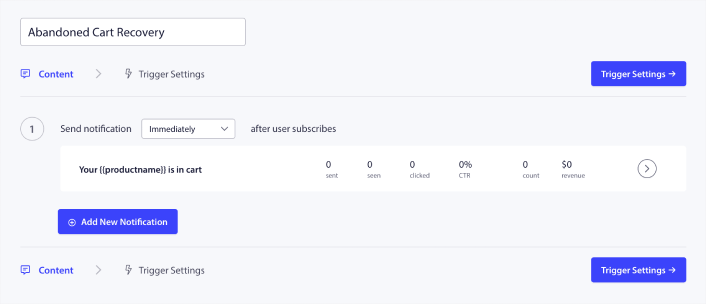
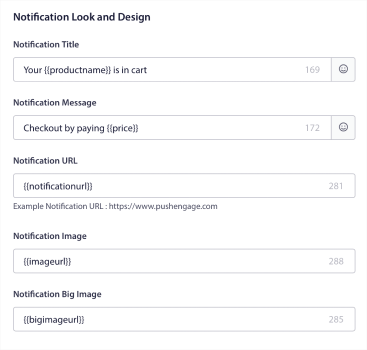
To edit a notification, simply click the arrowhead next to it, and you can customize the push notification:
För en mer detaljerad handledning, kolla in den här artikeln om hur man konfigurerar pushaviseringar för övergivna kundvagnar.
#3. Browse Abandonment Web Push Notification Campaigns
Övergivna webbläsningar är precis vad det låter som. Det är när en webbplatsbesökare surfar på din webbplats och plötsligt bestämmer sig för att gå därifrån. Dessa incidenter är också kända som "funnel abandonment" av andra leverantörer.
Övergivna webbläsningar är en mycket vanlig företeelse inom nästan alla branscher.
Och det är verkligen svårt att minska eller kontrollera eftersom det inte finns något sätt att ge incitament till en slumpmässig användare att stanna kvar på din webbplats. Det är här kampanjer för övergivna webbläsningar är så kraftfulla.
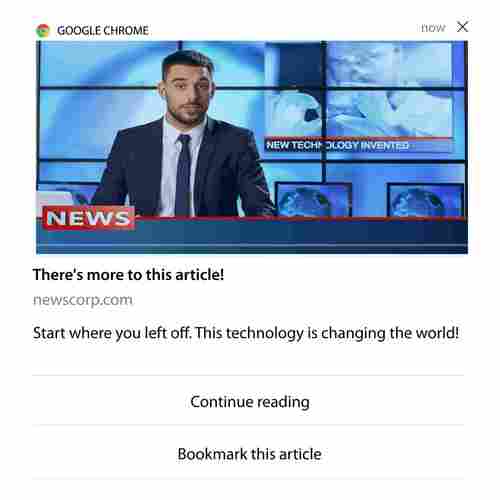
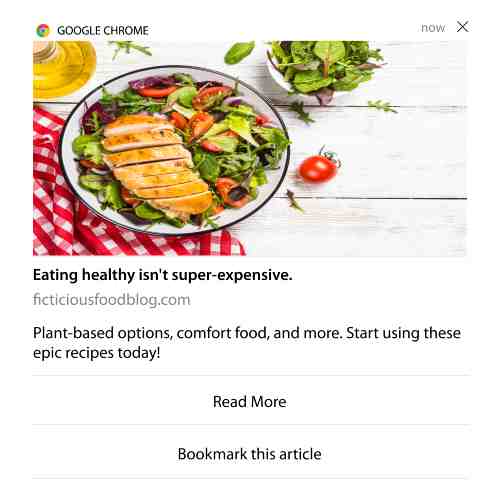
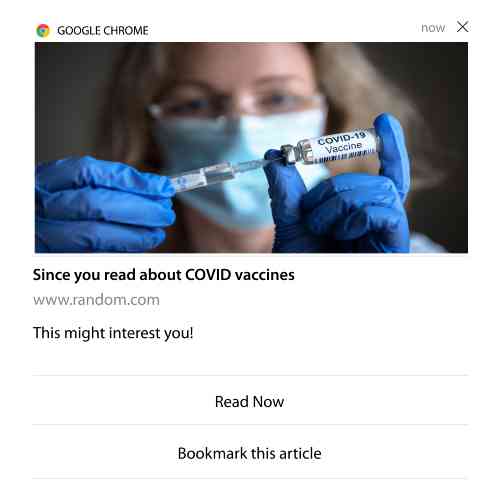
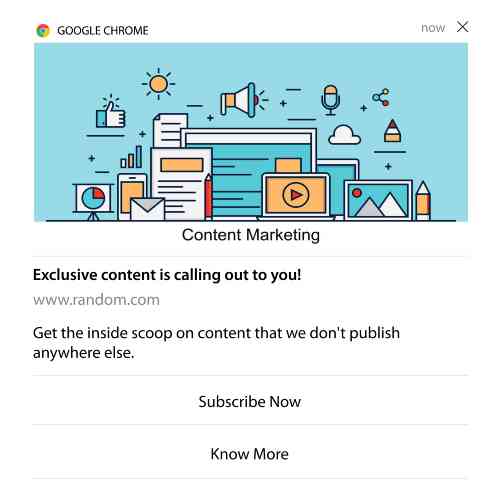
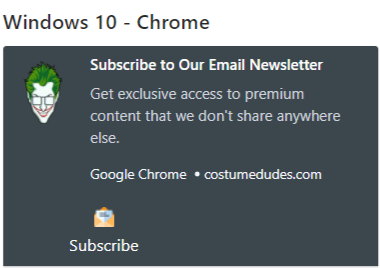
Här är ett exempel på pushaviseringar för övergivna webbläsningar för en utgivare:
The impressive part about PushEngage is that you can set up campaigns for pretty much any industry. So, you can send browse abandonment push notifications for SaaS and travel websites as well.
So, how do you set up browse abandonment campaigns?
With cart abandonment, there’s a very clear parameter to fire your push notifications. For browse abandonment, you may want to consider parameters such as:
- Added the product to Wishlist
- Looked at the same product more than X times
- Browsed more than X products in the same category
- Sökte på webbplatsen efter en specifik produkt
- Stayed on site for at least X minutes before bouncing
The idea behind this campaign for an eCommerce site is to get the subscriber to add the product to their cart. For publishers, it could be a click or a download on the article they were reading.
Gå till PushEngage-instrumentpanelen igen och gå till Kampanj » Utlösta kampanjer för att skapa en ny utlöst kampanj:

Skapa sedan en ny kampanj för webbläsaravhopp genom att klicka på knappen Skapa ny:

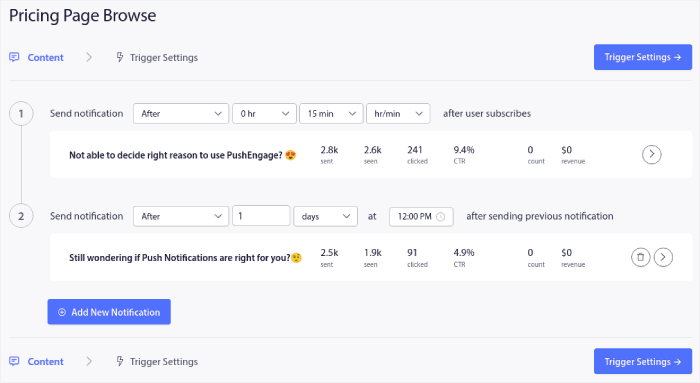
Därefter kommer du att kunna ställa in hela din sekvens av push-meddelanden tillsammans med en fördröjning mellan varje meddelande:
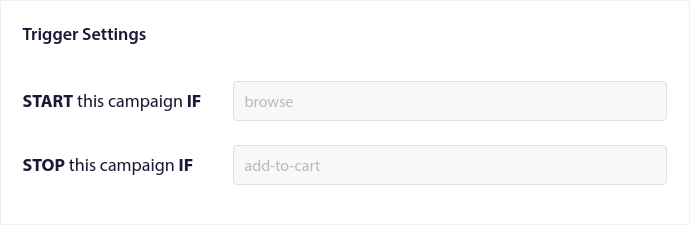
Om du är nybörjare på push-meddelanden bör du kolla in vår artikel om bästa praxis för push-meddelanden. När du är nöjd med ditt push-meddelandeinnehåll klickar du på Utlösningsinställningar. Du kommer att se att villkoren för en kampanj för webbläsaravhopp har förkonfigurerats i sekvensen.
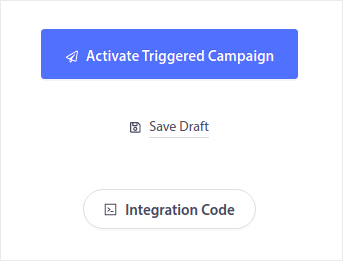
Klicka på knappen Integrationskod för att få kodavsnittet du behöver för att bädda in kampanjen för webbläsaravhopp på din webbplats.
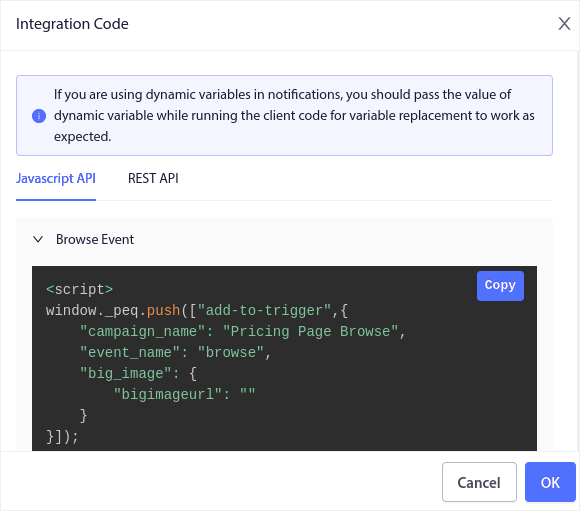
Kopiera sedan koden och klistra in den på din webbplats. Du vill klistra in den koden i HTML-<head>-sektionen på sidan som du vill spåra. Slutligen, klicka på knappen Aktivera utlöst kampanj:
Och du är klar!
#4. RSS Feed Web Push Notification Campaign
RSS Auto Push allows you to automate your notifications via RSS.
PushEngage checks every 10 minutes for a new post added to your RSS feed. If a new post is found, PushEngage converts it into a push notification and sends it out to all your subscribers. The best part is that it happens on complete autopilot.
RSS Feed campaigns are perfect for publishers and news sites:
If you’re a big publisher and you publish more than 1 post every 30 minutes, PushEngage keeps a delay of 5 minutes between 2 post notifications.
Before we go any further, you should check out this article on how to use RSS feeds for more epic tips and tricks.
Now, let’s go set up an RSS feed web push notification campaign on PushEngage.
Create a New RSS Web Push Notification Campaign
Once you’ve installed PushEngage on your site, head over to your PushEngage dashboard and go to Campaign » RSS Auto Push and click on Create New Campaign:

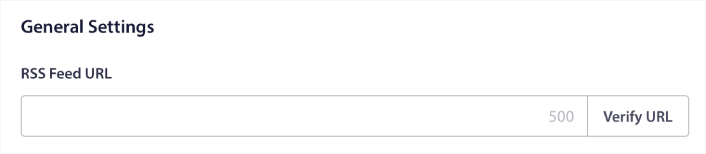
This will create a brand new RSS web push notification campaign. You can set up multiple RSS feed campaigns in PushEngage. Start by giving your campaign a descriptive name. Then, paste in the URL for your RSS feed:
Set Up RSS Notification Settings
Next, you want to set the Campaign Frequency:
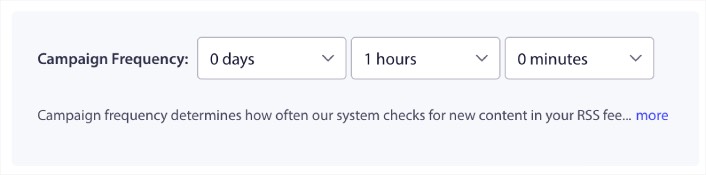
The Campaign Frequency is how often the RSS feed web push notification campaign looks for new content in your blog to send an automated push notification. The minimum value is 15 minutes, and the maximum value is 7 days.
Vi rekommenderar att leta efter innehåll att marknadsföra ungefär varannan dag om du inte är ett nyhetsbyrå. För nyhetsbyråer bör du hålla det till 15 minuter. Tänk på att PushEngage bara kommer att leta efter nytt innehåll efter att du har ställt in och publicerat din RSS-flödeskampanj.
Välj inlägg att marknadsföra
You can select what posts to promote. You can choose between Only the latest item or All items. If you set up the RSS push notifications to select only the latest item, PushEngage only sends the latest post:
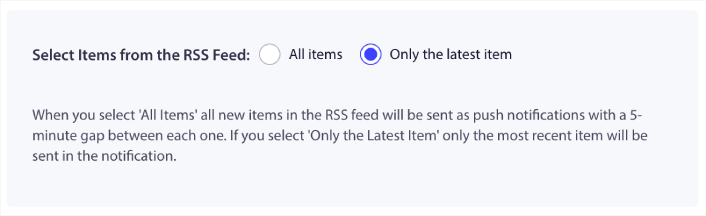
Or, you can select the All items options. In this case, the campaign will select all the posts on your site and send out a web push notification campaign for each with a 5-minute gap between them.
Set an RSS Push Notifications Icon
Your push notification icon establishes your brand identity in your RSS push notifications. We recommend using your brand mark so that your subscribers know instantly that the notification is from your brand.
Nu finns det två alternativ här. Du kan antingen ladda upp meddelandeikonen manuellt:
And that’s really simple to do. Just click on Change image and upload your notification icon. Or, you can fetch it from your RSS feed:
You can either select the item element or the attribute inside an element to dynamically select your notification icon from the feed. Typically, most RSS feeds will hold the site icon inside the media:content item element. Even more specifically, it’s usually inside the media:thumbnail attribute of the media:content element.
To target the element, you can select the Item Element Value option and set it to media:content. Or, you can select the Element Attribute Value option and set it to media:content > media:thumbnail.
NOTE: We recommend using this option only if you know how to read XML. RSS feeds might not contain the site icon in the same XML tags as our example. So, if you’re not sure how to fetch the notification icon from the RSS feed, we recommend uploading it manually instead.
Select Large Image for RSS Feed Notifications
Now, we’re going to select the large image for your RSS feed web push notifications. Again, there are two ways to do this. You can let PushEngage automatically find the image from the RSS feed:

Eller så kan du manuellt välja vilken bild du vill ha från flödet:
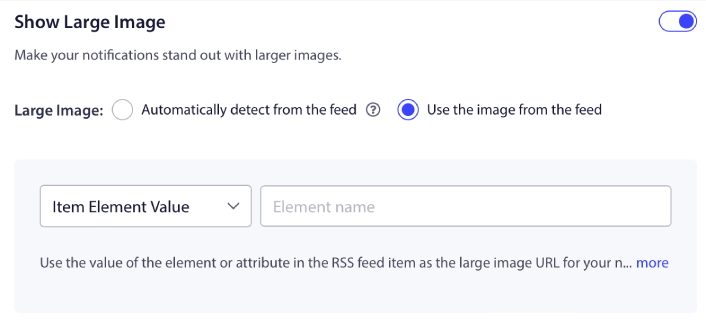
Det här är exakt samma som att välja meddelandeikonen från RSS-flödet. Du kan återigen välja bilden från XML-elementet som innehåller den eller så kan du välja det specifika attributet som innehåller din föredragna bild.
NOTE: We only recommend selecting a URL from your RSS feed if you know how to read XML. If you’re not sure how to read XML, it’s better to let PushEngage find the best image for your notifications.
Set Web Push Notification Campaign Duration
The web push notification campaign duration is how long the notification stays in your subscriber’s notification tray before it gets automatically deleted.
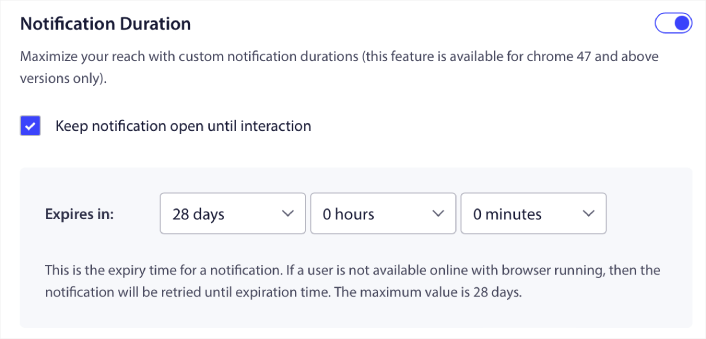
Om du inte vill överväldiga dina prenumeranter med en massa olästa notifikationer är det förmodligen bäst att låta push-notifikationerna löpa ut inom ett par dagar.
Unlike broadcast notifications or even other automated web push notifications, you can’t really schedule RSS push notifications. So, you always have the option to keep the notification open until your subscriber interacts with it, even within the expiry limit.
Set UTM Parameters
Vi är nästan klara. Bläddra ner för att ange dina egna UTM-parametrar för att spåra push-notifikationerna:
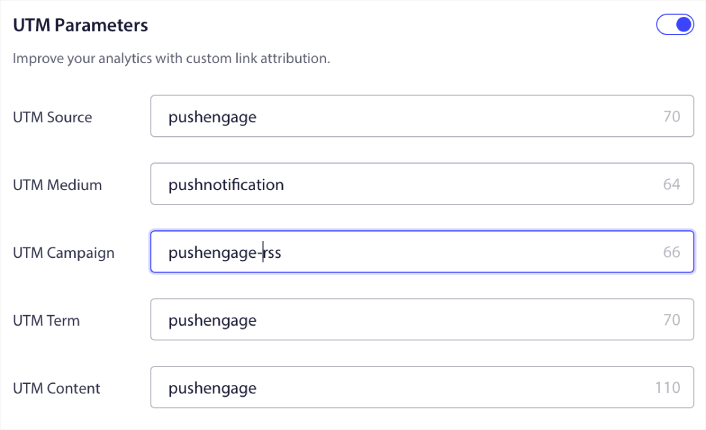
På så sätt kan du enkelt attribuera din trafik från dessa push-notifikationer i Google Analytics.
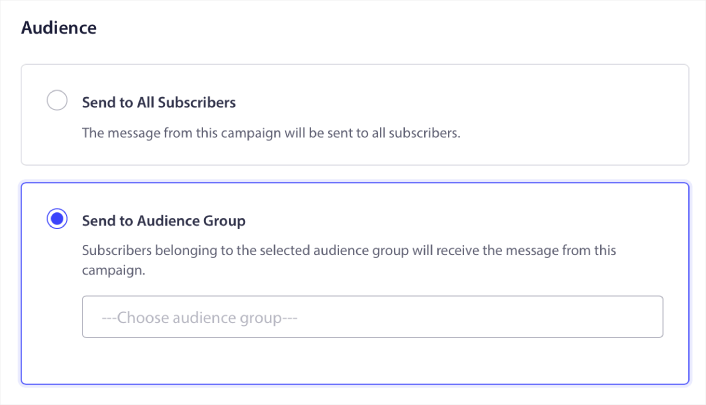
Välj målgruppsgrupp
Finally, we’re going to select an Audience Group to send your RSS web push notification campaign. You can either send the RSS feed campaign to all your subscribers, or you can create Audience Groups to send personalized push notifications even from your RSS feed.
Och det är allt! Det är verkligen allt som krävs.
Nu, varje gång du publicerar ett nytt inlägg, kommer alla push-notifikationsprenumeranter i den valda målgruppsgruppen automatiskt att få en push-notifikation om ditt nya innehåll.
That’s it! You’re all set. Every time you publish a new post, it will automatically go to all your subscribers.
#5. Automated Re-engagement Notifications
You can set up automated re-engagement campaigns for subscribers who haven’t engaged with your content for a while.
But why would you do it in the first place?
How about this:
- The cost of acquiring new customers is 5 times more than the cost of retaining existing customers
- It’s easy to target and remarket to a known audience whose personal preferences we already understand.
- In the long run, engaged customers give more business to the company than someone who barely connects with your brand.
Ofertia was able to increase their repeat users by 39% using push notifications offering personalized deals. They’re not the only ones either. You can use this for an eCommerce website to great effect:
There are lots of ways to re-engage your subscribers.
Picture this:
- A user visits your site. Sees a subtle opt-in. Clicks “Allow.”
- Instantly gets a welcome notification with a discount or the next step.
- Leaves your site…
- Later that day, they see a reminder: “Still thinking about it?”
- They click, come back, and buy.
That’s a basic push funnel — and you didn’t lift a finger once it was live.
Now, imagine layering in segmentation and automated campaigns. That’s when it gets fun. Using dynamic segments, you can figure out a lot about your subscribers and send them personalized content that they’ll love.
In your PushEngage dashboard, head over to Segmentation and create a new Segment:
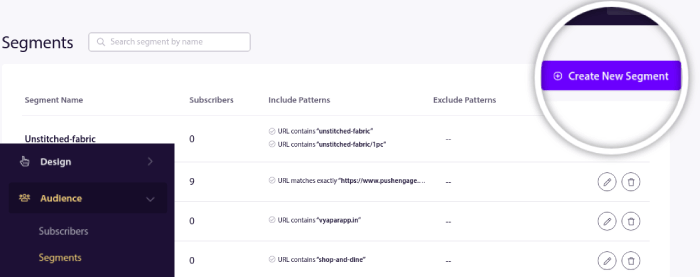
This allows you to create segments based on behavior and browsing patterns. You can actually set up a sequence of AND/OR operations that decide when certain segments receive automated push notifications.
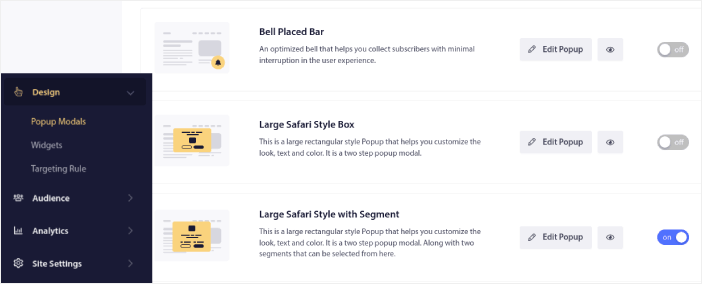
You can even segment your users when they subscribe to push notifications. Head over to Design » Popup Modals and select the Large Safari Style with Segment.
If you need even more ways to segment your users, you can create custom segments based on user actions using the PushEngage Javascript API.
#6. Page Visit Web Push Notification Campaign
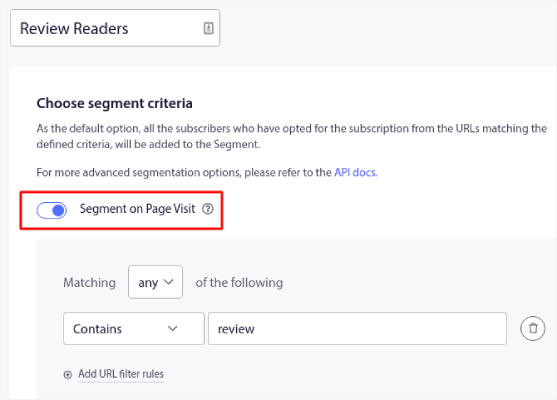
Page visit triggers are an extension of push notification segments. All you have to do is create a segment when a web visitor browses a URL with a particular phrase or pattern.
Then, you just head over to Audience » Segments and set your audience to a specific segment:
This allows you to create really personalized and automated push notifications.
And the best part is that you can create custom segments in PushEngage in a couple of minutes.
#7. Automated Push Notifications from Click-Through
You can’t create push notifications that get triggered when your subscribers click on a delivered notification using PushEngage.
But there’s a very clever workaround.
You can create a segment based on the URL that a particular notification leads to. Every time someone lands on this URL, they get added to the segment, and you can use this segment to send targeted notifications.
Push notification click campaigns are essentially an extension of the standard audience segmentation for drip campaigns.
Check out this tutorial on how to create a click-to-subscribe button.
#8. Repeating Automated Push Notifications
Imagine that you have…
- A weekly sale for a flea market;
- Or a weekend sale;
- Or a stock clearance sale;
- Or a monthly flash sale.
How inconvenient would it be to have to create push notifications for every event manually?
Fortunately, you can set repeating notifications with PushEngage.
Repeat notifications are scheduled and automated push notifications for a recurring event. You can set them up once, specify a schedule, and you’re done.
That’s just one of the ways in which MyDeal uses push notifications. Be sure to read the full case study!
Head over to Campaign and add an automated notification in your PushEngage dashboard. Then, scroll down to the scheduling section and go to the Send/Schedule tab:
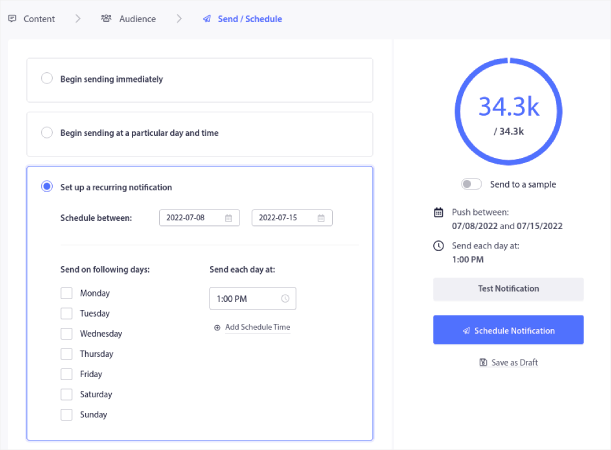
Ställ bara in tidpunkten så är du klar!
#9. Subscriber Timezone Notifications
Subscriber timezone notifications are exactly what they sound like. You send automated push notifications to your subscribers in their time zone.
Why’s this such a big deal?
Subscriber timezone notifications have higher open rates. Typically, any push notification gets delivered even if your subscriber is offline. These notifications then pile up and get ignored when your subscriber finally comes online.
On the other hand, a subscriber time zone web push notification campaign will get delivered when you KNOW your subscriber is most likely online.
Pro-Tip: Use A/B testing to figure out the perfect time to send your subscribers a push notification.
Subscriber timezone notifications feel way more personalized. And if you’re smart about it, you can combine it with geolocation data to personalize your notifications even further. This is exactly what Phooto did when they used local languages to skyrocket their open rates.
Let’s set up subscriber timezone notifications in PushEngage now.
When you create a new notification, head to the scheduling options and click on the checkbox that says Send Notifications in Subscriber Timezone:
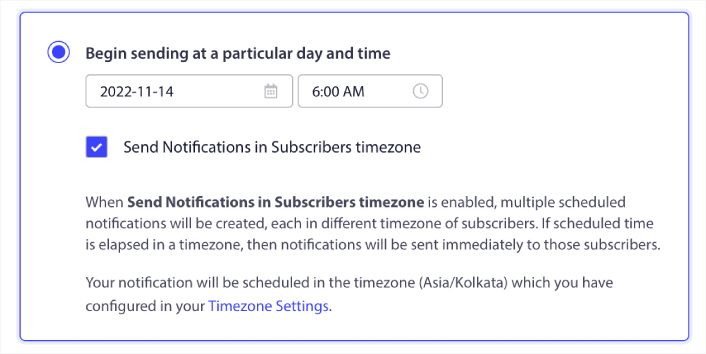
That’s all! You’ll have to do the same for your drip campaigns as well, but the results are well worth the effort of click one button for each campaign.
Start with 1–2 messages per week. Ramp up once you see what’s working.
Here’s a simple cadence to start with:
- Week 1: Welcome message + 1 product or content push
- Week 2: Reminder or discount follow-up
- Week 3: New drop, blog post, or feature highlight
If users stop clicking, pull back. If they keep clicking? Double down.
Pro-Tip: The last two tactics were all about scheduling push notifications. But these two aren’t the only ways to schedule automated push notifications. Check out our article on how to schedule push notifications for more epic tricks.
#10. Email Opt-In Notifications
Email marketing has long been the best way to generate and nurture leads. The best part about automated push notifications is that you can generate more email subscribers using them.
It’s really simple to set up, and using a combination of email and web push notification campaigns is way more effective than using one or the other.
All you have to do is send a trigger notification that asks the user to opt for email notifications.
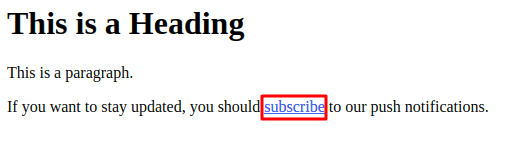
Just create a custom call to action (CTA) button and insert a subscription link as the button’s URL. That’s really all you need to. If you’re not sure how to get a subscribe button, just follow along.
In any notification, you can scroll down and turn on Multi-action buttons:
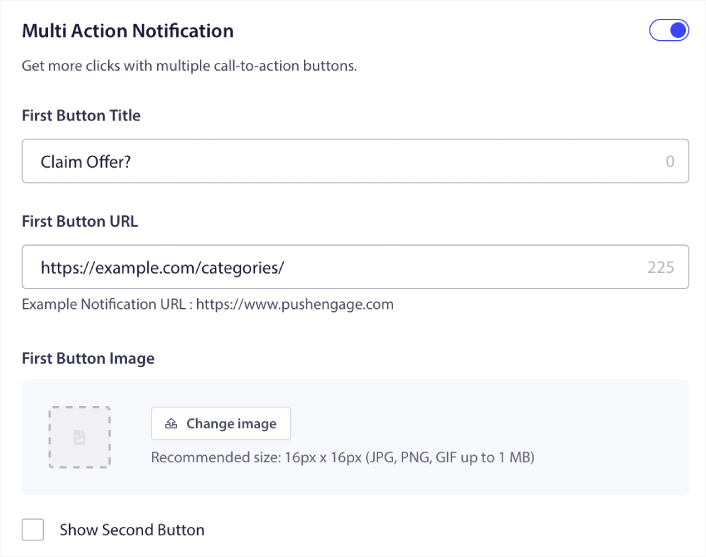
The URL should be a link to an email signup form. You can create one using pretty much any email service provider such as Drip. All you have to do is click on the sharing options for the signup form and copy that URL. Then, paste it into the button URL for your push notification.
Check out our tutorial on multi-action buttons for more details. You can even add an email icon to your button to make it super-clear that you’re asking your users to subscribe to your email notifications:
Proffstips: You can use the same idea to grow your YouTube channel as well. Just add ‘?sub_confirmation=1’ at the end of your channel URL and paste it into your push notification button URL.
Every time someone clicks on the subscribe button on your push notification, they will get redirected to your YouTube channel and get prompted to subscribe to it.
Segmentation Ideas You Can Steal
Segments are a really great way to send targeted push campaigns. And it should be a big part of your push notification marketing strategy. But how do you get started? What kinds of segments should you be creating?
Till att börja med bör du inte fokusera på att bara skapa en typ av segment. Vi kommer att guida dig genom de olika typerna av segmentering som vi har funnit vara mest effektiva.
Here are a few high-impact segments worth setting up:
- Engaged shoppers: People who clicked 2+ notifications in the past week
- Cart abandoners: People who visited a product but didn’t purchase
- Category fans: Users who keep checking one product category (e.g., “Sneakerheads”)
- Geo-targeted: Tailor messages based on country or city
The more specific you get, the more clicks you’ll earn. If you’re an advanced marketer, you should craft segments the way you would for an email campaign with different segmentation models:
- Geographic segments
- Behavioral segments
- Occasion-based segments
- Cultural segments
- Demographic segments
- Psychographic segments
Dynamic segments let you talk to subscribers like real people… not just traffic stats.
And if you’d like to further personalize your messaging, you can use audience groups.
How to Create a Push Notifications Audience Group
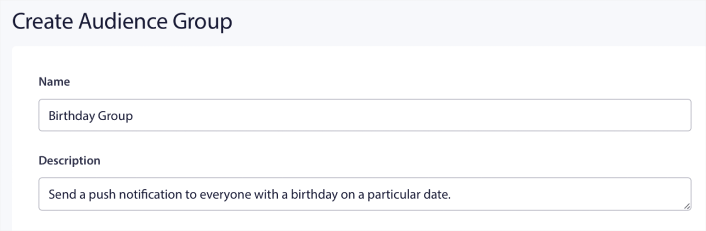
To get started, head over to your PushEngage dashboard and go to Audience » Audience Groups and click the Create New Audience Group button:

Innan du kan använda dina målgruppsgrupper för att skicka riktade push-sändningar måste du skapa en målgruppsgrupp med regler för att skapa den gruppen. Du kan börja med ett namn och en beskrivning för din målgruppsgrupp.
Create a Selection Criteria
Next, create a selection criterion to filter and target the right audience:
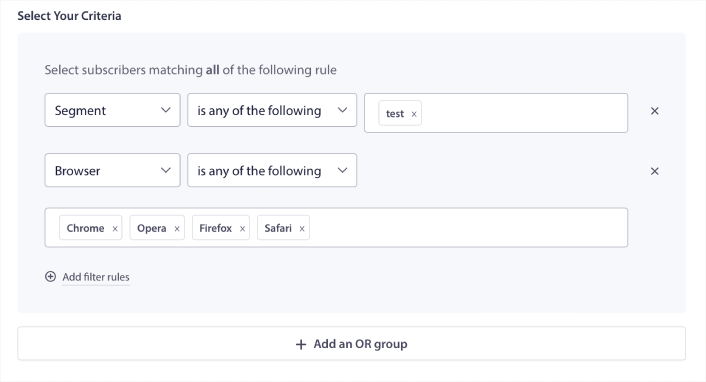
You can click Add filter rules to select subscribers who match ALL the filter rules or, you can click Add an OR group to create a filter where the subscribers meet at least one of the selection criteria.
User behavior is the most fundamental way to target your push notification subscribers. As we said before, subscriber segments usually group visitors who like to browse similar content. But even within that group of subscribers who love the same content, there are small personalizations that you can make.
Even more to the point, you can club multiple subscriber segments to send them a common, relevant message.
Filter By Subscriber Segment
If you haven’t already, you should start segmenting your push notification subscribers right away. Otherwise, this filter simply won’t work. But if you already have segments, then you can select multiple segments as the base for your audience group.

After that, you can add other filters to improve your targeting.
Filter By Subscriber Attribute
While attributes are mostly for drip push notifications, you can use them for push broadcasts as well. Now, push notification attributes are mostly useful for eCommerce sites. But you can also use them to send personalized push notifications if you have a Customer Relationship Management (CRM) tool.
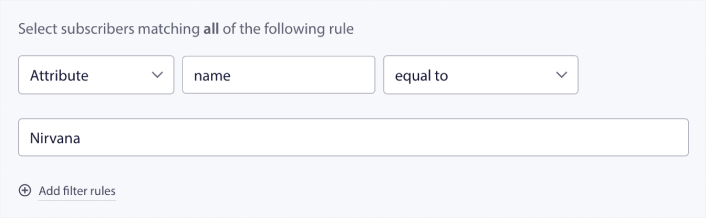
Attributes can hold personal information such as subscriber names, date of birth, any other info that you’d store in your CRM for personalized marketing campaigns.
Filter By Subscriber’s Device and Browser
I många fall är det avgörande att veta hur dina prenumeranter tar emot dina meddelanden.
Det finns en riktigt bra historia om Michael Jackson. Varje gång han spelade in en låt lyssnade han på den via en radio. Inte i sin inspelningssvit för en miljon dollar med toppljudkvalitet, utan en billig radio som de flesta av hans publik senare skulle använda. Om han gillade hur låten lät även på den billigaste enheten på marknaden, godkände han att låten släpptes.
No wonder Billie Jean went Platinum 29 times!
För dina push-notiser är det ingen skillnad.
Filtrera efter webbläsare för prenumeranter
Different browsers have different character limits for push notifications. So, when you send a push broadcast you need to be wary of these limits. The cool thing is that you can save different audience groups to retarget different browsers. You don’t need to create segments each time.

Filtrera efter enhet för prenumeranter
There’s a difference in the types of rich push notifications you can send to iOS, Android, and Windows devices. So, not every campaign you send out will look the same on all devices. In fact, many push notification types won’t even show up on all devices. Different devices also have different screen sizes. So, you may want to optimize how your push notifications look before sending them.
Men nu när du kan filtrera din målgrupp efter deras enhet, borde det inte vara ett problem längre.
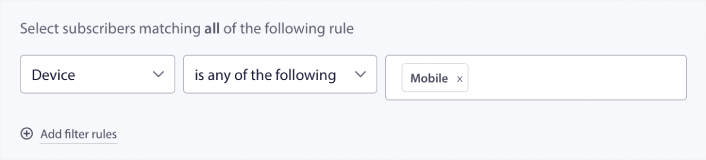
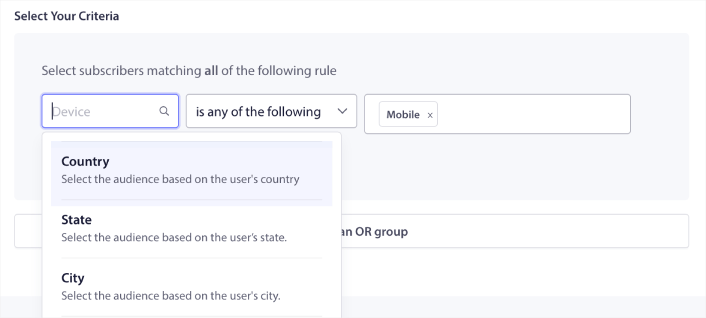
Hur man filtrerar efter geolokalisering
Du kan också filtrera efter geolokalisering för att ytterligare anpassa dina kampanjer. Filtret låter dig välja en målgrupp efter land, stad och delstat:
Phooto used geolocation to send push notifications in local languages. And it helped them skyrocket their engagement rates quickly. Read the full case study.
Hur man filtrerar efter engagemangsmått
En av de bästa sakerna med målgruppsgrupper är att det kan hjälpa dig att skapa återinriktningskampanjer med push-notiser. Du kan filtrera din målgrupp efter:
- Prenumerationsdatum
- Senaste sändningsdatum
- Senaste klickdatum
- Senaste visningsdatum
Att använda dessa mått kan hjälpa dig att återinrikta dig på prenumeranter med låga engagemangsnivåer eller sälja till prenumeranter med höga engagemangsnivåer.
Eller så kan du filtrera målgruppen efter:
- Totalt antal sändningar
- Totalt antal visningar
- Totalt antal klick
Dessa siffror kan hjälpa dig att hitta prenumeranter som får minst meddelanden från dig så att du kan hitta bättre sätt att anpassa notiser. Du kan också hitta de prenumeranter som interagerar mest med dina push-notiser.
Pro Tip: Combine two or more filters to find the best ways to re-engage with your subscribers. For instance, subscribers with a high Total View Count and high Total Click Count will give you subscribers who have been engaging with you for a while. These are loyal subscribers who deserve a reward.
Hur man filtrerar efter identifierare
Identifierare är hur PushEngage identifierar dina prenumeranter. Eftersom PushEngage är GDPR-kompatibel som standard, lagrar vår programvara aldrig någon personligt identifierbar data för någon av dina prenumeranter. Istället tilldelar vi varje prenumerant en profil-ID och en prenumerant-hash.
Keep in mind, you’ll be using profile IDs and subscriber hashes mostly as part of advanced campaigns. In other words, you’ll need to use the PushEngage API to create custom campaigns that use these identifiers.
Identifierare är fantastiska för att skicka transaktionella push-meddelanden som detta:
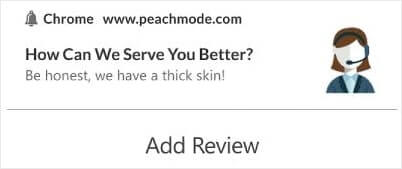
They’re great for custom eCommerce push notifications. So, we don’t really recommend using them for anything besides testing push broadcasts from the dashboard.
What to Do After You Set Up Web Push Notification Campaigns
Launching a web push notification campaign won’t guarantee success. As with any marketing tool, you need to test and improve your messaging and your segments.
Don’t get lost in the weeds. Focus on three numbers:
- Click-through rate (CTR): Are people engaging?
- Opt-in rate: Is your prompt working?
- Unsubscribes: Are you sending too much?
Bonus if you’re tracking revenue per send — but even without it, CTR and opt-in rate give you a fast feedback loop. Unfortunately, you can’t A/B test automated notifications directly. But these resources will help you get on the fast track:
- How to Install a Web Notifications WordPress Plugin to Your Site
- Hur du gör A/B-testning av pushmeddelanden (Bästa praxis)
- 7 bästa praxis för push-notiser för att få omedelbar trafik
- 21 Best eCommerce WordPress Plugins in 2022 (Free and Paid)
- 7 Best WordPress News Plugins in 2022 (Compared)
Also, PushEngage comes with its fair share of integrations. You can even set up some custom triggers using Zapier. These are fairly advanced campaigns, and we recommend setting them up only once you’re familiar with our other built-in automation.
You should also know that the PushEngage Javascript API is very flexible, and you can set up custom triggers for pretty much any action on your website.
Once you go through all these resources, you’ll realize that PushEngage is the #1 push notifications software in the market.
So, if you haven’t already, get started with PushEngage today!


