Looking for a quick and easy way to create a sales page in WordPress?
Creating a sales page is the best way to showcase your products and services to potential customers and make them want to buy. But what if you’ve never designed a web page before? What if you have no coding experience and you don’t know how to add custom functionality to your pages?
Fortunately, there’s an easy way to create a sales page in WordPress. In this article, we’re going to help you launch a sales page in less than 15 minutes.
Är du redo? Låt oss dyka in.
What’s a Sales Page and Why Should You Care?
A sales page is a fully customizable web page that’s focused on selling a product or a service to your website visitors. Unlike a social media site or a marketplace like Amazon or Etsy, your sales page focuses on a single product or service to sell at a time. Even better, it doesn’t showcase all your competitors in the same web page!
Every sales page is designed to convince and convert website visitors into paying customers. Depending on how much time you have, your business model, and how much money you’re expecting to make from your subscribers, you could:
- Offer coupons and discounts
- Host a giveaway
- Create a free guide or checklist as a lead magnet
- Accept donations from fans
Och mycket mer!
But before you get started, remember to have a very clear and specific goal for your landing page. Just because you can do a lot of things doesn’t mean that you should do them all on one page. More often than not, if you give your visitors too many things to click on, they won’t click on anything at all.
What do All Successful Sales Pages Have?
Now that you know what a sales landing page in WordPress does and why you should build one, it’s time to create a blueprint for your landing page. If you check out any successful landing pages, you’ll notice that they all have some very basic common elements:
- Headline: The headline is where you grab people’s attention and make them want to scroll down and learn more about you.
- Description: Just below the headline, you should have a description of what your viewers should expect from the rest of the page. This is a great place to convince readers to buy your product as well.
- Latest episodes: Once people know what to expect from your brand, give them a taste of your show by listing your latest episodes. We recommend showcasing 3-5 episodes at most.
- Buy button: Follow up with a purchase button so that your visitors can directly add your product to cart. This is known as the call to action (CTA) button. It’s how you nudge your visitors to take action on your page. Depending on your goal for the landing page, your CTA will vary.
- Social proof: A great way to give your readers a strong reason to subscribe is by offering social proof. Social proof simply tells your visitor that there are other people who are already taking the same action as you want them to take.
- Newsletter optin: Once you hit your visitors with the core offer, you can also ask them to become email subscribers. You can also ask them to become push notification subscribers using a click to subscribe button. It’s always best if you offer something valuable in exchange.
- Social sharing buttons: The more people talk about you on social media, the better chances you have of skyrocketing your subscribers. So, put up social sharing buttons on your landing page to encourage people to share it on social media.
Here’s a sneak peek at the WordPress sales page we’ll be creating in our tutorial.

Remember, these are only the most basic parts of any successful landing page. For your page, you can add a lot of other sections and create custom offers to increase your conversions.
How to Create a Sales Page in WordPress
Now that you know what to create, it’s time to launch your sales page in WordPress. We highly recommend using SeedProd to create your landing pages.

SeedProd is the best WordPress landing page builder. It’s perfect for businesses, bloggers, and website owners looking to build high-converting landing pages without any development skills.
With SeedPreed, you get pre-built templates for high-converting landing pages that you can publish instantly. This includes templates for:
- Säljsidor
- Kommer snart-sidor
- 404-sidor
- Underhållssidor
- Squeeze-sidor
- Inloggningssidor
- Tack-sidor
- Webinar-sidor
- Videosidor
Och mycket mer!
Steg #1: Installera och aktivera SeedProd
Först vill du skaffa SeedProd Pro pluginet och aktivera det. Om du är osäker på hur du gör det, kolla in den här artikeln om hur man installerar ett WordPress plugin. Gå sedan till SeedProd » Inställningar i din WordPress-instrumentpanel och aktivera Pro-versionen:

Gå sedan till SeedProd » Sidor för en översikt över Seed પ્રોડs landningssidors instrumentpanel. Det är här du kan se de olika typerna av landningssidor du kan skapa med SeedProd:

Keep in mind that these are all special pages with pre-built functionality and design templates. For a sales landing page, you don’t want to use ANY of these special landing pages. Instead, you’re going to create a custom landing page.
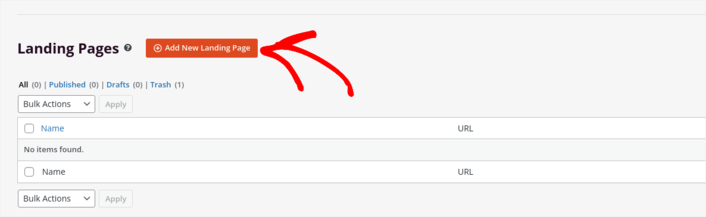
Scroll further down and click the Add New Landing Page button to get started:
Step #2: Create a New Sales Landing Page
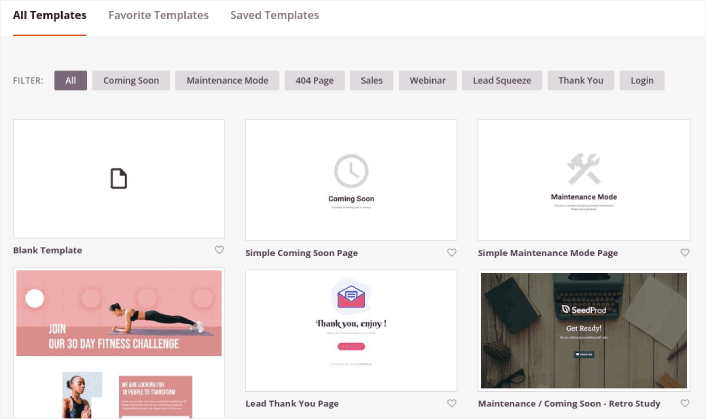
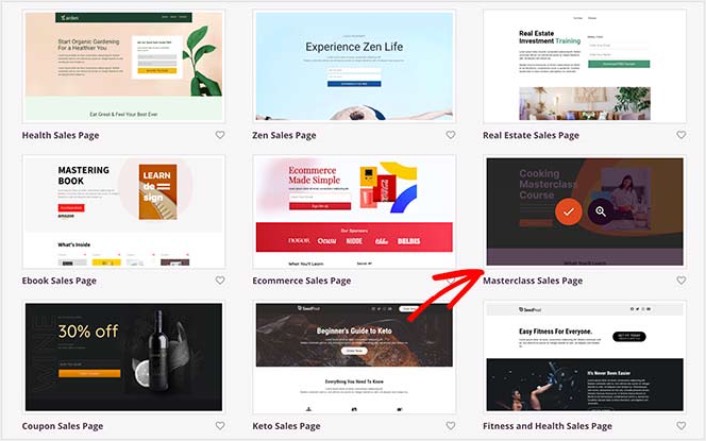
After clicking the Add New Landing Page button, you’ll see SeedProd’s library of landing page templates. These are professionally designed landing page templates that are completely responsive.
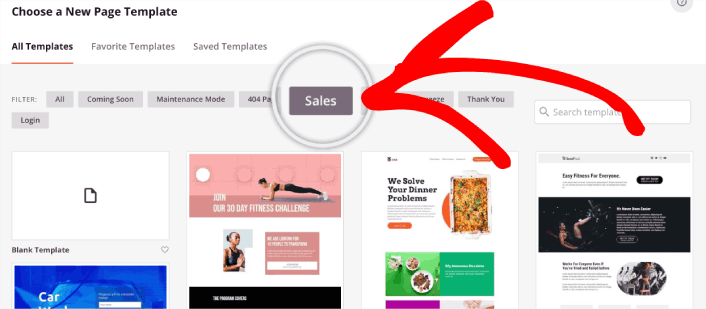
Next, you can select one of these templates to help you get started. Remember, the template is just a starting point. you can customize everything about the page later on. For now, find a template that you think will fit. When the templates page opens, you can click Sales to filter the list:
For this guide, we’ll select the Masterclass Sales Page. Go ahead and click on it now.
Net, we’re going to customize the landing page.
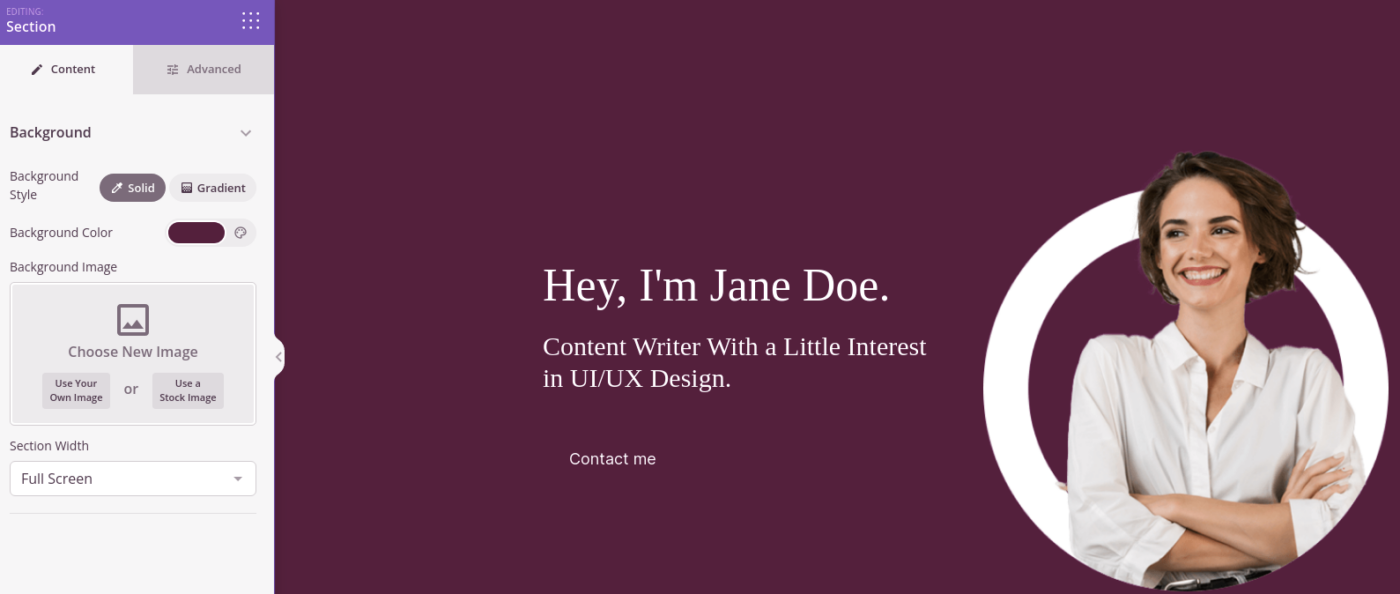
Step #3: Customize Your Landing Page Design
SeedProd’s visual builder allows you to customize your landing page using drag-and-drop content blocks.
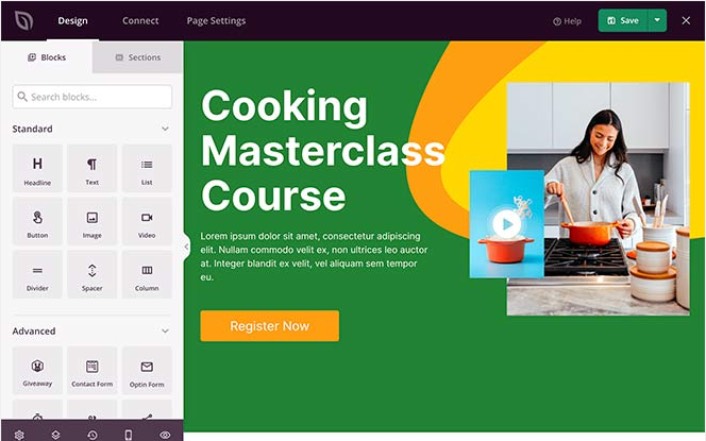
You can create a fully customized header for your landing page in a matter of minutes. You can even add custom elements to convince and convert your traffic. For instance, you can create a video module and embed a YouTube video to convince your visitors to buy your product or service.
It’s also super easy to add a section with a brief description of your product or service . Head over to the Sections tab in the visual builder and under the Hero section, you’ll find several pre-built templates that you can import with a single click.
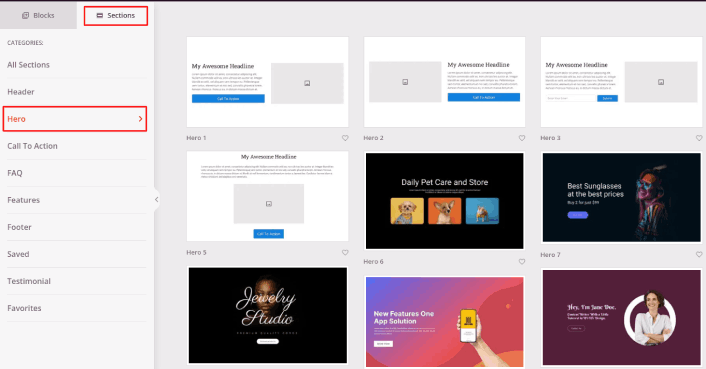
Go ahead and select one that you like.
Don’t worry about the colors or the content. You can edit all of it. What you should look for is a layout that goes well with your template.
You can customize the hero section the same way we did earlier by choosing a different image and changing the headline and description. While you’re at it, add a call-to-action button that nudges visitors to buy from you.
Next, from the Sections tab, select the Testimonial heading, and choose a design you like. And just like that, you have a testimonials section on your landing page.
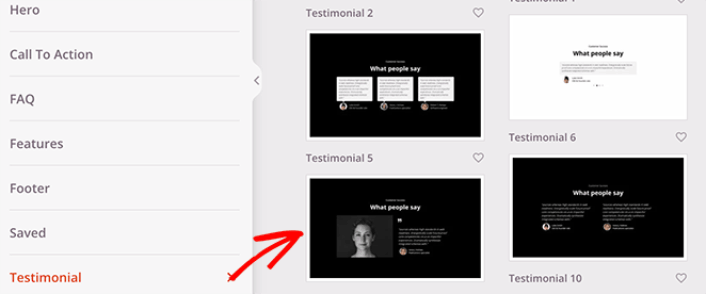
It’s so simple!
Step #4: Add a Click to Subscribe Button to Your Sales Page
Du kan också lägga till en klick-för-prenumerera-knapp för att samla in prenumeranter på push-notiser. Push-notiser är ett utmärkt sätt att öka din återkommande trafik, få mer engagemang och till och med sälja officiella varor om du har några.
I SeedProd, dra och släpp bara modulen Anpassad HTML från sidofältet.
Vi har placerat prenumerationsknappen direkt under e-postregistreringsformuläret i den första vyn.

Men du kan infoga knappen var du vill.
För den här delen behöver du viss erfarenhet av HTML och CSS. Eller så kan du kopiera den här koden och klistra in den i ditt anpassade HTML-block:
<button onclick="subscribeOnClickButton()" style="border: none; padding-left: 5%; padding-right:5%; text-align: center; display: inline-block; color: blue;">Get Updates via Push Notifications</button>Det där är en standardknapp i HTML med väldigt lite styling. Det enda speciella är onclick-funktionen i koden. Det betyder i princip att dina besökare kan klicka på knappen för att prenumerera på något. Nu behöver vi ge knappen lite extra kod för att tillåta dina besökare att prenumerera på push-notiser.
Gå till PushEngage startsida och klicka på knappen Kom igång :

Sedan vill du välja gratisplanen för att prova PushEngage eller välja en betald plan om du menar allvar med att växa din verksamhet. De betalda planerna kommer med fler kampanjalternativ och möjligheten att bygga ännu större prenumerantlistor.
I din PushEngage-instrumentpanel, gå till Webbplatsinställningar » Webbplatsdetaljer och klicka på knappen Klicka här för installationsinstruktioner. Under Valfri webbplats, får du din installationskod:

VARNING: Du måste kopiera koden du får från din instrumentpanel. Koden är unik för varje PushEngage-användare. Du kan inte kopiera koden i bilden och samla prenumeranter på push-notiser.
När du har koden i din PushEngage-instrumentpanel, lägg till detta kodavsnitt i din kod:
<script> window._peq = window._peq || [];</script> <script>
function subscribeOnClickButton(){
window._peq.push(['subscribe',{}.pe,function(res){
if(res.statuscode==1)
{
// Code to return response
console.log(res);
}
}]);
}
</script>
Din slutliga kod bör se ut ungefär så här:
<script src="https://clientcdn.pushengage.com/core/02a6e92667ae2279fcba8932356c1d93.js" async></script>
<script> window._peq = window._peq || [];</script> <script>
function subscribeOnClickButton(){
window._peq.push(['subscribe',{}.pe,function(res){
if(res.statuscode==1)
{
// Code to return response
console.log(res);
}
}]);
}
</script>
Du vill lägga till den här koden i HTML-blocket på din landningssida efter koden för knappen. Det bör se ut ungefär så här:

Feel free to customize the styles for the button any way you please. When you’re done customizing your sales page, go ahead and hit the Save button.
Step #5: Configure Your Page Settings
After you’re done designing your sales page, click the Connect tab at the top of your page builder, and select your email marketing provider to collect leads on your site.

Klicka sedan på fliken Sidinställningar högst upp på skärmen.

Here, you can add an SEO plugin and a Google Analytics plugin to your sales page. You can even set up custom tracking codes such as a Facebook Pixel or a Pinterest pixel to track ad performance.
Step #6: Publish Your Sales Page in WordPress
Now let’s go ahead and publish your design. To do this, click the dropdown arrow next to the save button and click Publish.
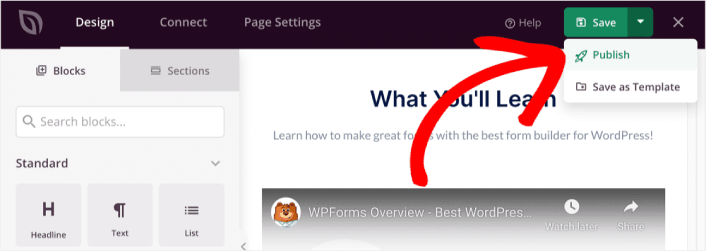
You can then click the See Live Page button to see how it looks.
Congratulations! You just published your very first sales page.
What to do After You Build a Sales Page
Now that your sales page is live, it’s time to work on your traffic, engagement, and sales. You should try using push notifications on your site. Push notifications are a great marketing tool that can help you grow your business.
Ta en titt på dessa episka resurser så förstår du vad vi menar:
- 7 smarta strategier för att öka kundengagemanget
- Är push-notiser effektiva? 7 statistik + 3 experttips
- Hur du ställer in pushmeddelanden för övergivna kundvagnar (Enkel handledning)
Vi rekommenderar att använda PushEngage för att skapa dina push-notiskampanjer. PushEngage är den främsta push-notisprogramvaran i världen. Så, om du inte redan har gjort det, kom igång med PushEngage idag!


