
Are you looking for an easy way to add a Tripadvisor widget to WordPress site?
If you’re running a business in the hospitality industry, your Tripadvisor reviews are super important. Not only does Tripadvisor bring in new bookings for you, the Tripadvisor rating can help you book customers from your website as well.
Here’s the cool part: You can add a lot more than your Tripadvisor ratings to your WordPress site.
But how do you add a Tripadvisor widget to your WordPress site? Do you need to write custom code? Are the plugins easy to use? What kind of features do you get with your widget?
If you want to manually create a Tripadvisor widget, you’ll have to purchase access to the Tripadvisor API. As a result, showing reviews on your website could get expensive. But there’s a way around it.
In this article, we’re going to answer all these questions and more. Let’s check out how to add a Tripadvisor widget in WordPress the easy way.
Should You Add a Tripadvisor Widget in WordPress?
You should use a plugin to add a Tripadvisor widget in WordPress. The trick is finding the right plugin for the job. You don’t want a poorly coded plugin slowing down your site. So, it’s best to use a professionally made plugin to add a Tripadvisor widget to your WordPress site.
The best WordPress plugins are tested and optimized for speed. And it’s important to use a good plugin because your can embed a Tripadvisor widget in a landing page to act as social proof and get more conversions.
Of course, this doesn’t mean that you can’t embed a Tripadvisor widget in WordPress without a plugin. But it’s difficult to customize the look and feel of your feed without knowing HTML and CSS. You could also lose your embed code if you switch your WordPress theme. The same problem happens if you’re not using a child theme and your theme gets a major update.
It’s also really annoying to embed multiple feeds in different posts and pages through code.
We recommend using Smash Balloon to insert a WordPress Tripadvisor widget to your site.

Smash Balloon is a simple WordPress plugin that allows you to display your social media feeds and reviews on your site without using any code at all.
You can use Smash Balloon to create custom social media feeds for your WordPress site in a few clicks. There’s no coding involved and no need to hire a developer. And you get to integrate Tripadvisor Instagram, Facebook, Twitter, and YouTube feeds together or separately as you wish.
Signup for Smash Balloon is to use their Reviews Feed Pro to create a Tripadvisor widget for your site.

The best part? It’s incredibly easy to use.
يستغرق إعداد Smash Balloon 5 دقائق بالكاد. ولا يوجد منحنى تعلم على الإطلاق.
يثق أكثر من 2 مليون مستخدم في Smash Balloon لعرض خلاصاتهم الاجتماعية على مواقعهم. وفوق كل ذلك، يتمتع Smash Balloon بتقييم متوسط 4.8 من أصل 5 نجوم على ووردبريس.
Let’s check out how to create a Tripadvisor widget for your WordPress site using Smash Balloon.
How to Add a Tripadvisor Widget in WordPress
قم بتثبيت وتفعيل إضافة Reviews Pro. إذا لم تكن متأكدًا من كيفية القيام بذلك، فراجع هذه المقالة حول كيفية تثبيت إضافة WordPress. ثم، اتبع الخطوات في هذا الدليل لإعداد وتضمين موجز Tripadvisor في WordPress.
Step #1: Create a Tripadvisor Widget in WordPress
للبدء، انتقل إلى قائمة موجز المراجعات من لوحة تحكم WordPress الخاصة بك وانقر على زر إضافة جديد:
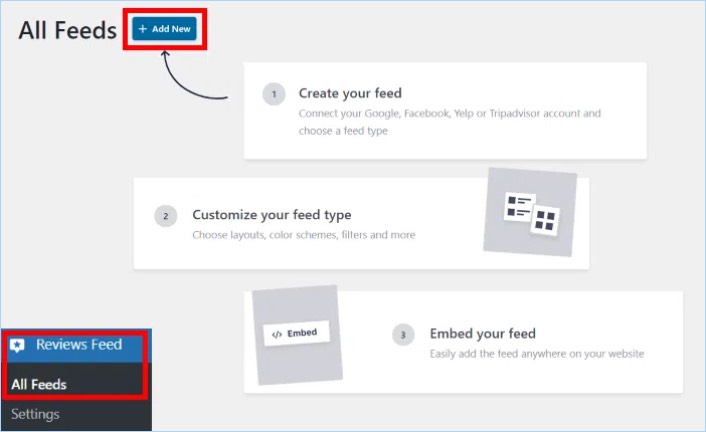
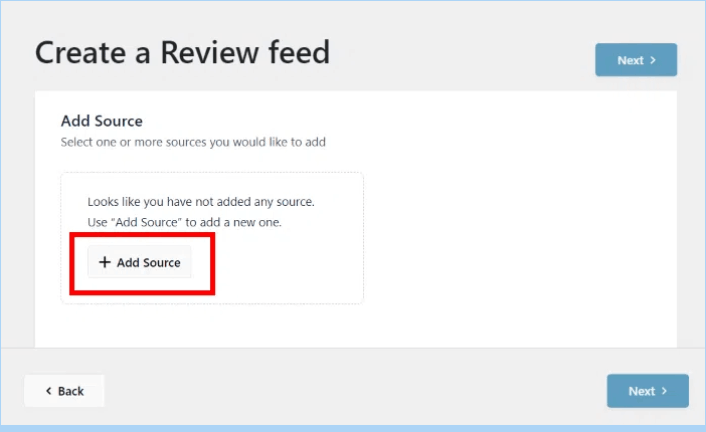
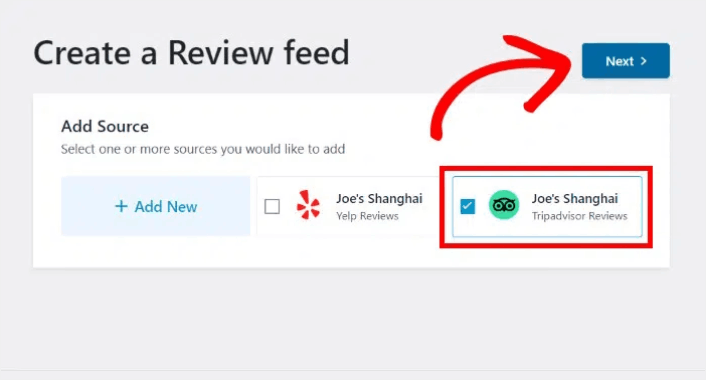
The next step is to add sources for your new reviews widget. You can simply connect this widget to your Tripadvisor pages. Click on the Add Source button here to get started.
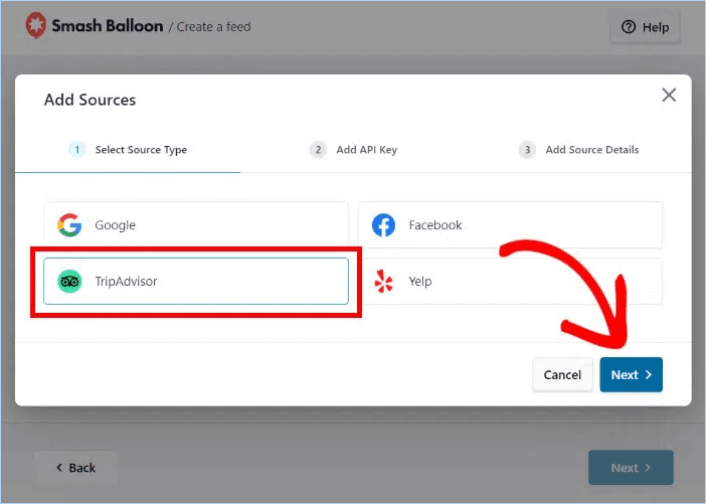
To continue, select the Tripadvisor option on the popup and click on Next.
Step #2: Connect Your Widget to Tripadvisor
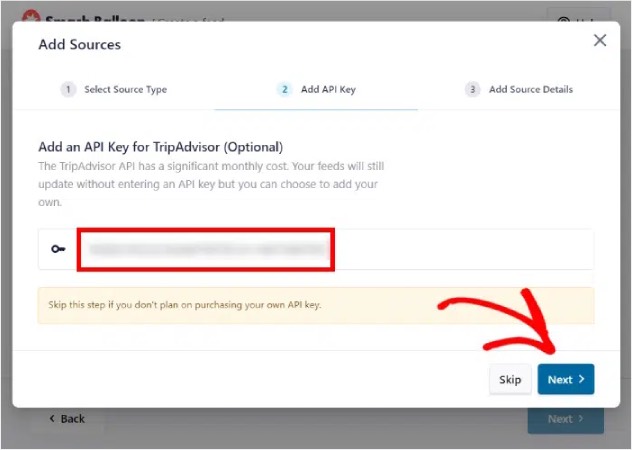
With the Reviews Pro plugin, you can connect to Tripadvisor even without using an API key! In case you already have a Tripadvisor API key, paste it into the popup and click on the Nextbutton.
أو يمكنك النقر على زر تخطي للمتابعة.
Then, all you have to do is paste the link to a Tripadvisor page here and then click on the Finish button.
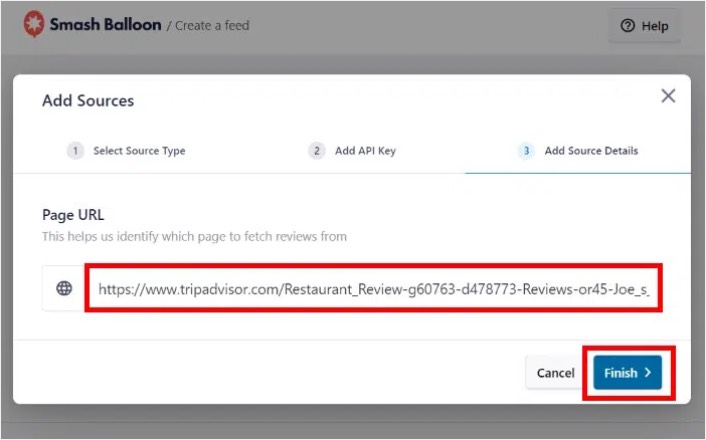
NOTE: You can add your Tripadvisor page to your widget even without the API Key.
Finally, click on the Next button to confirm this source for your Tripadvisor widget.
Your Tripadvisor widget will now automatically copy your website’s design and look beautiful even without any customization.
Step #3: Customize Your Tripadvisor Reviews
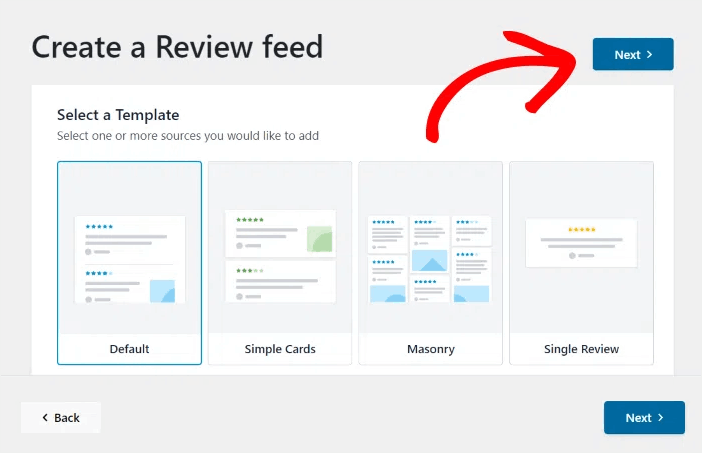
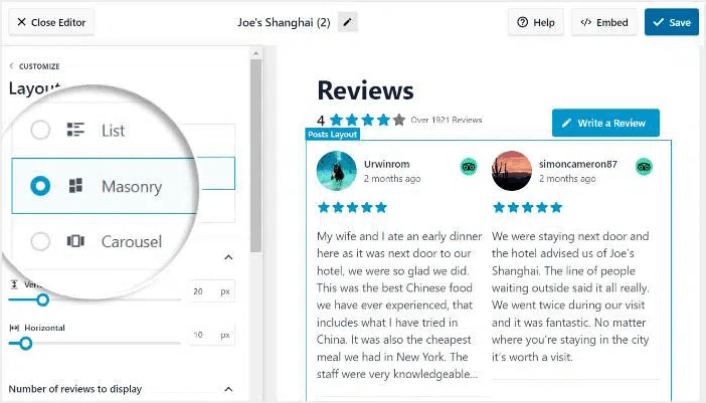
To customize your Tripadvisor widgets, all you have to do is select a pre-designed template that comes with the plugin.
لديك 7 قوالب بتصاميم مختلفة يمكنك الاختيار من بينها:
- افتراضي
- بطاقات بسيطة
- فسيفساء
- مراجعة فردية
- عرض دوار
- دوار
- شبكة دوارة
بعد تحديد قالب الأداة المصغرة الخاص بك، انقر فوق الزر التالي.
Whenever you make any changes, the live preview on the right will show you how your Tripadvisor widget looks in real-time.
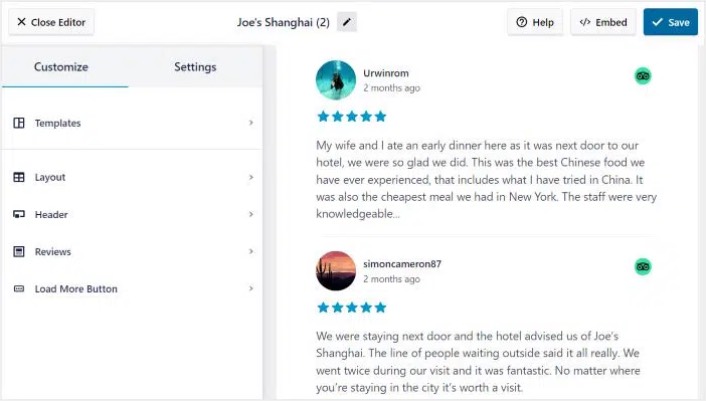
انقر فوق خيار تخطيط الموجز في اللوحة اليسرى:

مع Reviews Feed Pro، يمكنك الاختيار من بين 3 خيارات: قائمة، مكدس، و دوار.
جرّب التخطيطات المختلفة حتى تجد ما يناسب موقعك. انقر فوق الزر حفظ لتأكيد تغييراتك.
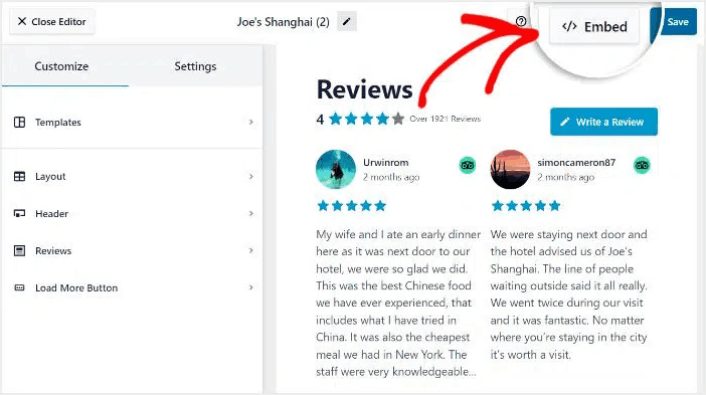
Step #4: Publish Your Tripadvisor Widget in WordPress
انقر فوق الزر تضمين في الأعلى للبدء.
لتضمينها في صفحة ووردبريس، انقر فوق الزر إضافة إلى صفحة:
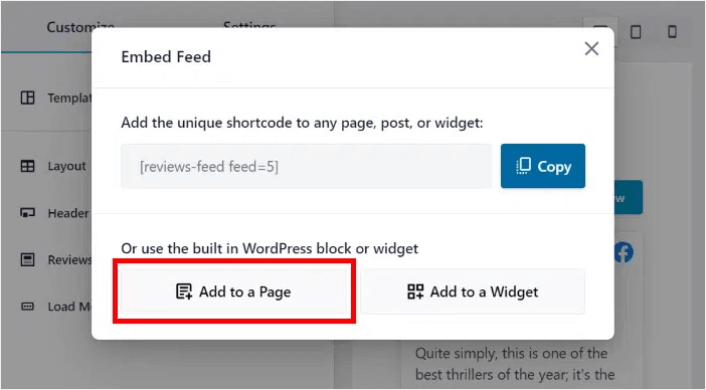
ما عليك سوى تحديد الصفحة التي تريد تضمين الموجز فيها والنقر فوق الزر إضافة:

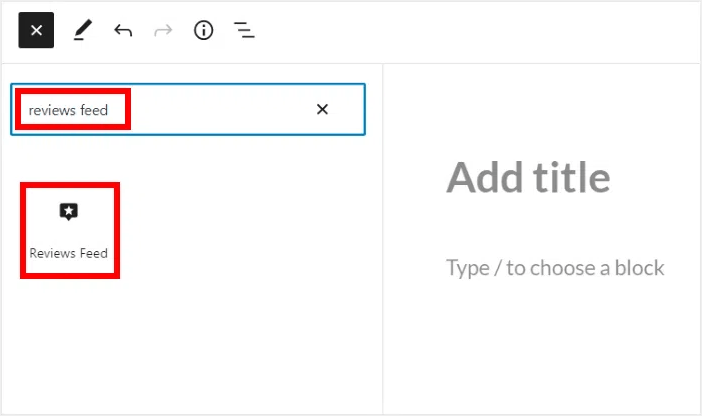
سيؤدي هذا إلى فتح صفحة ووردبريس في محرر الكتل. انقر فوق أيقونة الزائد (+) لإضافة كتلة ووردبريس جديدة.
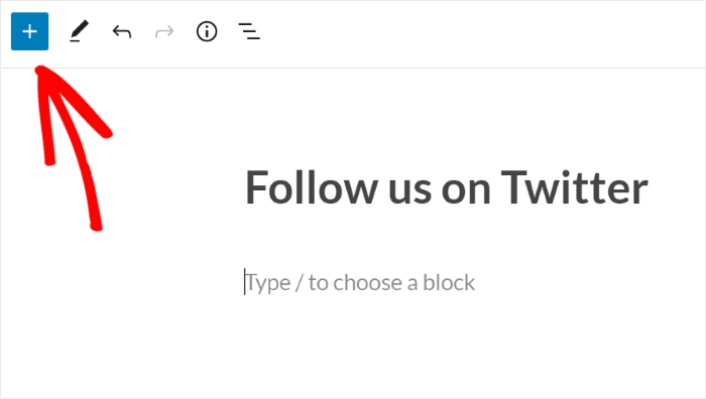
انقر فوق كتلة ووردبريس موجز المراجعات لإضافتها إلى صفحتك:
أخيرًا، انقر فوق الزر نشر أو تحديث، وسيتم نشر موجز تويتر الخاص بك على موقع ووردبريس الخاص بك مثل هذا:
وهذا كل شيء! لقد انتهيت.
What to do After You Add a Tripadvisor Widget in WordPress
That’s all for this one, folks! By now, you’ve managed to embed a Tripadvisor widget in WordPress. You should also check out how to embed Instagram photos in WordPress. And how to set up a viral giveaway to supercharge your social media following.
بعد ذلك، كل ما تبقى هو جذب الزيارات إلى موقعك حتى تتمكن نماذج الاتصال الخاصة بك من العمل. طريقة بسيطة للقيام بذلك هي البدء في استخدام إشعارات الدفع. يعد إرسال إشعارات الدفع طريقة رائعة لجذب الزيارات المتكررة إلى موقعك. إذا كان هذا شيئًا تهتم به، فيجب عليك أيضًا الاطلاع على هذه المقالات:
- تكلفة إشعارات الدفع: هل هي مجانية حقًا؟ (تحليل الأسعار)
- كيفية إضافة إضافة إشعارات الويب لـ WordPress إلى موقعك
- كيفية الحصول على المزيد من حركة المرور إلى مدونة ووردبريس الخاصة بك (9 طرق سهلة)
- كيفية زيادة معدل الاشتراك في إشعارات الدفع على الويب (7 طرق)
نوصي باستخدام PushEngage لإرسال إشعارات الدفع الخاصة بك. PushEngage هو البرنامج رقم 1 لإشعارات الدفع في العالم. لذا، إذا لم تكن قد قمت بذلك بالفعل، ابدأ مع PushEngage اليوم.


