
Looking for a way to start passing on credit card fees to customers in WordPress?
If you’re using Stripe to process payments on your site, then you already know that Stripe charges 2.8% + $0.30 per transaction.
And it’s not just a Stripe thing. Every payment gateway charges some percentage in transaction fees. This means that the bigger your transaction, the more fees you’ll end up paying.
In this article, we’re going to go over passing on credit card fees to customers in WordPress. And we’ll do it without any coding at all using a simple, easy to use plugin.
يبدو جيدًا؟ دعنا نتعمق.
Passing On Credit Card Fees to Customers
Before you start passing on credit card fees to customers, there’s something you should know. Passing on credit card fees in legal by Federal Law in the United States. However, different states have different legislation and not all of them allow you to pass on credit card fees to customers. So, make sure that you talk to a good lawyer before you start saving on credit card fees.
PushEngage هو المكون الإضافي رقم 1 للإشعارات الفورية في العالم. احصل عليه مجانًا!
Also, for this tutorial, we’re going to use one of the best Stripe plugins in the world. If you’re using a different solution, check if they allow fee recovery. If not, you’ll need to switch to WP Simple Pay.
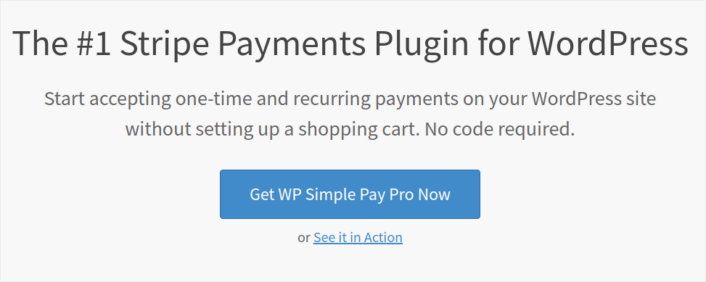
Step #1: Install WP Simple Pay Pro
WP Simple Pay هو بالضبط ما يبدو عليه. إنه يجعل المدفوعات عبر الإنترنت بسيطة على موقع ووردبريس الخاص بك. إنه سهل الاستخدام، وموثوق للغاية، ولا يتطلب أي برمجة للإعداد.
أفضل جزء؟ يساعدك WP Simple Pay على التركيز على إنشاء المنتجات وبيعها دون الحاجة إلى القلق بشأن قبول المدفوعات من جميع أنحاء العالم.
يتم تخزين جميع معلومات العملاء والمدفوعات في حساب Stripe الخاص بك، وليس على موقع ووردبريس الخاص بك. نتيجة لذلك، لن تؤدي الإضافة إلى إبطاء موقعك مثل البدائل الأخرى. يوفر WP Simple Pay أبسط طريقة لإضافة مدفوعات Stripe إلى موقع ووردبريس الخاص بك.
وإعداد WP Simple Pay بسيط للغاية.
إليك نظرة سريعة على أهم ميزات WP Simple Pay Pro:
- منشئ نماذج الدفع
- منشئ صفحات الدفع Stripe Checkout
- مدفوعات بمبالغ مخصصة
- خيارات اشتراك مخصصة
- خصومات باستخدام رموز القسائم
- طرق دفع بديلة
- تدفق تأكيد الدفع المخصص
And more! You can get a closer look at the features in our review of WP Simple Pay Pro. Or go ahead and install WP Simple Pay Pro. If you’re not sure how to install the plugin, check out this guide on how to install WordPress plugins.
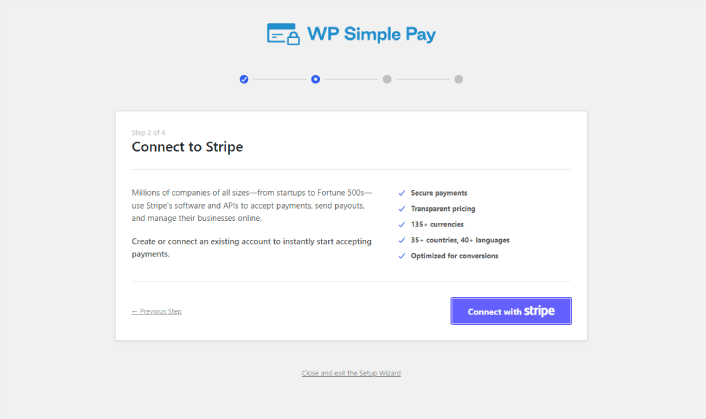
Step #2: Connect Stripe to WordPress
After you’ve installed and activated WP Simple Pay, you’ll need to connect your Stripe account to WordPress in order to begin accepting payments and configuring recovery fee options.
Simply click on the Connect with Stripe button in the setup wizard:
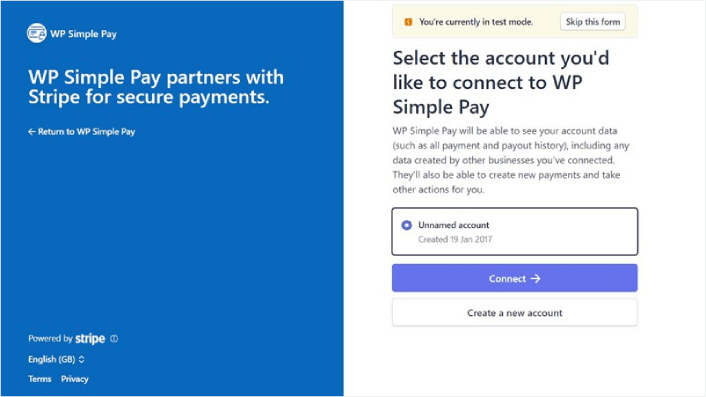
If you already have a Stripe account, all you need to do is go ahead and connect it to your site. And if you’re new to Stripe, you can click on the Create a new account button to get your Stripe account for free:
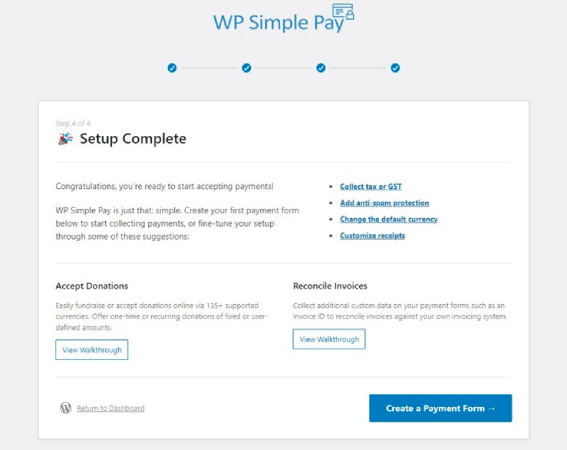
Once that’s done, you can set up your first payment form using WP Simple Pay.
Step #3: Create a Payment Form
To begin accepting payments on your site and passing on credit card fees to your customers, you’ll need to create a payment form. Click on the Create a Payment Form button on the success page.
You can select from a whole library of templates for your payment form.
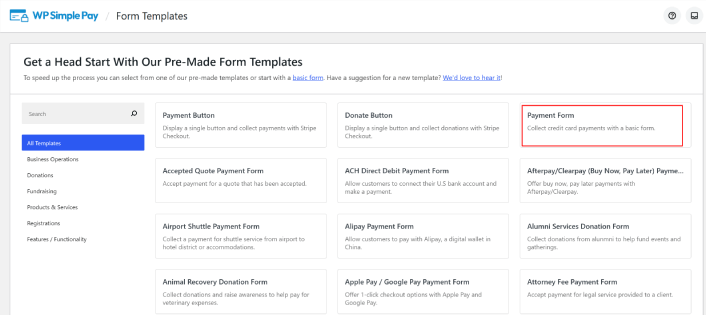
Just set up the payment form and you’re ready to accept payments.
Step #4: Configure the Form for Passing On Credit Card Fees to Customers
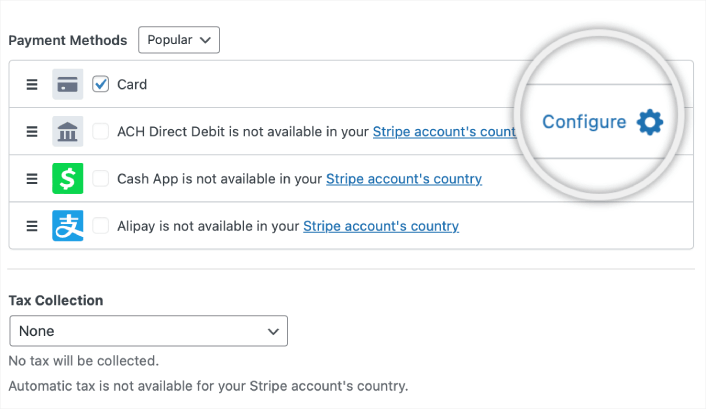
Head over to the Payment option on the left to customize the currency, amount, and also select between a one-time or subscription payment. Once that’s done, scroll down to Payment Methods. Here, you can see all the different payment methods that are available in your country and choose the ones you want to allow your users to use.
To add a recovery fee for credit cards, simply click on Configure.
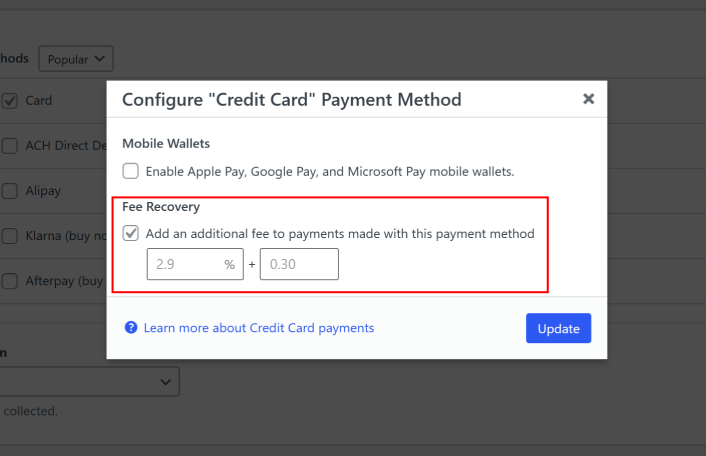
A popup appears, allowing you to customize the Fee Recovery values.
وهذا كل شيء.
Step #5: Add Your Payment Form to a Page
The final step to begin accepting payments with the Stripe processing fee covered by your customers is to embed the form on your site. Simply go to the page or post where you want your payment form and click on the + icon to add the WP Simple Pay block.
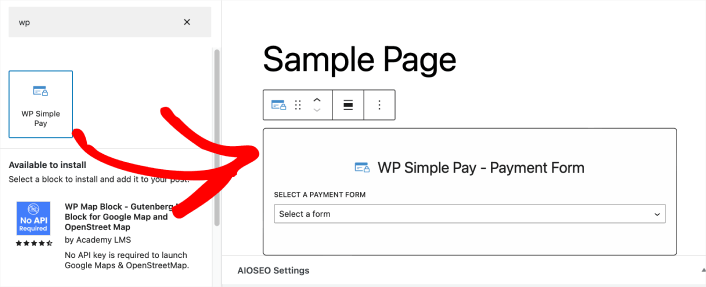
You can select your payment form from the dropdown list. And you’re done!
What to do After Passing On Credit Card Fees to Customers
Now that you can start passing on credit card fees to customers, you should see an increase in revenue. You need to make sure that this bump doesn’t become confusing for you when you’re tracking revenue for your site.
إذا كنت مستعدًا لقبول المدفوعات على موقعك، فإن الشيء التالي الذي يجب أن تركز عليه هو جلب حركة المرور والتفاعل والمبيعات إلى موقعك. تعد الإشعارات الفورية طريقة رائعة للقيام بذلك.
هنا، تحقق من هذه الموارد الرائعة للبدء في استخدام الإشعارات الفورية على الفور:
- كيفية إعداد إشعارات الدفع للسلات المتروكة (دليل سهل)
- كيفية جدولة إشعارات الدفع بالطريقة السهلة [دليل 5 دقائق]
- كيفية إنشاء حملات إشعارات انخفاض الأسعار في < 10 دقائق.
- كيفية إضافة إضافة إشعارات الويب لـ WordPress إلى موقعك
PushEngage هو البرنامج رقم 1 للإشعارات الفورية في العالم. لذلك، نوصي باستخدام PushEngage لإنشاء إشعاراتك الفورية وتنمية أعمال التجارة الإلكترونية الخاصة بك.


