
Looking for a resource on how to sell online yoga classes?
You’ve already been through a lot like selecting the right platform, building your eCommerce site, creating products to sell, and working on your pricing model. But then you realize exactly how many different ways there are to sell digital products online.
There are a bunch of plugins that help you sell digital downloads on WordPress.
But how do you choose the right plugin to start selling? Is the plugin free? Do you get all the features you need or do you have to buy other plugins later on to actually start selling?
The most confusing part is…
Is the plugin that you’re looking at even meant for digital downloads? Or is it a general store plugin that’s mostly meant for selling physical goods and you’re stuck with a ton of unnecessary settings that you don’t even need?
Don’t worry. In this article, we’re going to show you step by step how to make money selling documents on WordPress. The best part? You can complete the setup in 10 minutes or less!
دعنا نتعمق.
How to Sell Online Yoga Classes from Scratch
Now that we understand why you should sell yoga classes online, it’s time to show you how to get started. Don’t worry if you’ve never done this before. This article is meant for complete beginners. All you have to do is follow along.
- Step #1: How to Set Up Your Hosting Server
- Step #2: How to Install WordPress on Your Server
- Step #3: How to Create a Website Theme
- Step #4: Setting Up Easy Digital Downloads
- Step #5: How to Sell Online Yoga Classes as Digital Products
- Step #6: How to Customize Your Website
- Step #7: How to Integrate Your Email Marketing Service with Your Site
- Step #8: Add a Click to Subscribe Button to Your Landing Page
- Step #9: How to Publish Your Site
- How to Sell Online Yoga Classes Even Faster
لنبدأ.
Step #1: How to Set Up Your Hosting Server
Before you create a website, you need to get:
- A domain name
- Web hosting
- An SSL certificate
You might run into videos and articles online that talk about building a free website. Believe us when we say it, there’s no such thing as a truly free website. Most free hosting sites offer extremely bad hosting, no technical support, and slap their branding on your website.
If you’re testing themes for web development or looking to experiment with a web page and its design, that’s fine. But for any self-respecting business owner, “free websites” are a horrible way to go.
Select a Hosting Service
Most modern hosting services will offer a custom domain name, web hosting, and an SSL certificate. But we recommend using one of these three hosting providers to start building:
All three hosting services are completely optimized for WordPress. And you get a free domain name and SSL certificate when you buy website hosting. For this article, we will show you how to get started using Bluehost. But it’s a somewhat similar process for our other recommended hosting services.
NOTE: These are all paid hosting services. You can create a website for free using free hosting. But if you’re serious about building a business, we recommend using hosting services that take your business seriously.
Sign Up for WordPress Hosting
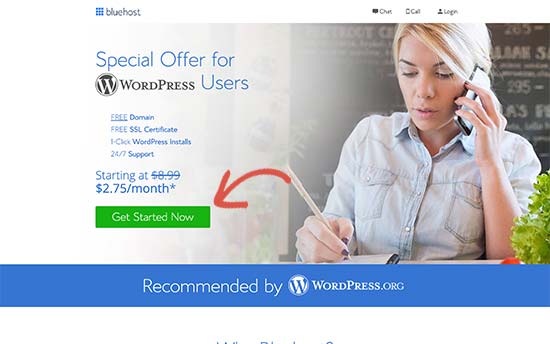
Head over to Bluehost and click on Get Started:
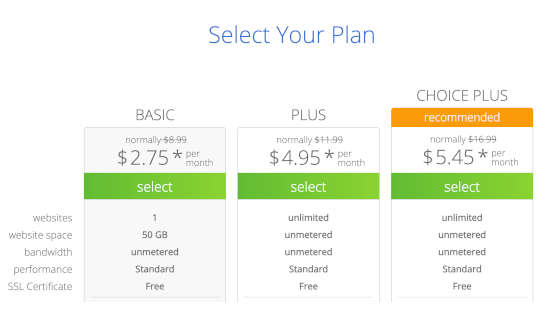
Then, choose your hosting plan on the next screen. We recommend getting the Plus plan if you’re looking to scale the business. But if you’re just looking to get started, even the Basic plan should be fine for you.
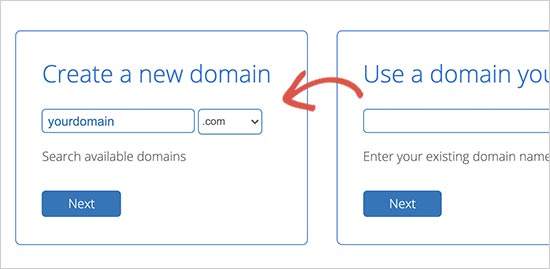
After that, you’ll choose the domain name for your website.
Finally, Bluehost will confirm your order and try to upsell you some added services such as Domain Privacy Protection. It’s entirely up to you whether you want to get this extra stuff. We don’t recommend it for small businesses, but if you think that the upsells are worth it, go ahead and add them to your cart.

After that, you complete the checkout process.
Step #2: How to Install WordPress on Your Server
Once you’re done with the checkout, Bluehost will send you an email to log in to your cPanel account. The cPanel is your web hosting control panel. From there, you can manage your email inboxes and FTP accounts, get support from Bluehost, and more.
When you log in to cPanel, you’ll see that Bluehost has already installed WordPress for you. WordPress is a website builder and content management system (CMS) to create and publish content on your website. It’s open-source software that anyone can use to make any kind of website imaginable.
Why Choose WordPress?
It started out as a blogging platform in 2003 but soon transformed into a CMS and later a full-fledged website building platform. Today it powers more than 38% of all websites on the internet.
If you want to build an eCommerce website, then you have a choice between Wix, Shopify, Squarespace and WooCommerce. These are the most popular apps to create a new website for an online store.
We recommend using WooCommerce over other platforms as it’s the leading eCommerce website software in the world and unlike most other services, it’s free. The cool part is that WooCommerce acts like a WordPress plugin and is based on WordPress. So, even if you want to build an eCommerce store, we recommend getting started with WordPress.
Log In to Your WordPress Site
To get into your WordPress dashboard, all you have to do is click on the Log in to WordPress button:

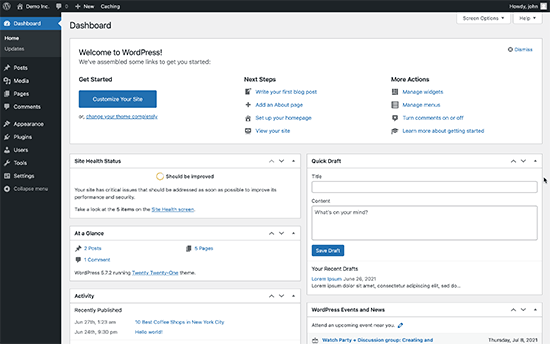
Your WordPress dashboard will look something like this:
NOTE: The WordPress installation process is different for different hosting services. You may have to manually install WordPress if you’re not using Bluehost, depending on your hosting service. Mostly, you’ll need to locate a software installer inside your cPanel called Softaculous. Softaculous is a setup wizard that will help you install WordPress on your server.
Configure Your WordPress Settings
When you first log in to your WordPress dashboard, you’ll want to take care of a few small details before launching your product.
Head over to Settings » General to set the website title and description tags:
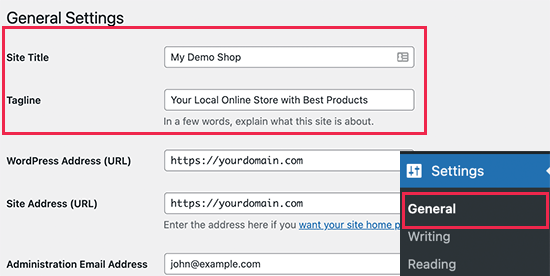
Then, change your WordPress Address and Site Address to their HTTPS versions to use SSL on your site:
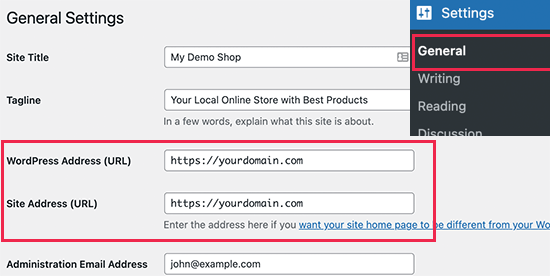
When you’re done, hit the Save Changes button at the bottom.
Step #3: How to Create a Website Theme
Before you can dive into building a lead generating machine, you need to design your website. The traditional way is to hire a designer to design a website with an amazing user experience for you.
But you can skip this step altogether and use a WordPress theme instead. Most WordPress themes come with design templates that you can use straight away and customize according to your need.
What is a Theme?
A WordPress theme allows you to create pages and posts on your site with zero coding. WordPress themes are template files written in PHP, HTML, CSS, and JavaScript. Each file works together to create the design and functionality of your WordPress site.
A typical WordPress theme will include some, if not all, of the following theme files:
- footer.php
- header.php
- index.php
- page.php
- sidebar.php
- archive.php
WordPress themes also include a functions.php file and style.css file.
If you’re not sure what any of this means, don’t worry. You don’t need to be a coding expert to install and use a WordPress theme.
Selecting a WordPress Theme
There are tons of free and paid WordPress themes that can help you create a website easily. We recommend using a theme builder such as SeedProd.

SeedProd is the #1 drag-and-drop WordPress website builder.
You get a drag-and-drop landing page builder that’s packed with options to build product sites and landing pages. Unlike WordPress website builders, you can customize every inch of your landing page including navigation menus, footers, fonts, and styles. SeedProd also works with any WordPress theme and creates mobile-friendly landing pages.
With SeedProd, you get pre-built website templates for high-converting landing pages that you can publish instantly. This includes templates for:
- صفحات المبيعات
- صفحات قريباً
- صفحات 404
- صفحات الأسئلة الشائعة
- صفحات الصيانة
- صفحات هبوط التطبيقات
- صفحات تسجيل الدخول
- صفحات الشكر
- صفحات الندوات عبر الإنترنت
- صفحات الفيديو
And lots more! You can even create your own theme using the SeedProd Theme Builder. The best part is that any website you build with SeedProd looks just as good on a mobile device. Check out the full list of features in our SeedProd review.
Install and Activate SeedProd
Go ahead and install and activate the SeedProd plugin.

If you’re not sure how to do that, check out this article on how to install a WordPress plugin.
Create a WordPress Theme Without Coding
Then, in your WordPress dashboard, head over to SeedProd » Theme Builder:
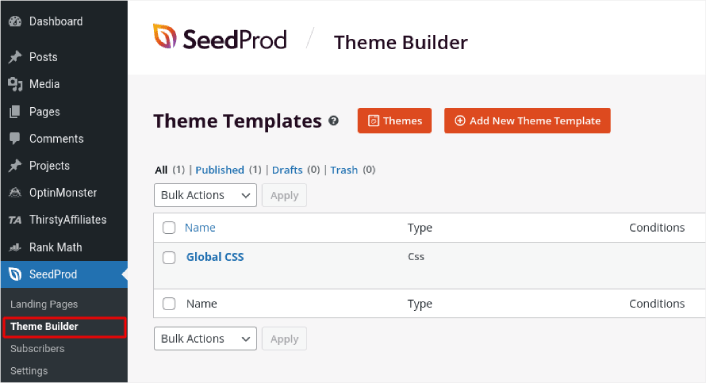
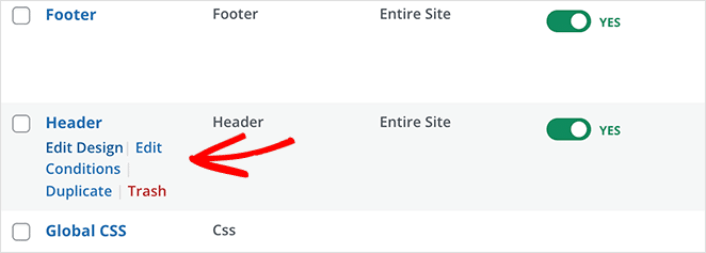
This is where you can create all the individual parts that make up your theme, including:
- Header
- تذييل
- Single Post
- Single Page
- Archive (Blog Page)
- Home Page
- Sidebar
You can create each of these theme parts individually by clicking the Add New Theme Template button. And then, you can edit each of these elements using a drag-and-drop visual builder.
Or, you can use one of the many fully designed themes in SeedProd by clicking on the Themes button. Just choose any theme that matches your business closely to get started:
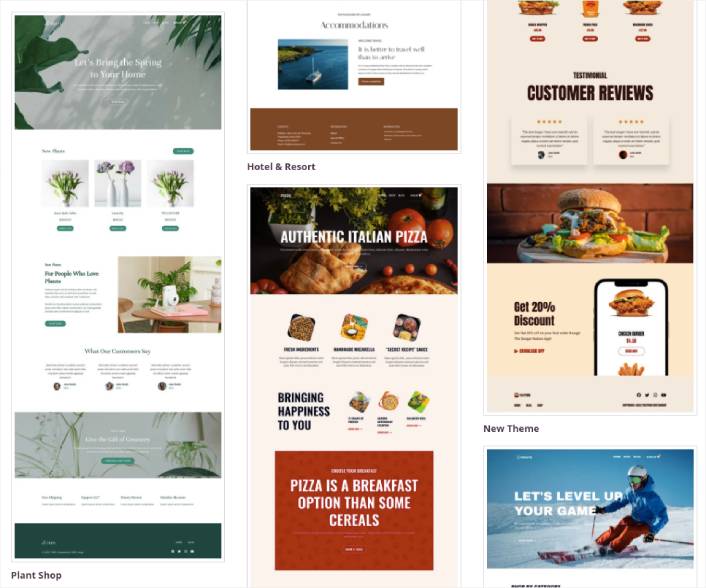
It doesn’t have to be an exact match. You can even select one based on the design. You can edit everything about these themes including fonts, the web design, and the overall user experience. But you can also check for a template for yoga classes.
Step #4: Setting Up Easy Digital Downloads
The most popular eCommerce plugin on WordPress is WooCommerce. Hands down, if you’re selling physical goods, you should use WooCommerce. But you’re not selling physical goods.
This article is all about how to sell digital goods on WordPress. For digital products, there’s no better eCommerce plugin than Easy Digital Downloads.
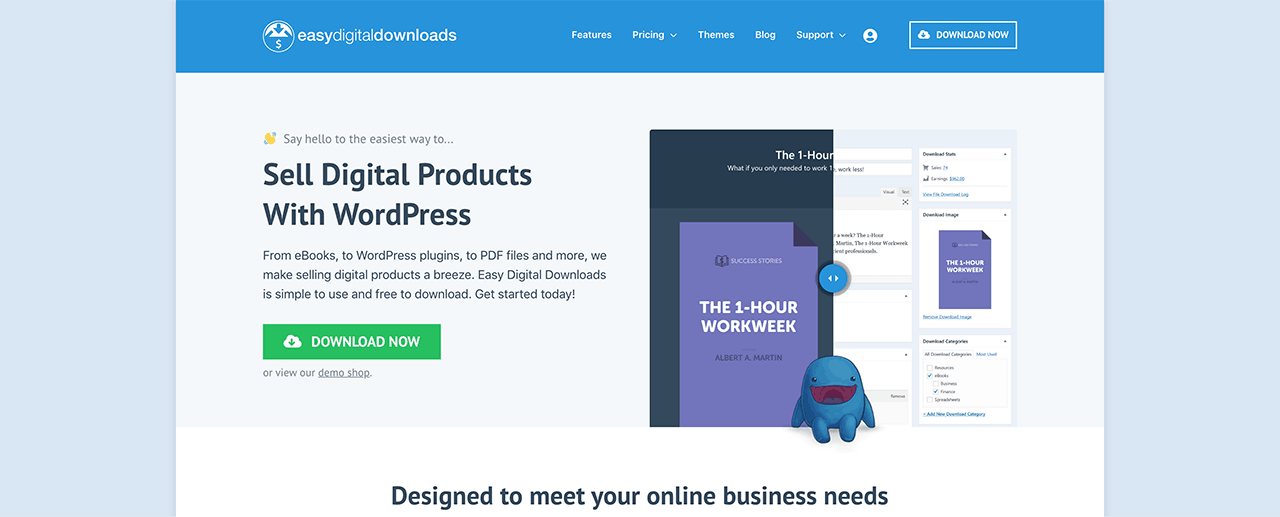
Easy Digital Downloads focuses entirely on selling digital products. So, you don’t have to deal with unnecessary options and UIs you get on WooCommerce. It’s super easy to set up an online store using Easy Digital Downloads and you can use the plugin to sell any digital product including:
- Online classes and courses
- Software
- eBooks and PDFs
- Documents
- مقاطع الفيديو
- Audio and music files
- Photography, graphic designs, and digital art
And practically any other type of media file under the sun. You also get a ton of cool features such as:
- Multiple payment gateway integrations
- A software license creator for licensing models such as plugins and games
- Recurring payments for subscription model businesses
- Multi-vendor platforms for marketplace sites
- Email marketing integrations to grow faster
- Custom deliverables for freelancers
- Commissions for affiliates and marketplace vendors
- Reviews for your products
- Custom wallet for your customers
- Instant product comparison tables
- Product showcases
And more. You can check out their full list of features and how easy it is to use these features in our review of Easy Digital Downloads.
Now that we know a little bit about why you would want to use Easy Digital Downloads, it’s time to check out how to set up the plugin. First, go ahead and install the plugin. If you’re not sure how to do that, check out this article on how to install WordPress plugins.
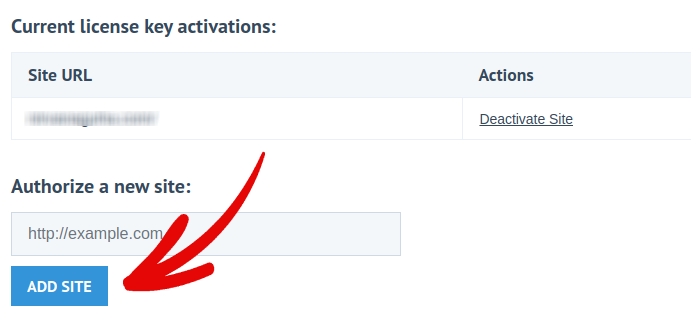
Then, head over to your Easy Digital Downloads dashboard and head over to License Keys, and click on Manage Sites:
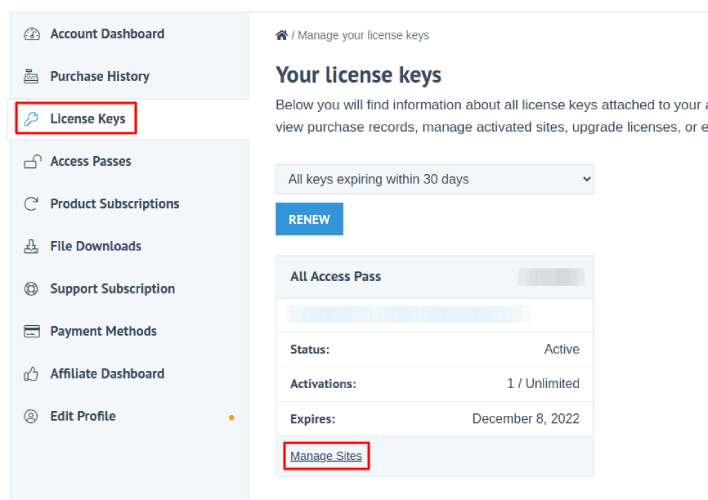
وأضف موقعك إلى لوحة التحكم:
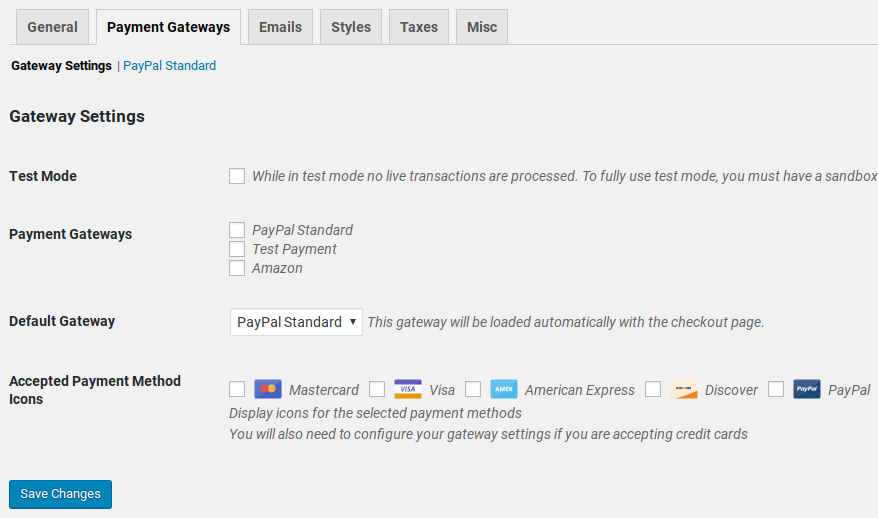
After that, all you have to do is set up your payment processor. Head back to your WordPress dashboard. You should see a new section in your WordPress dashboard called Downloads.
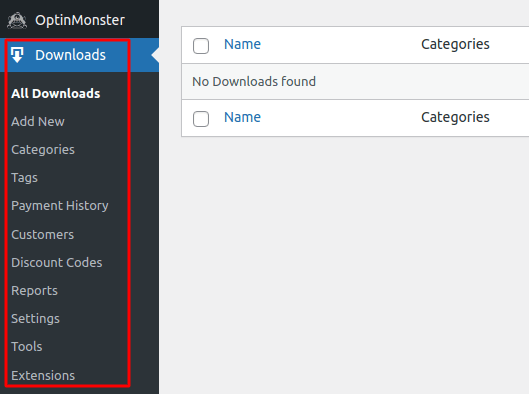
Click on Downloads » Settings and then click on the Payment Gateways tab to choose and set up your payment gateway.
And you’re all set up!
Step #5: How to Sell Online Yoga Classes as Digital Products
Now that your store is ready, it’s time to start adding yoga classes to your store.
By default, Easy Digital Downloads will create and set up pages for your eCommerce store. The primary checkout page, success page, failed transaction page, and purchase history page is pre-defined. So, you’re ready to start uploading your products to your store.
Go to Downloads » Add New:
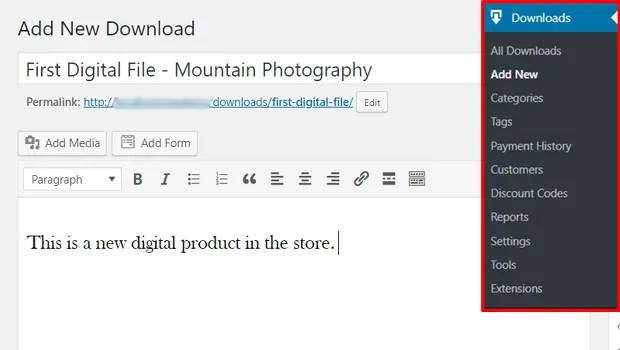
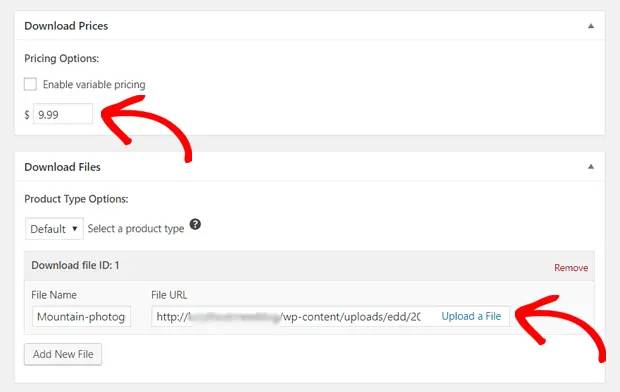
Give your product a title and a description to get started. Then you’re good and ready, scroll down to the Download Prices section to set the price for your product. Then, upload the file for your product:
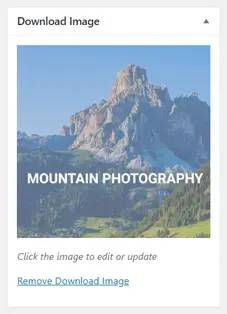
Next, you’ll want to upload a nice featured image for your product. This is the image that goes up on your product listings. So, make this count by uploading a super attractive design.
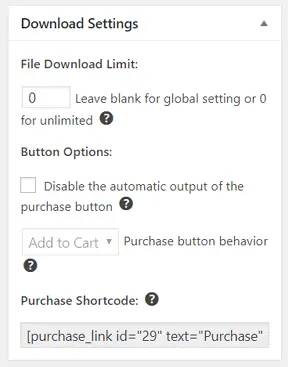
Then, scroll up to Download Settings and review the download options. If you’re selling documents as a limited edition product, you can set a limit on the product downloads. If not, go with the default options:
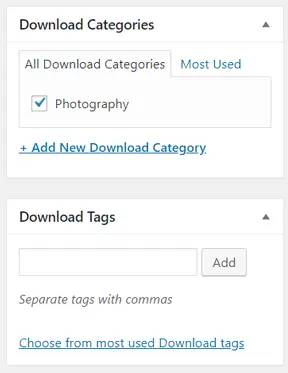
Finally, add any product category or tag that’s appropriate for your product:
That’s it! Go ahead and click on Publish to publish your very first digital product.
Here’s what your product page will look like without any customization at all:

Go ahead and customize your page now.
Step #6: How to Customize Your Website
Now that you have a theme to get you started, you’ll want to edit that theme to suit your business. This is super easy to do.
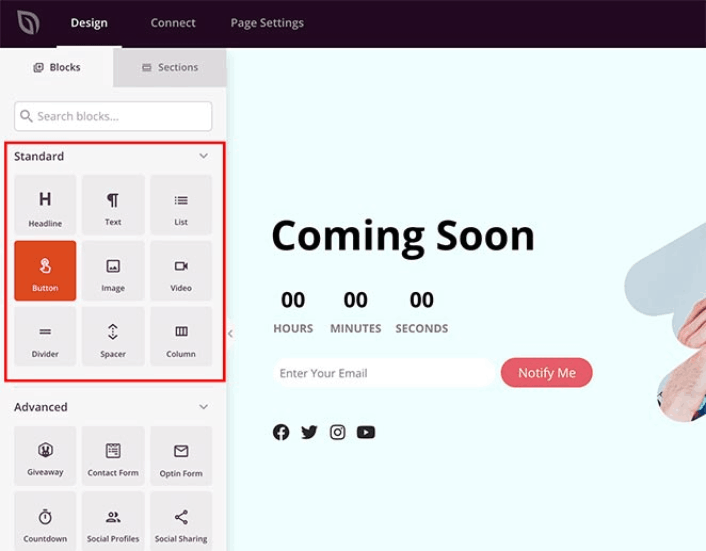
SeedProd’s page builder comes with various content blocks in a drag and drop editor. Even if you’re never used a page builder before, you’re going to find it super easy to use. Just drag and drop different design elements from the sidebar:
يمكنك استخدام هذه الكتل لإنشاء صفحات هبوط تفاعلية للغاية مع:
- هدايا RafflePress لزيادة التفاعل على موقعك قبل الإطلاق
- نماذج الاتصال لجمع العملاء المحتملين على موقعك
- مؤقتات العد التنازلي لزيادة الخوف من فوات الفرصة (FOMO) والإثارة حول إصدارك
- أزرار التواصل الاجتماعي للحصول على بعض المشاركات على وسائل التواصل الاجتماعي
- FAQ blocks for better Search Engine Optimization
وأكثر من ذلك بكثير!
You can edit any of the content blocks on the page by simply clicking on them. This includes the navigation menu or the blog posts on your site. Once you lock down your website’s design, you can build your website any way you want it.
Step #7: How to Integrate Your Email Marketing Service with Your Site
بعد الانتهاء من تصميم صفحة "قيد الإنشاء" الخاصة بك، انقر فوق علامة التبويب Connect في أعلى منشئ الصفحات الخاص بك، وحدد مزود التسويق عبر البريد الإلكتروني لجمع العملاء المحتملين على موقعك.

Marketing tools and integrations can help build your online presence. So, we highly recommend setting up an email list.
We recommend using Constant Contact as your email marketing service. It’s a robust service that allows you to create powerful email marketing campaigns easily.
When you’re done configuring your email marketing service, click the Page Settings tab at the top of your screen as an added bonus.

هنا، يمكنك إضافة إضافة تحسين محركات البحث و إضافة تحليلات جوجل إلى صفحة الهبوط الخاصة بك. يمكنك حتى إعداد رموز تتبع مخصصة مثل Facebook Pixel أو Pinterest pixel لتتبع أداء الإعلانات.
Pro Tip: You should also set a blog subscription widget on your site. It doesn’t matter if you’re running a personal blog or a business website.
Step #8: Add a Click to Subscribe Button to Your Landing Page
يمكنك أيضًا إضافة زر انقر للاشتراك لجمع مشتركين في الإشعارات الفورية. تعد الإشعارات الفورية طريقة رائعة لزيادة حركة المرور المتكررة، والحصول على المزيد من التفاعل، وحتى بيع البضائع الرسمية إذا كان لديك بعض منها.
في SeedProd، قم فقط بسحب وإفلات وحدة HTML المخصصة من الشريط الجانبي.
لقد وضعنا زر الاشتراك مباشرة أسفل نموذج الاشتراك عبر البريد الإلكتروني في الطية الأولى.

ولكن يمكنك إدراج الزر في أي مكان تريده.
لهذا الجزء، تحتاج إلى بعض الخبرة في HTML و CSS. أو، يمكنك نسخ هذا الكود ولصقه في كتلة HTML المخصصة الخاصة بك:
<button onclick="subscribeOnClickButton()" style="border: none; padding-left: 5%; padding-right:5%; text-align: center; display: inline-block; color: blue;">Get Updates via Push Notifications</button>هذا زر قياسي في HTML مع القليل جدًا من التنسيق. الشيء الوحيد المميز هو وظيفة onclick في الكود. هذا يعني بشكل أساسي أنه يمكن لزوارك النقر على الزر للاشتراك في شيء ما. الآن، نحتاج إلى إضافة بعض الأكواد الإضافية للزر للسماح لزوارك بالاشتراك في إشعارات الدفع.
توجه إلى الصفحة الرئيسية لـ PushEngage وانقر على زر البدء:

بعد ذلك، ستحتاج إلى تحديد الخطة المجانية لتجربة PushEngage أو اختيار خطة مدفوعة إذا كنت جادًا بشأن تنمية عملك. تأتي الخطط المدفوعة مع المزيد من خيارات الحملات والقدرة على بناء قوائم مشتركين أكبر.
في لوحة تحكم PushEngage الخاصة بك، انتقل إلى إعدادات الموقع » تفاصيل الموقع وانقر على زر انقر هنا لتعليمات الإعداد. ضمن أي موقع، ستحصل على كود التثبيت الخاص بك:

تحذير: تحتاج إلى نسخ الكود الذي تحصل عليه من لوحة التحكم الخاصة بك. الكود فريد لكل مستخدم PushEngage. لن تتمكن من نسخ الكود الموجود في الصورة وجمع المشتركين في إشعارات الدفع.
بمجرد حصولك على الكود في لوحة تحكم PushEngage الخاصة بك، أضف هذا المقتطف إلى الكود الخاص بك:
<script> window._peq = window._peq || [];</script> <script>
function subscribeOnClickButton(){
window._peq.push(['subscribe',{}.pe,function(res){
if(res.statuscode==1)
{
// Code to return response
console.log(res);
}
}]);
}
</script>
يجب أن يبدو الكود النهائي الخاص بك شيئًا كهذا:
<script src="https://clientcdn.pushengage.com/core/02a6e92667ae2279fcba8932356c1d93.js" async></script>
<script> window._peq = window._peq || [];</script> <script>
function subscribeOnClickButton(){
window._peq.push(['subscribe',{}.pe,function(res){
if(res.statuscode==1)
{
// Code to return response
console.log(res);
}
}]);
}
</script>
ستحتاج إلى إضافة هذا الكود إلى كتلة HTML في صفحة الهبوط الخاصة بك بعد الكود الخاص بالزر. يجب أن يبدو شيئًا كهذا:

Feel free to customize the styles for the button any way you please. When you’re done customizing your webinar landing page, go ahead and hit the Save button. You should check out eCommerce push notifications if you’re still wondering how to sell online yoga classes.
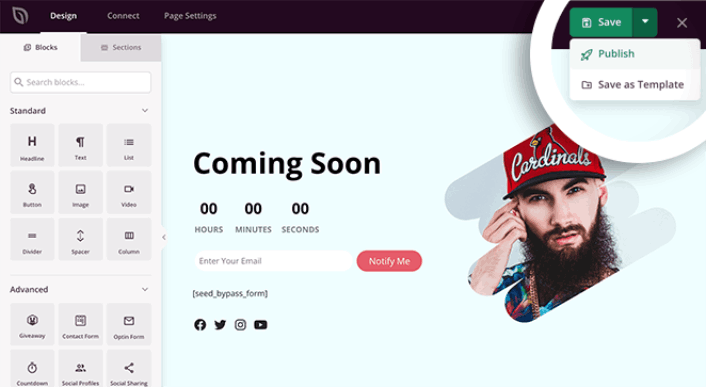
Step #9: How to Publish Your Site
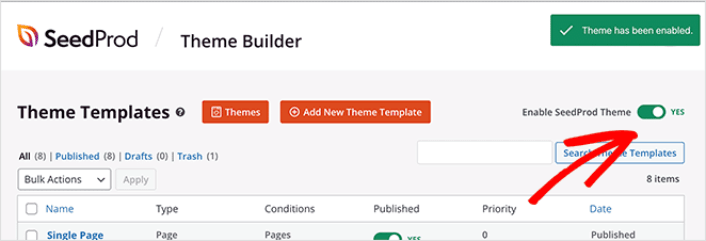
When you’re done editing your WordPress site, go ahead and publish it by clicking on Save » Publish:
Then, go back to your Theme Builder and click on Enable SeedProd Theme:
وأنت انتهيت!
How to Sell Online Yoga Classes Even Faster
Now that your product is up, it’s time to selling documents online.
هناك طريقة رائعة لزيادة مبيعاتك وهي إنشاء حملات إشعارات فورية آلية. يمكن أن تكون الإشعارات الفورية أداة رائعة حقًا لزيادة الزيارات المتكررة والمشاركة والمبيعات على موقعك. إذا كنت جديدًا في حملات الإشعارات الفورية، فراجع هذه الموارد المذهلة التي ستساعدك على النمو بشكل أسرع بكثير:
- 7 أمثلة على خيارات الاشتراك في الإشعارات الفورية ذات التحويل العالي
- كيفية إعداد إشعارات الويب الفورية على موقعك
- كيفية تحويل المشتركين إلى مشترين باستخدام إشعارات الدفع عبر الويب
- كيفية إضافة إضافة إشعارات الويب لـ WordPress إلى موقعك
We recommend getting started with PushEngage for your push notification campaigns. PushEngage is the #1 push notification software in the world. So, your campaigns will be in safe hands and you can get super creative with your push notifications. Like this one:

إذا كنت جادًا بشأن تنمية أعمالك، فيجب عليك الاستثمار في PushEngage.


