
Not sure how to create a landing page in WordPress?
You’ve probably heard how important it is to create a killer landing page. After all, your landing page is meant to convert your traffic into customers.
But how do you actually create a landing page in WordPress?
The default options with Gutenberg editor aren’t that great. And if you’re using a theme to draft your pages, that’s not the same as creating a high-converting landing page. Your theme is simply going to carry forward all the styles as the rest of the site.
What if you don’t want the navigation menu to show up on the landing page? What if you want to integrate eCommerce modules for direct checkouts? What if you want to get rid of all the custom sidebars on the rest of the site?
In this article, we’re going to show you how to create a landing page in WordPress in 5 simple steps.
The best part? There’s ZERO coding involved.
دعنا نتعمق.
Before We Start: What’s a Landing Page?
A landing page is a webpage on your site that is specifically designed to sell your product or service. You can also use landing pages to collect leads.
In short: a landing page is a conversion machine on your site.

The way it works is also simple. You create marketing or advertising campaigns that bring traffic straight to your landing page. Then, the landing page converts that traffic into leads or paying customers.
Since the goal of a landing page is to convert more of your website traffic into customers, it has to look attractive and engaging. Most importantly, you’ll have to properly design various call-to-action elements such as:
- The buy button
- Signup forms
- Play media button
والمزيد!
How to Create a Landing Page in WordPress
In the next few sections, we’re going to show you step-by-step how to create a landing page in WordPress. As we said, creating a landing page using your theme isn’t a good solution.
That’s why we recommend using one of the top WordPress landing page plugins. Even if you’re not a developer, you can create a high-converting landing page in WordPress and boost your website traffic and sales.
Our recommendation is to use SeedProd.

SeedProd is the best WordPress landing page builder in the market. In this article, we’re going to use SeedProd to create your first landing page. If you’re not 100% convinced that this is the right landing page builder for you, you should go check out our review of SeedProd.
And then, get started!
Step #1: Install the SeedProd Plugin on Your Site
First, you’ll need to visit the SeedProd website and purchase the plugin. Then, you can download the plugin file to your computer. Then, copy the plugin license key from your SeedProd dashboard.
Next, you’ll have to log into your WordPress dashboard and install the plugin. If you need detailed instructions, check out this step-by-step guide to installing a WordPress plugin. Head over to the SeedProd plugin welcome screen on WordPress and verify your license key:

After your account is verified, you’re ready to create a landing page.
Step #2: Create a Landing Page with SeedProd
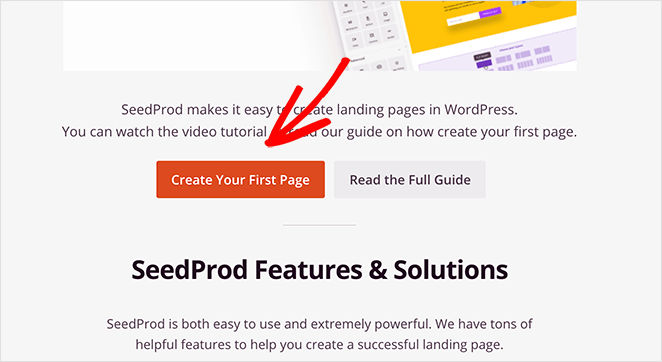
In the SeedProd welcome screen, scroll further down and click on Create Your First Page button:
Then, you’ll see 5 different types of landing pages that you can create:

Using SeedProd’s templates, you can quickly launch complicated pages such as:
- Coming Soon and Maintenace Mode Pages
- Login Pages
- 404 Pages
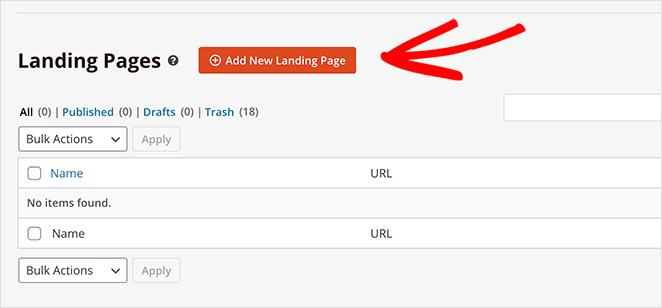
And if you scroll down a little further, you can launch a custom landing page from pre-built templates. Click on Add New Landing Page:
Then, choose a landing page template from the pre-built landing pages listed in SeedProd’s builder:
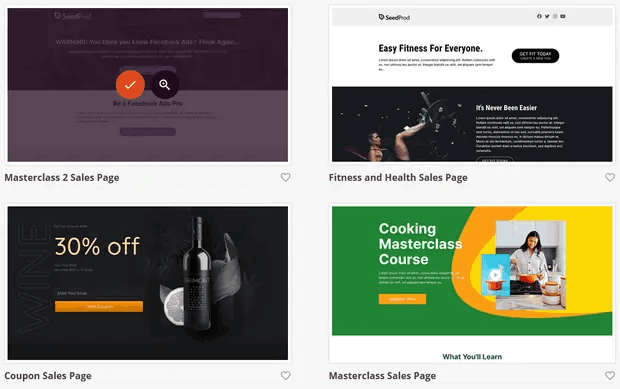
Take your time and select the right template for you. To select a template, just click the checkmark icon on the template.
Remember, the template is just a starting point. In the next section, we’ll see how to customize your landing page easily using SeedProd’s drag-and-drop builder.
Step #3: Customize the Landing Page Template
After choosing your landing page template, you’ll be redirected to SeedProd’s visual drag and drop builder where you can customize your landing page. The left hand side of the editor is a list of the design elements that you can use to customize your landing page:
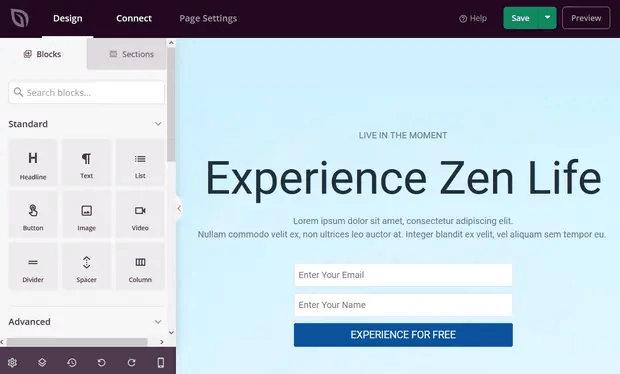
And you can also click on any of the design elements in the live preview to edit them directly on the preview:
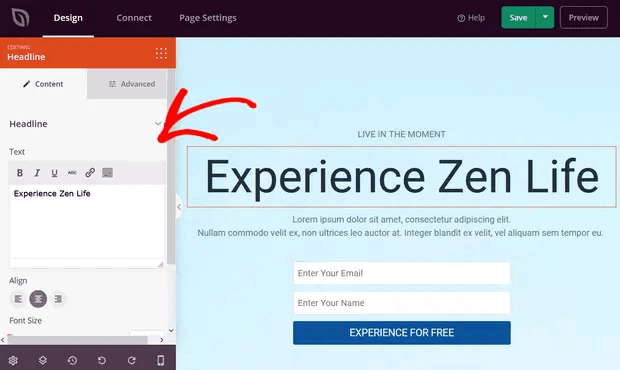
You can change the text, its style, color, alignment, and layout to fit your product or overall brand. Additionally, you can easily add new blocks such as buttons, optin forms, contact forms, social profiles, and more to your landing page template.
For instance, you can drag and drop a countdown timer to increase urgency:
When you’re done, click on Save.
Step #4: Add a Click to Subscribe Button to Your Landing Page
يمكنك أيضًا إضافة زر انقر للاشتراك لجمع مشتركين في الإشعارات الفورية. تعد الإشعارات الفورية طريقة رائعة لزيادة حركة المرور المتكررة، والحصول على المزيد من التفاعل، وحتى بيع البضائع الرسمية إذا كان لديك بعض منها.
في SeedProd، قم فقط بسحب وإفلات وحدة HTML المخصصة من الشريط الجانبي.
لقد وضعنا زر الاشتراك مباشرة أسفل نموذج الاشتراك عبر البريد الإلكتروني في الطية الأولى.

ولكن يمكنك إدراج الزر في أي مكان تريده.
لهذا الجزء، تحتاج إلى بعض الخبرة في HTML و CSS. أو، يمكنك نسخ هذا الكود ولصقه في كتلة HTML المخصصة الخاصة بك:
<button onclick="subscribeOnClickButton()" style="border: none; padding-left: 5%; padding-right:5%; text-align: center; display: inline-block; color: blue;">Get Updates via Push Notifications</button>هذا زر قياسي في HTML مع القليل جدًا من التنسيق. الشيء الوحيد المميز هو وظيفة onclick في الكود. هذا يعني بشكل أساسي أنه يمكن لزوارك النقر على الزر للاشتراك في شيء ما. الآن، نحتاج إلى إضافة بعض الأكواد الإضافية للزر للسماح لزوارك بالاشتراك في إشعارات الدفع.
توجه إلى الصفحة الرئيسية لـ PushEngage وانقر على زر البدء:

بعد ذلك، ستحتاج إلى تحديد الخطة المجانية لتجربة PushEngage أو اختيار خطة مدفوعة إذا كنت جادًا بشأن تنمية عملك. تأتي الخطط المدفوعة مع المزيد من خيارات الحملات والقدرة على بناء قوائم مشتركين أكبر.
في لوحة تحكم PushEngage الخاصة بك، انتقل إلى إعدادات الموقع » تفاصيل الموقع وانقر على زر انقر هنا لتعليمات الإعداد. ضمن أي موقع، ستحصل على كود التثبيت الخاص بك:

تحذير: تحتاج إلى نسخ الكود الذي تحصل عليه من لوحة التحكم الخاصة بك. الكود فريد لكل مستخدم PushEngage. لن تتمكن من نسخ الكود الموجود في الصورة وجمع المشتركين في إشعارات الدفع.
بمجرد حصولك على الكود في لوحة تحكم PushEngage الخاصة بك، أضف هذا المقتطف إلى الكود الخاص بك:
<script> window._peq = window._peq || [];</script> <script>
function subscribeOnClickButton(){
window._peq.push(['subscribe',{}.pe,function(res){
if(res.statuscode==1)
{
// Code to return response
console.log(res);
}
}]);
}
</script>
يجب أن يبدو الكود النهائي الخاص بك شيئًا كهذا:
<script src="https://clientcdn.pushengage.com/core/02a6e92667ae2279fcba8932356c1d93.js" async></script>
<script> window._peq = window._peq || [];</script> <script>
function subscribeOnClickButton(){
window._peq.push(['subscribe',{}.pe,function(res){
if(res.statuscode==1)
{
// Code to return response
console.log(res);
}
}]);
}
</script>
ستحتاج إلى إضافة هذا الكود إلى كتلة HTML في صفحة الهبوط الخاصة بك بعد الكود الخاص بالزر. يجب أن يبدو شيئًا كهذا:

Feel free to customize the styles for the button any way you please. When you’re done customizing your landing page, go ahead and hit the Save button.
Step #5: Connect Your Email Marketing Service
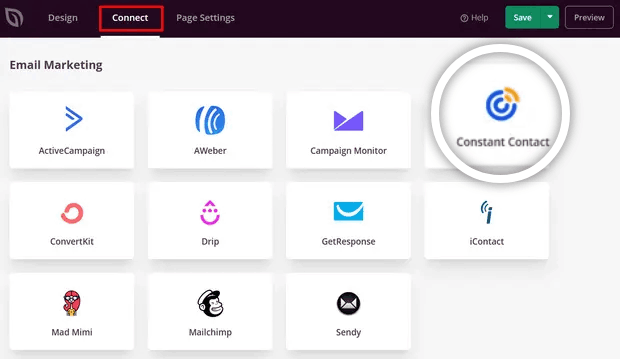
A lot of small businesses collect leads from their landing page instead of selling something. If you’re creating a landing page to collect leads on your site, then you’ll want to create an optin. Then, connect your optin to an email service provider such as Constant Contact.
To do this, go to the Connect tab on the SeedProd builder and select your email service provider from the list:
Next, click Connect New Account:
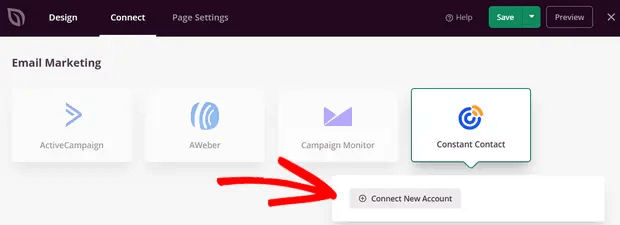
And follow the instructions to set up your email service to collect leads.
Step #6: Publish Your Landing Page
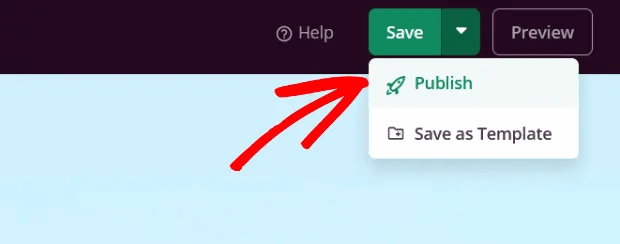
When you’re done customizing your page, click on Save. Then, click on the dropdown arrow next to the Save button and hit Publish:
You should see a success message on publishing your page that looks something like this:
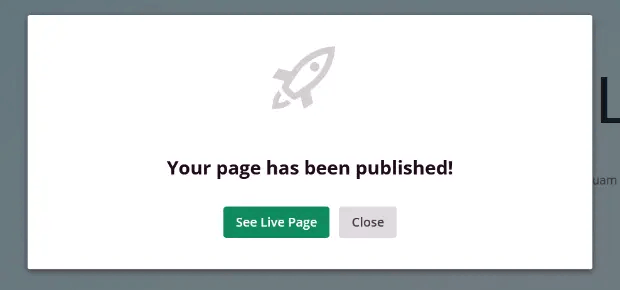
You can click on the See Live Page button to view your landing page. And you’re all done!
What to Do After You Create a Landing Page in WordPress?
هذا كل شيء لهذا اليوم أيها الأصدقاء!
Now that your landing page is live, the only challenge you have left is to send traffic to your landing page.
وإذا كنت تبحث عن طريقة ميسورة التكلفة لزيادة زياراتك، نوصي باستخدام إشعارات الدفع. يمكن أن تساعدك إشعارات الدفع في جلب المزيد من الزيارات المتكررة وتفاعل الموقع. يمكنك أيضًا إنشاء حملات إشعارات دفع آلية تولد مبيعات.
غير مقتنع؟ تحقق من هذه الموارد:
- 7 استراتيجيات ذكية لزيادة تفاعل العملاء
- هل إشعارات الدفع فعالة؟ 7 إحصائيات + 3 نصائح خبراء
- كيفية إعداد إشعارات الدفع للسلات المتروكة (دليل سهل)
- كيفية إضافة إضافة إشعارات الويب لـ WordPress إلى موقعك
نوصي باستخدام PushEngage لإنشاء حملات إشعارات الدفع الخاصة بك. PushEngage هو البرنامج رقم 1 لإشعارات الدفع في العالم. لذا، إذا لم تكن قد قمت بذلك بالفعل، ابدأ مع PushEngage اليوم!


