Looking for a guide on how to create a FAQ page for your WordPress site?
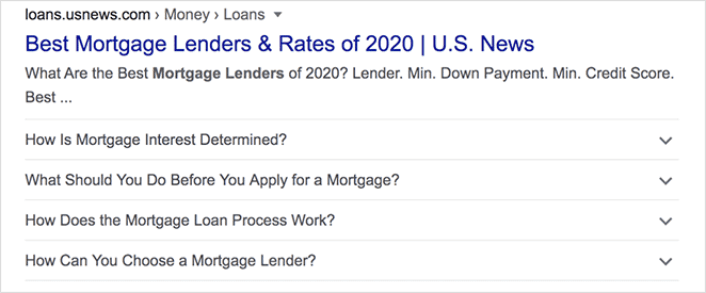
FAQ pages can address sales objections in potential customers. At the same time, it can bring in search traffic straight from Google’s “People Also Ask” featured snippets.
The coolest part is that you can use a FAQ page as a landing page that redirects visitors to product and sales pages.
In this article, we’re going to show you how to create a FAQ page for your WordPress site the easy way. Then, we’ll show you how to optimize your page to generate a ton of search traffic.
The best part? It’s perfectly fine if you’ve never done this before. This article is meant for complete beginners.
دعنا نتعمق.
What the Best FAQ Pages Have in Common
Before we jump into our tutorial on how to create a FAQ page, here’s a checklist that will come in handy when you’re writing the content for your FAQ page:
- Does the FAQ page have a clear structure that’s easy to navigate?
- Are the answers clear and concise?
- Are there links to more comprehensive guides when needed?
- Does the business update the FAQ pages as it grows?
- Is it easy to search and find queries?
- Does the FAQ page include a search bar for users to find answers quickly?
- Is there a call to action for users to buy the product or service?
If you’re just getting started with FAQ pages yourself, you should also consider all these factors before you create one. And if you already have a FAQ page, you should consider updating it so that it follows these best practices. Also, you can check out our list of epic FAQ pages from six-figure businesses.
How to Create a FAQ Page in WordPress
Now that you know what kinds of FAQ pages work well, it’s time to create your own FAQ page. The easiest way to add a FAQ page to your WordPress site is with a drag-and-drop page builder plugin. We did a breakdown of the most powerful landing page builders and compared the best in the world.
Our recommendation is that you use SeedProd.

SeedProd is the best website builder for WordPress. It lets you create WordPress themes, landing pages, and flexible layouts for your WordPress site without code.
If you need the quick version of why you should use SeedProd, here it is:
- SeedProd works with any WordPress theme. There’s no messy transition and if you switch themes, you won’t break your landing pages completely.
- The designs are mobile-friendly and you actually get a mobile preview of your page. Seeing as most people use the internet from mobile devices rather than PCs, this is pretty important.
- يفخر SeedProd بكونه سريعًا وخفيفًا للغاية. لذلك، لن يؤدي إلى بطء تحميل موقعك. وبالتأكيد لن يستهلك الكثير من موارد الخادم الخاصة بك.
For a more detailed look at the features, you should check out our review of SeedProd. With this plugin, you can quickly launch your FAQ pages. The best part is that you can customize your entire page in the visual editor. This saves a lot of time and money you’d otherwise have spent on custom development.
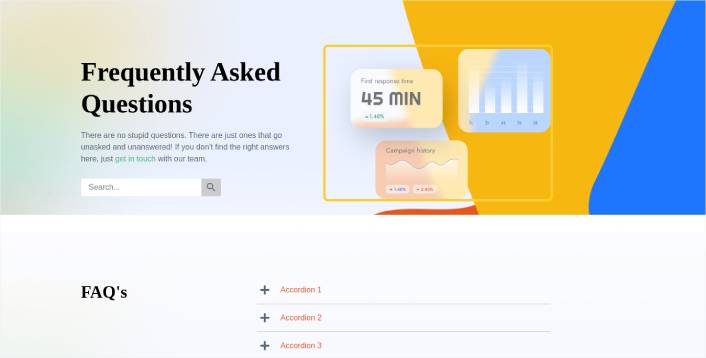
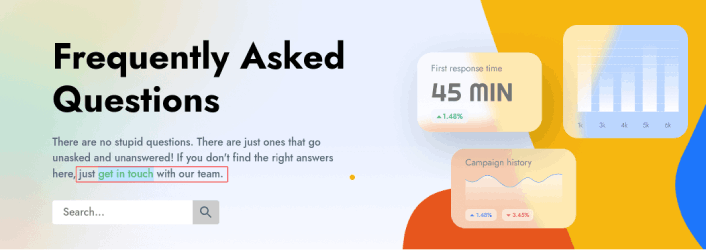
If you follow every step in this tutorial, you should be able to create a FAQ page just like this one:
Step #1: Install the SeedProd Plugin on Your Site
أولاً، ستحتاج إلى الحصول على إضافة SeedProd Pro وتفعيلها. إذا لم تكن متأكدًا من كيفية القيام بذلك، فراجع هذه المقالة حول كيفية تثبيت إضافة ووردبريس. بعد ذلك، انتقل إلى SeedProd » Settings في لوحة تحكم ووردبريس الخاصة بك وقم بتفعيل الإصدار الاحترافي:

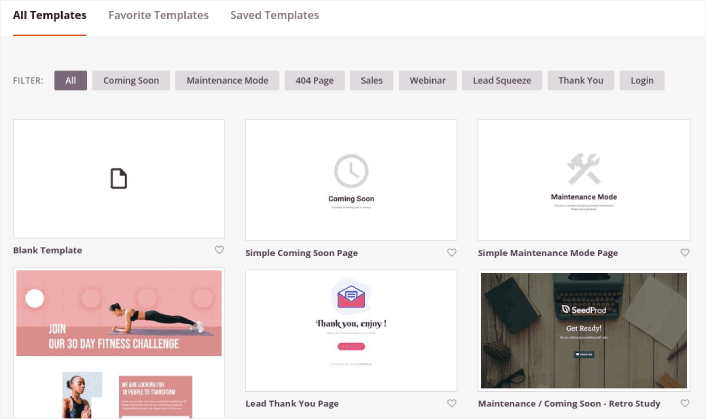
بعد ذلك، انتقل إلى SeedProd » Pages للحصول على نظرة عامة على لوحة تحكم صفحات الهبوط في SeedProd. هذا هو المكان الذي يمكنك فيه رؤية الأنواع المختلفة من صفحات الهبوط التي يمكنك إنشاؤها باستخدام SeedProd:

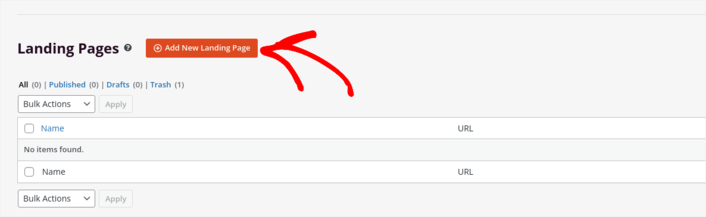
Keep in mind that these are all special pages with pre-built functionality and design templates. For an FAQ page, you don’t want to use ANY of these special landing pages. Instead, you’re going to create a custom landing page.
مرر لأسفل وانقر على زر إضافة صفحة هبوط جديدة للبدء:
Step #2: Create a FAQ Page with SeedProd
بعد النقر على زر إضافة صفحة هبوط جديدة، سترى مكتبة SeedProd لقوالب صفحات الهبوط. هذه قوالب صفحات هبوط مصممة باحترافية ومتجاوبة بالكامل.
بعد ذلك، يمكنك تحديد أحد هذه القوالب لمساعدتك في البدء. تذكر، القالب هو مجرد نقطة انطلاق. يمكنك تخصيص كل شيء عن الصفحة لاحقًا. في الوقت الحالي، ابحث عن قالب تعتقد أنه سيكون مناسبًا:
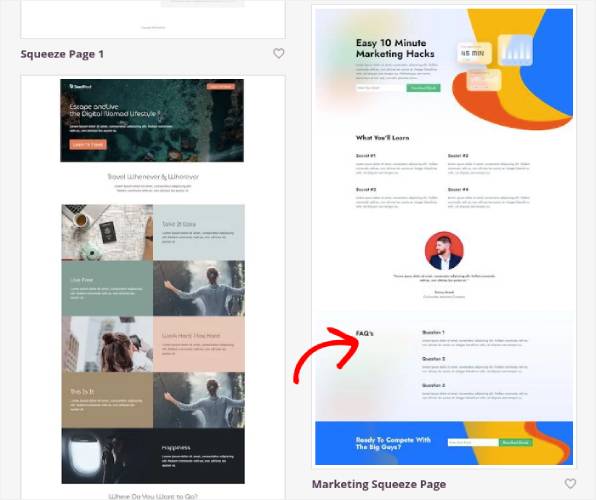
We’re using the Marketing Squeeze Page template for this tutorial because it already has a FAQ section in it. But you can select any template you like. The template is mostly a place to start your page design.
If you find an exact match for your page, that’s great. For instance, in our podcast landing page tutorial, we found an exact template built especially for podcast landing pages. If you don’t find an exact match, it’s still perfectly fine because we’re going to customize our page anyway.
Step #3: Customize the FAQ Page Template
يتيح لك منشئ SeedProd المرئي تخصيص صفحة الهبوط الخاصة بك باستخدام كتل محتوى بالسحب والإفلات.
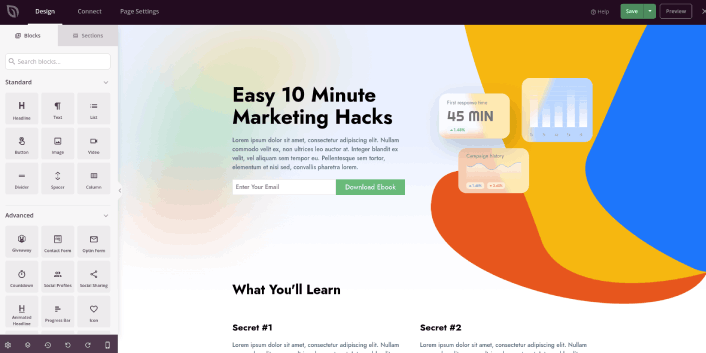
The first thing you should do is edit the headline for the page. You want it to be super clear and to the point. Just click on the headline in the preview and start editing it:
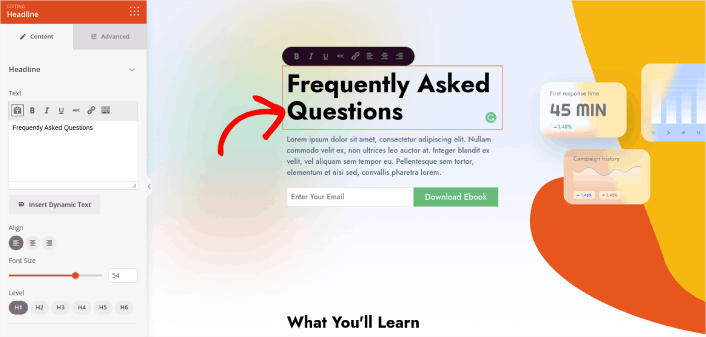
Next, add a little body copy in the exact same way:
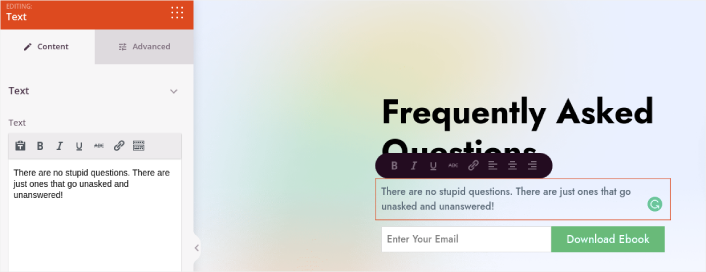
In the template, you can see a call to action (CTA) that says Download Ebook. Of course, for an FAQ page, you don’t necessarily want to collect leads in the first 10 seconds. So, you can click on the email optin and delete it. Instead, we highly recommend using a search bar in the hero section.
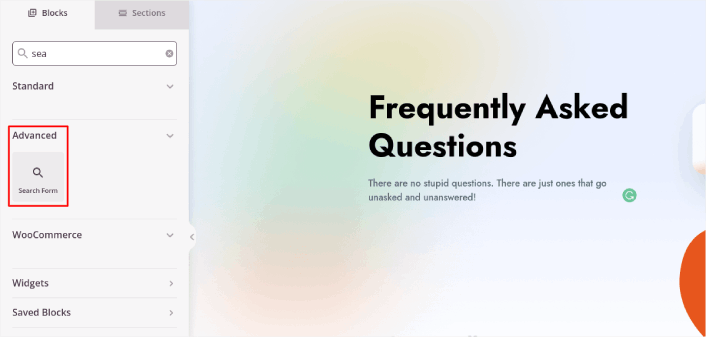
Just drag and drop the Search Form content block from the sidebar on the left onto your page preview section:
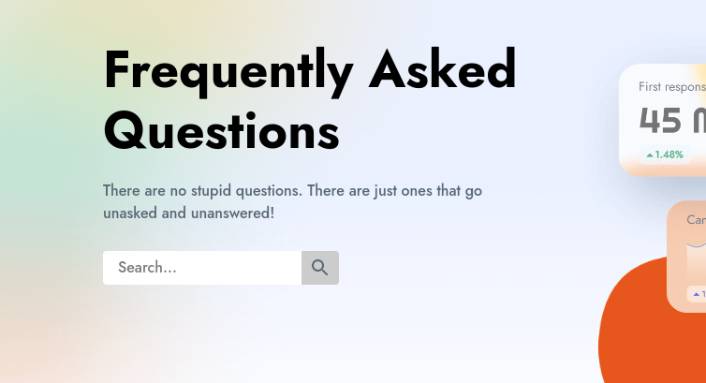
يجب أن يبدو شيئًا كهذا:
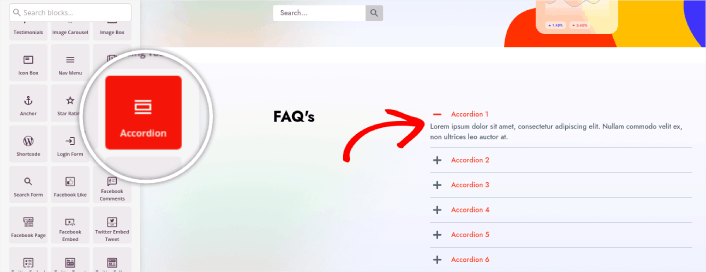
You can get rid of all the other blocks in the hero section and keep only the FAQs section. In the FAQs section, you’ll see a simple Q&A format with normal headers and paragraphs. You can keep this if you like the style. But we recommend using the Accordion module for your FAQ section:
After that, all you have to do is fill out the content. And there you have it!
Your basic FAQ page is done. If you want to supercharge it, you can also add a few tweaks to it. For instance, you can create a link to the contact page in the body copy of your hero section.
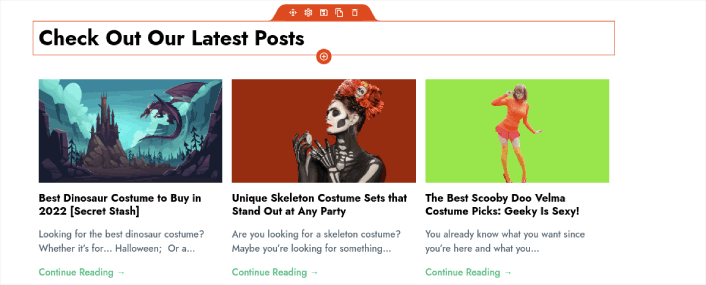
You can also add a blog section below the FAQs to redirect visitors to your latest posts using the Post block:
Finally, modify the CTA section at the bottom to collect email leads if that’s one of your marketing objectives:

You can do a lot more in terms of design and all from drag-and-drop content blocks. Once you’re happy with the overall look and feel of your FAQ page, it’s time to connect your email marketing service.
Step #4: Connect Your Email Marketing Service
After you’re done designing your FAQ page, click the Connect tab at the top of your page builder, and select your email marketing provider to collect leads on your site.

بعد ذلك، انقر فوق علامة التبويب إعدادات الصفحة في أعلى شاشتك.

هنا، يمكنك إضافة إضافة تحسين محركات البحث و إضافة تحليلات جوجل إلى صفحة الهبوط الخاصة بك. يمكنك حتى إعداد رموز تتبع مخصصة مثل Facebook Pixel أو Pinterest pixel لتتبع أداء الإعلانات.
نوصي باستخدام All in One SEO كإضافة تحسين محركات البحث الخاصة بك لووردبريس.

إذا كنت تستخدم AIOSEO مع SeedProd، يمكنك ببساطة الانتقال إلى إعدادات الصفحة » تحسين محركات البحث » Schema وإعداد مخطط الأسئلة الشائعة على الصفحة:
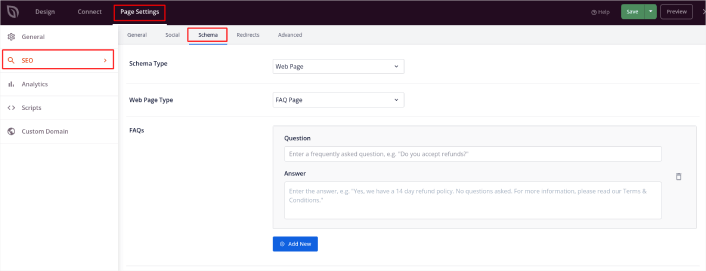
اضبط نوع المخطط على صفحة ويب و نوع صفحة الويب على صفحة الأسئلة الشائعة. ثم، ما عليك سوى لصق الأسئلة الشائعة الخاصة بك في حقول الأسئلة الشائعة أدناه.
Step #5: Publish Your Landing Page
Now let’s go ahead and publish your design. To do this, click the dropdown arrow next to the save button and click Publish. You can then click the See Live Page button to see how it looks.
And you’re done! If you followed every step, your FAQ page should look something like this:
Bonus Step: Add a Click to Subscribe Button to Your FAQ Page
يمكنك أيضًا إضافة زر انقر للاشتراك لجمع مشتركين في الإشعارات الفورية. تعد الإشعارات الفورية طريقة رائعة لزيادة حركة المرور المتكررة، والحصول على المزيد من التفاعل، وحتى بيع البضائع الرسمية إذا كان لديك بعض منها.
في SeedProd، قم فقط بسحب وإفلات وحدة HTML المخصصة من الشريط الجانبي.
لقد وضعنا زر الاشتراك مباشرة أسفل نموذج الاشتراك عبر البريد الإلكتروني في الطية الأولى.

ولكن يمكنك إدراج الزر في أي مكان تريده.
لهذا الجزء، تحتاج إلى بعض الخبرة في HTML و CSS. أو، يمكنك نسخ هذا الكود ولصقه في كتلة HTML المخصصة الخاصة بك:
<button onclick="subscribeOnClickButton()" style="border: none; padding-left: 5%; padding-right:5%; text-align: center; display: inline-block; color: blue;">Get Updates via Push Notifications</button>هذا زر قياسي في HTML مع القليل جدًا من التنسيق. الشيء الوحيد المميز هو وظيفة onclick في الكود. هذا يعني بشكل أساسي أنه يمكن لزوارك النقر على الزر للاشتراك في شيء ما. الآن، نحتاج إلى إضافة بعض الأكواد الإضافية للزر للسماح لزوارك بالاشتراك في إشعارات الدفع.
توجه إلى الصفحة الرئيسية لـ PushEngage وانقر على زر البدء:

بعد ذلك، ستحتاج إلى تحديد الخطة المجانية لتجربة PushEngage أو اختيار خطة مدفوعة إذا كنت جادًا بشأن تنمية عملك. تأتي الخطط المدفوعة مع المزيد من خيارات الحملات والقدرة على بناء قوائم مشتركين أكبر.
في لوحة تحكم PushEngage الخاصة بك، انتقل إلى إعدادات الموقع » تفاصيل الموقع وانقر على زر انقر هنا لتعليمات الإعداد. ضمن أي موقع، ستحصل على كود التثبيت الخاص بك:

تحذير: تحتاج إلى نسخ الكود الذي تحصل عليه من لوحة التحكم الخاصة بك. الكود فريد لكل مستخدم PushEngage. لن تتمكن من نسخ الكود الموجود في الصورة وجمع المشتركين في إشعارات الدفع.
بمجرد حصولك على الكود في لوحة تحكم PushEngage الخاصة بك، أضف هذا المقتطف إلى الكود الخاص بك:
<script> window._peq = window._peq || [];</script> <script>
function subscribeOnClickButton(){
window._peq.push(['subscribe',{}.pe,function(res){
if(res.statuscode==1)
{
// Code to return response
console.log(res);
}
}]);
}
</script>
يجب أن يبدو الكود النهائي الخاص بك شيئًا كهذا:
<script src="https://clientcdn.pushengage.com/core/02a6e92667ae2279fcba8932356c1d93.js" async></script>
<script> window._peq = window._peq || [];</script> <script>
function subscribeOnClickButton(){
window._peq.push(['subscribe',{}.pe,function(res){
if(res.statuscode==1)
{
// Code to return response
console.log(res);
}
}]);
}
</script>
ستحتاج إلى إضافة هذا الكود إلى كتلة HTML في صفحة الهبوط الخاصة بك بعد الكود الخاص بالزر. يجب أن يبدو شيئًا كهذا:

Feel free to customize the styles for the button any way you please. When you’re done customizing your FAQ page, go ahead and hit the Save button.
What to Do Once You Know How to Create a FAQ Page
You just learned how to create a FAQ page that looks awesome and converts really well. The only challenge you have left is to send traffic to it.
وإذا كنت تبحث عن طريقة ميسورة التكلفة لزيادة زياراتك، نوصي باستخدام إشعارات الدفع. يمكن أن تساعدك إشعارات الدفع في جلب المزيد من الزيارات المتكررة وتفاعل الموقع. يمكنك أيضًا إنشاء حملات إشعارات دفع آلية تولد مبيعات.
غير مقتنع؟ تحقق من هذه الموارد:
- 7 استراتيجيات ذكية لزيادة تفاعل العملاء
- هل إشعارات الدفع فعالة؟ 7 إحصائيات + 3 نصائح خبراء
- كيفية إعداد إشعارات الدفع للسلات المتروكة (دليل سهل)
- كيفية إضافة إضافة إشعارات الويب لـ WordPress إلى موقعك
نوصي باستخدام PushEngage لإنشاء حملات إشعارات الدفع الخاصة بك. PushEngage هو البرنامج رقم 1 لإشعارات الدفع في العالم. لذا، إذا لم تكن قد قمت بذلك بالفعل، ابدأ مع PushEngage اليوم!


