Looking for a tutorial on how to create a blog page on WordPress?
Creating a separate page for your blog makes it easier for visitors to find your latest posts. But if you’ve never made a blog page before, how do you even get started? Do you need a plugin to do it? Or can you do it from WordPress default settings as is?
In this article, we’re going to show you how to create a blog page on WordPress step by step and in the simplest way possible.
يبدو جيدًا؟ دعنا نتعمق.
What Is a WordPress Blog Page?
A WordPress blog page is a page on a WordPress website that displays posts in reverse chronological order, with the most recent post at the top of the page. The page is usually called the “blog” or “news” page and is often the main page of a WordPress website.
You can use a blog page to share updates, news, stories, and other information with website visitors. A blog posts page typically includes the following web design elements:
- Navigation menu
- Blog posts list
- تذييل
We also recommend having a sidebar to showcase your most popular posts, a newsletter subscription form, and even ads from Google AdSense or Google AdSense alternatives.
Blog pages are a common feature of WordPress websites and are easy to set up and customize. You can use the built-in WordPress editor to add and format your blog posts. But if you want to customize the blog page itself, you can use WordPress plugins to add features and functionality.
Why Create a Blog Page on WordPress?
There are many reasons why you might want to create a blog page on your WordPress website. Here are a few:
- Share updates and news with your audience: A blog page is a great way to share updates, news, and other information with your website visitors. You can use it to keep them informed about what’s going on with your business, organization, or personal life.
- Engage with your audience: By allowing comments on your blog posts, you can encourage your visitors to share their thoughts and ideas with you and with each other.
- Improve your website’s search engine rankings: Search engines, like Google, tend to favor websites that have fresh, regularly-updated content. By regularly publishing blog posts, you can help your website rank higher in search engine results.
- Establish yourself as an authority in your field: If you are knowledgeable about a particular topic, a blog can be a great way to share your expertise with others and establish yourself as an authority in your field.
- Monetize your website: If you have a large and engaged audience, you may be able to monetize your blog by selling advertising space or promoting products or services.
In short, a blog page can be a valuable addition to any WordPress website, whether you are using it for personal or professional purposes. If you’re not sure where to get started, you should check out our article on how to create a website.
How to Create a Blog Page on WordPress with a Page Builder
One of the easiest ways to create a blog page on WordPress is to use a WordPress page builder plugin. We recommend using SeedProd.

SeedProd هو أفضل إضافة ووردبريس لإنشاء صفحات هبوط تحقق التحويلات.
تحصل على منشئ صفحات هبوط بالسحب والإفلات مليء بالخيارات لبناء صفحات التجارة الإلكترونية وصفحات الهبوط. على عكس منشئي مواقع ووردبريس، يمكنك تخصيص كل شبر من صفحة الهبوط الخاصة بك بما في ذلك قوائم التنقل، والتذييلات، والأنماط. يعمل SeedProd أيضًا مع أي سمة ووردبريس وينشئ صفحات هبوط متوافقة مع الجوّال.
مع SeedProd، تحصل على قوالب جاهزة لصفحات هبوط عالية التحويل يمكنك نشرها على الفور. وهذا يشمل قوالب لـ:
- صفحات المبيعات
- صفحات قريباً
- صفحات 404
- صفحات الصيانة
- صفحات هبوط التطبيقات
- صفحات تسجيل الدخول
- صفحات الشكر
- صفحات الندوات عبر الإنترنت
- صفحات الفيديو
وغيرها الكثير! نحب استخدام SeedProd وكتبنا حتى مراجعة متعمقة لملحق SeedProd. تفضل بإلقاء نظرة عليها!
Step #1: Install the SeedProd Plugin on Your Site
First, you’ll need to visit the SeedProd website and purchase the plugin. Then, you can download the plugin file to your computer. Then, copy the plugin license key from your SeedProd dashboard.
Next, you’ll have to log into your WordPress dashboard and install the plugin. If you need detailed instructions, check out this step-by-step guide to installing a WordPress plugin. Head over to the SeedProd plugin welcome screen on WordPress and verify your license key:

After your account is verified, you’re ready to create a blog page on WordPress.
Step #2. Choose a Starter Theme Template
Head over to SeedProd » Theme Builder in your WordPress dashboard:
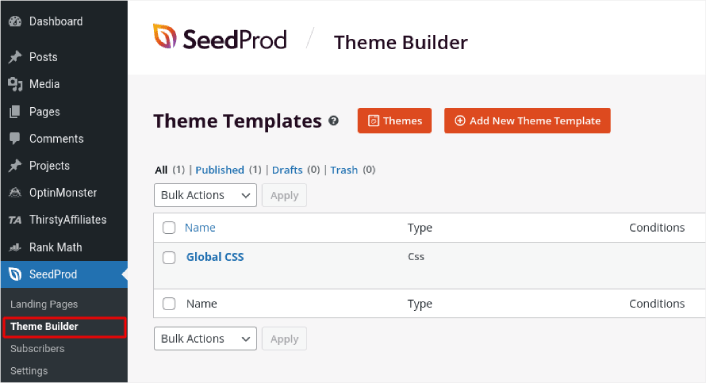
Here, you can select a starter theme with SeedProd. You can create a custom theme using SeedProd very easily. But for now, we’re going to select a pre-built template. Click on the Themes button and select your starter theme.
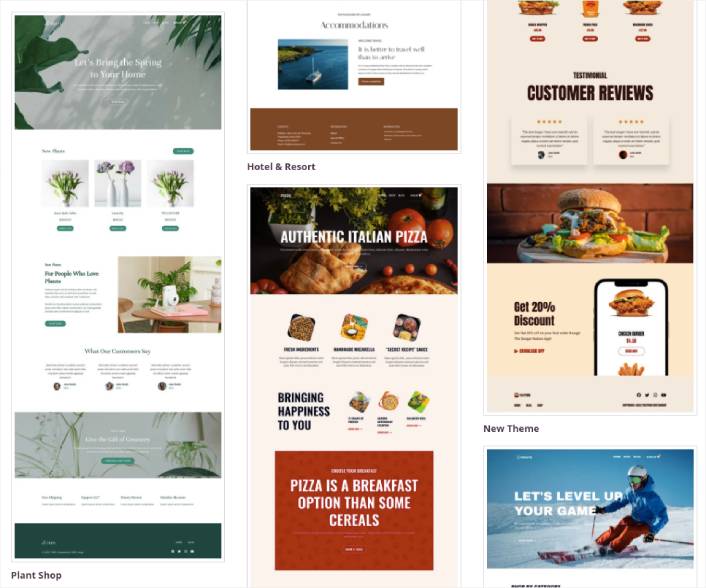
After choosing a theme, SeedProd will automatically create all the theme templates. From here, you can edit each template using the drag-and-drop editor. Each page is set up automatically with an attractive layout and placeholder content ready for you to customize.
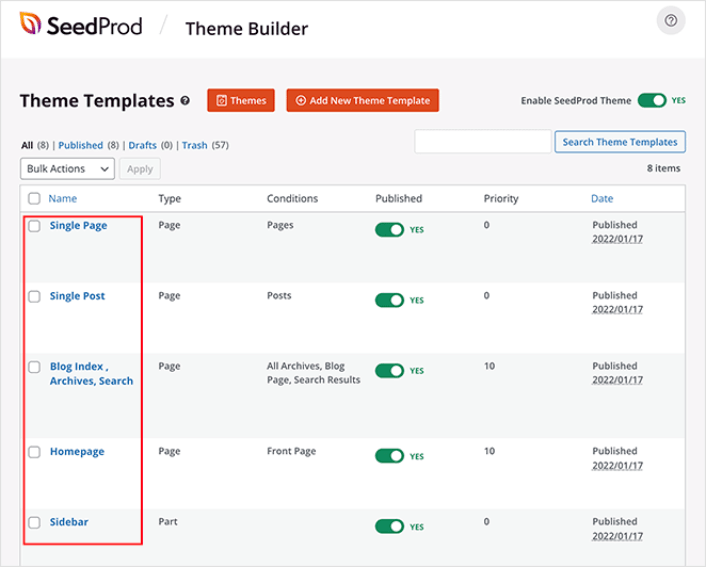
Here, you can choose to customize every part of your theme. We recommend customizing your home page first, but for this article, we’re going to skip ahead and go straight for the blog page.
Step #3. Customize Your Blog Page
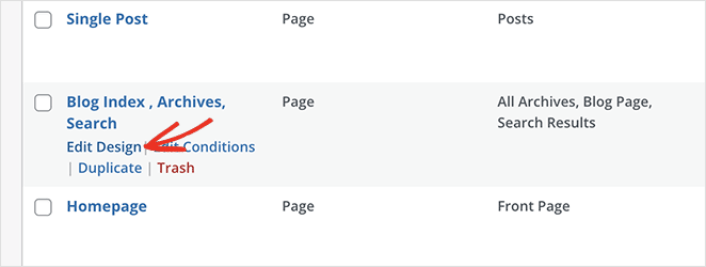
SeedProd’s theme builder comes with many ways to customize your blog page. Click the Edit Design link on the Blog Page template file to get started:
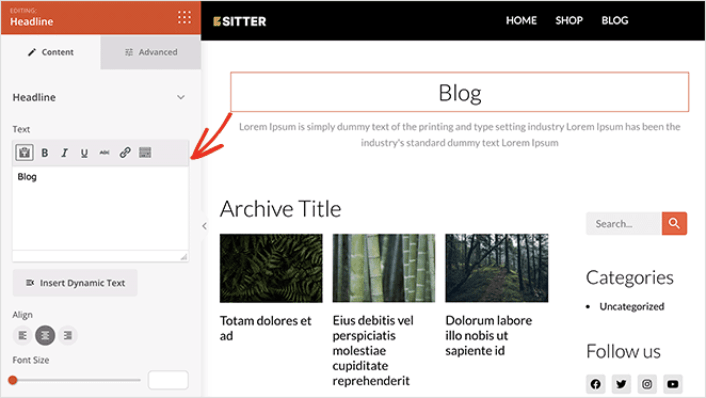
It’s super easy to customize the blog page using the SeedProd builder. All you have to do is click on an element and edit it:
SeedProd offers several blocks you can use on your blog page. The most important is the Posts block which shows a list of recent blog posts.

You can change the layout of the Posts block easily by clicking it and choosing different settings in the left-hand panel.
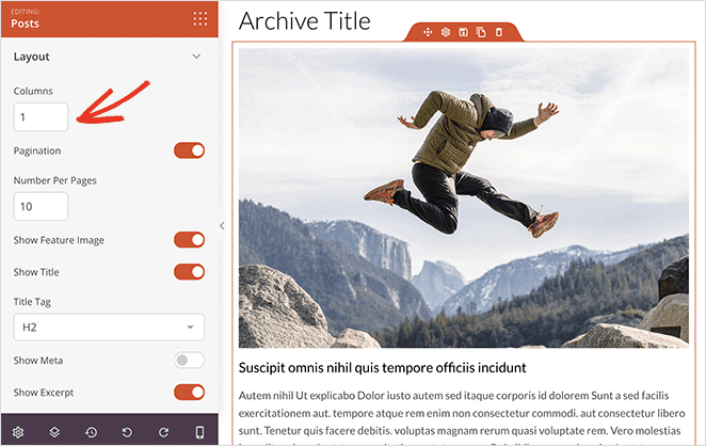
If you scroll through the block settings, you’ll see other toggles to show or hide:
- Featured image
- Read more text
- Pagination
- Meta information
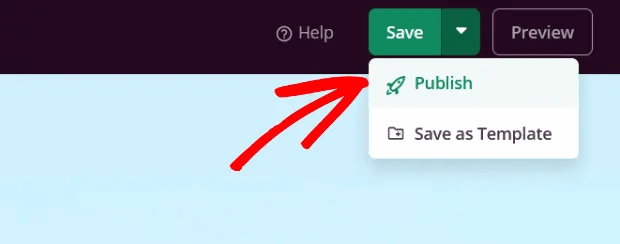
These settings allow you to display your blog posts to best suit your target audience. When you’re done customizing your page, click on Save. Then, click on the dropdown arrow next to the Save button and hit Publish:
Step #4: Add a Click to Subscribe Button to Your Blog Page
You can also add a click to subscribe button to collect push notification subscribers. Push notifications are a great way to increase your repeat traffic, get more engagement and even sell official merch if you have some.
In SeedProd, just drag and drop the Custom HTML module from the sidebar.
We’ve put the subscribe button directly underneath the blog title in the first fold.
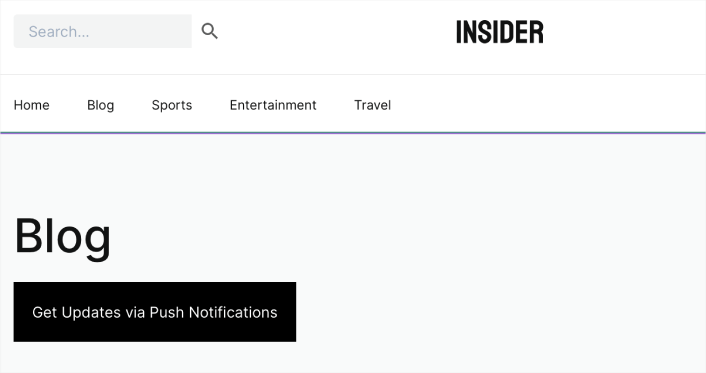
But you can insert the button anywhere you like.
لهذا الجزء، تحتاج إلى بعض الخبرة في HTML و CSS. أو، يمكنك نسخ هذا الكود ولصقه في كتلة HTML المخصصة الخاصة بك:
<button onclick="subscribeOnClickButton()" style="border: none; padding-left: 5%; padding-right:5%; text-align: center; display: inline-block; color: blue;">Get Updates via Push Notifications</button>That’s a standard button in HTML with very little styling. The only fancy bit is the onclickfunction in the code. It basically means that your visitors can click on the button to subscribe to something. Now, we need to give the button some extra code to allow your visitors to subscribe to push notifications.
توجه إلى الصفحة الرئيسية لـ PushEngage وانقر على زر البدء:

بعد ذلك، ستحتاج إلى تحديد الخطة المجانية لتجربة PushEngage أو اختيار خطة مدفوعة إذا كنت جادًا بشأن تنمية عملك. تأتي الخطط المدفوعة مع المزيد من خيارات الحملات والقدرة على بناء قوائم مشتركين أكبر.
في لوحة تحكم PushEngage الخاصة بك، انتقل إلى إعدادات الموقع » تفاصيل الموقع وانقر على زر انقر هنا لتعليمات الإعداد. ضمن أي موقع، ستحصل على كود التثبيت الخاص بك:

تحذير: تحتاج إلى نسخ الكود الذي تحصل عليه من لوحة التحكم الخاصة بك. الكود فريد لكل مستخدم PushEngage. لن تتمكن من نسخ الكود الموجود في الصورة وجمع المشتركين في إشعارات الدفع.
بمجرد حصولك على الكود في لوحة تحكم PushEngage الخاصة بك، أضف هذا المقتطف إلى الكود الخاص بك:
<script> window._peq = window._peq || [];</script> <script>
function subscribeOnClickButton(){
window._peq.push(['subscribe',{}.pe,function(res){
if(res.statuscode==1)
{
// Code to return response
console.log(res);
}
}]);
}
</script>
يجب أن يبدو الكود النهائي الخاص بك شيئًا كهذا:
<script src="https://clientcdn.pushengage.com/core/02a6e92667ae2279fcba8932356c1d93.js" async></script>
<script> window._peq = window._peq || [];</script> <script>
function subscribeOnClickButton(){
window._peq.push(['subscribe',{}.pe,function(res){
if(res.statuscode==1)
{
// Code to return response
console.log(res);
}
}]);
}
</script>
ستحتاج إلى إضافة هذا الكود إلى كتلة HTML في صفحة الهبوط الخاصة بك بعد الكود الخاص بالزر. يجب أن يبدو شيئًا كهذا:

Feel free to customize the styles for the button any way you please. When you’re done customizing your blog page, go ahead and hit the Save button.
What to do After You Create a Blog Page on WordPress
Now that you know how to create a blog page on WordPress, all that’s left is to send traffic to your site and watch your business grow.
وإذا كنت تبحث عن طريقة ميسورة التكلفة لزيادة زياراتك، نوصي باستخدام إشعارات الدفع. يمكن أن تساعدك إشعارات الدفع في جلب المزيد من الزيارات المتكررة وتفاعل الموقع. يمكنك أيضًا إنشاء حملات إشعارات دفع آلية تولد مبيعات.
غير مقتنع؟ تحقق من هذه الموارد:
- 7 استراتيجيات ذكية لزيادة تفاعل العملاء
- هل إشعارات الدفع فعالة؟ 7 إحصائيات + 3 نصائح خبراء
- كيفية إعداد إشعارات الدفع للسلات المتروكة (دليل سهل)
- كيفية إضافة إضافة إشعارات الويب لـ WordPress إلى موقعك
نوصي باستخدام PushEngage لإنشاء حملات إشعارات الدفع الخاصة بك. PushEngage هو البرنامج رقم 1 لإشعارات الدفع في العالم. لذا، إذا لم تكن قد قمت بذلك بالفعل، ابدأ مع PushEngage اليوم!


