
Do you want to embed YouTube live streams in your WordPress blog posts?
Live streams are the ultimate tool for you to engage with your community and grow your following. If you can couple that with your website traffic, you can get the best of both worlds.
The sad thing about live streams is that once they’re done, YouTube doesn’t always push it to new viewers unless they’re making a lot of money out of ads. So, showcasing your live streams on your WordPress site is a nice way to add views to your older streams as well.
You’re probably worried about having to handle the HTML code to embed videos. WordPress actually makes it super easy to embed videos from video hosting sites like YouTube, Vimeo, Facebook, Twitter, and many others. But live streams are a whole other beast.
In this article, we’re going to show you step-by-step how to embed YouTube live streams in WordPress.
دعنا نتعمق.
How to Embed a YouTube Live Stream in WordPress
Unlike regular YouTube videos, live streams are usually longer and allow viewers to interact directly with the creator in real time.
You can use WordPress video embed plugins to embed a YouTube live stream on your site. A plugin can help you automatically embed all of your YouTube channel videos and live streams in a customizable gallery format.
We recommend using Smash Balloon to embed your YouTube live streams.
Smash Balloon هو إضافة ووردبريس بسيطة تسمح لك بعرض خلاصات الوسائط الاجتماعية الخاصة بك على موقعك دون استخدام أي كود على الإطلاق. يعد عرض خلاصاتك الاجتماعية على موقعك طريقة رائعة لتحويل حركة المرور على الويب الخاصة بك إلى متابعين على وسائل التواصل الاجتماعي وإبقائهم منخرطين لفترة طويلة.
أفضل ما في Smash Balloon هو أنه لا يتطلب أي كود. كل ما عليك فعله هو تثبيت الإضافة ثم ربط صفحات الوسائط الاجتماعية الخاصة بك بموقعك.
يمكنك استخدام Smash Balloon لـ:
- استخدم خلاصات الهاشتاج الخاصة بك على موقعك كدليل اجتماعي
- اعرض خلاصات تويتر التفاعلية لزيادة تفاعل موقع الويب
- قم بتضمين مقاطع فيديو يوتيوب الخاصة بك على موقعك لزيادة عدد المشتركين في يوتيوب
- أضف تقييمات صفحة فيسبوك التجارية الأصيلة إلى موقعك لزيادة التحويلات
And lots more! Check out our review of Smash Balloon or just get started.
Step #1: Install YouTube Feed Pro
First thing you need to do is install the YouTube Feed Pro plugin.
The YouTube Feed Pro plugin is meant to especially embed YouTube videos to your WordPress site. For more details, see our step by step guide on how to install a WordPress plugin.
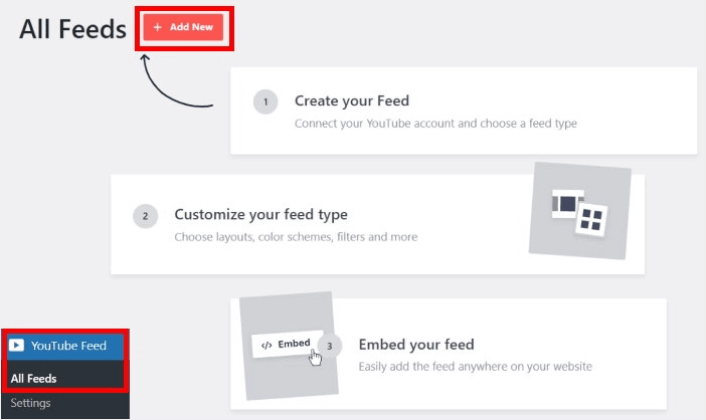
Step #2: Create a YouTube Live Stream Feed
Head over to YouTube Feed » All Feeds menu from your WordPress dashboard and click on the Add New button:
Select the Live Streams option for now and then click on the Next button.
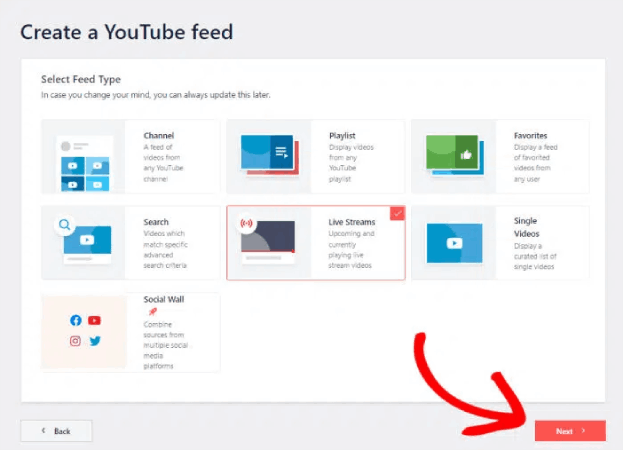
Now, you can set up your website to automatically pull your live streams from your YouTube channel and display them on a page.
Step #3: Connect YouTube to Your WordPress Site
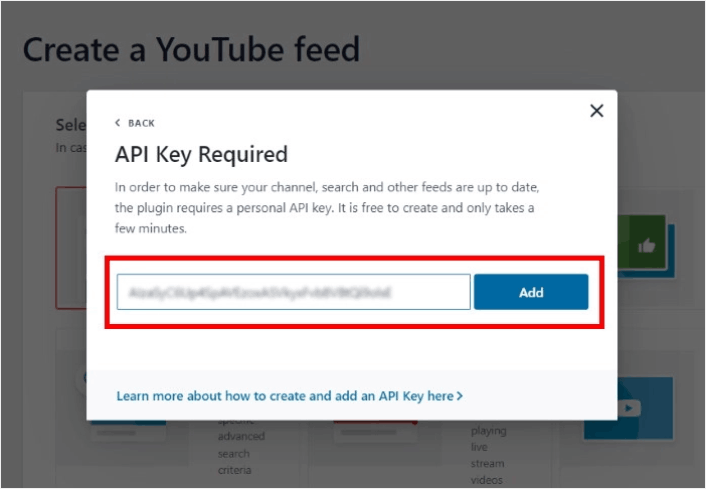
The easiest way to connect your YouTube channel to your WordPress site is to use your YouTube API Key. If you don’t have an API key yet, you can take a look at this step-by-step guide for creating your YouTube API Key.
Once you do that, copy the YouTube API key and open your WordPress site. Now paste your API key into the popup there and then click on Add.
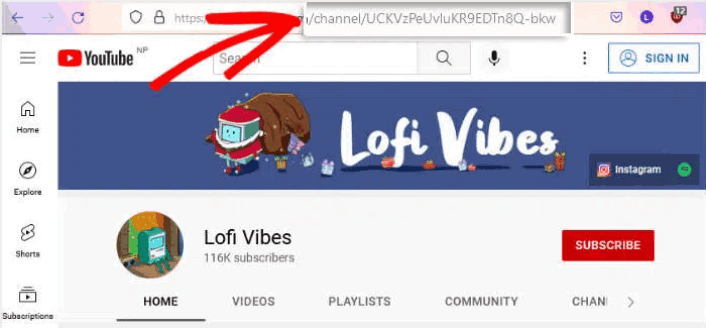
Next, go to your YouTube channel and take a look at the URL for your channel. You’ll need to copy the code that comes after “/channel/” or “/user/” on the URL.
After copying the code, go back to your website and then paste it into Add Channel ID for Livestream field.
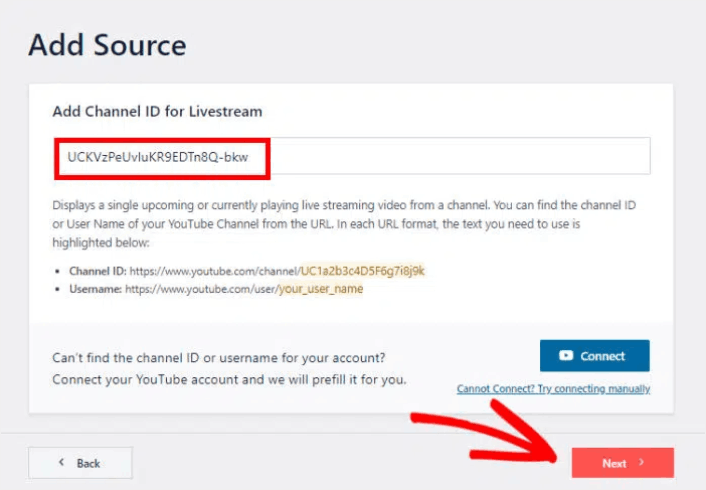
Then, simply click on the Next button.
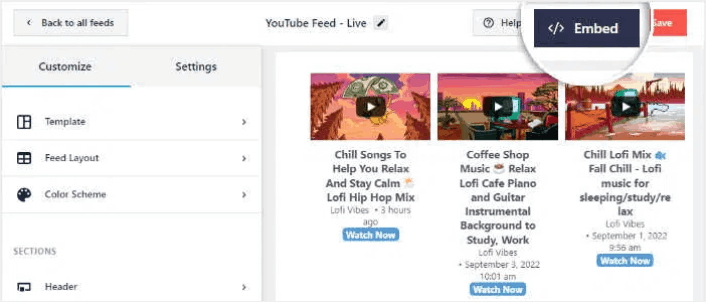
Step #4: Customize Your Live YouTube Feed
Finally, we’re going to customize how your embedded feed looks on your site. It’s super easy. The plugin asks you to choose a pre-built template for your feed. You have 8 different feed templates to choose from:
- افتراضي
- دوار
- Cards
- List
- Gallery
- Latest video
- عرض دوار
- عنصر واجهة المستخدم
Simply select the layout that you want to use and then click on Next.

You’re can now use the plugin’s live feed editor to customize your live streams in detail.
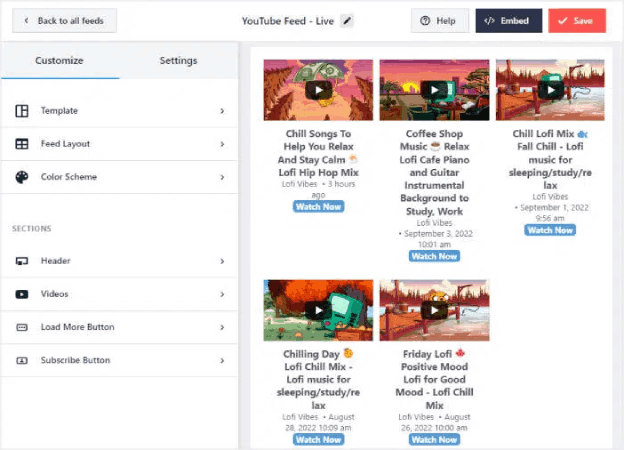
Once you’re ready to start designing your feed, click on the Feed Layout tab on the sidebar menu. Or, to change the color palette for your embed, you can click on the Color Scheme tab. When you’re done customizing your feed layout, remember to hit Save.
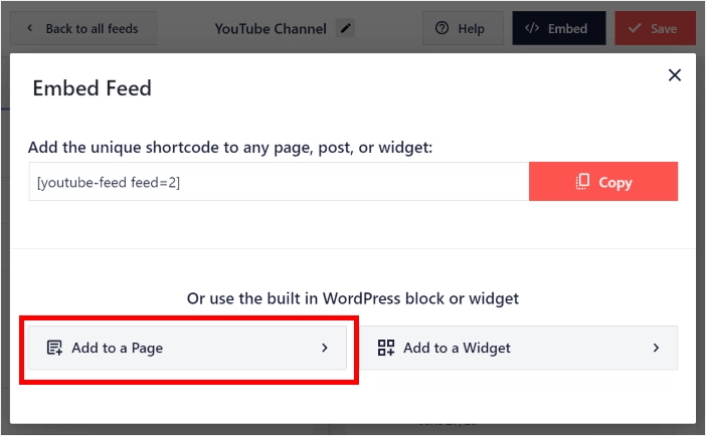
Step #5: Embed YouTube Live Stream Feed on WordPress
With YouTube Feed Pro, you can start embedding your YouTube feeds directly from the live feed editor. To do that, first, click on the Embed button at the top.
YouTube Feed Pro will then show you a popup with the embed options for this live feed. For now, select the Add to a Page option on the popup.
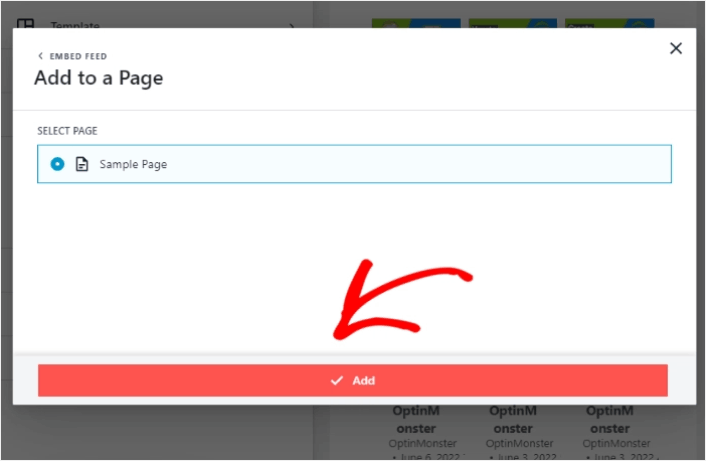
Now select your WordPress page from the list and then click on Add to continue.
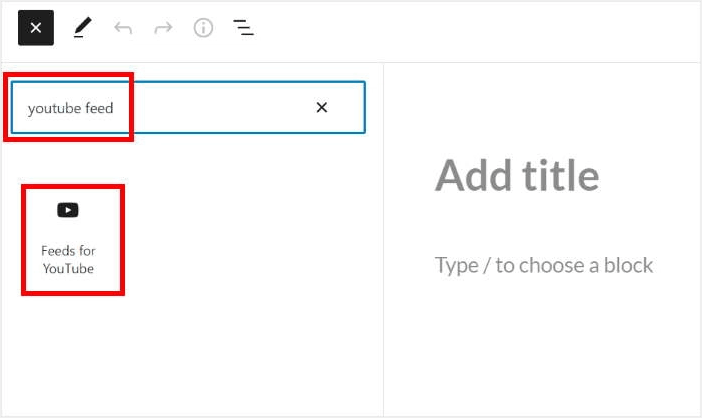
You’ll see the Gutenberg page editor open up for that page. All you have to do now is add a new block and select the YouTube Feed block.
Click on the Update button and your YouTube live streams will be online on your site.

And that’s it, you’re done!
What to do After You Embed a YouTube Live Stream
That’s all for this one, folks! By now, you’ve managed to embed a YouTube live stream in WordPress. You should also check out how to embed Instagram photos in WordPress. And how to set up a viral giveaway to supercharge your social media following.
بعد ذلك، كل ما تبقى هو جذب الزيارات إلى موقعك حتى تتمكن نماذج الاتصال الخاصة بك من العمل. طريقة بسيطة للقيام بذلك هي البدء في استخدام إشعارات الدفع. يعد إرسال إشعارات الدفع طريقة رائعة لجذب الزيارات المتكررة إلى موقعك. إذا كان هذا شيئًا تهتم به، فيجب عليك أيضًا الاطلاع على هذه المقالات:
- تكلفة إشعارات الدفع: هل هي مجانية حقًا؟ (تحليل الأسعار)
- كيفية الحصول على المزيد من حركة المرور إلى مدونة ووردبريس الخاصة بك (9 طرق سهلة)
- كيفية زيادة معدل الاشتراك في إشعارات الدفع على الويب (7 طرق)
- كيفية إضافة إضافة إشعارات الويب لـ WordPress إلى موقعك
نوصي باستخدام PushEngage لإرسال إشعارات الدفع الخاصة بك. PushEngage هو البرنامج رقم 1 لإشعارات الدفع في العالم. لذا، إذا لم تكن قد قمت بذلك بالفعل، ابدأ مع PushEngage اليوم.


