You have configured Web Push Notification on your website. A subscription box for Push Notification is live as well. Visitors coming to your website are subscribing to your push notification by clicking on “Allow”.

Once they click Allow, they are subscribed to your push notification. However, there are a lot of people who clicked on “Deny” or “Block”. So what happens to this set of visitors? Will they receive your Push Notification?
The answer is No; they will not receive your push notification. And they will not see the push subscription opt-in as well. Since they have clicked “Block”, they will not see the subscription box next time they visit your website.
People may have clicked “Block” earlier, but now they want to subscribe to your push notification service. They want to receive updates about your product, new blog posts, updates about your website. However, they cannot do so, since the opt-in will not appear on their browser.
However, with PushEngage, you can now allow such visitors to subscribe to your Push Notification service. One of the ways to optimize push subscription rates is to use “Get Notification Widget”.
What is Get Notification Widget?
Get Notification Widget allows the user to get the Subscription Opt-In re-appear on their browser. This will allow them to subscribe to your Web Push Notification. When a user clicks on “Deny”, the push subscription doesn’t appear when the user re-visits your website. To allow the user to subscribe to your Push Notification, Enable “Get Notification Widget”.
How Get Notification Widget Works?
You have enabled the Get Notification Widget from your account. Now when a visitor comes to your website and clicks on “Deny” or “No“, Get Notification Widget gets Activated. See the below steps for more clarity:
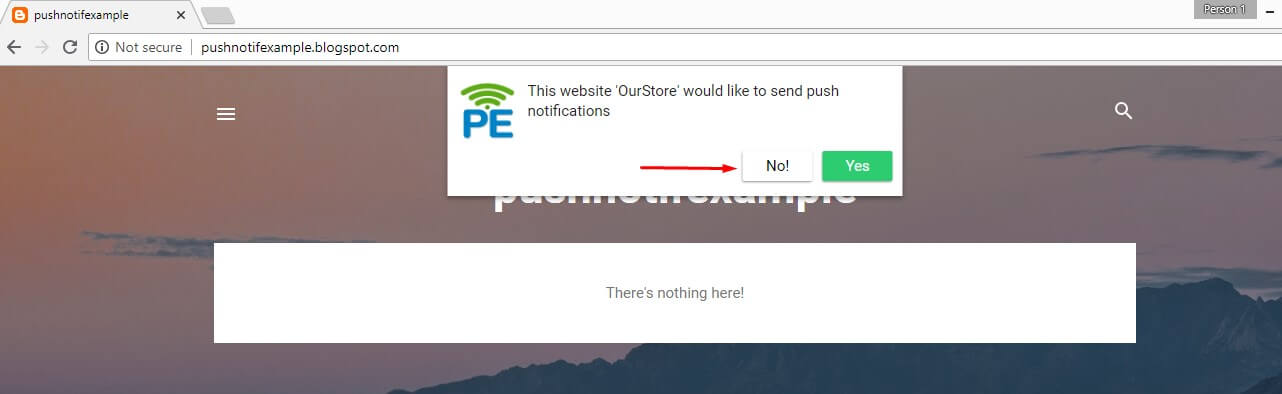
- In the below screenshot, the push notification opt-in appeared, and the user clicked on “No”.
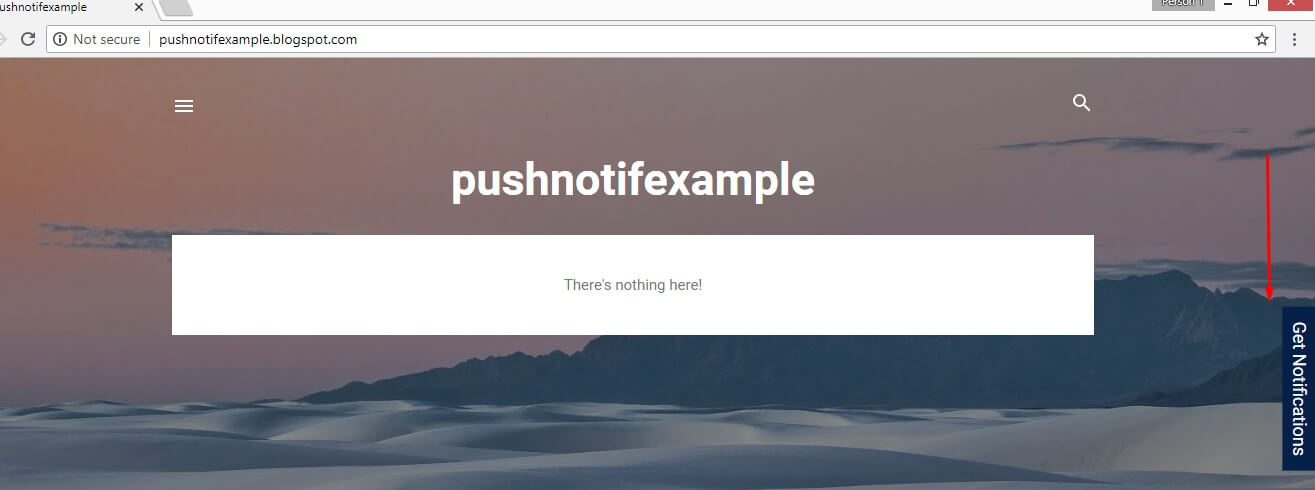
- On Clicking Now, Get Notification Widget gets activated. It will appear on the website.
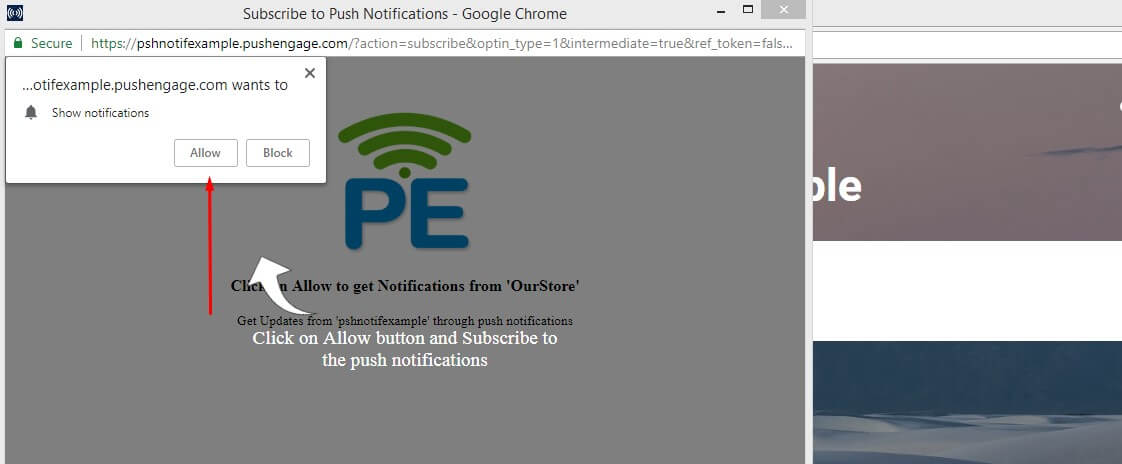
- Click On Get Notification Widget and it will show the Subscription Opt-In. The user can now click on “Allow” to get subscribed to Push Notification.
How to Enable Get Notification Widget?
To enable Get Notification Widget, follow the below steps:
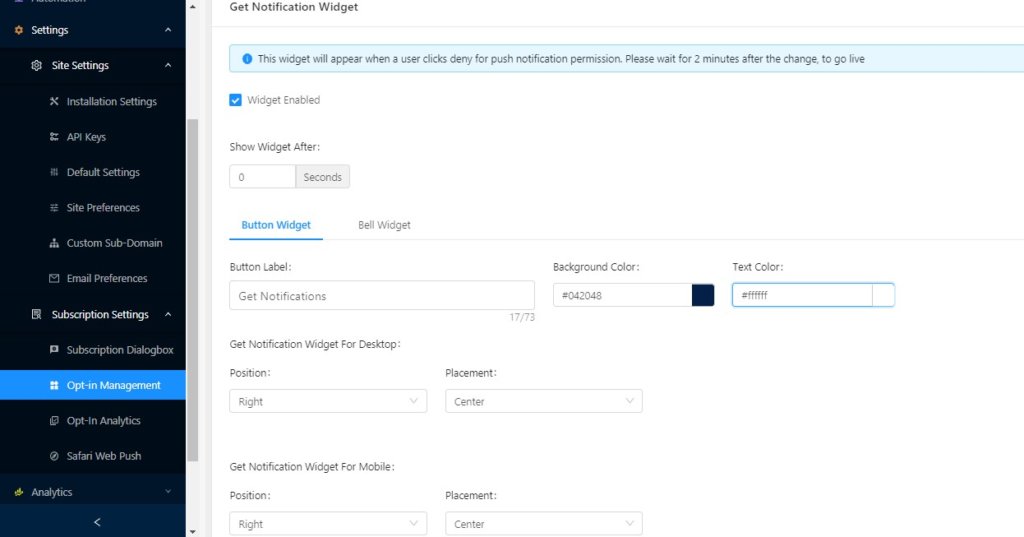
From PushEngage Dashboard, go to Settings –> Subscription Settings –>Opt-in Management. You will see the “Get Notification Widget“. Check the button to Enable.
How to Configure Get Notification Widget?
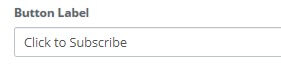
Change the text: You can change the text of the widget. Instead of “Get Notifications”, you can write “Click to Subscribe”

Farklı Arka Plan Rengi ve Metin Rengi: Widget'ın arka plan rengini renk paletinize uyacak şekilde de değiştirebilirsiniz. Metin rengini bile değiştirebilirsiniz. Varsayılan Mavi Arka Plan ve Beyaz metin rengidir. Siyah arka plan ve Kırmızı Renkli Metin gibi başka herhangi bir kombinasyona değiştirebilirsiniz.

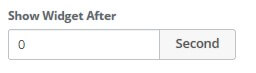
Gecikme Ekleme: Bildirim Widget'ına gecikme ekleyebilirsiniz. Yani 10 saniye gecikme eklerseniz, Bildirim Widget'ı kullanıcının “Engelle” veya “Hayır” düğmesine tıkladıktan 10 saniye sonra görünecektir.
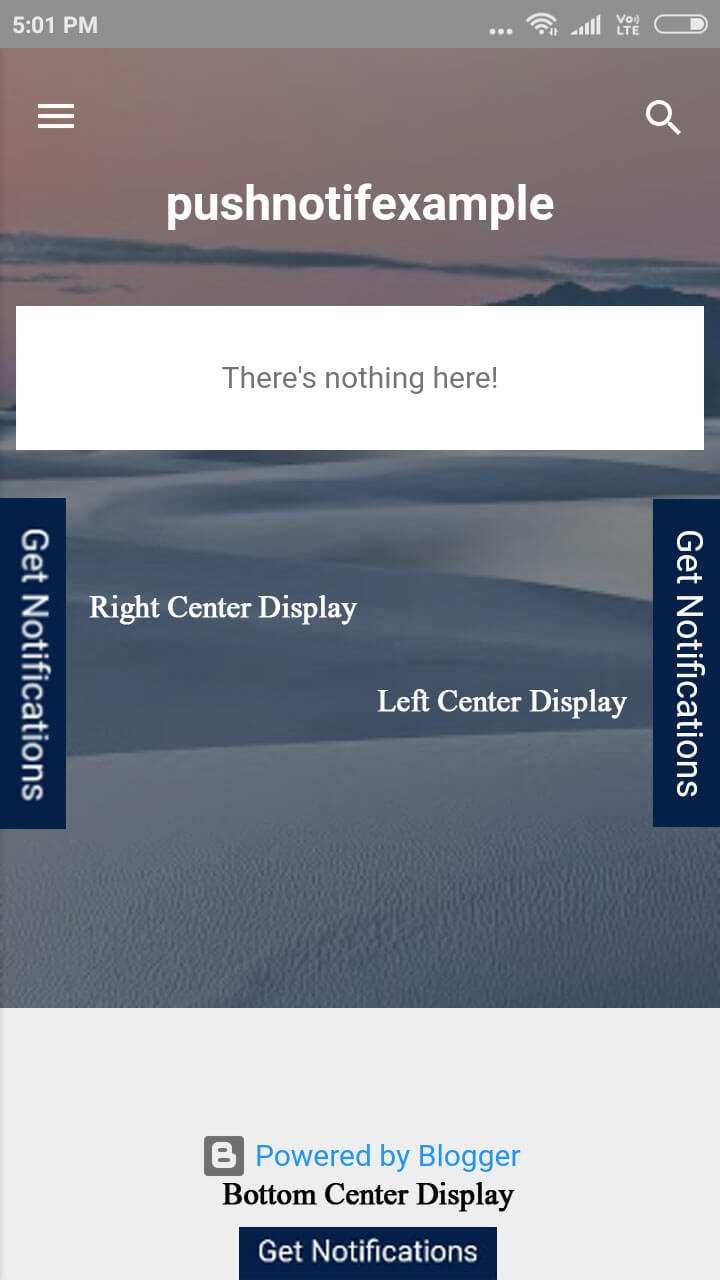
Görüntü Ayarları: “Bildirim Widget'ı Al” için iki görüntü ayarı vardır.
- Konum: Widget'ı tarayıcınızın hangi tarafında göstermek istediğiniz: Sol, Sağ veya Alt
- Yerleşim: Widget'ınızı nereye yerleştirmek istediğiniz: Orta, Üst veya Alt.
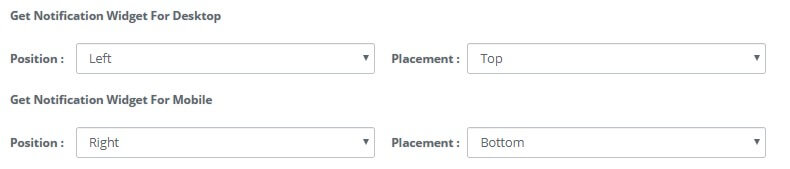
Masaüstü ve Mobil için Görüntü ayarlarını ayrı ayrı ayarlayabilirsiniz.
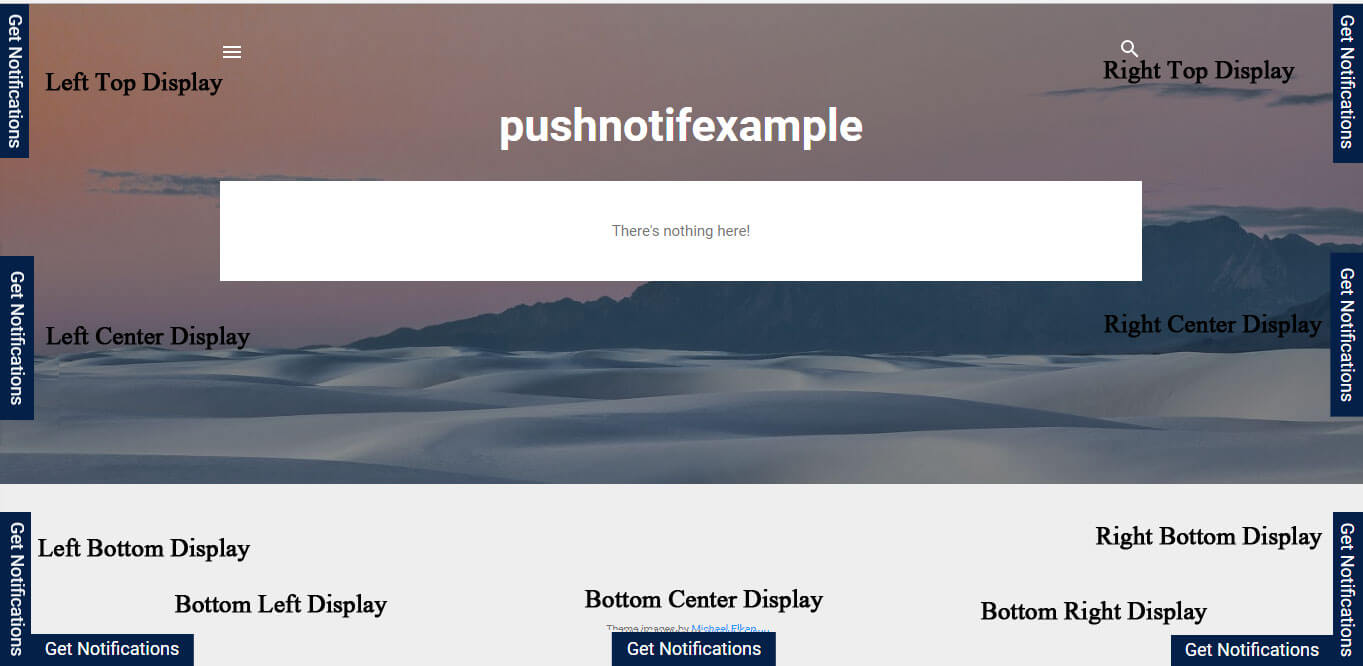
Aşağıda ayarların farklı kombinasyonları ve nasıl görüneceği yer almaktadır:
Masaüstünde:
Mobil'de:
Bildirim Widget'ı Al'ı kullanmaya başlayın ve ziyaretçinize Anlık Bildiriminize abone olma şansı verin.
Herhangi bir satıcıyla anlaşmadan önce her zaman hizmet sağlayıcının farklı özelliklerini ve ayrıca üst inceleme sitelerindeki yorumları kontrol edin. Her zaman deneme sürümü isteyebilir ve memnun kaldığınızda ücretli plana geçebilirsiniz. Hizmet sağlayıcının her zaman anlık abone kullanıcılarınızı diğer satıcılardan geçirebildiğinden emin olun.


İyi iş