
Looking for a WP Mail SMTP review to make up your mind about the plugin?
You’re in the right place, for sure.
WP Mail SMTP can help you cut down on spam emails from your WordPress site.
But is it really the #1 WordPress SMTP plugin? Why would you need an SMTP plugin in the first place? WordPress has its own PHP mailer. Why invest in buying an SMTP plugin that also helps you send emails?
In this article, we’re going to answer all these questions and more.
Most importantly, we’re going to put WP Mail SMTP to the test and find out if it’s really worth buying.
Låt oss dyka rakt in.
What Is WP Mail SMTP?
WP Mail SMTP is a plugin that helps you improve your WordPress email deliverability. The plugin bypasses the default wp_mail() function and forces your site to use SMTP settings instead.
In simple terms: You can use any email deliverability service provider including Gmail to send emails. But more on that later.
Using WP Mail SMTP removes some of the biggest email deliverability issues in WordPress. The default method for WordPress sites to send email can get flagged as spam. And that’s if they get delivered in the first place.
WP Mail SMTP can also come in handy when:
- din hosting inte stöder mail()-funktionen och WordPress inte kan skicka e-post
- din server inte är korrekt konfigurerad för att leverera e-post från din WordPress-webbplats
- du vill skicka dina affärse-postmeddelanden via Gmail eller Google Apps
- enquiry messages from your WordPress forms never get sent to your inbox
And here’s the thing: Nearly ALL WordPress websites suffer from the same problem.
So, even if you’re running a personal blog and collecting emails to send out a newsletter or if you’re a plumber who accepts bookings on a tiny business site, you’re going to have the exact same problem with emails on WordPress.
If you’ve been suffering from email deliverability issues from WordPress or WooCommerce already and you know what we’re talking about, you should definitely get started with WP Mail SMTP today.
Don’t even think about it. Just go get the plugin right now.
But if you’d like to understand the problem more deeply and get a clearer picture of what WP Mail SMTP has to offer, keep reading.
Why Use WP Mail SMTP?
Most WordPress hosting providers aren’t really configured properly to send emails. As a result, you may not even get notified of contact form submissions. Using WP Mail SMTP allows you to bypass the default wp_mail() function and forces your site to use SMTP settings instead.
This way, even if your web host isn’t properly configured to send emails, you will still be able to send automated emails and email notifications from your site.
Don’t even get us started on what a nightmare this is for WooCommerce stores!
WordPress handles user registration emails using built-in PHP code called the wp_mail() function:

This is a big problem because not all WordPress hosts offer servers configured properly to use PHP mail.
And even if the servers are configured properly, Gmail and other email service providers use strict spam filters. These spam filters try to authenticate that your email is coming from your business and not a fraudulent third party. That’s where most of your emails get blocked or flagged as spam.
You can work your way around this problem using WP Mail SMTP.
How to Set Up WP Mail SMTP on Your Site
In this section, we’re going to show you how to use an SMTP service to ensure your email delivery. We’ll show you what SMTP service we use too, but no matter which SMTP service you choose, you need to install the WP Mail SMTP plugin.
Så, fortsätt och installera och aktivera pluginet. Om du är osäker på hur du gör det, kommer den här handledningen att visa dig hur man installerar ett WordPress-plugin.
Step #1: Configure the Plugin
När du har installerat pluginet, gå till din WordPress-instrumentpanel och klicka på WP Mail SMTP för att konfigurera pluginet:
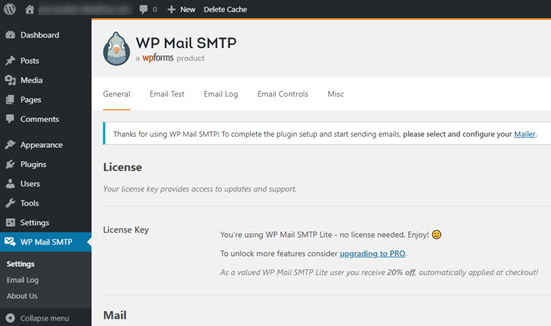
After you enter your license key, start filling out the Mail section:
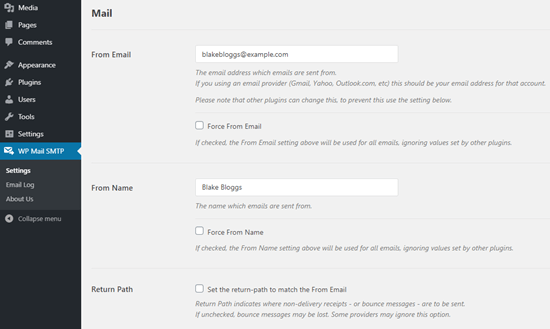
NOTE: Make sure that you enter the same email address as the one you’ll be using for your SMTP service. If there are conflicting emails, you’ll keep getting errors from the SMTP service dashboard.
The best part about this plugin is that even if your other WordPress plugins such as WP Forms use other email addresses, WP Mail SMTP can force them to use this email address.
Det var allt för nu.
Next, you’ll need to choose an SMTP mailing service for your site. We recommend using SMTP.com. But you can find a lot of different services in there.
To finish setting up the WP Mail SMTP plugin, you’ll have to create an account with SMTP.com next. It’s a very popular SMTP service that allows you to send bulk emails with high delivery rates.
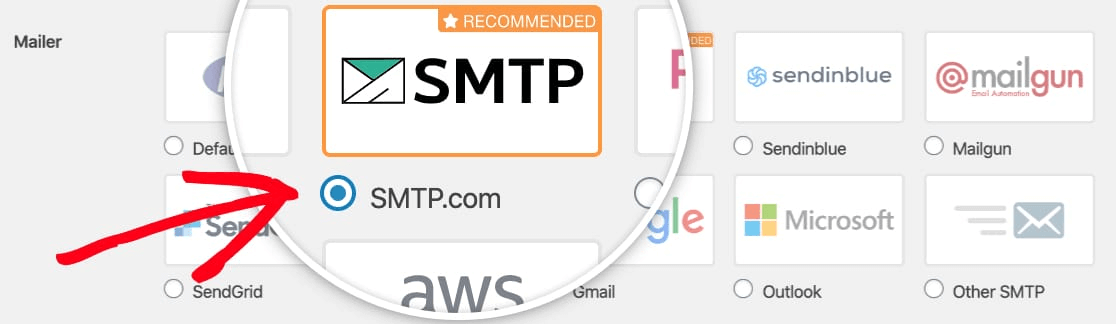
Step #2: Update the WP Mail SMTP Plugin
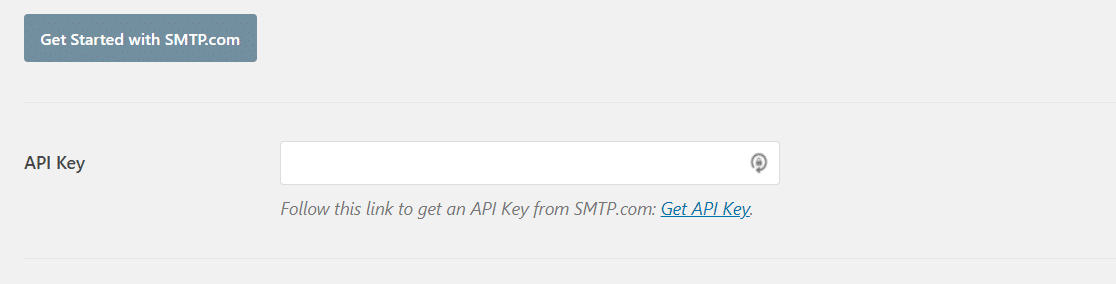
Go to the WP Mail SMTP plugin and click on WP Mail SMTP » Settings.
Välj sedan under Mailer en tjänsteleverantör. Du kan välja mellan en hel rad alternativ:

Vi rekommenderar att använda SMTP.com:
Steg 3: Skapa ett SMTP-konto
Skapa ett nytt konto:

Once you’ve signed up, you’ll be asked to click on an activation link via email and confirm your identity. So, keep an eye out for multiple emails.
Och sedan, gå tillbaka till WP Mail SMTP-pluginet för att ansluta ditt SMTP-konto till pluginet.
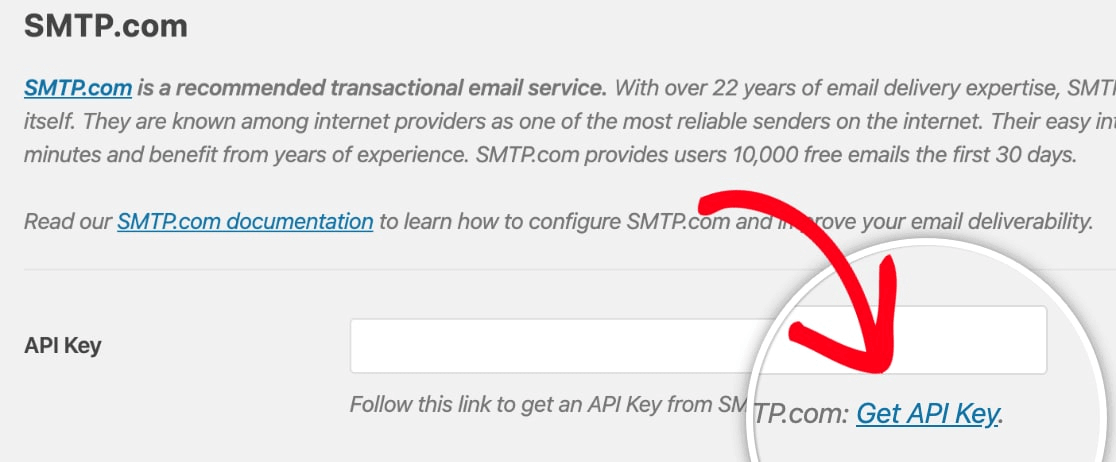
The popup will ask for an API key which you can get from your SMTP.com dashboard. Click on the Get API Key link (click on on this link to get there directly):
Du bör se en tabell på den här sidan. Kopiera API-nyckeln i kolumnen Nyckel:
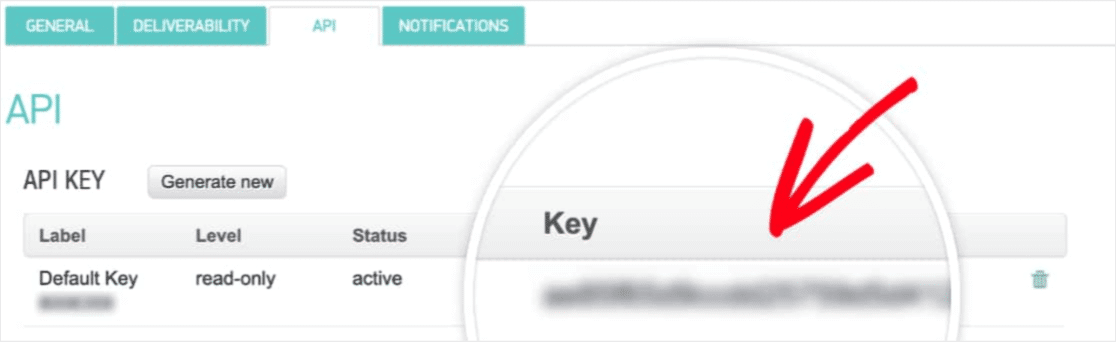
Klistra sedan in den här API-nyckeln i WP Mail SMTP:
Slutligen, i fältet Avsändarnamn, klicka på länken Hämta avsändarnamn:

Kopiera namnet i kolumnen Namn:
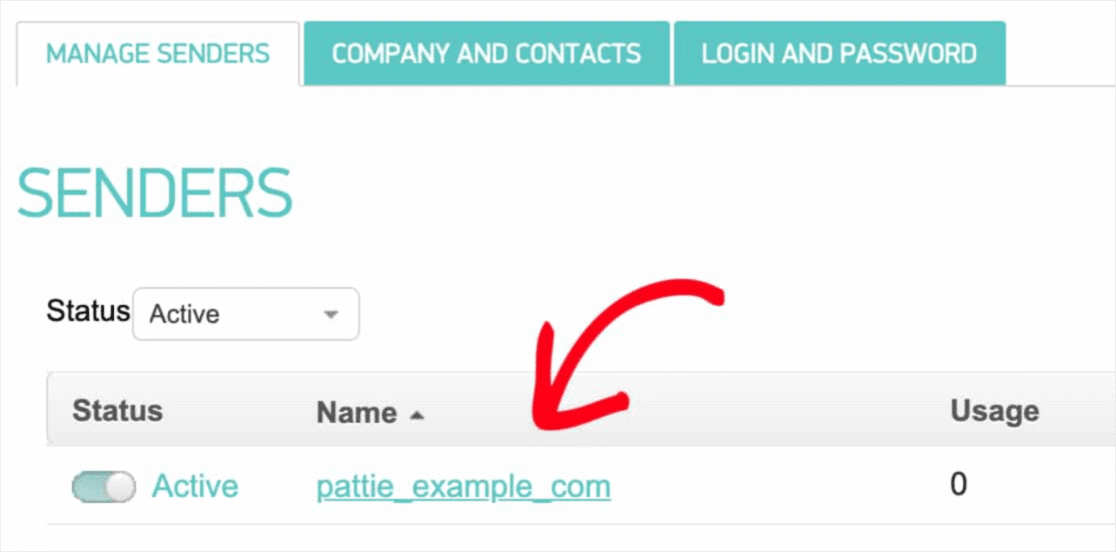
Och klistra in det i WP Mail SMTP.
Tryck sedan på Spara inställningar:

Steg 4: Lägg till SPF-posten i din DNS
After the authentication, your most important task will begin: Adding the SPF record to your DNS records. If things got way too techy for you way too fast, don’t worry. It’s a simple process.
Sender Policy Framework (SPF) is how SMTP.com authenticates your emails. Including this step ensures that your emails won’t get stranded in the Spam inbox.
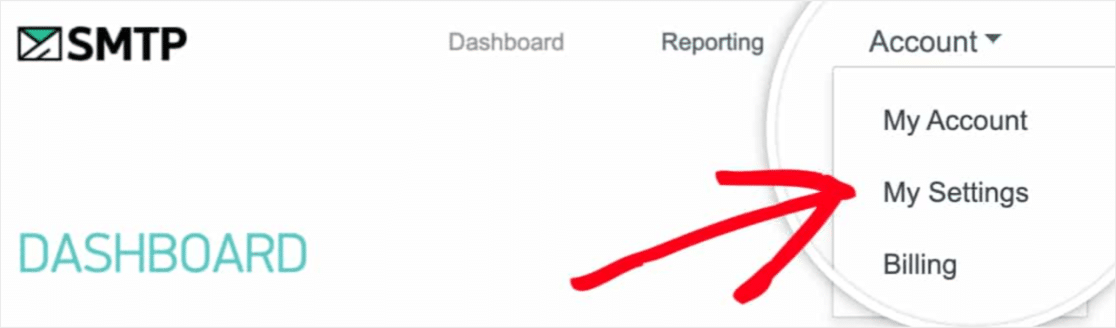
Go to the navigation menu of your SMTP.com account and click on Account » My Settings:
Head to General Settings and look under SPF Record:
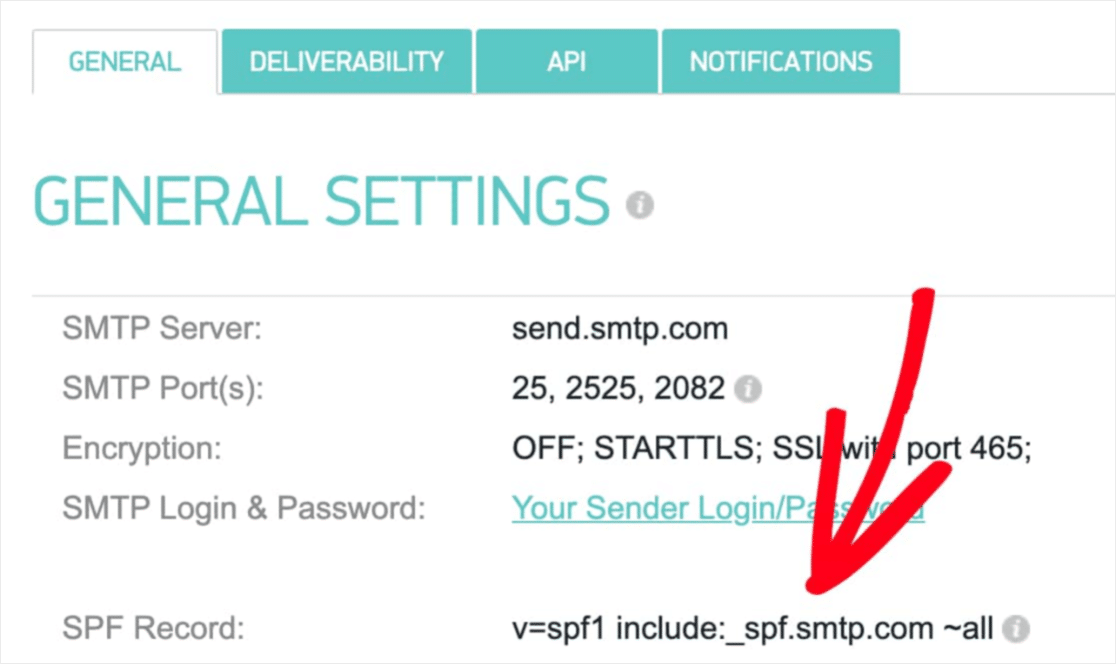
Du måste lägga till denna SPF-post i DNS-inställningarna för din webbplats. Om du inte vet hur du gör detta, kolla in den här artikeln om hur du lägger till SPF-poster.
OBS: I DNS-inställningarna ser du ett fält som heter TTL (Time To Live). Standardvärdet är vanligtvis 1 timme. Om du kan ändra denna post, rekommenderar vi att ändra den till 1 dag eller 86400 sekunder. Detta gör att servern kan cachelagra denna information under en hel dag.
Step #5: Validate Your SPF Records
If you’ve added the SPF record, then it’s time to validate that the changes were updated. It may take up to 48 hours for the changes to reflect. So, validating the results before moving on to the next step is a good idea.
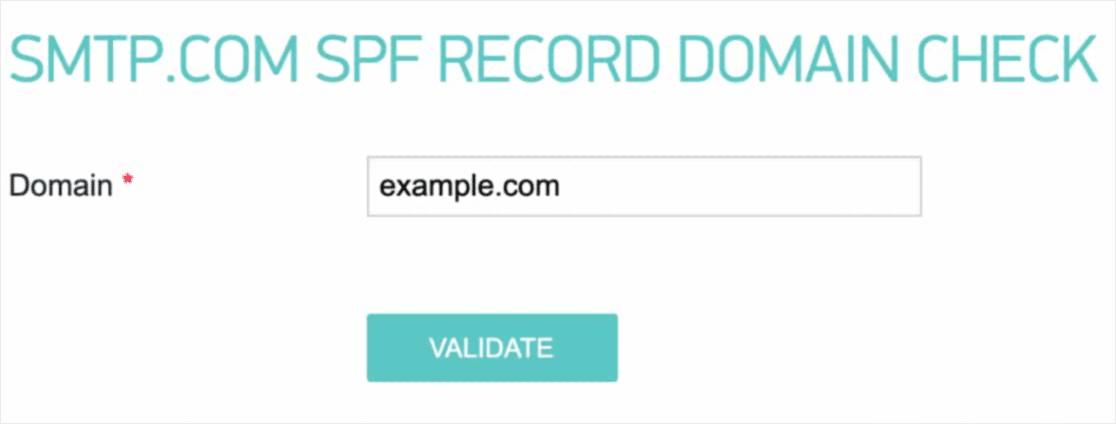
Klicka på den här länken och gå till avsnittet som säger SMTP.com SPF Record Domain Check.
I fältet Domän, skicka in din webbplats URL och klicka på Validera:
If all went well, you should see this Pass message:
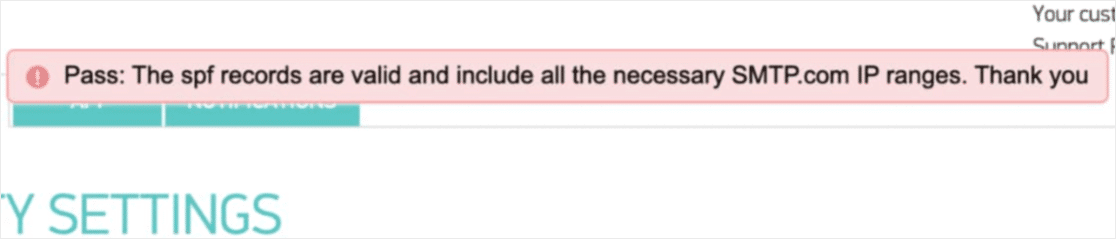
Och du är klar!
Step #6: Send a Test Email
You’re all set. This is the last step where you verify that everything’s working as it should be. Thankfully, WP Mail SMTP has a built-in ‘Test Email’ function.
Head over to WP Mail SMTP and click on the Email Test tab:
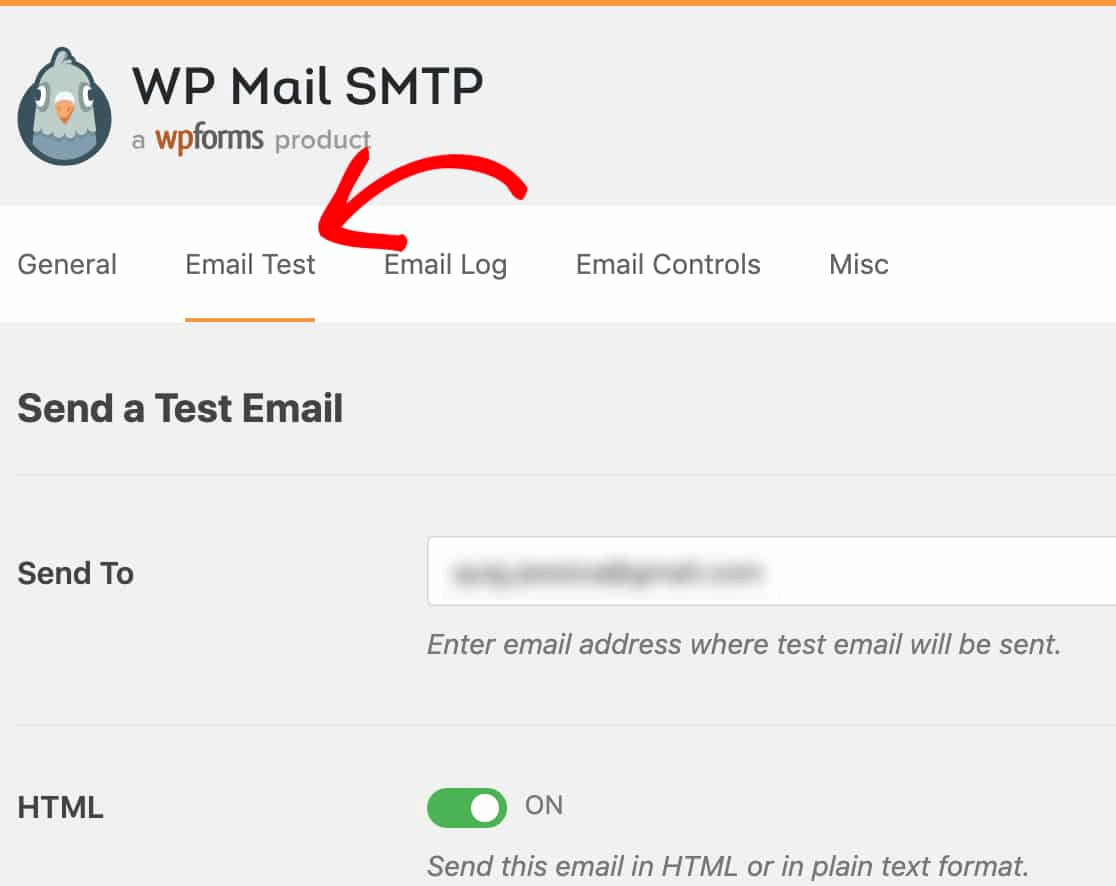
Ange en e-postadress som du har tillgång till och skicka ett test-e-postmeddelande. Om allt gick bra bör du se detta framgångsmeddelande:

Kontrollera nu din inkorg och bekräfta att du fick e-postmeddelandet i din Primära inkorg. Vi är mycket säkra på att du hittar det där.
Slutligen, allt du behöver göra är att verifiera att e-postmeddelandet gick igenom ditt SMTP.com-konto. Klicka på den här länken för att gå till sidan Leveransinställningar. Om du ser 'Godkänd'-meddelandet som detta, gjorde du ett utmärkt jobb:
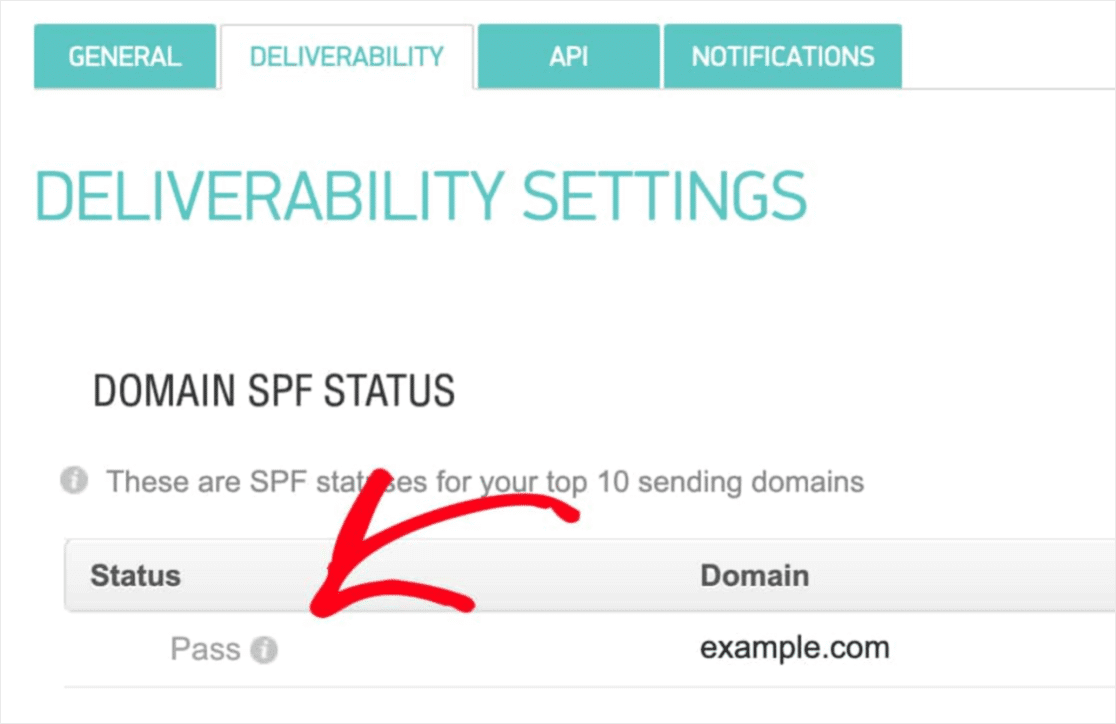
If you don’t see a ‘Pass’ status, then you did an oopsie. Go back to the previous section and go through steps 1-4 and make sure that you didn’t miss anything.
Prissättning
The final consideration here is pricing.
It’s pretty clear that WP Mail SMTP is geared more towards solving a common issue without any coding.
As you go for the higher packages, you get much more value from WP Mail SMTP.
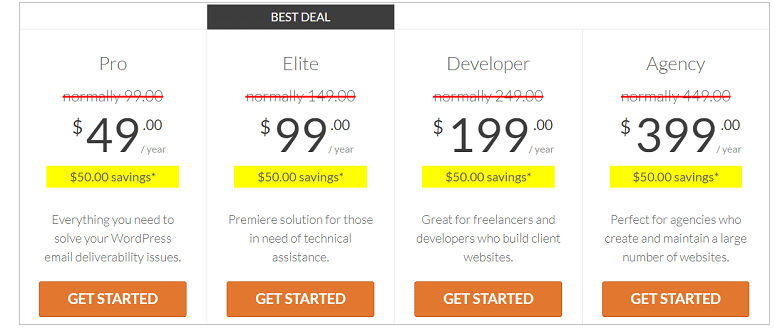
WP Mail SMTP comes under 4 different pricing slabs:
- Pro Plan: Available at $49/year. It offers a year of free downloads, support and updates.
- Elite Plan: Available at $99/year. This plan comes with a free White Glove setup and priority support.
- Developer Plan: Available at $199/year. You get a year of free downloads, support and updates. You can add upto 20 different websites.
- Agency Plan: Available at $399/year. This license includes everything in the Developer Plan and you can add upto 100 websites.
Which one’s most suited for your needs? Drop a comment and let us know.
Avslutning
Det var allt för den här gången, gott folk!
Our verdict? WP Mail SMTP is definitely a good investment for growing businesses.
As we said, any WordPress site could potentially suffer from the exact same problem with emails. Even if you’re running a really small business, you could end up running your revenue to the ground because your site didn’t let you know when a customer made an inquiry.
Make no mistake, the level of ease with which you can resolve email deliverability issues with WP Mail SMTP is unrivaled. And if you consider the pricing, it’s even more appealing.
In our view, WP Mail SMTP is definitely the best SMTP plugin for WordPress. And if you’re ready to solve the issue, you should get the plugin right now.
If you’re not ready to solve such problems yet, you should focus more on marketing. A nice way to get more traffic, engagement, and conversions would be to use push notifications for your site. We recommend using PushEngage to create your push notification campaigns.
PushEngage är den främsta mjukvaran för push-notiser i världen. Så, om du inte redan har gjort det, kom igång med PushEngage idag!


