What are push messages?
Push messages are short, clickable messages delivered to a subscriber’s device even when they’re offline. You can easily send out any link to promote any part of your business using push messages from a simple, easy-to-use dashboard.
Here’s the most awesome part: Push messages are a super-easy way to get repeat visitors to your site on autopilot even if…
- You’re just starting and your fan base is still tiny
- Även om... du driver en e-handelsbutik med hundratals kampanjer varje månad
- Even if… you have a mega blog that’s already generating a ton of SEO traffic
I den här artikeln kommer vi att visa dig hur du får återkommande besökare direkt varje gång du publicerar:

You can get started for free right now. Once you start getting results from a free push notification software, you can switch or upgrade to get more features to help you grow faster.
But first, let’s understand a little more about push messages and how they work.
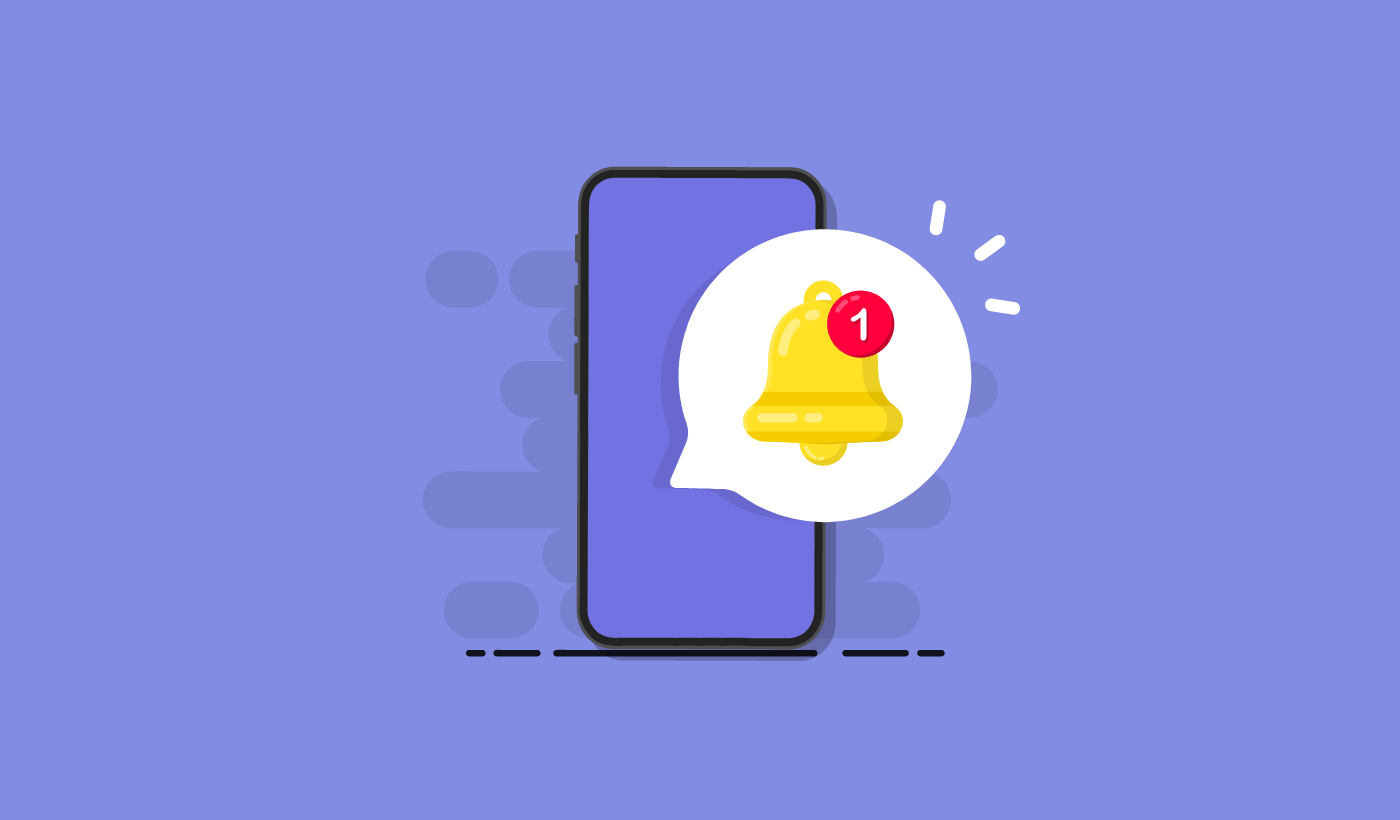
What Are Push Messages?
A push message is a short, clickable popup that you can send to a subscriber to promote offers and other content:
The best part is that the messages will get delivered even if your subscriber isn’t using a browser. It’s like an email blast, but with a web push message, your subscribers don’t need to be using an app to see your message. And unlike social media websites, there is no algorithm reducing your reach to get you to pay for ads.
The coolest part about web push messages is that you can use them to complement your lead magnets and email opt-in forms.
We recommend using PushEngage to get started with push messages for free. The simplest push message you can send for free is an RSS push message. In an RSS push, every time you publish a blog post, PushEngage automatically sends out a broadcast message to all your subscribers.
How to Add Push Messages to Your Website
Before you get started with push message campaigns, you’ll have to get a service to send push messages.
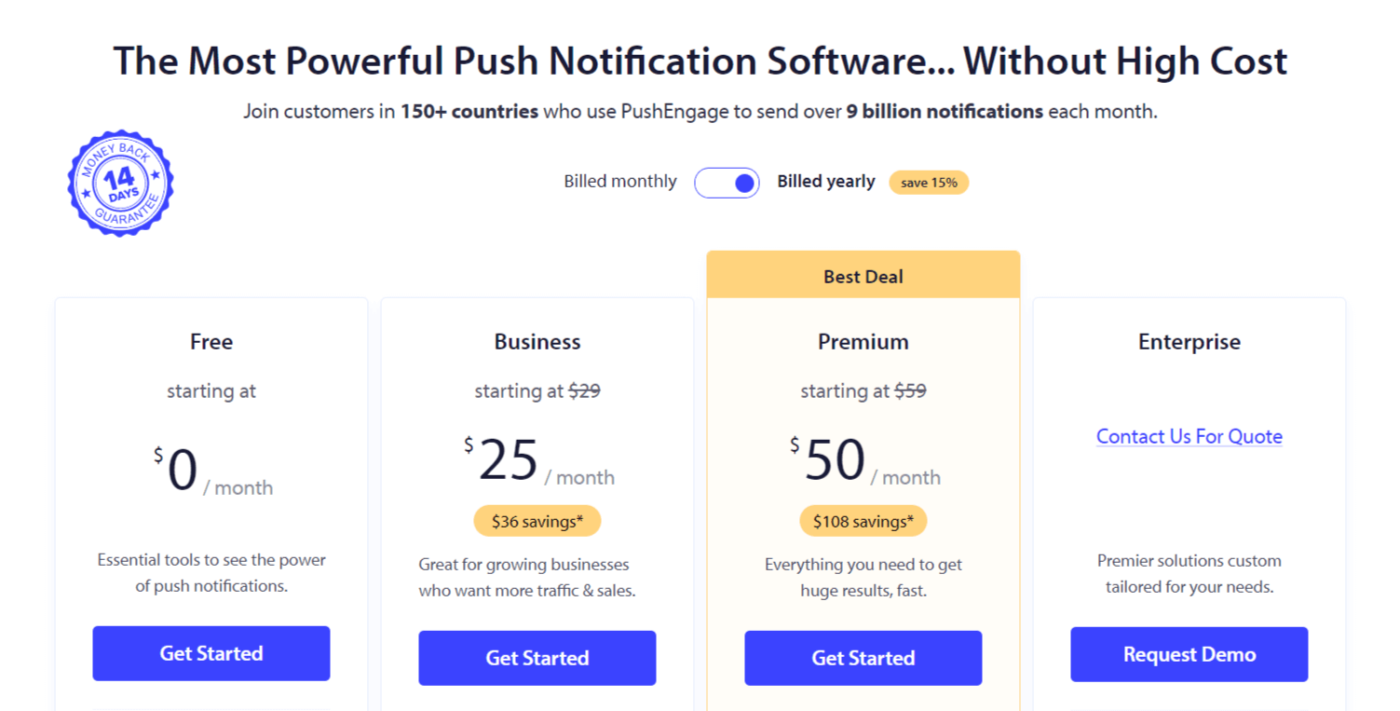
Vi rekommenderar att du börjar med PushEngage. PushEngage är ett av de bästa plugin-programmen för push-aviseringar för WordPress. Du når omedelbart upp till 200 prenumeranter med bara gratisnivån. Om din webbplats växer till mer än 200 prenumeranter kan du snabbt skala upp genom att uppgradera din plan.
Låt oss titta på hur du kan använda gratisversionen av PushEngage för att börja skicka push-meddelanden.
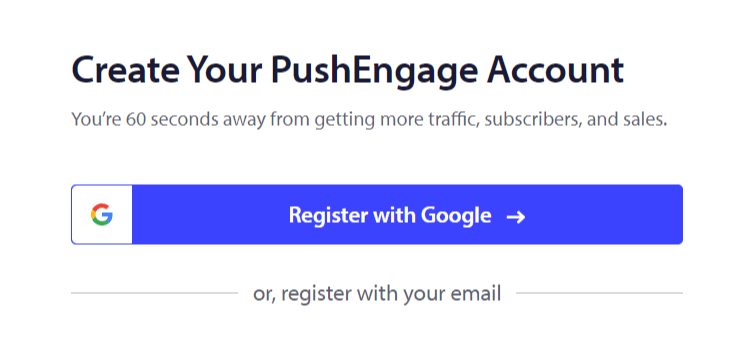
Steg #1: Skapa ett gratis PushEngage-konto
Gå till PushEngage och klicka på Kom igång:

Välj sedan planen för ditt PushEngage-konto. Du kan komma igång gratis, men om du menar allvar med att växa ditt företag rekommenderar vi att du skaffar en betald plan för att låsa upp mer avancerade kampanjer.
Steg #2: Registrera dig för PushEngage
Registrera dig för pluginet med dina användaruppgifter eller ditt Gmail-ID eller din e-postadress och lösenord:
Och följ bara instruktionerna och slutför inställningen av ditt konto.
Step #3: Install PushEngage to Your Site
När du har registrerat dig kommer du till PushEngage-instrumentpanelen:
The process to add push messages to your site is different for different platforms. So, we’ve created detailed, step-by-step guides for the most popular platforms for you:
- Installera push-notiser på WordPress
- Installera push-notiser på WordPress (utan plugin)
- Installera push-notiser på WooCommerce
- Installera push-notiser på Wix
- Installera push-notiser på Blogger
- Installera push-notiser på Zoho
- Installera push-notiser på Volusion
- Installera push-notiser på Weebly
- Installera push-notiser på ClickFunnels
- Installera push-notiser på PrestaShop
- Installera push-notiser på OpenCart
- Installera push-meddelanden på CS-Cart
- Installera push-meddelanden på Drupal
- Installera push-meddelanden på Squarespace
- Installera push-meddelanden på X-Cart
- Installera push-meddelanden på BigCommerce
- Installera push-meddelanden på Jimdo
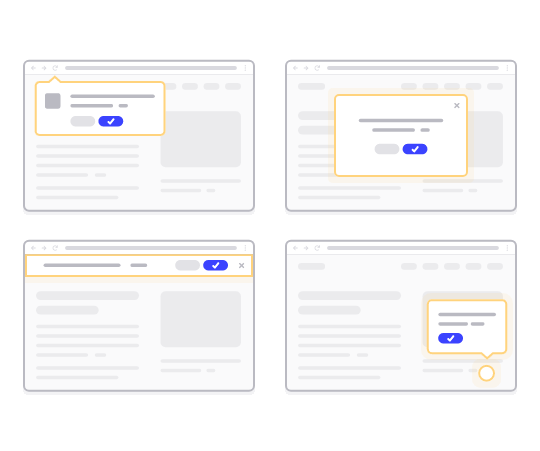
Step #4: Set Up the PushEngage Opt-In
Once you’re done installing PushEngage to your site, head back to the PushEngage dashboard and go to Design » Popup Modals and select an optin to collect subscribers:
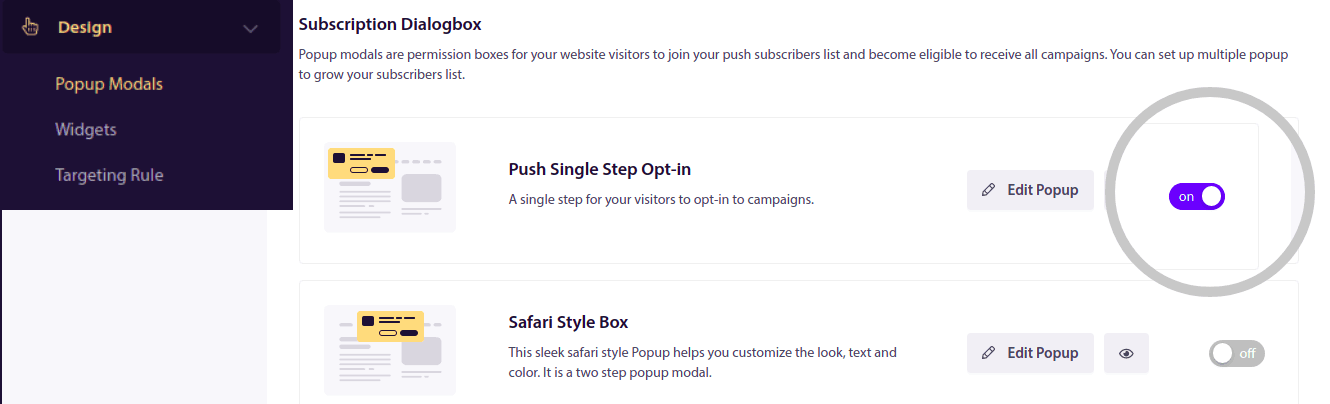
Härifrån kan du anpassa ditt godkännande för push-notiser. Om du behöver hjälp med det bör du kolla in den här artikeln om hur man skapar ett anpassat godkännande för push-notiser.
If you need some inspiration, you can check out this article on high-converting push notification opt-ins.
Remember: You need to install an SSL certificate on your website to be able to use single opt-ins. But you can install two-step opt-ins even without a secure website. So, if you have an SSL certificate installed, use single opt-ins. If not, check out this article on how to install an SSL certificate on WordPress websites.
Och det är allt!
You have successfully set up push messages on your website.
How Do Push Messages Work?
Let’s check out how push messages work.
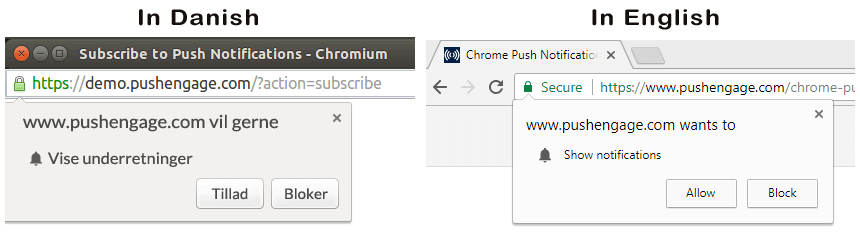
The short version is that every time a new visitor enters your website, they get prompted to become a push notification subscriber.
Next, you use a web push notification service like PushEngage to create and schedule the messages you want to send out to your subscribers. You can either send out a single push message manually or set up an automated sequence of push messages:

Also, you can choose to either send it to every subscriber on your list or to specific segments of your subscribers. Finally, your subscribers receive your messages when their device comes online and take the suggested action.
To PushEngage and our servers, your subscribers are a unique hash number generated based on your subscriber’s device and browser. Besides, the server can also store the geolocation of your subscribers. No personal or identifying data is stored for any of your subscribers.
The beauty of it all is that you don’t need to know anything about coding or how to maintain the original servers. We take care of all that for you. All you have to worry about is setting up your campaigns and making a profit!
By now, you’re probably wondering how personalized push messages work if the servers only store a hash number and no personal details. This is where the service provider API comes into play. For you, that would be the PushEngage Javascript API. You can use this API and connect it to any other CRM or database you might have.
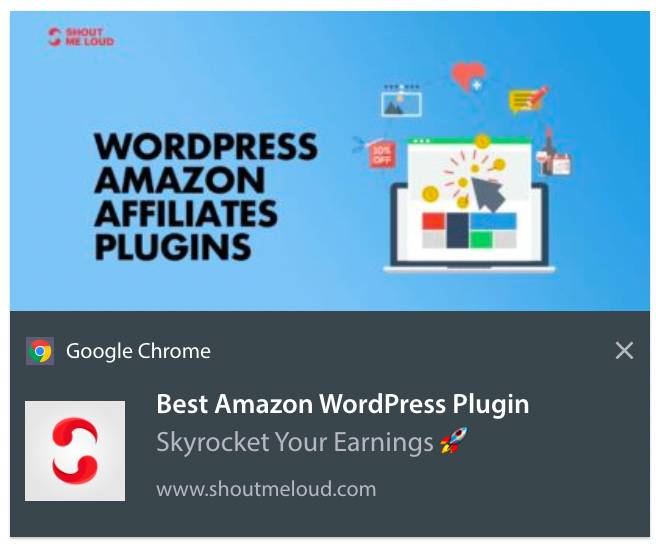
This allows you to use the personal details of your subscribers to send them personalized push messages like this one:

You can also send out advanced eCommerce campaigns such as cart abandonment campaigns without using the PushEngage API.

Vad händer härnäst?
Det var allt för den här gången.
Om du precis har börjat med push-meddelanden, kolla in hur du skapar ditt första välkomstmeddelande med PushEngage. Ett välkomstmeddelande är utmärkt för återengagemang och för att få återkommande besökare till din webbplats.
Tycker du att det är svårt att komma på kampanjidéer? Kolla in dessa fantastiska resurser:
- 75 episka pushmeddelandeexempel du kan stjäla just nu
- Hur man använder push-meddelanden om formulärabstinens för att återhämta förlorade leads
- Hur du skickar personliga push-notiser med Drip-attribut
- 10 exempel på e-handelsbutiker som använder push-notiser väl
- 8 personliga push-notiser som fungerar [stöds av data]
Och om du inte redan har gjort det, kom igång med PushEngage idag!


