Content marketing is not an easy task. The longer you keep at it, the more you realize how important it is to automate certain tasks for greater impact. Thankfully, automated push notifications can take the pressure right off your shoulders.
Automated push notifications are single web push notifications or a series of push notifications that keep working in the background. Automated notifications work without any manual action on your part.
That’s the point: They’re completely automated.
Set ‘em and forget ‘em!
In this article, we’ll show you how to use simple, actionable tricks to bring in traffic and sales on autopilot:
- Even if… you’ve never used push notifications before and you have no idea how to start;
- Even if… you’ve experimented with automated push notifications, but you failed at it;
- Even if… you’ve used a couple of automated campaigns and need help with scaling up;
These 11 ideas are going to help you develop a loyal fanbase and monetize it more effectively.
Let’s just dive right in.
- Triggered vs Automated Push Notification Campaigns
- Automated Welcome Push Notification
- Welcome Drip Push Notifications
- Abandoned Cart Campaigns
- Kampanjer för övergivet surfande
- RSS Feed Campaigns
- Automated Re-engagement Notifications
- Page Visit Trigger Campaigns
- Push Notification Click Campaigns
- Repeating Notifications
- Subscriber Timezone Notifications
- Email Opt-In Notifications
Triggered vs Automated Push Notification Campaigns
Triggered campaigns involve setting up a push notification, defining a trigger to set it off, and a workflow to control its scheduling. Automated push notifications are set off automatically at specific intervals.
For all intents and purposes, they look the same from the outside. The critical difference is that trigger campaigns are way more flexible and customizable. Not to mention, push notifications cost way less than most other channels.
Since triggered campaigns can have any custom trigger at all, it’s impractical to cover them all in one article. So, you can check out trigger push notification campaigns for eCommerce websites in our other article.
In this article, we’ll focus only on automated push notifications and trigger campaigns for publishers.
Now, before we jump into the different types of campaigns, there’s something you should know. A lot of these campaigns are available only for Business, Premium, and Enterprise subscriptions of PushEngage.
PushEngage is the #1 web push notification software in the world and it’s tailor-made to help businesses grow.
So, if you haven’t already, get started with PushEngage now.
Let’s take a look at our 11 epic automated push notification ideas now.
#1. Automatiserad välkomstpushavisering
En välkomstavisering är en enkel pushavisering som är avsedd att uppskatta alla nya prenumeranter.
The idea is simple:
- Confirm that your new visitor has subscribed to push notifications
- Incentivize your new subscribers to stay engaged with your brand
Check out this article to get an even better idea of why welcome push notifications are important.
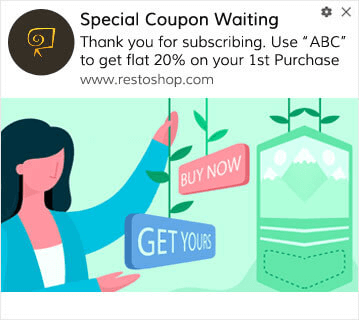
You can even add an offer or gift for subscribing to your push notifications. This is pretty common with a lot of our customers. You can use your welcome push notification to:
- Dela en välkomstkupong
- Erbjud premiumfunktioner
- Skicka gratis leverans
- Erbjuda gratis gåvor
- Onboarda din prenumerant med en genomgång
Nu ska vi konfigurera din första välkomstpushavisering med PushEngage.
Go to Settings » Site Settings » Installation Settings in the PushEngage Dashboard, and scroll down. You’ll need to check the box to enable Welcome Notification:

Then you can configure your welcome message and welcome image as well.

Det är så enkelt!
#2. Welcome Drip Push Notifications
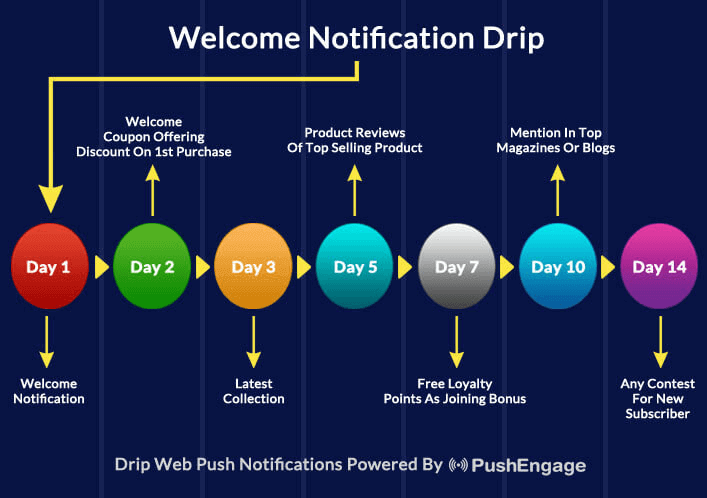
Welcome drip notifications are a series of welcome messages that are triggered when someone new subscribes to your push notifications.
It’s an extension of a stand welcome notification. You can use a welcome drip to do everything a welcome notification, but better. Once you’re familiar with a welcome notification, you should move on to a welcome drip sequence for even better engagement.
Here’s an example of a welcome drip sequence with push notifications:
You can get started with your own welcome drip notifications using some of these onboarding templates. Or, you can check out how ShoutMeLoud uses drip notifications to increase engagement and sales.
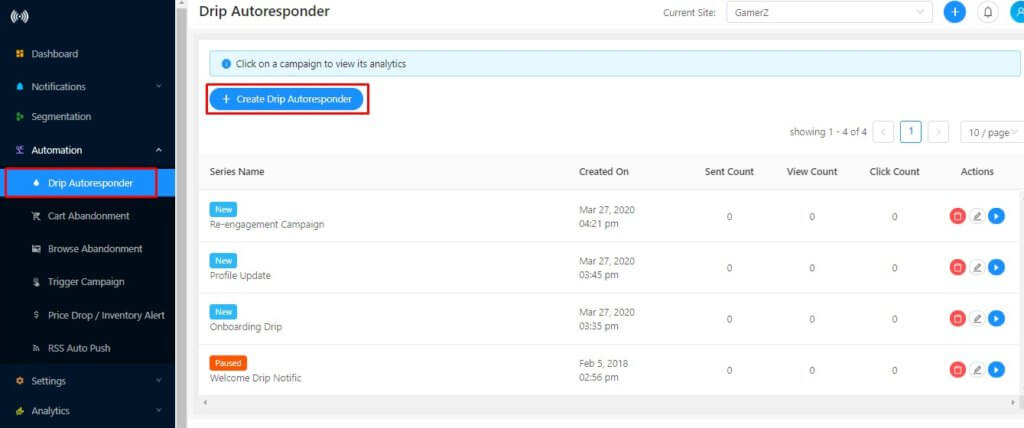
Now, let’s see how you can set up a welcome drip from your PushEngage Dashboard.
Head over to Automation » Drip Autoresponder and create your autoresponder series:
Leave the targeting to its default value. This will send the drip series to all new subscribers. And create your notifications inside the dashboard:
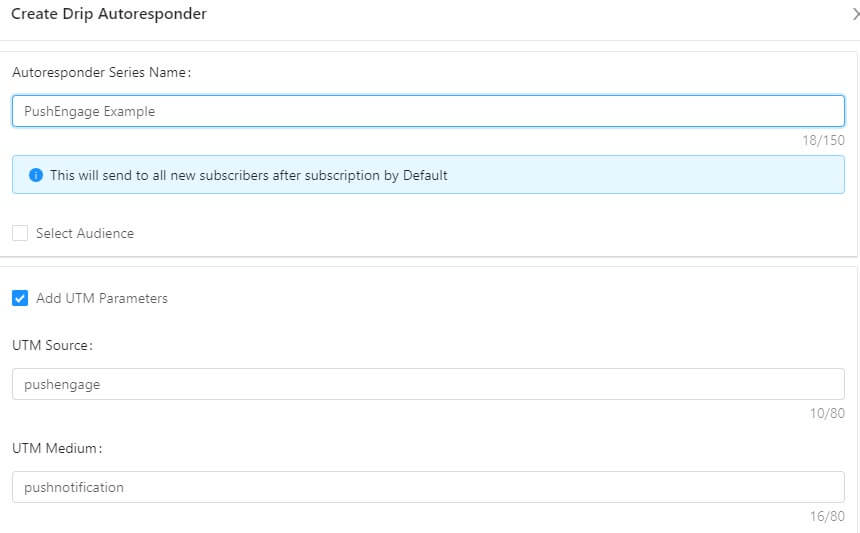
Proffstips: You can even set the UTM parameter for the campaign here. This way, you’ll see what percentage of traffic comes from this welcome drip on Google Analytics.
Finally, set the delay between each notification:
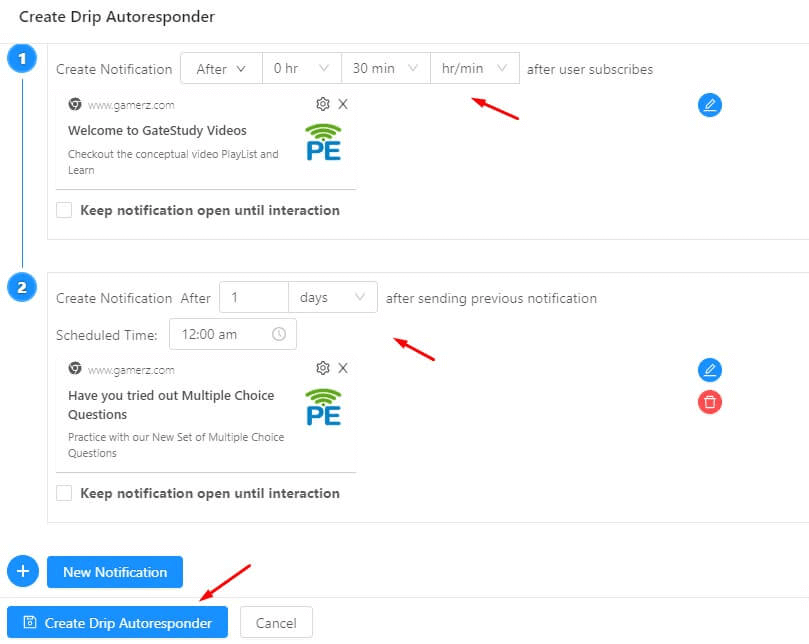
And that’s all! Your welcome drip campaign is now live.
#3. Abandoned Cart Campaigns
Övergivna kundvagnar uppstår när en potentiell kund lägger en produkt i kundvagnen och inte slutför köpprocessen.
Ditt jobb är att minska antalet övergivna kundvagnar så mycket som möjligt.
Ett sätt att återvinna dina förlorade försäljningar är att använda pushaviseringar för övergivna kundvagnar. Kampanjer för återhämtning av övergivna kundvagnar riktar sig till prenumeranter med en övergiven kundvagn och skickar dem uppföljningar, påminnelser, erbjudanden, kuponger och rabatter.

Det är en enkel idé: Få så många människor som möjligt att köpa något.
Pushaviseringar för övergivna kundvagnar har en mycket verklig inverkan på din resultatrad. Till exempel får WickedWeasel 2 000–4 000 USD per vecka i extra försäljning från sin kampanj med pushaviseringar för övergivna kundvagnar.
Nu ska vi konfigurera din allra första kampanj för övergivna kundvagnar med PushEngage.
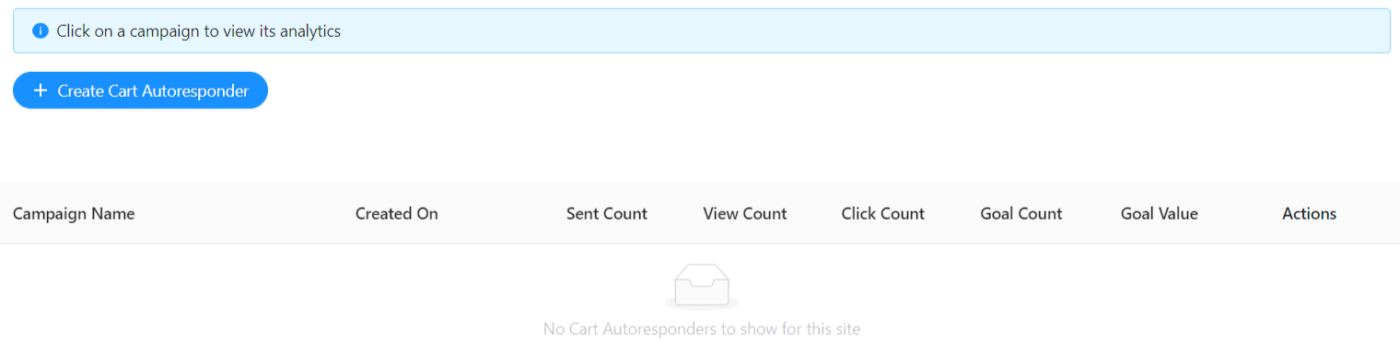
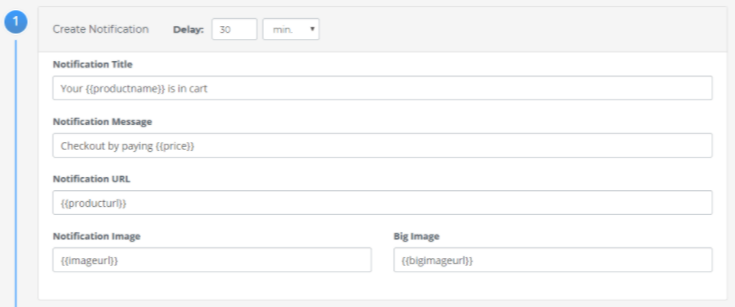
Head over to Automation » Cart Abandonment in the PushEngage dashboard and create a new Cart Abandonment Campaign:
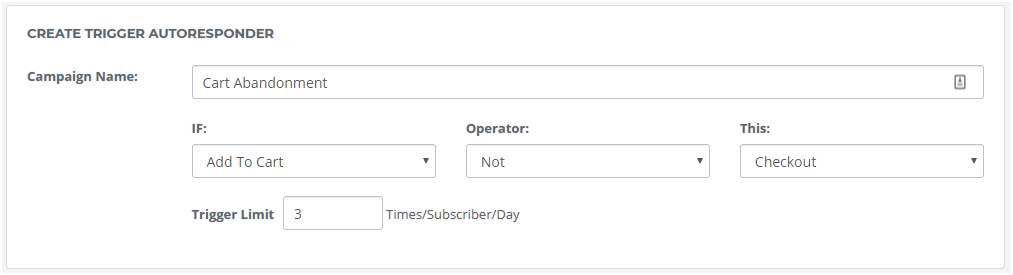
Then, use the PushEngage cart abandonment trigger to send out automated push notifications:
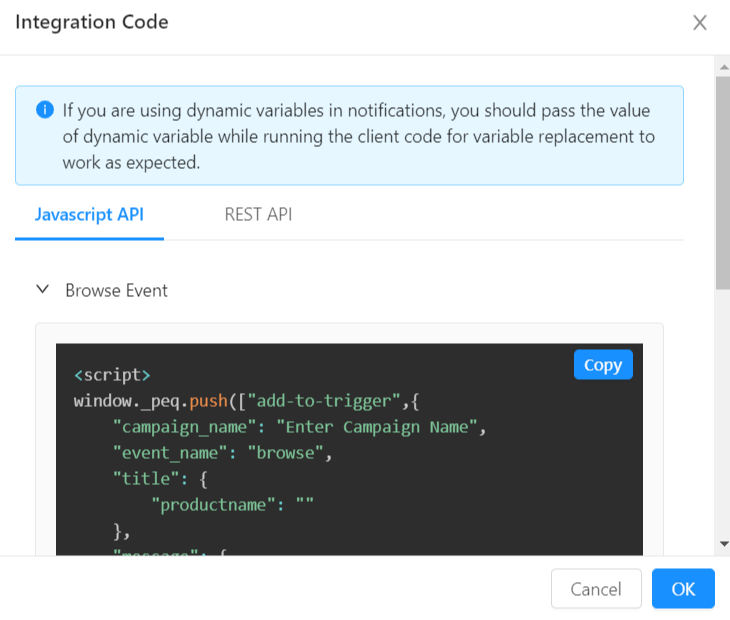
Create your notifications inside the PushEngage dashboard:
And finally, just integrate the code snippet with your website.
That’s all you need to do. The entire setup takes 10 minutes tops.
#4. Browse Abandonment Campaigns
Övergivna webbläsningar är precis vad det låter som. Det är när en webbplatsbesökare surfar på din webbplats och plötsligt bestämmer sig för att gå därifrån. Dessa incidenter är också kända som "funnel abandonment" av andra leverantörer.
Övergivna webbläsningar är en mycket vanlig företeelse inom nästan alla branscher.
Och det är verkligen svårt att minska eller kontrollera eftersom det inte finns något sätt att ge incitament till en slumpmässig användare att stanna kvar på din webbplats. Det är här kampanjer för övergivna webbläsningar är så kraftfulla.
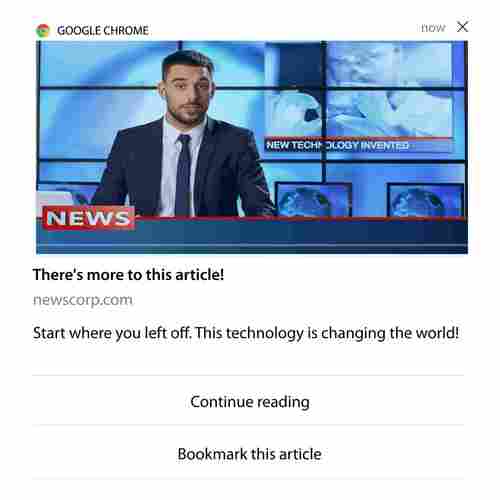
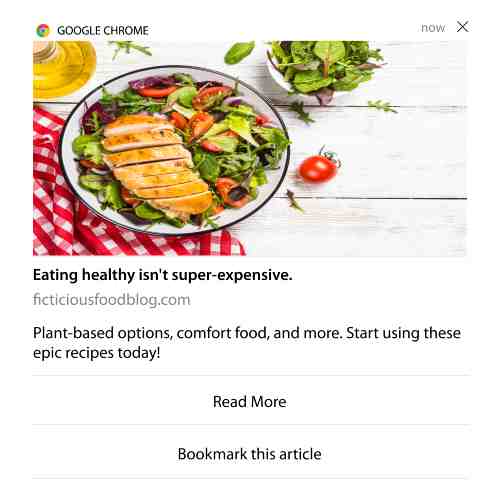
Här är ett exempel på pushaviseringar för övergivna webbläsningar för en utgivare:
The impressive part about PushEngage is that you can set up campaigns for pretty much any industry. So, you can send browse abandonment push notifications for SaaS and travel websites as well.
So, how do you set up browse abandonment campaigns?
With cart abandonment, there’s a very clear parameter to fire your push notifications. For browse abandonment, you may want to consider parameters such as:
- Added the product to Wishlist
- Looked at the same product more than X times
- Browsed more than X products in the same category
- Sökte på webbplatsen efter en specifik produkt
- Stayed on site for at least X minutes before bouncing
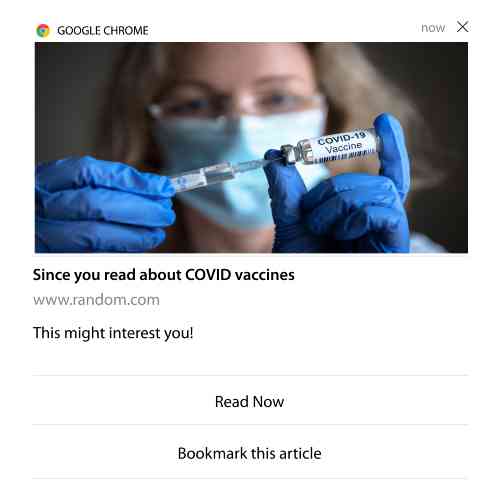
The idea behind this campaign for an eCommerce site is to get the subscriber to add the product to their cart. For publishers, it could be a click or a download on the article they were reading.
Head over to the PushEngage dashboard and then head to Automation » Browse Abandonment » Create
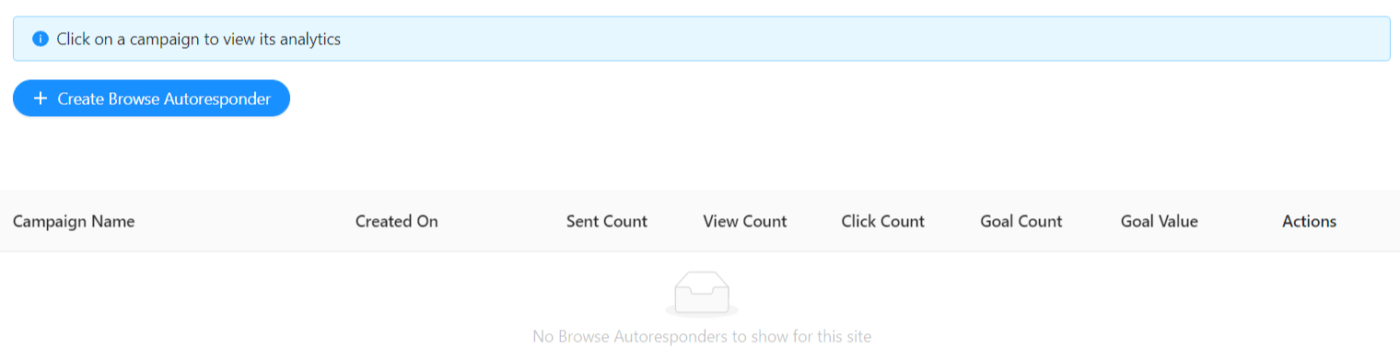
Next, set up the basic campaign details, trigger limits, and UTM parameters:

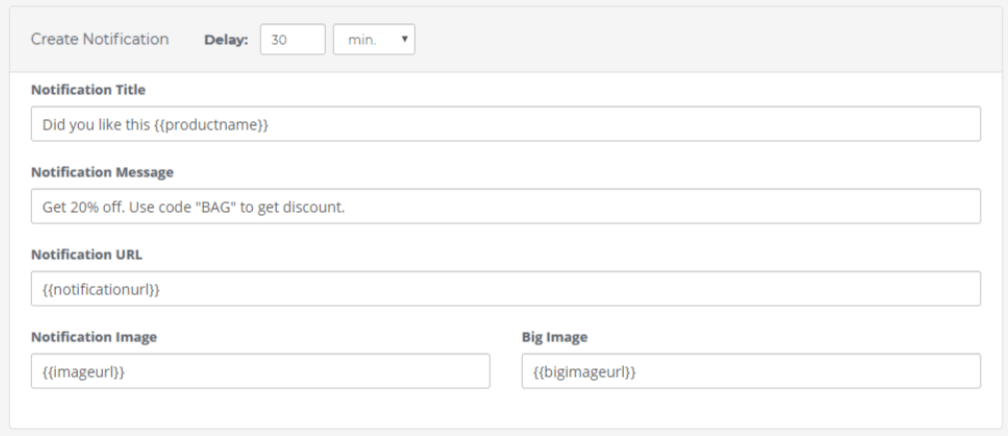
Then, create your campaign right from the dashboard and add delays to each notification in the series:
Finally, add the code to your website.
Och du är klar!
#5. RSS Feed Campaigns
RSS Auto Push allows you to automate your notifications via RSS.
PushEngage checks every 10 minutes for a new post added to your RSS feed. If a new post is found, PushEngage converts it into a push notification and sends it out to all your subscribers. The best part is that it happens on complete autopilot.
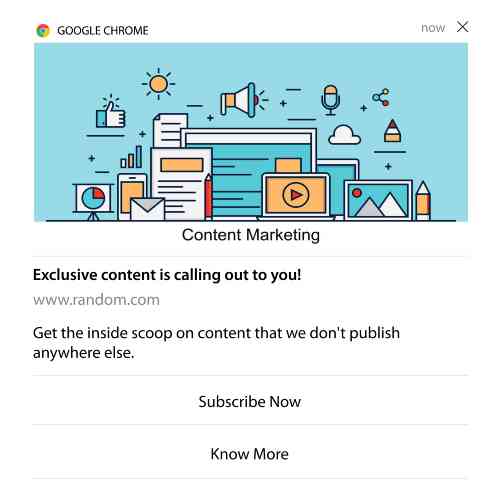
RSS Feed campaigns are perfect for publishers and news sites:
If you’re a big publisher and you publish more than 1 post every 30 minutes, PushEngage keeps a delay of 5 minutes between 2 post notifications.
Before we go any further, you should check out this article on how to use RSS feeds for more epic tips and tricks.
Now, let’s go set up an RSS feed campaign on PushEngage.
Head over to Automation » RSS Auto Push and just turn it on:
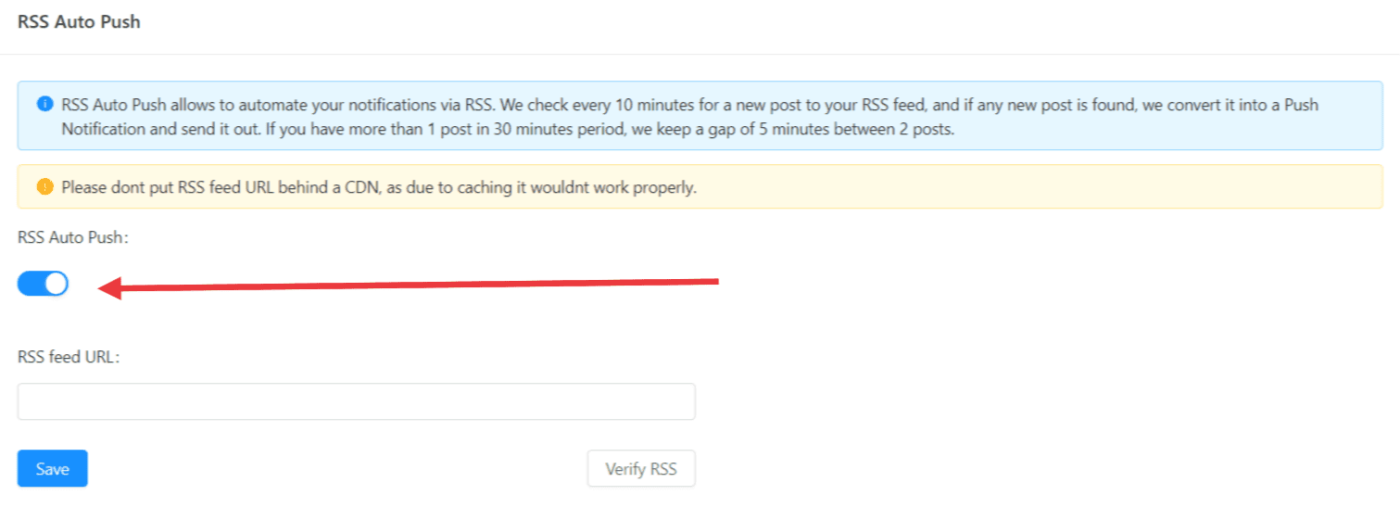
You’ll have to paste in your RSS feed URL. For a WordPress site, it’s usually in the format of:
Then, click on Verify RSS.
And finally, click on Save.
That’s it! You’re all set. Every time you publish a new post, it will automatically go to all your subscribers.
#6. Automated Re-engagement Notifications
You can set up automated re-engagement campaigns for subscribers who haven’t engaged with your content for a while.
But why would you do it in the first place?
How about this:
- The cost of acquiring new customers is 5 times more than the cost of retaining existing customers
- It’s easy to target and remarket to a known audience whose personal preferences we already understand.
- In the long run, engaged customers give more business to the company than someone who barely connects with your brand.
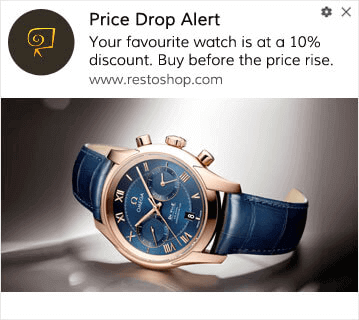
Ofertia was able to increase their repeat users by 39% using push notifications offering personalized deals. They’re not the only ones either. You can use this for an eCommerce website to great effect:
There are lots of ways to re-engage your subscribers.
But one of the most effective ways is to use Segmentation. Using dynamic segments, you can figure out a lot about your subscribers and send them personalized content that they’ll love.
In your PushEngage dashboard, head over to Segmentation and create a new Segment:
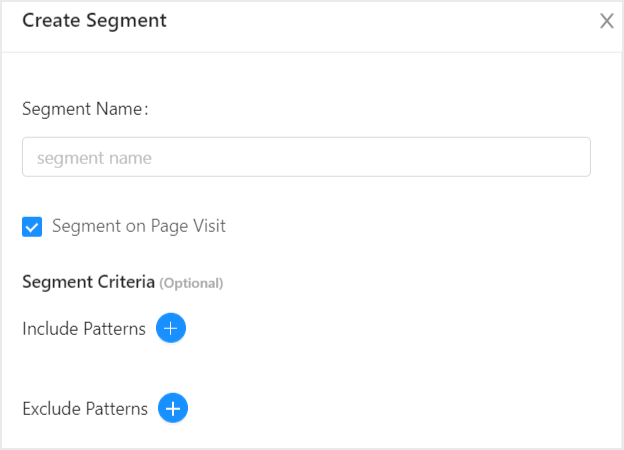
This allows you to create segments based on behavior and browsing patterns.
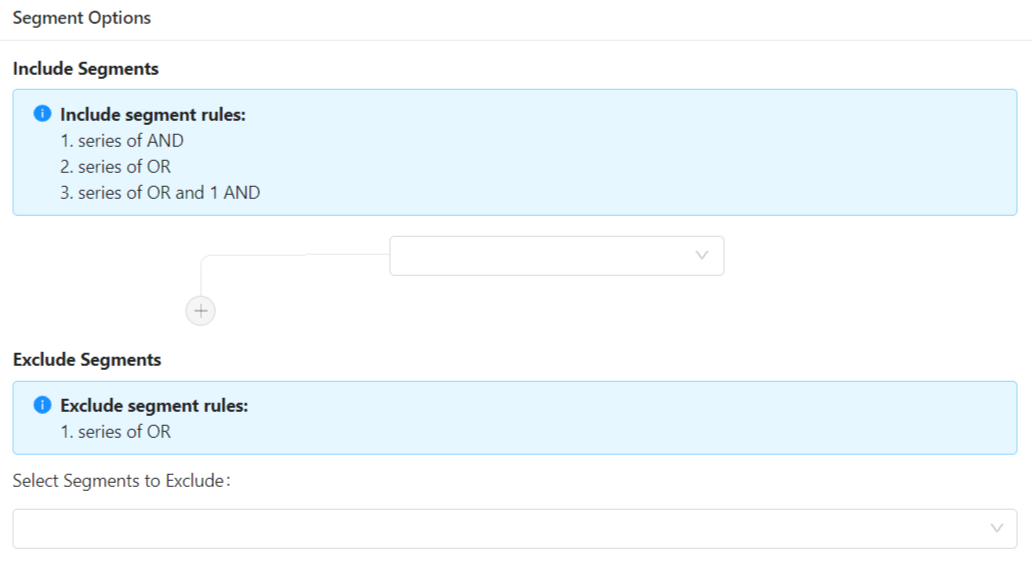
You can actually set up a sequence of AND/OR operations that decide when certain segments receive automated push notifications:
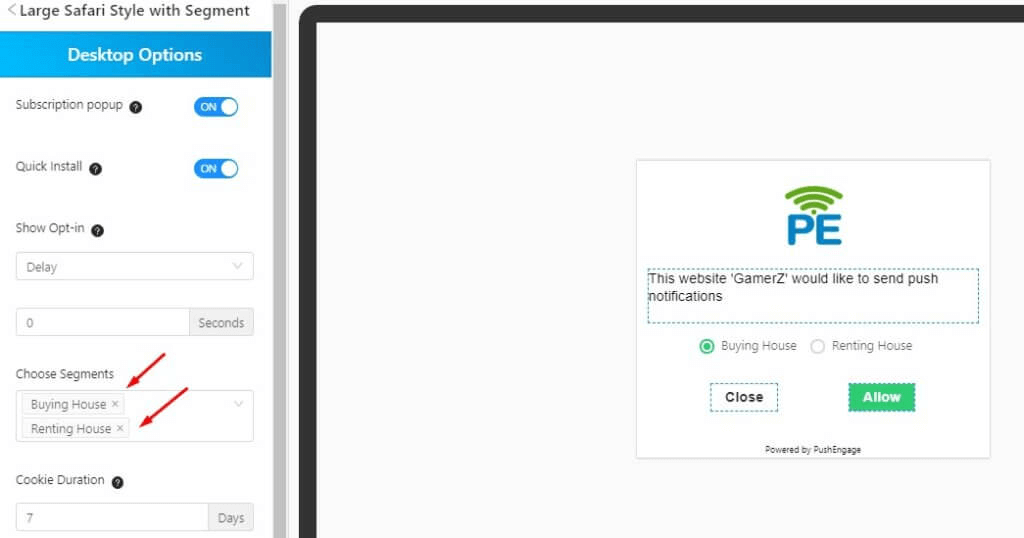
You can even segment your users when they subscribe to push notifications. Head over to Settings » Subscription Settings » Subscription Dialog Box.
Choose the Large Safari Style with Segments option and then add your segments here:
If you need even more ways to segment your users, you can create custom segments based on user actions using the PushEngage Javascript API.
#7. Page Visit Trigger Campaigns
Page visit triggers are an extension of push notification segments. All you have to do is create a segment when a web visitor browses a URL with a particular phrase or pattern.
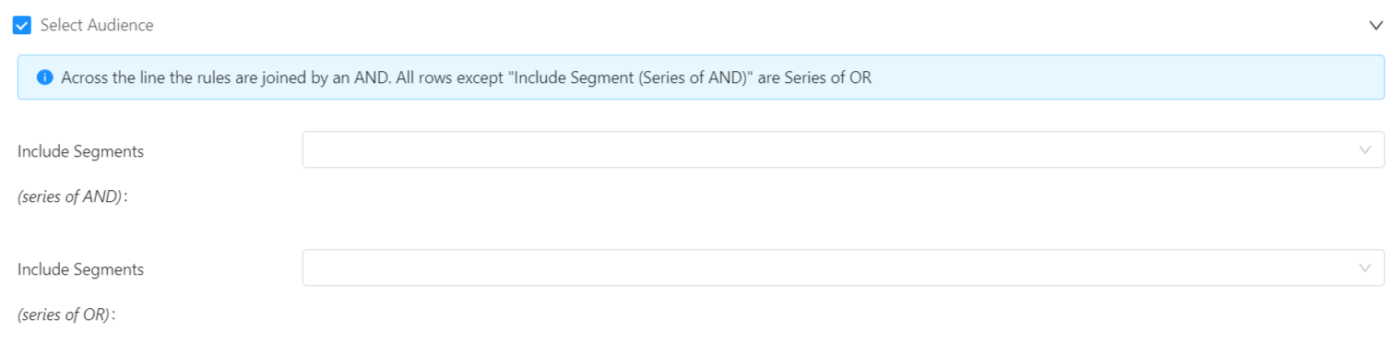
Then, you just head over to Automations » Drip Campaigns and set your audience to a specific segment:
This allows you to create really personalized and automated push notifications.
And the best part is that you can create custom segments in PushEngage in a couple of minutes.
Snyggt, eller hur?
#8. Automated Push Notifications from Click-Through
You can’t create push notifications that get triggered when your subscribers click on a delivered notification using PushEngage.
But there’s a very clever workaround.
You can create a segment based on the URL that a particular notification leads to. Every time someone lands on this URL, they get added to the segment and you can use this segment to send targeted notifications.
Push notification click campaigns are essentially an extension of the standard audience segmentation for drip campaigns.
Did you like that idea? Let us know in the comments below!
#9. Repeating Automated Push Notifications
Imagine that you have…
- A weekly sale for a flea market;
- Or a weekend sale;
- Or a stock clearance sale;
- Or a monthly flash sale.
How inconvenient would it be to have to create push notifications for every event manually?
Fortunately, you can set repeating notifications with PushEngage.
Repeat notifications are scheduled and automated push notifications for a recurring event. You can set them up once, specify a schedule, and you’re done.
That’s just one of the ways in which MyDeal uses push notifications. Be sure to read the full case study!
Gå till Notifications » New Notification och lägg till en avisering i din PushEngage-instrumentpanel. Rulla sedan ner till schemaläggningssektionen och gå till fliken Repeat Scheduling:
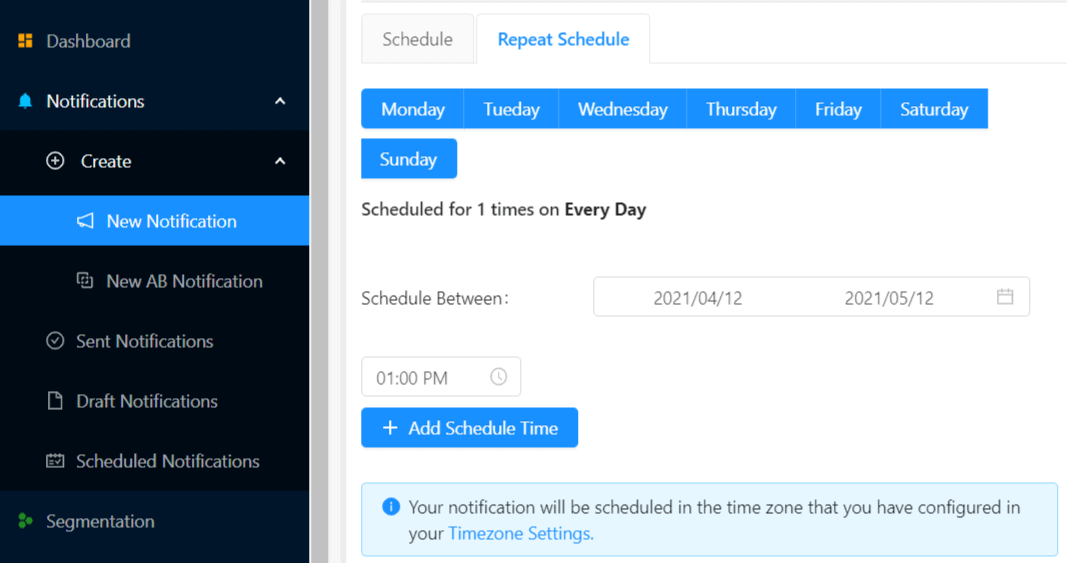
Ställ bara in tidpunkten så är du klar!
#10. Subscriber Timezone Notifications
Subscriber timezone notifications are exactly what they sound like. You send automated push notifications to your subscribers in their timezone.
Why’s this such a big deal?
Subscriber timezone notifications have higher open rates. Typically, any push notification gets delivered even if your subscriber is offline. These notifications then pile up and get ignored when your subscriber finally comes online.
On the other hand, subscriber timezone notifications get delivered when you KNOW your subscriber is most likely online.
Pro-Tip: Use A/B testing to figure out the perfect time to send your subscribers a push notification.
Subscriber timezone notifications feel way more personalized. And if you’re smart about it, you can combine it with geolocation data to personalize your notifications even further. This is exactly what Phooto did when they used local languages to skyrocket their open rates.
Let’s set up subscriber timezone notifications in PushEngage now.
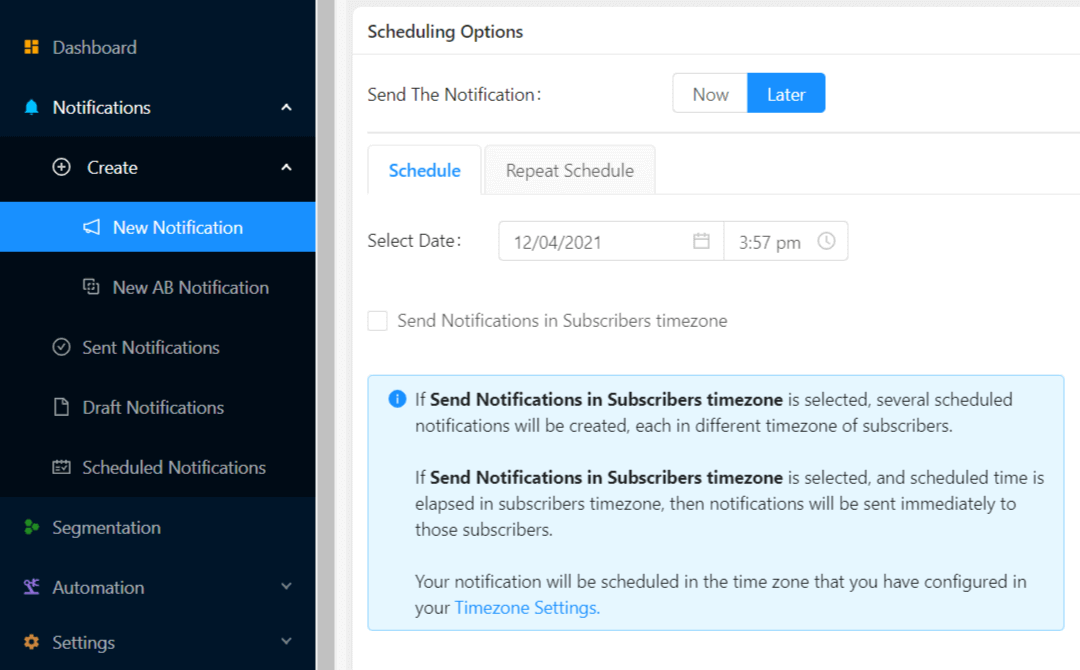
When you create a new notification, head to the Scheduling Options section and click on the checkbox that says Send Notifications in Subscriber Timezone:
That’s all! You’ll have to do the same for your drip campaigns as well, but the results are well worth the effort of click one button for each campaign.
Pro-Tip: The last two tactics were all about scheduling push notifications. But these two aren’t the only ways to schedule automated push notifications. Check out our article on how to schedule push notifications for more epic tricks.
#11. Email Opt-In Notifications
Email marketing has long since been the best way to generate and nurture leads. The best part about automated push notifications is that you can generate more email subscribers using them.
It’s really simple to set up and using a combination of email and push notifications is way more effective than using one or the other.
All you have to do is send a trigger notification that asks the user to opt for email notifications.
Just create a custom call to action (CTA) button and insert a subscription link as the button’s URL. That’s really all you need to. If you’re not sure how to get a subscribe button, just follow along.
Head over to Notifications » New Notification » Create New Notification and turn on Multi-action buttons:
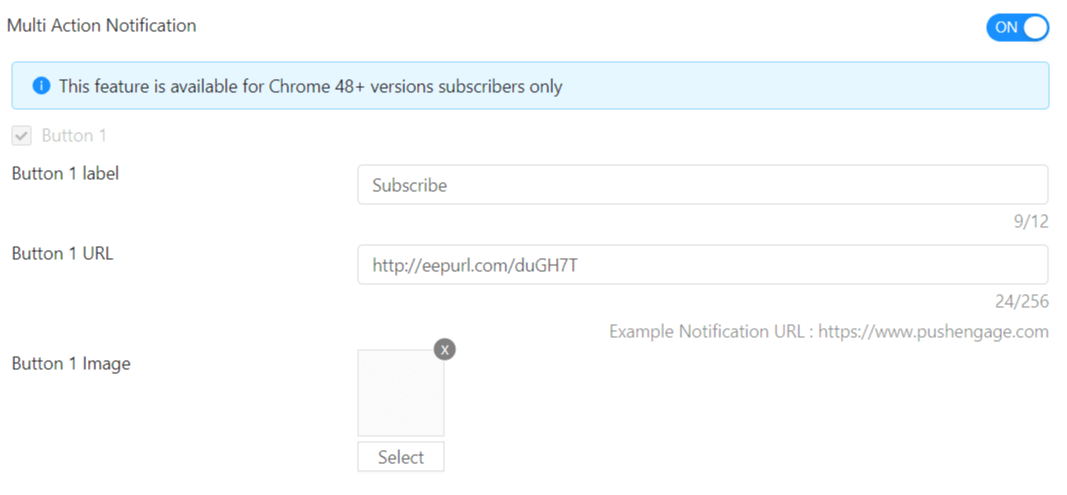
The URL should be a link to an email signup form. You can create one using pretty much any email service provider such as Drip. All you have to do is click on the sharing options for the signup form and copy that URL. Then, paste it into the button URL for your push notification.
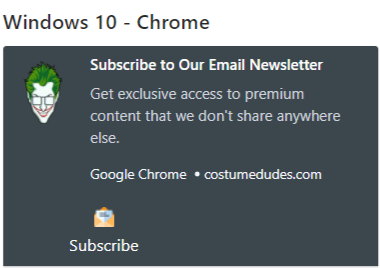
You can even add an email icon to your button to make it super-clear that you’re asking your users to subscribe to your email notifications:
Proffstips: You can use the same idea to grow your YouTube channel as well. Just add ‘?sub_confirmation=1’ at the end of your channel URL and paste it into your push notification button URL.
Every time someone clicks on the subscribe button on your push notification, they will get redirected to your YouTube channel and get prompted to subscribe to it.
Avslutning
Did you like these 11 automated push notification ideas?
Good news: This is not all you can do with PushEngage.
To understand how powerful the platform truly is, you should also check out trigger push notification campaigns for eCommerce websites you can set up today.
Also, PushEngage comes with its fair share of integrations. You can even set up some custom triggers using Zapier. These are fairly advanced campaigns and we recommend setting them up only once you’re familiar with our other built-in automation.
You should also know that the PushEngage Javascript API is very flexible and you can set up custom triggers for pretty much any action on your website.
Once you go through all these resources, you’ll realize that PushEngage is the #1 push notifications software in the market.
So, if you haven’t already, get started with PushEngage today!


