WordPress not sending email?
If your WordPress site stops sending emails, it can result in a direct loss to your business. You could end up losing valuable leads and potential customers. Or you could end up completely breaking the experience for your existing customers.
But what’s the problem, really? Why isn’t your WordPress site sending emails?
And more importantly, how do you fix it?
In this article, we’ll answer all these questions and give you an easy way to fix the issue.
Lad os dykke lige ned i det.
Why is WordPress Not Sending Email Notifications?
It’s a common issue among WordPress users and chances are high that it has nothing to do with your installed themes or plugins.
Your WordPress site can’t send emails because your hosting provider isn’t properly configured to send emails. And you may not even get notified of contact form submissions.
Just imagine the number of leads and potential customers you could lose in a matter of hours. For an online store, you may end up in a scenario where people buy from you, but none of your automated emails are sent. That can lead to a lot of confusion and even a loss of trust in your customers.
Let’s take a closer look at the technical end of the problem.
WordPress handles user registration emails using built-in PHP code called the wp_mail() function:

This is a big problem because not all WordPress hosts are configured properly to use PHP mail.
And even if the servers are configured properly, Gmail and other email service providers use strict spam filters. These spam filters try to verify automatically that your email is coming from your business and not a fraudulent third party. That’s where most of your emails get blocked or flagged as spam.
How to Fix the WordPress Not Sending Email Issue
The right way to deal with the issue is to send your emails using SMTP instead of relying on WordPress’ PHP mail.
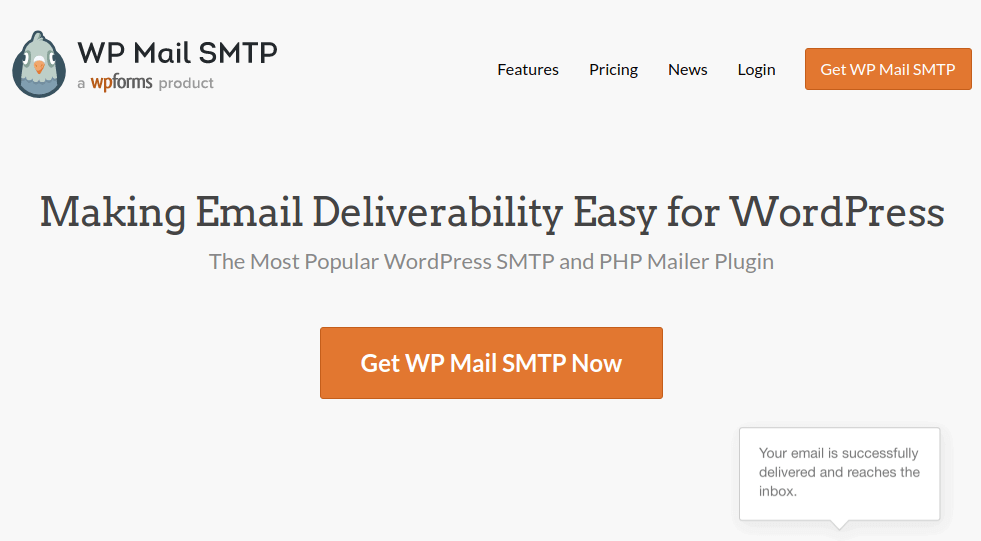
And we’re going to show you how to use an SMTP service to make sure that your email is always delivered. All you need to do is install the WP Mail SMTP plugin.
The WP Mail SMTP plugin will help you fix your email delivery issues in a few simple steps. And it’s not technical at all. It’s super simple and anyone can do it. So, go ahead and install and activate the plugin. If you’re not sure how to do that, this tutorial will show you how to install a WordPress plugin.
Step #1: Installing the WP Mail SMTP Plugin
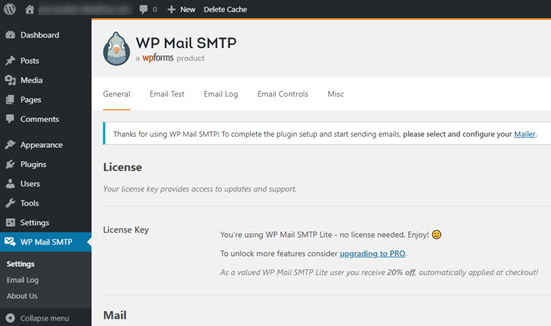
Once you’re done installing the plugin, head over to your WordPress dashboard and click on WP Mail SMTP to configure the plugin:
After you enter your license key, enter your email and name in the Mail section:
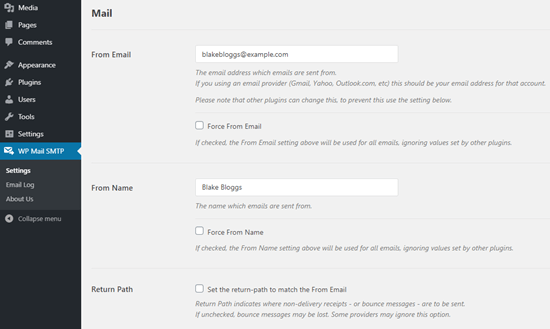
NOTE: Make sure that you enter the same email address as the one you’ll be using for your SMTP service. If there are conflicting emails, you’ll keep getting errors from the email service provider dashboard.
Bare rolig, hvis du bruger en anden e-mailadresse i andre WordPress-plugins som f.eks. WPForms. WP Mail SMTP tvinger andre plugins til automatisk at bruge den e-mailadresse, du bruger til at konfigurere din SMTP-tjeneste.
That’s all for now.
Step #2: Selecting an Email Service Provider
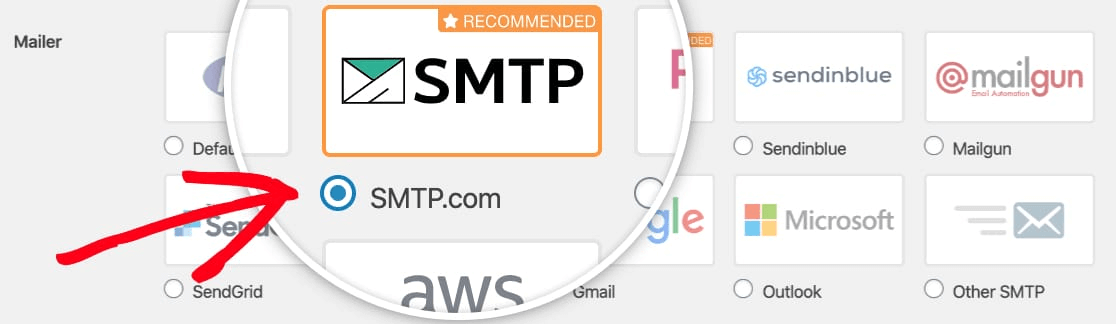
Next, you’ll need to choose an SMTP mailing service for your site. We recommend using SMTP.com. But you can find a lot of different services there.
Head over to your WordPress dashboard and go to WP Mail SMTP » Settings.
Then, under Mailer, select a service provider. You can choose between a whole host of options:

We recommend using SMTP.com:
To finish setting up the WP Mail SMTP plugin, you’ll have to create an account with SMTP.com next. It’s a super popular SMTP service that allows you to send bulk emails with high delivery rates.
Step #3: Creating an SMTP Account
Opret en ny konto:

Once you’ve signed up, you’ll be asked to click on an activation link via email and confirm your identity.
So, keep an eye out for multiple emails.
And then, go back to the WP Mail SMTP plugin to connect your SMTP account to the plugin.
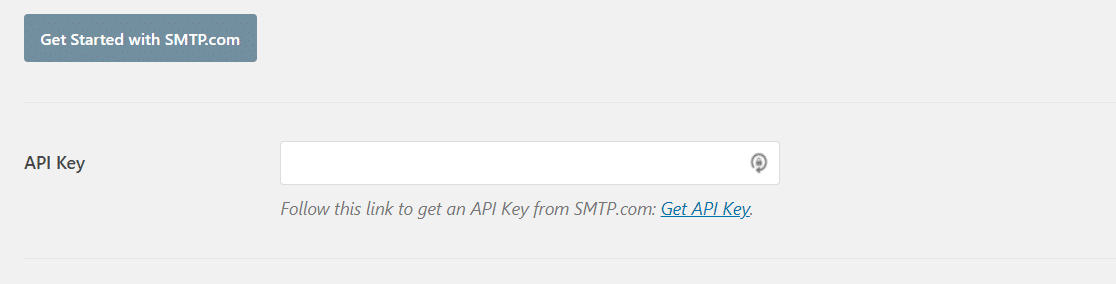
Pop-up'en vil bede om en API-nøgle, som du kan få fra dit SMTP.com-dashboard. Klik på linket Få API-nøgle (klik på dette link for at komme dertil direkte):
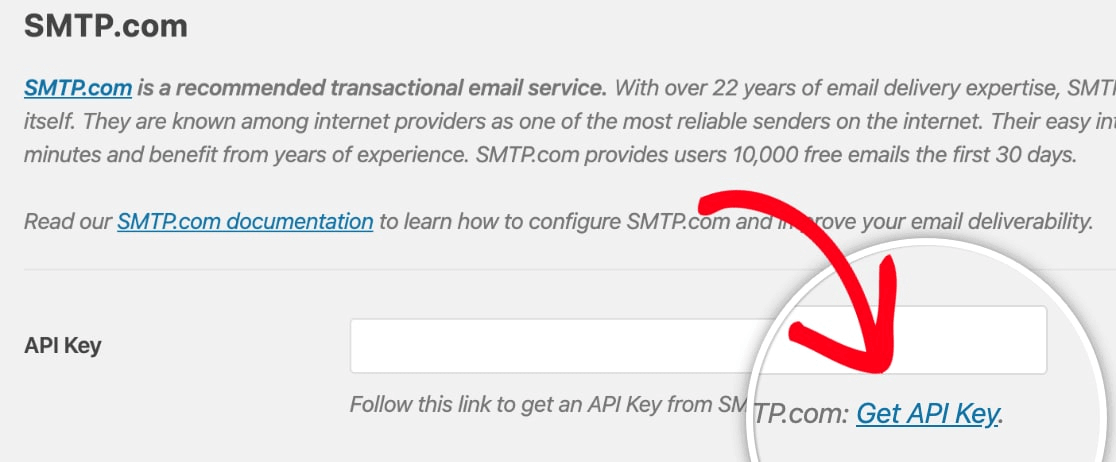
You should see a table on this page. Copy the API Key in the Key column:
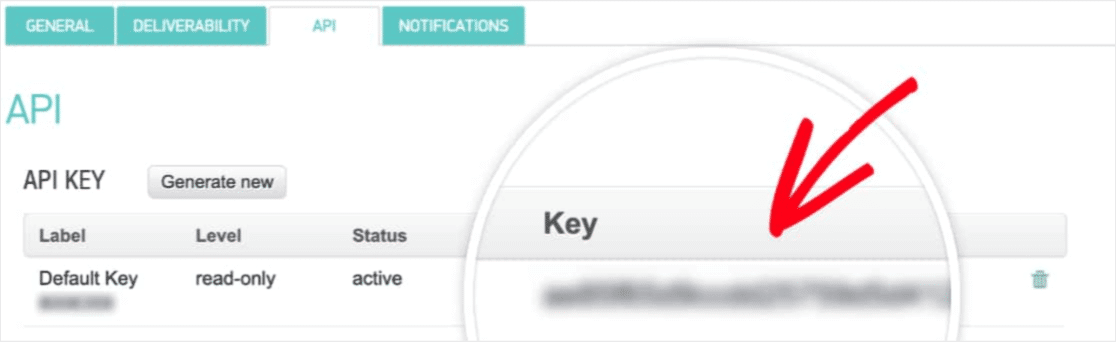
Then paste this API key in WP Mail SMTP:
Finally, in the Sender Name field, click on the Get Sender Name link:

Copy the name in the Name column:
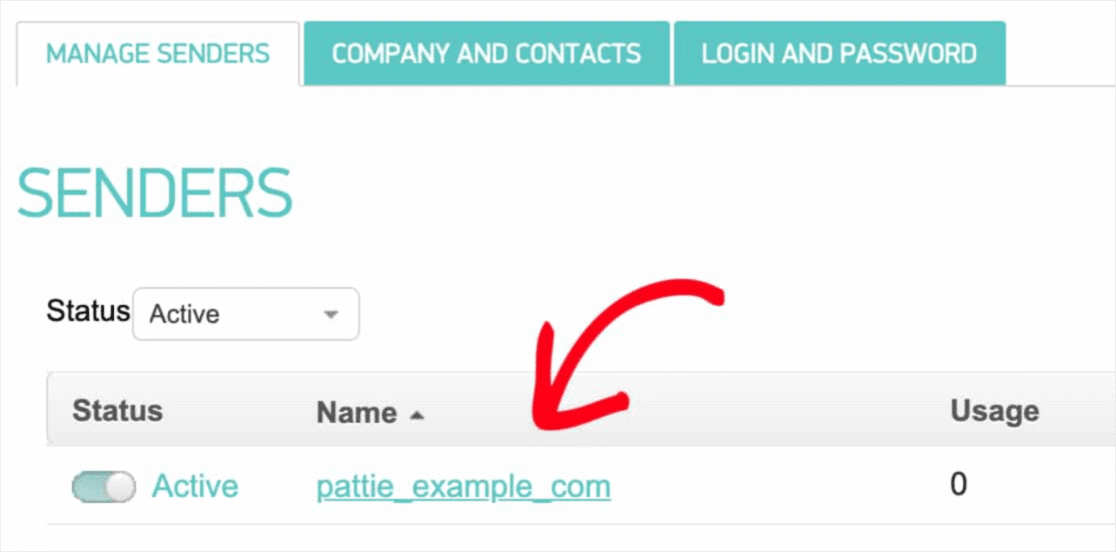
And paste it in WP Mail SMTP.
Tryk derefter på Gem indstillinger:

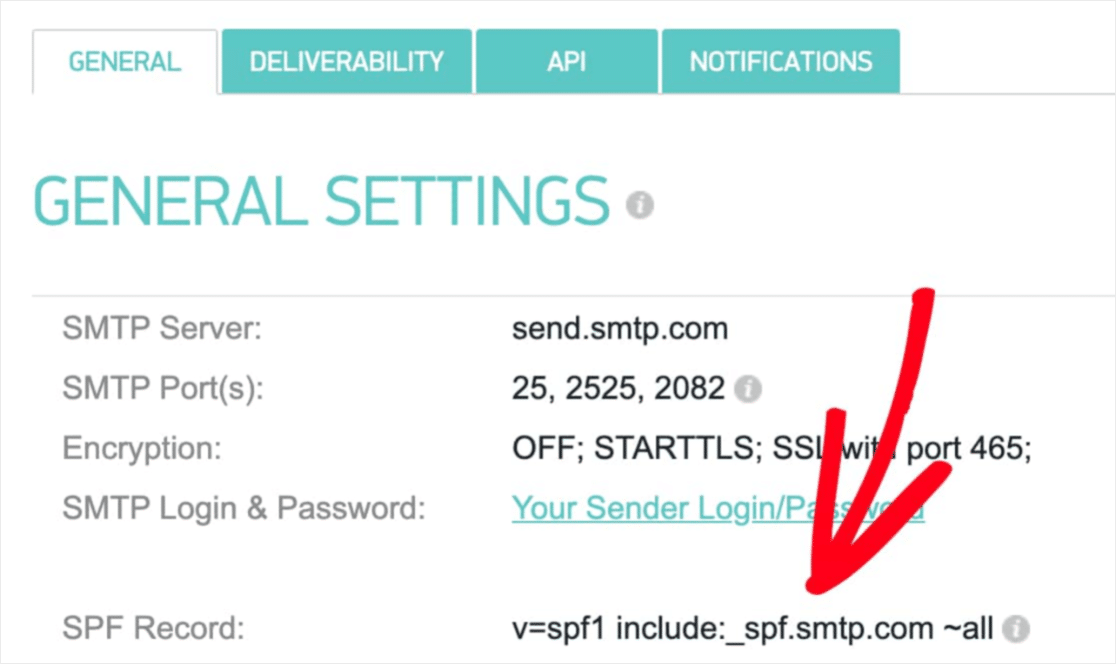
Step #4: Adding the SPF Record to Your DNS
Now, you’ll have to add the SPF record to your DNS records.
If you don’t know what any of these mean, don’t worry. We’ll explain.
The Sender Policy Framework (SPF) is how SMTP.com authenticates your emails. Implementing this step ensures that your emails won’t get kicked into the Spam inbox.
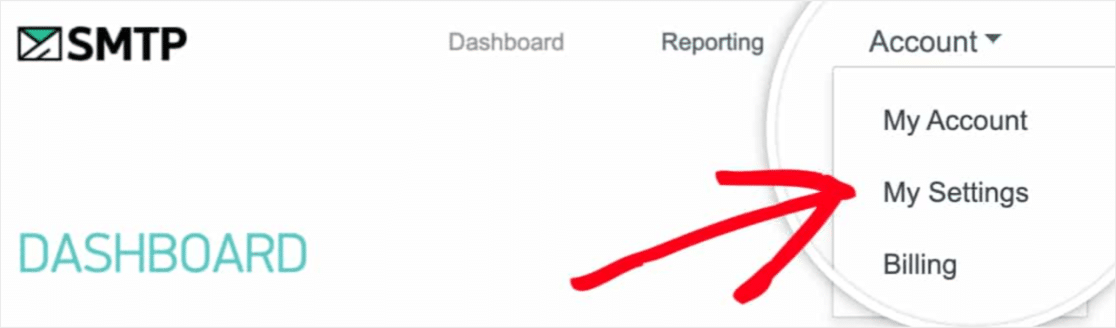
Gå til navigationsmenuen på din SMTP.com-konto og klik på Konto » Mine indstillinger:
Then, go to General Settings and look under SPF Record:
Du skal tilføje denne SPF-post til DNS-indstillingerne for dit websted. Hvis du ikke ved, hvordan du gør dette, kan du se denne artikel om hvordan man tilføjer SPF-poster.
BEMÆRK: I DNS-indstillingerne vil du se et felt kaldet TTL (Time To Live). Standardværdien er normalt 1 time. Hvis du kan ændre denne post, anbefaler vi at ændre den til 1 dag eller 86400 sekunder. Dette vil give serveren mulighed for at cache disse oplysninger i en hel dag.
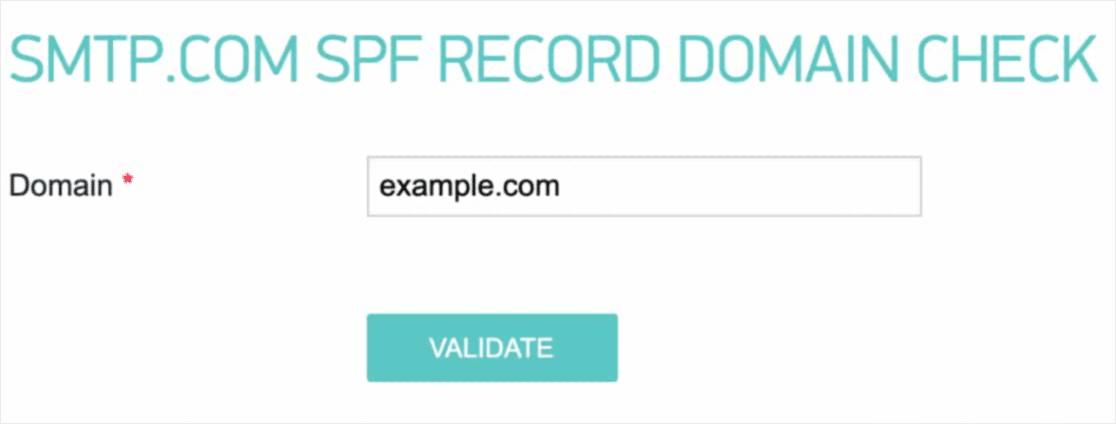
Trin #5: Validering af dine SPF-records
Hvis du har tilføjet SPF-recorden, bør du validere, at ændringerne er blevet opdateret. Det kan tage op til 48 timer, før ændringerne afspejles. Derfor er det en god idé at validere resultaterne, før du går videre til næste trin.
Klik på dette link og gå til sektionen, der siger SMTP.com SPF Record Domain Check.
I feltet Domæne skal du indsende din hjemmesides URL og klikke på Valider:
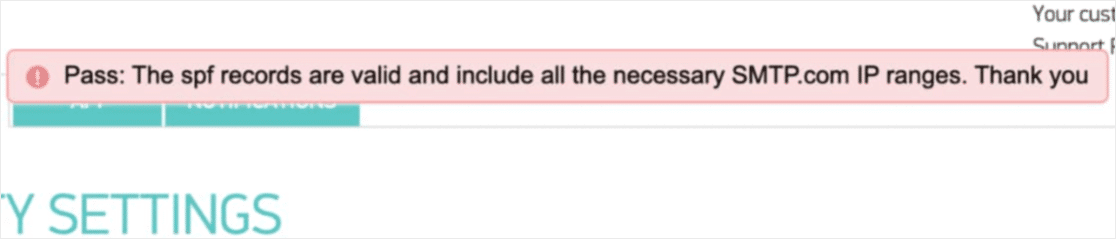
If you followed every step, you should see this Pass message:
Og du er færdig!
Trin #6: Afsendelse af en test-e-mail
You’re done configuring WP Mail SMTP. It’s time to check if everything’s working properly.
Go to WP Mail SMTP in your WordPress dashboard and click on the Email Test tab:
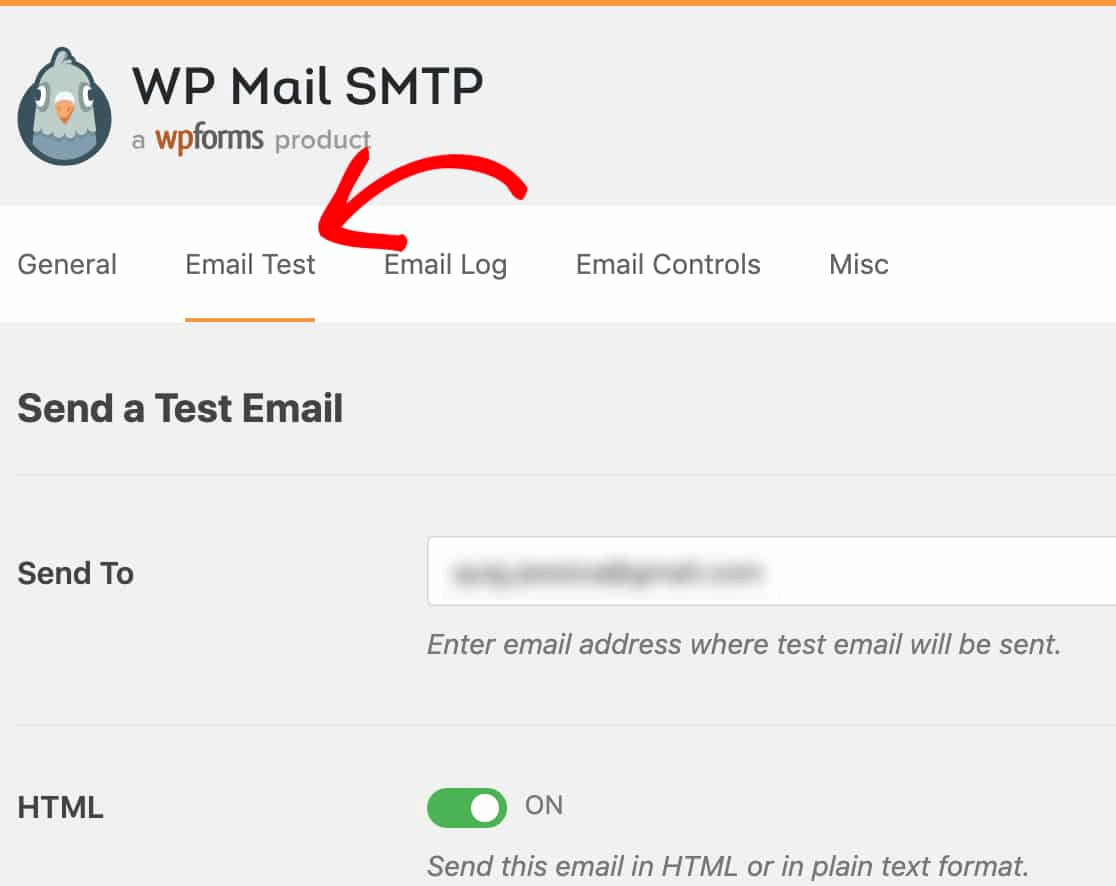
Indtast en hvilken som helst e-mailadresse, du har adgang til, og send en test-e-mail. Hvis alt gik godt, bør du se denne succesbesked:

Tjek nu din indbakke og bekræft, at du har modtaget e-mailen i din primære indbakke. Vi er meget sikre på, at du finder den der.
Endelig skal du bare verificere, at e-mailen gik igennem din SMTP.com-konto. Klik på dette link for at gå til siden Leveringsdygtighedsindstillinger. Hvis du ser 'Bestået'-notifikationen som denne, har du gjort et godt stykke arbejde:
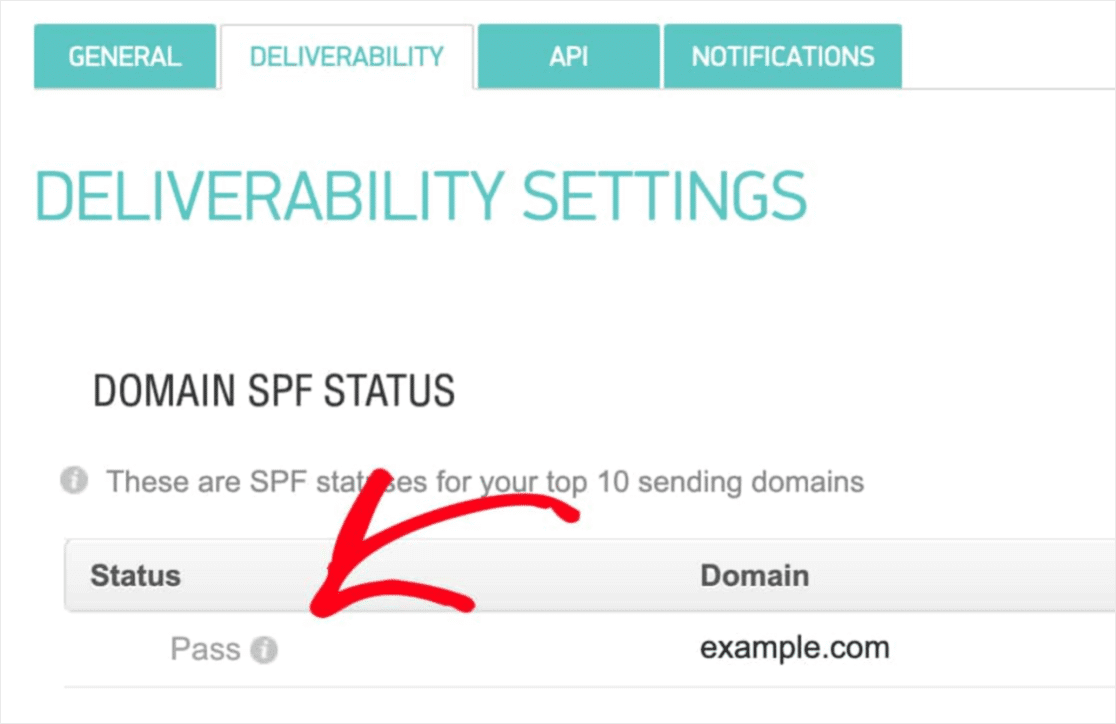
Hvis du ikke ser 'Pass' i feltet Status, så har du fejlet et sted. Gennemgå trin 1-4 igen og sørg for, at du ikke har overset noget.
Afslutning
Det var alt for denne gang, folkens!
If you’re not happy to see your marketing efforts go down the drain, then it’s time to install the WP Mail SMTP plugin.
Once your WordPress email deliverability issues are fixed, you can go back to increasing your traffic, engagement, and sales in peace. Speaking of which, have you tried using push notifications yet?
Push notifications are a great way to increase traffic, engagement, and sales for any business. And if you’re starting out with push notifications, we recommend using PushEngage. PushEngage is the #1 push notification software in the market.
Og det bedste er, at PushEngage giver små virksomheder mulighed for at konkurrere med store brands. Så det passer godt på ethvert vækststadie, uanset om du ønsker at starte, vokse eller skalere din virksomhed.
Hvis du lige er kommet i gang med push-meddelelser, bør du også tjekke nogle af disse artikler ud:
- 7 Smarte Strategier til at Øge Kundeengagement
- Sådan får du mere trafik til din WordPress-blog (9 nemme måder)
- Sådan øger du din opt-in-rate for web push-meddelelser (7 måder)
Og hvis du ikke allerede har gjort det, kom i gang med PushEngage i dag for at komme til næste niveau!


