
Looking for an easy way to add a WordPress events calendar to your site?
Having an events calendar on your site is a great way to get more eyeballs for your online and offline events. But which plugin do you use? How easy is it to set up a calendar? Where do you get started?
Don’t worry. We’re going to answer all these questions and more.
In this article, we’re going to show you step-by-step how to add an events calendar to your WordPress site.
Klar? Lad os dykke ned.
Step #1: Install and Setup Sugar Calendar
Sugar Calendar is one of the best WordPress calendar plugins you’ll ever find. It’s a lightweight plugin that’s super easy to set up and use. For this tutorial, we’re going to use Sugar Calendar to set up an events calendar for your site.
First things first, you’ll need to install and activate the Sugar Calendar plugin. If you’re not sure how to do that, you should check out this article on how to install a WordPress plugin.
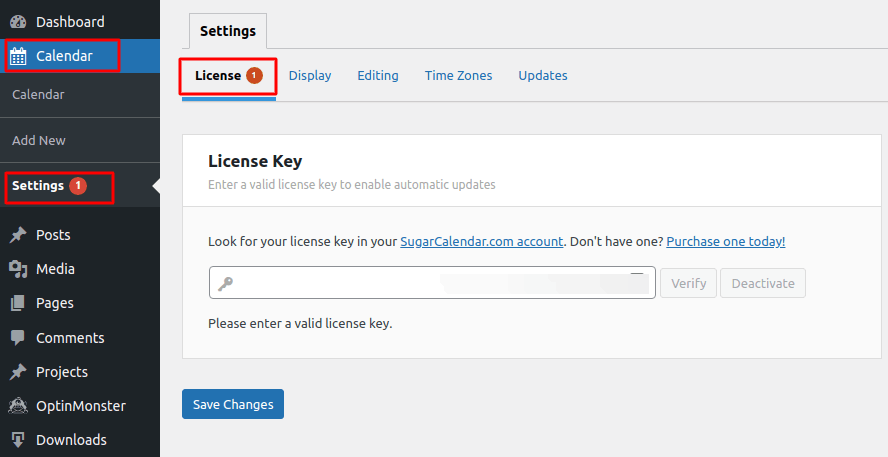
Once that’s done, go to your WordPress dashboard and head over to Calendar » Settings » License:
Then, log in to your Sugar Calendar account and go to Your Account:
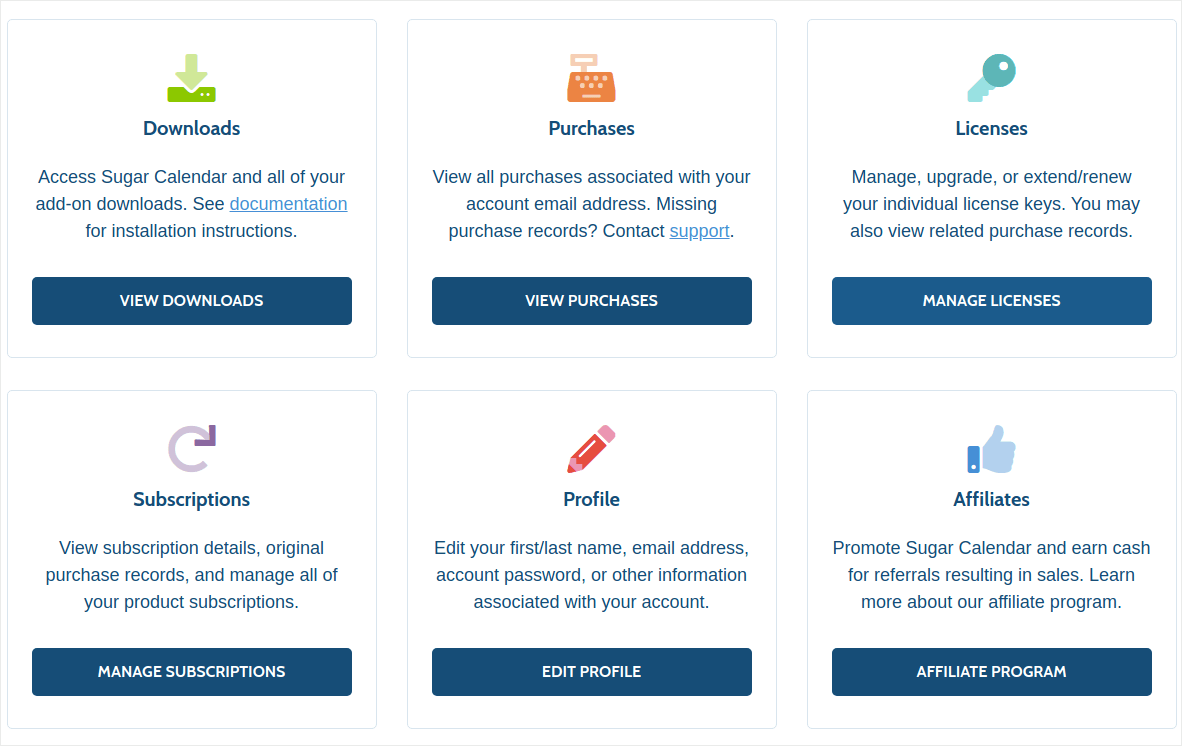
Then, click on Manage Licenses to get your license key:
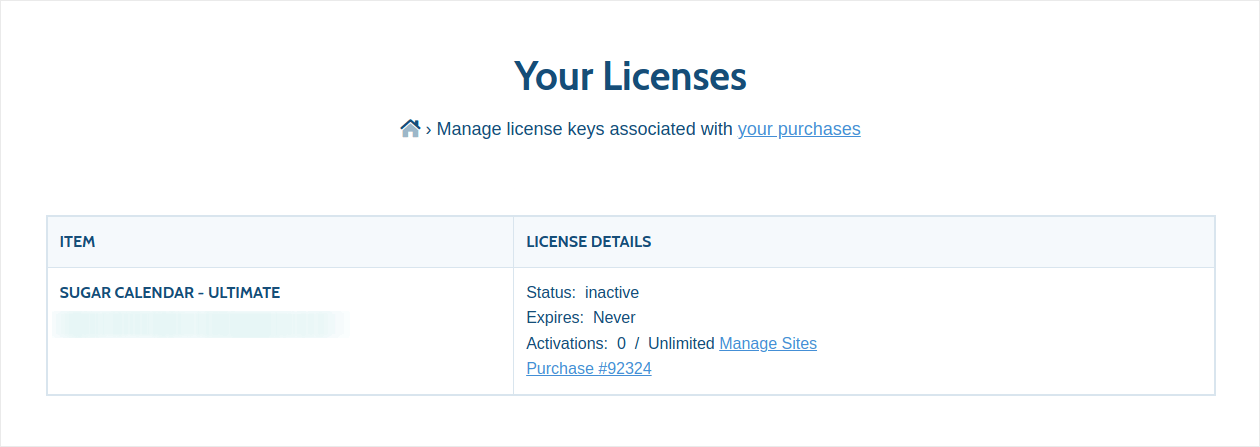
Finally, paste your license key in the Sugar Calendar plugin:
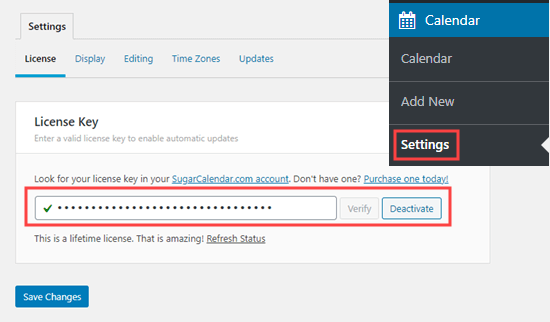
When you’re done, click Save Changes and you’re done setting up the plugin. Next, we’re going to create your WordPress calendar.
Step #2: Create a WordPress Events Calendar in Sugar Calendar
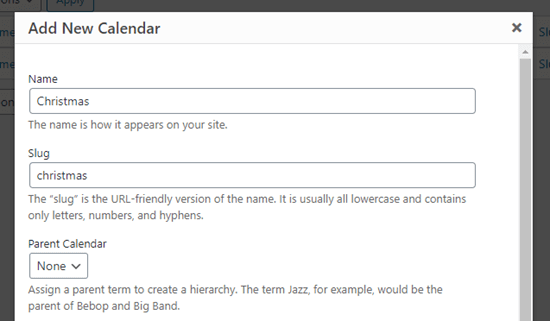
Head over to your WordPress dashboard and go to Calendar » Calendars » Add Calendar:
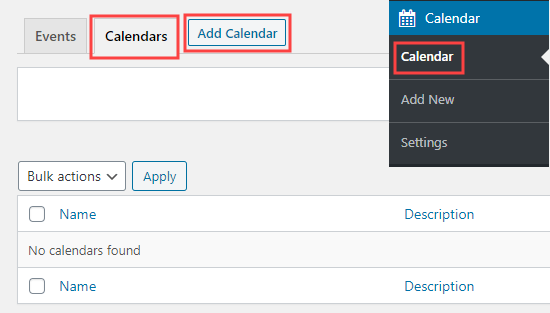
You’ll see a popup box to add your new calendar.
Here, give your calendar a name, a description, and a slug to define the URL for your calendar:
By now, you’ve already created a new calendar. So, let’s go fill it out with your events.
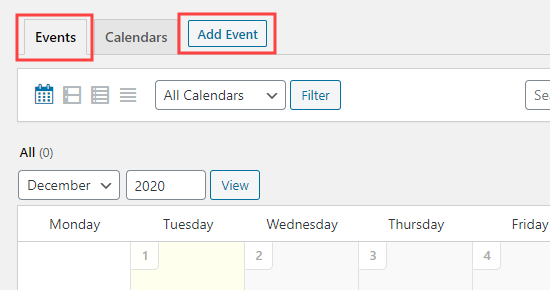
Step #3: Add Events in Sugar Calendar
Click on the Events tab and then click on the Add Events button to add an event to your calendar:
Now, it’s time to fill in the details for your own event. Start by giving your event a name, location, details, and description:
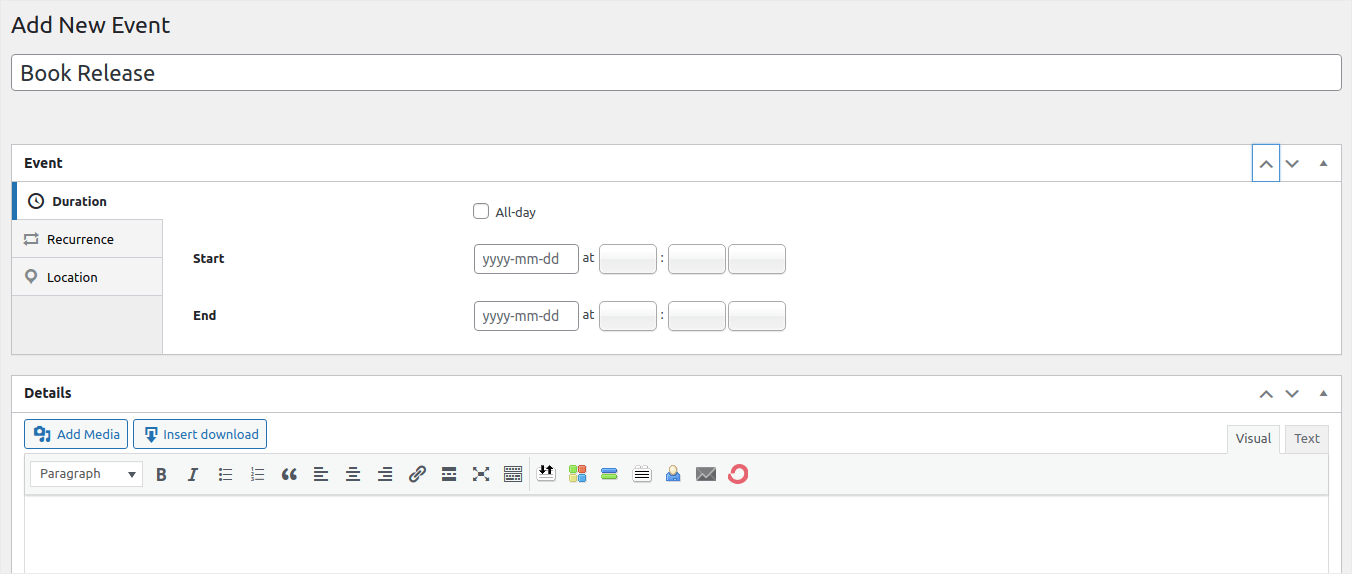
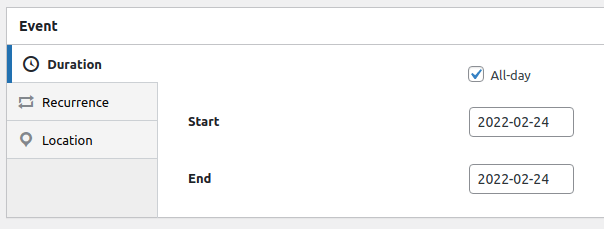
You can set the start and end times for your event under Duration:
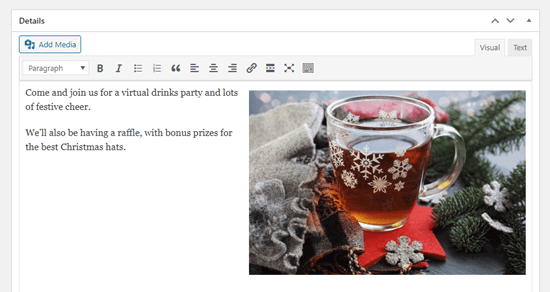
Finally, go ahead and fill up the information about your event in the Details tab:
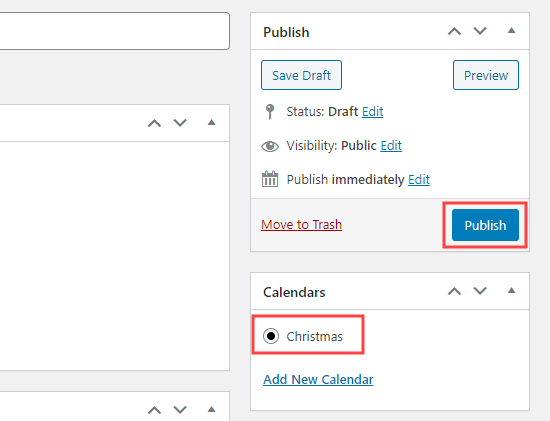
Finally, add the event to a calendar and hit Publish:
And that’s all! Since this is your first calendar, you’ll need to display your calendar somewhere on your site next.
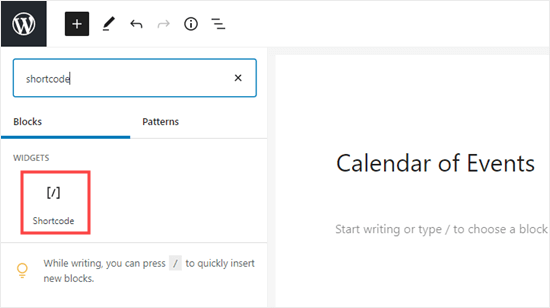
Step #4: Display Your WordPress Events Calendar on Your Site
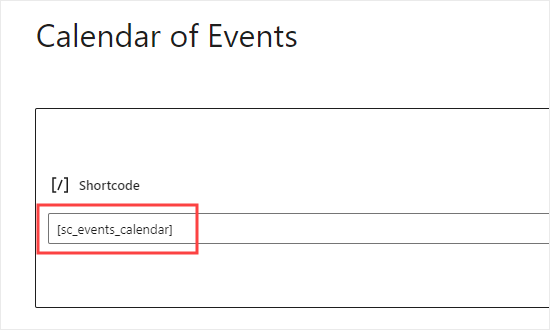
You can add your calendar to any page or post on your website. You can even use the Sugar Calendar widget to add it to your sidebar. On any page you want to display the calendar, go ahead and create a new Shortcode block:
And then, paste in this shortcode: [sc_events_calendar]
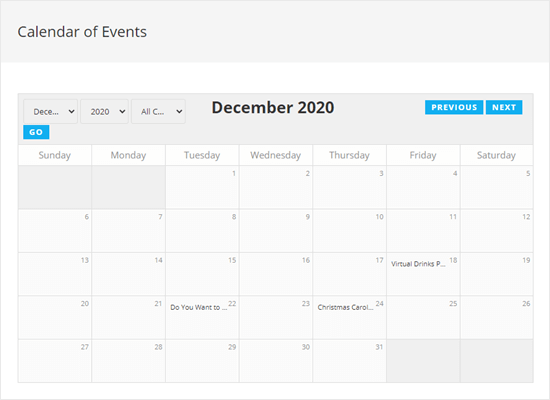
Finally, it’s time to publish your calendar and see it live on your page:
Det var det. Du er færdig! Dine besøgende vil nu kunne tjekke din kalender ud på dit websted og se på forskellige listede begivenheder.
Sådan promoverer du din WordPress-begivenhedskalender
Det var alt for denne gang, folkens!
Hvis du leder efter en supereffektiv måde at promovere din nye kalender eller en kommende begivenhed på, bør du prøve at sende push-meddelelser. Push-meddelelser er en fantastisk måde at øge din gentagne trafik, webstedsengagement og salg på.
Tjek disse ressourcer ud, og du vil vide, hvad vi taler om:
- Drip-kampagner og autosvar til web push-notifikationer
- 5 fordele ved at bruge kampagner med push-notifikationer om forladte indkøbskurve
- Sådan konverterer du abonnenter til købere ved hjælp af web push-notifikationer
- Sådan tilføjer du et Web Notifications WordPress-plugin til dit websted
Vi anbefaler at bruge PushEngage til at sende dine push-meddelelser. PushEngage er den #1
push-meddelelsestjeneste i verden. Så hvis du mener det alvorligt med at vækste din virksomhed, er PushEngage det rigtige valg for dig.


