Looking for a tutorial on how to create a blog page on WordPress?
Creating a separate page for your blog makes it easier for visitors to find your latest posts. But if you’ve never made a blog page before, how do you even get started? Do you need a plugin to do it? Or can you do it from WordPress default settings as is?
In this article, we’re going to show you how to create a blog page on WordPress step by step and in the simplest way possible.
Lyder godt? Lad os dykke ned.
What Is a WordPress Blog Page?
A WordPress blog page is a page on a WordPress website that displays posts in reverse chronological order, with the most recent post at the top of the page. The page is usually called the “blog” or “news” page and is often the main page of a WordPress website.
You can use a blog page to share updates, news, stories, and other information with website visitors. A blog posts page typically includes the following web design elements:
- Navigation menu
- Blog posts list
- Fodtekst
We also recommend having a sidebar to showcase your most popular posts, a newsletter subscription form, and even ads from Google AdSense or Google AdSense alternatives.
Blog pages are a common feature of WordPress websites and are easy to set up and customize. You can use the built-in WordPress editor to add and format your blog posts. But if you want to customize the blog page itself, you can use WordPress plugins to add features and functionality.
Why Create a Blog Page on WordPress?
There are many reasons why you might want to create a blog page on your WordPress website. Here are a few:
- Share updates and news with your audience: A blog page is a great way to share updates, news, and other information with your website visitors. You can use it to keep them informed about what’s going on with your business, organization, or personal life.
- Engage with your audience: By allowing comments on your blog posts, you can encourage your visitors to share their thoughts and ideas with you and with each other.
- Improve your website’s search engine rankings: Search engines, like Google, tend to favor websites that have fresh, regularly-updated content. By regularly publishing blog posts, you can help your website rank higher in search engine results.
- Establish yourself as an authority in your field: If you are knowledgeable about a particular topic, a blog can be a great way to share your expertise with others and establish yourself as an authority in your field.
- Monetize your website: If you have a large and engaged audience, you may be able to monetize your blog by selling advertising space or promoting products or services.
In short, a blog page can be a valuable addition to any WordPress website, whether you are using it for personal or professional purposes. If you’re not sure where to get started, you should check out our article on how to create a website.
How to Create a Blog Page on WordPress with a Page Builder
One of the easiest ways to create a blog page on WordPress is to use a WordPress page builder plugin. We recommend using SeedProd.

SeedProd is the best WordPress plugin to create landing pages that convert.
You get a drag-and-drop landing page builder that’s packed with options to build eCommerce pages and landing pages. Unlike WordPress website builders, you can customize every inch of your landing page including navigation menus, footers, and styles. SeedProd also works with any WordPress theme and creates mobile-friendly landing pages.
With SeedPreed, you get pre-built templates for high-converting landing pages that you can publish instantly. This includes templates for:
- Salgsider
- Kommer snart-sider
- 404-sider
- Vedligeholdelsessider
- App-landingssider
- Login pages
- Takkesider
- Webinar-sider
- Video-sider
And lots more! We love using SeedProd and we even wrote an in-depth review of the SeedProd plugin. Go ahead and check that out!
Trin #1: Installer SeedProd-pluginnet på dit websted
Først skal du besøge SeedProd-webstedet og købe pluginnet. Derefter kan du downloade pluginfilen til din computer. Kopier derefter plugin-licensnøglen fra dit SeedProd-dashboard.
Dernæst skal du logge ind på dit WordPress-dashboard og installere pluginnet. Hvis du har brug for detaljerede instruktioner, kan du se denne trin-for-trin-guide til installation af et WordPress-plugin. Gå til SeedProd-pluginnets velkomstskærm på WordPress, og bekræft din licensnøgle:

After your account is verified, you’re ready to create a blog page on WordPress.
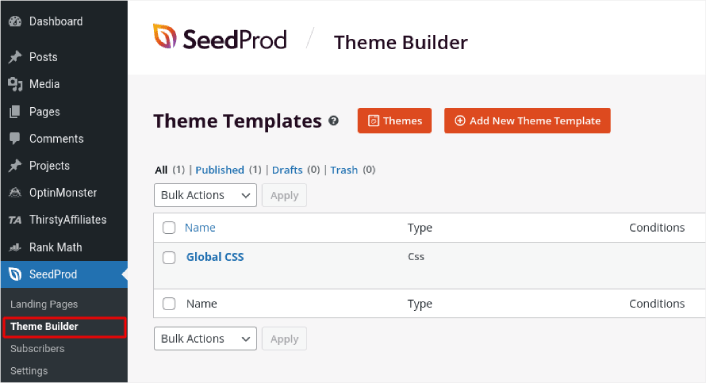
Step #2. Choose a Starter Theme Template
Head over to SeedProd » Theme Builder in your WordPress dashboard:
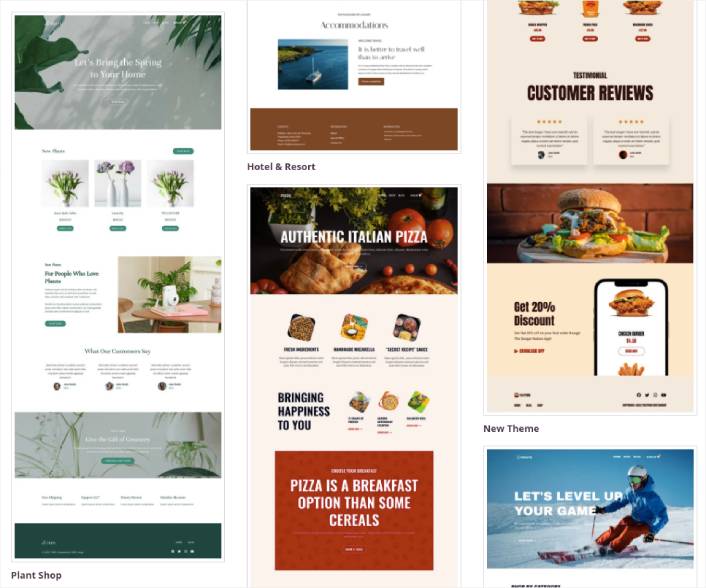
Here, you can select a starter theme with SeedProd. You can create a custom theme using SeedProd very easily. But for now, we’re going to select a pre-built template. Click on the Themes button and select your starter theme.
After choosing a theme, SeedProd will automatically create all the theme templates. From here, you can edit each template using the drag-and-drop editor. Each page is set up automatically with an attractive layout and placeholder content ready for you to customize.
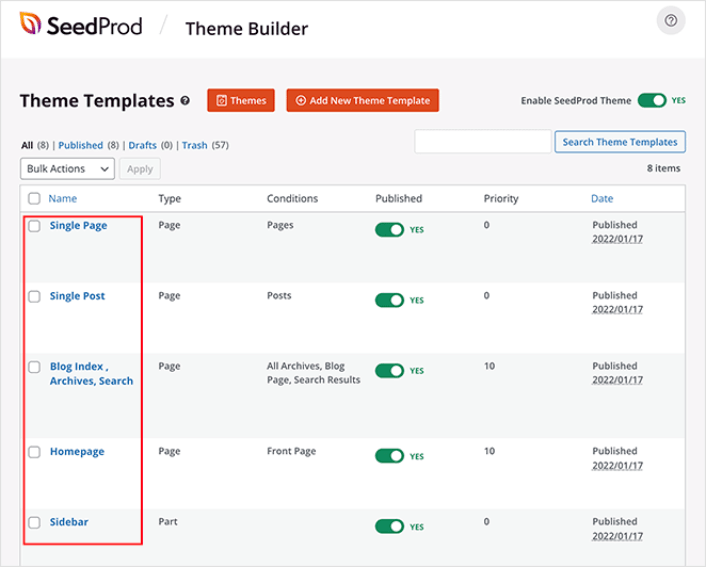
Here, you can choose to customize every part of your theme. We recommend customizing your home page first, but for this article, we’re going to skip ahead and go straight for the blog page.
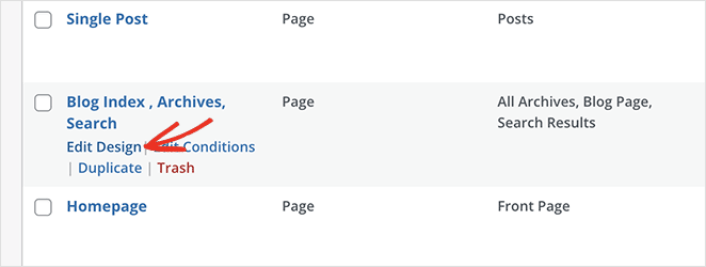
Step #3. Customize Your Blog Page
SeedProd’s theme builder comes with many ways to customize your blog page. Click the Edit Design link on the Blog Page template file to get started:
It’s super easy to customize the blog page using the SeedProd builder. All you have to do is click on an element and edit it:
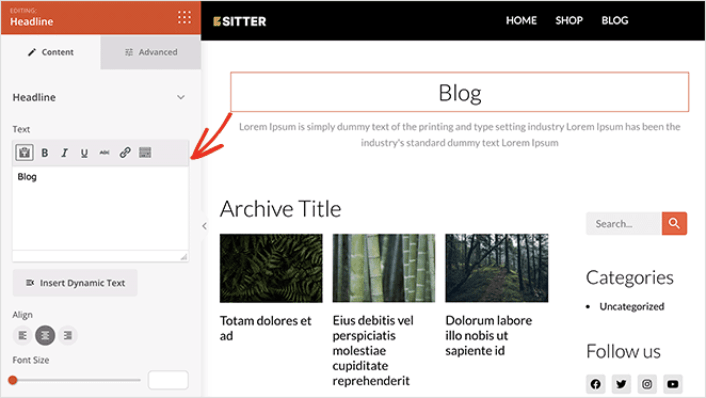
SeedProd offers several blocks you can use on your blog page. The most important is the Posts block which shows a list of recent blog posts.

You can change the layout of the Posts block easily by clicking it and choosing different settings in the left-hand panel.
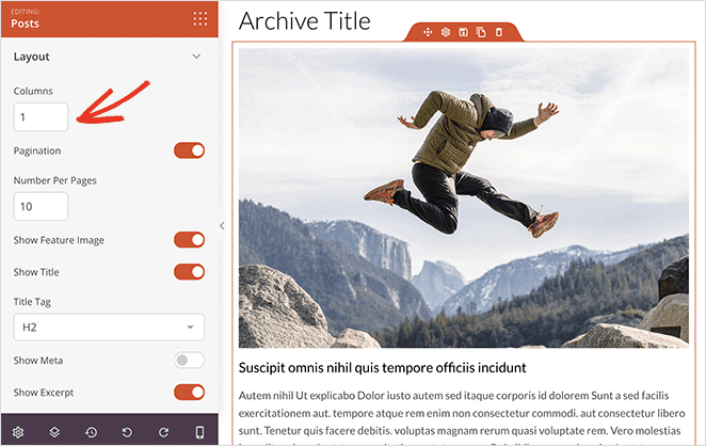
If you scroll through the block settings, you’ll see other toggles to show or hide:
- Featured image
- Read more text
- Pagination
- Meta information
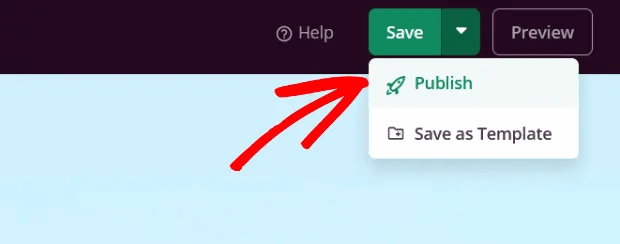
These settings allow you to display your blog posts to best suit your target audience. When you’re done customizing your page, click on Save. Then, click on the dropdown arrow next to the Save button and hit Publish:
Step #4: Add a Click to Subscribe Button to Your Blog Page
You can also add a click to subscribe button to collect push notification subscribers. Push notifications are a great way to increase your repeat traffic, get more engagement and even sell official merch if you have some.
In SeedProd, just drag and drop the Custom HTML module from the sidebar.
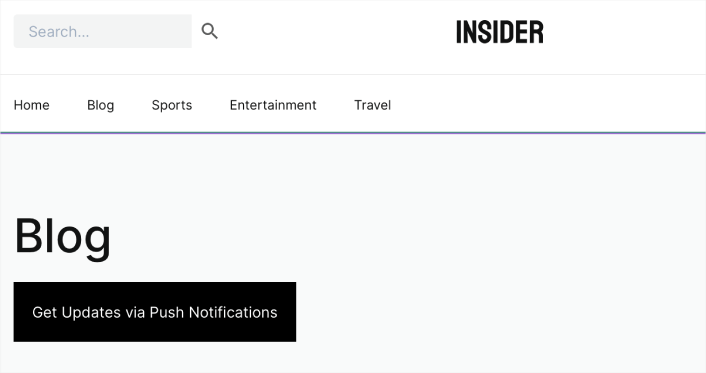
We’ve put the subscribe button directly underneath the blog title in the first fold.
But you can insert the button anywhere you like.
Til denne del skal du have lidt erfaring med HTML og CSS. Eller du kan kopiere denne kode og indsætte den i din Brugerdefineret HTML-blok:
<button onclick="subscribeOnClickButton()" style="border: none; padding-left: 5%; padding-right:5%; text-align: center; display: inline-block; color: blue;">Get Updates via Push Notifications</button>That’s a standard button in HTML with very little styling. The only fancy bit is the onclickfunction in the code. It basically means that your visitors can click on the button to subscribe to something. Now, we need to give the button some extra code to allow your visitors to subscribe to push notifications.
Gå til PushEngage hjemmeside og klik på knappen Kom i gang :

Vælg derefter gratisplanen for at prøve PushEngage, eller vælg en betalt plan, hvis du er seriøs omkring at udvide din virksomhed. De betalte planer kommer med flere kampagnemuligheder og muligheden for at opbygge endnu større abonnentlister.
På dit PushEngage dashboard skal du gå til Sideindstillinger » Sideoplysninger og klikke på knappen Klik her for opsætningsinstruktioner. Under Enhver side får du din installationskode:

ADVARSEL: Du skal kopiere den kode, du får fra dit dashboard. Koden er unik for hver PushEngage-bruger. Du kan ikke kopiere koden på billedet og indsamle push-notifikationsabonnenter.
Når du har koden i dit PushEngage-dashboard, skal du tilføje dette uddrag til din kode:
<script> window._peq = window._peq || [];</script> <script>
function subscribeOnClickButton(){
window._peq.push(['subscribe',{}.pe,function(res){
if(res.statuscode==1)
{
// Code to return response
console.log(res);
}
}]);
}
</script>
Din endelige kode skal se nogenlunde sådan ud:
<script src="https://clientcdn.pushengage.com/core/02a6e92667ae2279fcba8932356c1d93.js" async></script>
<script> window._peq = window._peq || [];</script> <script>
function subscribeOnClickButton(){
window._peq.push(['subscribe',{}.pe,function(res){
if(res.statuscode==1)
{
// Code to return response
console.log(res);
}
}]);
}
</script>
Du vil gerne tilføje denne kode til HTML-blokken på din landingsside efter koden til knappen. Det skal se nogenlunde sådan ud:

Feel free to customize the styles for the button any way you please. When you’re done customizing your blog page, go ahead and hit the Save button.
What to do After You Create a Blog Page on WordPress
Now that you know how to create a blog page on WordPress, all that’s left is to send traffic to your site and watch your business grow.
Og hvis du leder efter en overkommelig måde at øge din trafik på, anbefaler vi at bruge push-notifikationer. Push-notifikationer kan hjælpe dig med at tiltrække mere gentagen trafik og engagement på webstedet. Du kan også oprette automatiserede push-notifikationskampagner, der genererer salg.
Ikke overbevist? Tjek disse ressourcer:
- 7 Smarte Strategier til at Øge Kundeengagement
- Er Push-notifikationer Effektive? 7 Statistikker + 3 Eksperttips
- Sådan opsættes push-meddelelser om forladte indkøbskurve (nem vejledning)
- Sådan tilføjer du et Web Notifications WordPress-plugin til dit websted
Vi anbefaler at bruge PushEngage til at oprette dine push-notifikationskampagner. PushEngage er den #1 push-notifikationssoftware i verden. Så hvis du ikke allerede har gjort det, så kom i gang med PushEngage i dag!


